Are you ready to give your kitchen a quick and easy upgrade? Mounting cabinet hardware is one of the simplest ways to transform the look and feel of your space.
But if you’re worried about making mistakes or don’t know where to start, you’re not alone. This guide will walk you through each step clearly and confidently, so you can install your new handles and knobs like a pro. By the end, you’ll see how a small change can make a big difference—and you’ll be excited to show off your refreshed kitchen.
Let’s get started!

Credit: www.homedepot.com
Choosing The Right Hardware
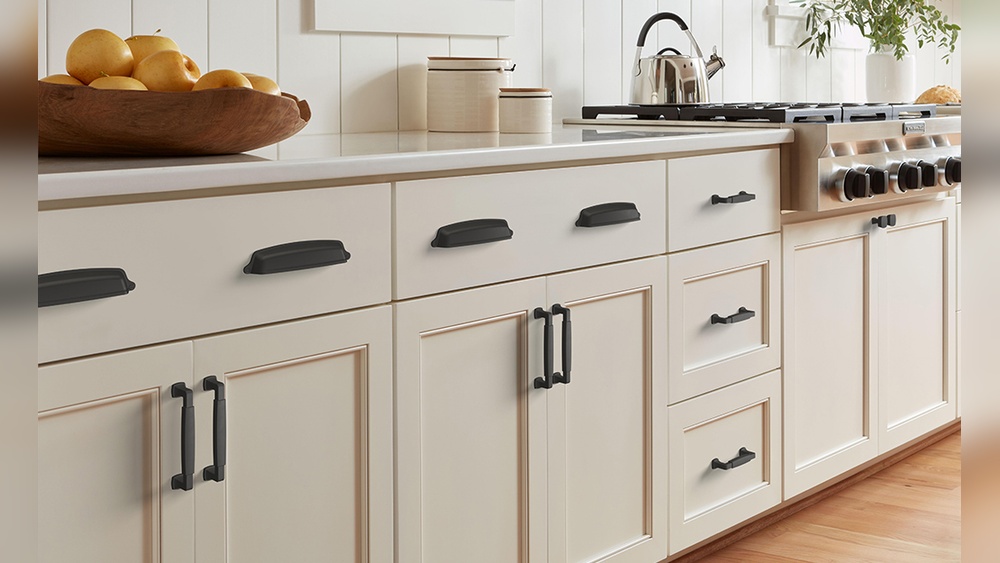
Choosing the right hardware for your kitchen cabinets makes a big difference. It affects how your kitchen looks and how easy it is to use. The right hardware can brighten your space and match your style perfectly. Think about the types, materials, and how they fit your cabinets before buying.
Types Of Cabinet Hardware
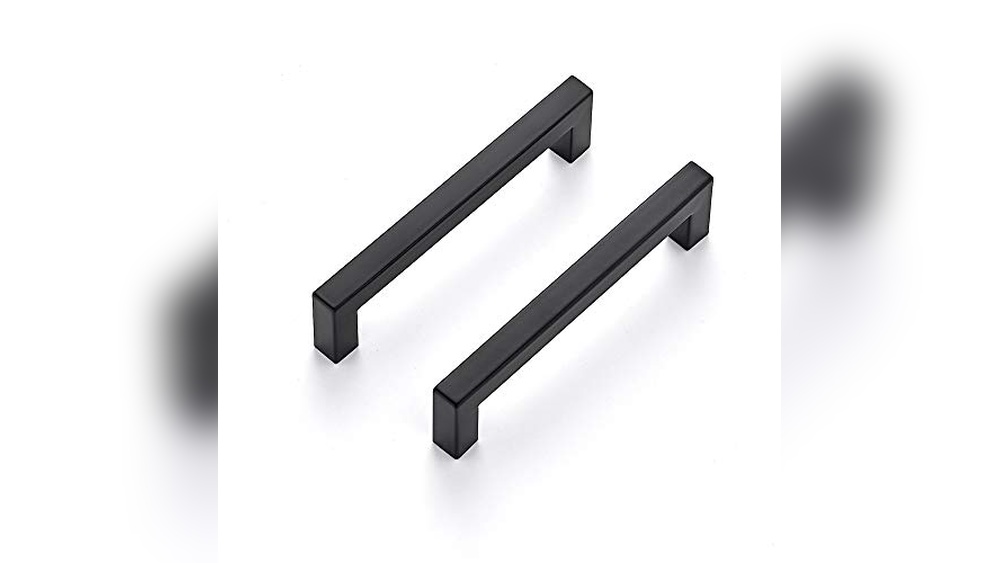
Cabinet hardware includes knobs, pulls, and handles. Knobs are small and round, easy to install. Pulls are longer and give a modern feel. Handles often have a bar shape and offer a firm grip. Choose a type that feels good and suits your kitchen’s use.
Material And Finish Options
Hardware comes in many materials like metal, wood, and plastic. Metal options include brass, stainless steel, and bronze. Finishes vary from shiny to matte. Pick a material that resists rust and matches your kitchen’s moisture level. The finish should blend with your other kitchen fixtures.
Matching Hardware To Cabinet Style
Match hardware style to your cabinet design. Classic cabinets look great with vintage or antique hardware. Modern cabinets pair well with sleek, simple pieces. Rustic kitchens benefit from wood or wrought iron hardware. Choose hardware that fits the overall style and color of your kitchen.
Tools You’ll Need
Mounting kitchen cabinet hardware requires the right tools for a smooth process. Using proper tools ensures your work is precise and safe. Prepare all tools before starting to avoid interruptions.
Measuring Tools
Accurate measurement is key to perfect hardware placement. Use a tape measure to check distances and heights. A ruler helps mark smaller areas precisely. A pencil or marking tool is essential for clear, visible marks.
Drilling Equipment
A drill makes holes for screws quickly and cleanly. Choose a drill with adjustable speed for better control. Use drill bits that fit your screws to avoid damage. A screwdriver or drill bit driver will help tighten screws securely.
Additional Supplies
Keep screws of the right size ready for your hardware. Use a level to make sure hardware is straight. A clamp can hold hardware in place while you work. Have a small container for screws to avoid losing them.
Preparing The Cabinets
Preparing the cabinets is the first step to mount kitchen cabinet hardware properly. Clean, smooth surfaces help hardware stick well. Removing old hardware makes space for new pieces. Marking drill points ensures perfect placement and avoids mistakes. Careful preparation saves time and effort later.
Cleaning Surfaces
Wipe the cabinet doors and drawers with a damp cloth. Remove dust, grease, and dirt to create a clean surface. Use mild soap if needed, then dry completely. Clean surfaces help screws hold tight. Avoid oily or sticky residues that can cause hardware to loosen.
Removing Old Hardware
Unscrew existing handles or knobs carefully. Keep screws and hardware if you want to reuse them. If screws are stuck, try a screwdriver with a firm grip. Remove any leftover adhesive or filler from old hardware holes. Smooth the surface to prevent bumps under new hardware.
Marking Drill Points
Measure the distance between screw holes on your new hardware. Use a pencil to mark drill points on the cabinet. Check marks twice for accuracy before drilling. Use a level to keep handles straight. Precise marks make installation easier and hardware look neat.
Measuring For Placement
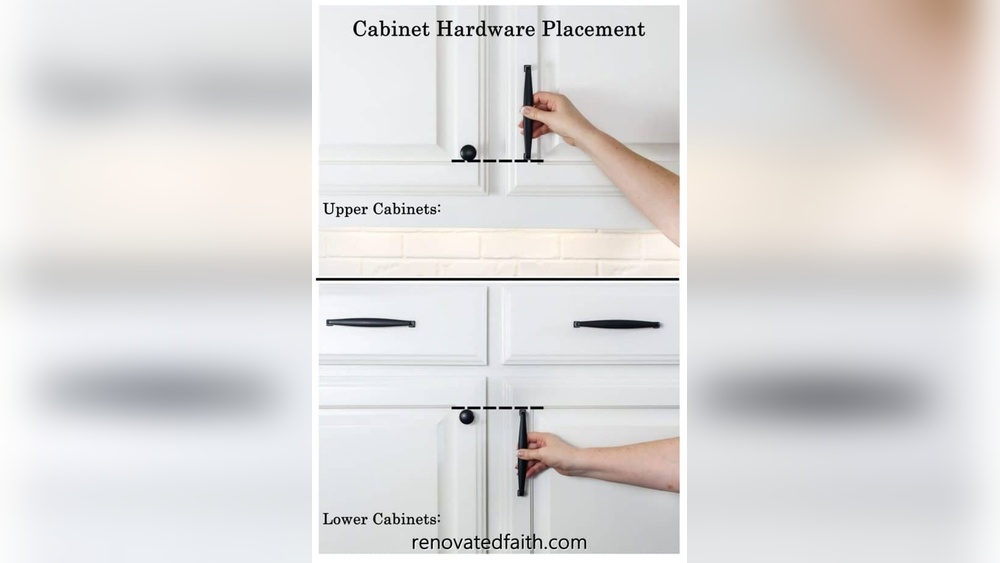
Measuring for placement is the first step to mounting kitchen cabinet hardware correctly. It ensures handles and knobs fit well and look balanced. Careful measuring avoids mistakes that can ruin the cabinet’s look. Take your time and use the right tools to get accurate results.
Standard Heights And Spacing
Start by knowing the usual height for handles and knobs. Most cabinet knobs go 2 to 3 inches from the corner. Handles often sit 3 to 4 inches from the edge. Space between handles should be even on drawers. Keeping these numbers consistent creates a neat, uniform appearance.
Aligning Handles And Knobs
Check that handles and knobs line up across all cabinets. Handles on drawers should be centered horizontally. Knobs on doors usually go in the upper corner. Make sure the hardware on adjacent doors matches in height and placement. This alignment makes your kitchen look well planned and tidy.
Using Templates For Accuracy
Templates help mark exact spots fast and correctly. They save time and reduce guesswork. Use a paper or plastic template with holes at the right height and distance. Hold it steady and mark through the holes with a pencil. Repeat for all cabinets to keep placement consistent.
Drilling Holes Safely
Drilling holes safely is a key step in mounting kitchen cabinet hardware. Careful drilling prevents damage to your cabinets and ensures hardware fits perfectly. Take your time and follow these simple tips for the best results. Safety and precision go hand in hand.
Selecting Drill Bits
Choose drill bits made for wood. They have sharper tips to start holes cleanly. Use the right size for your screws. A bit too big or small can cause loose or cracked holes. Check the bit before drilling to avoid mistakes.
Preventing Wood Splintering
Place painter’s tape over the spot to drill. It helps keep wood from splintering. Drill slowly and steadily to control the bit. Stop drilling just before breaking through. Flip the cabinet and finish the hole from the back side.
Drilling At Correct Angles
Hold the drill straight and steady. Angled holes can weaken the screw hold. Use a drill guide or a square to keep the drill level. Steady pressure keeps the drill bit from wandering. This ensures a strong and clean hole every time.
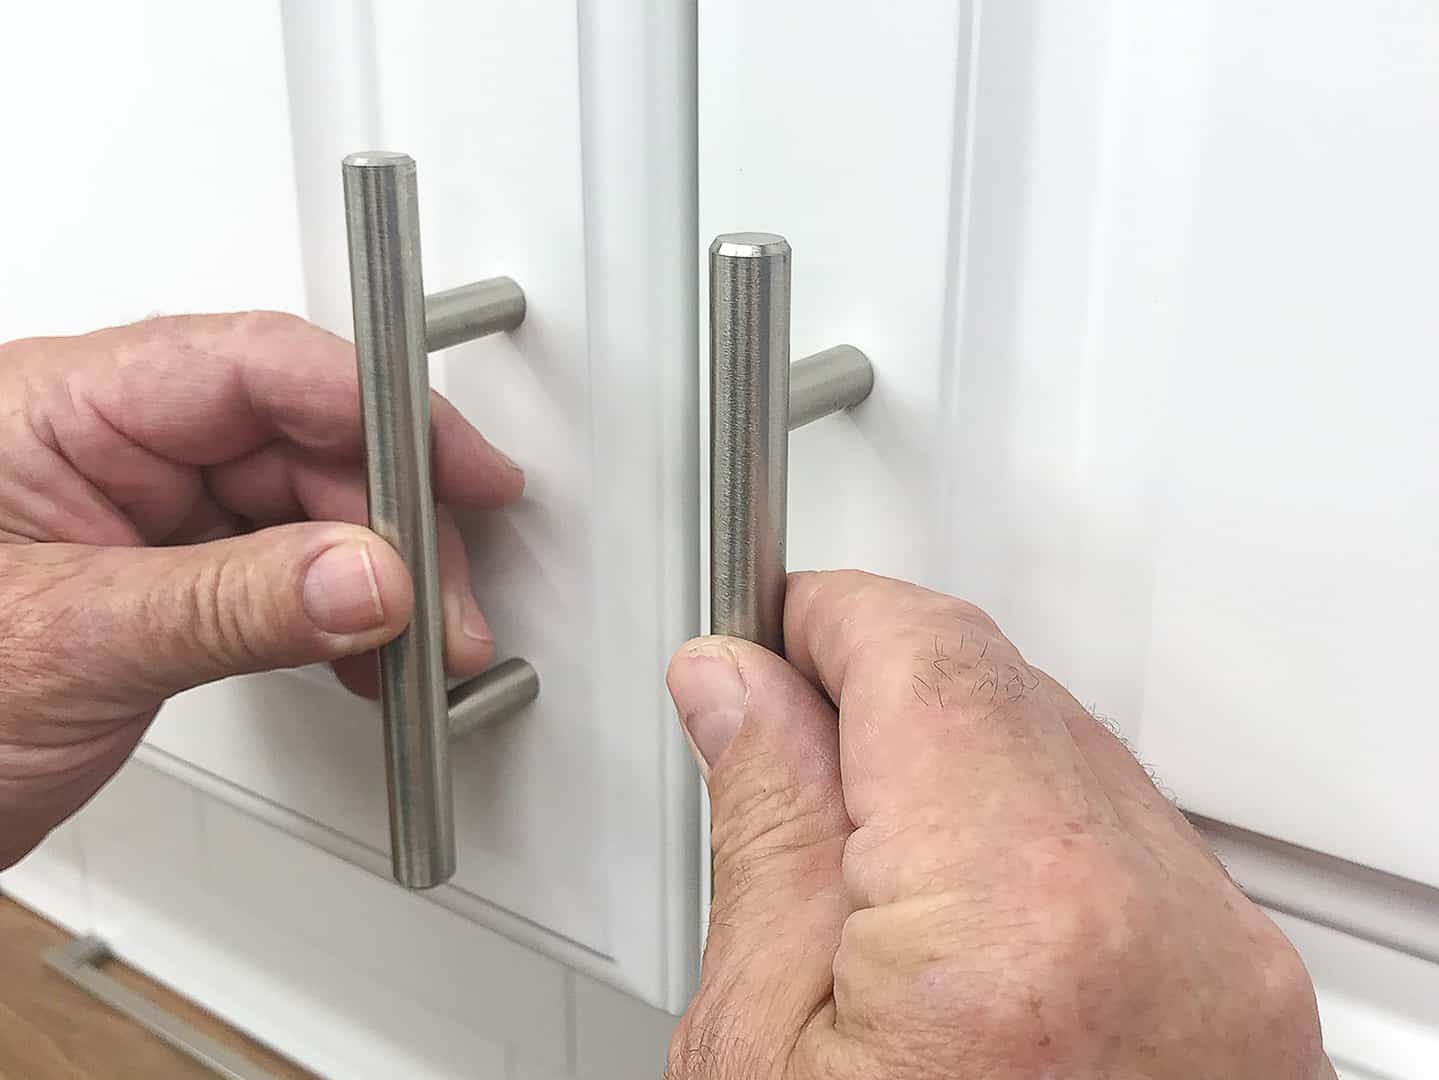
Attaching The Hardware
Attaching kitchen cabinet hardware is a key step in finishing your cabinets. It adds style and makes opening doors easier. Proper attachment ensures the hardware stays in place and looks neat.
Take your time to align and secure each handle or knob. The right technique prevents damage and keeps your kitchen looking great.
Screwing In Handles And Knobs
Start by placing the handle or knob on the cabinet door. Line up the holes with the pre-drilled spots. Insert the screws from inside the cabinet. Use a screwdriver to tighten the screws gently. Avoid over-tightening, which can strip the screw holes or damage the hardware.
Ensuring A Secure Fit
Check that each screw is firmly in place. The hardware should not wiggle or move. Tighten screws just enough to hold the piece steady. For heavier handles, use longer screws if needed. A secure fit helps the hardware last longer and work better.
Adjusting Alignment
Look at the hardware from different angles. Make sure handles and knobs line up evenly on all doors and drawers. If you see any misalignment, loosen the screws slightly. Shift the hardware until it looks straight. Then, tighten the screws again. Proper alignment gives your kitchen a polished, professional look.
Troubleshooting Common Issues
Mounting kitchen cabinet hardware can sometimes lead to small problems. These issues can make your cabinets look uneven or cause the hardware to fall off. Fixing these problems quickly helps keep your kitchen looking nice and working well.
Misaligned Hardware
Misaligned handles or knobs create an unbalanced look. Check the holes before screwing in the hardware. Use a level or ruler to make sure the pieces line up. Tighten screws evenly to keep everything straight. Small shifts can cause big alignment problems.
Loose Screws
Loose screws make hardware wobble or fall off. Tighten screws with the right screwdriver size. Avoid over-tightening to prevent stripping the hole. If screws do not hold, try using longer screws or anchors. This gives extra grip and holds the hardware firmly.
Damaged Cabinet Surfaces
Drilling or screwing can damage cabinet surfaces. Cracks or chips weaken the wood around holes. Use wood filler to fix small damage before mounting hardware. Sand the area smooth and let it dry. This creates a stronger base for screws and improves the cabinet’s look.
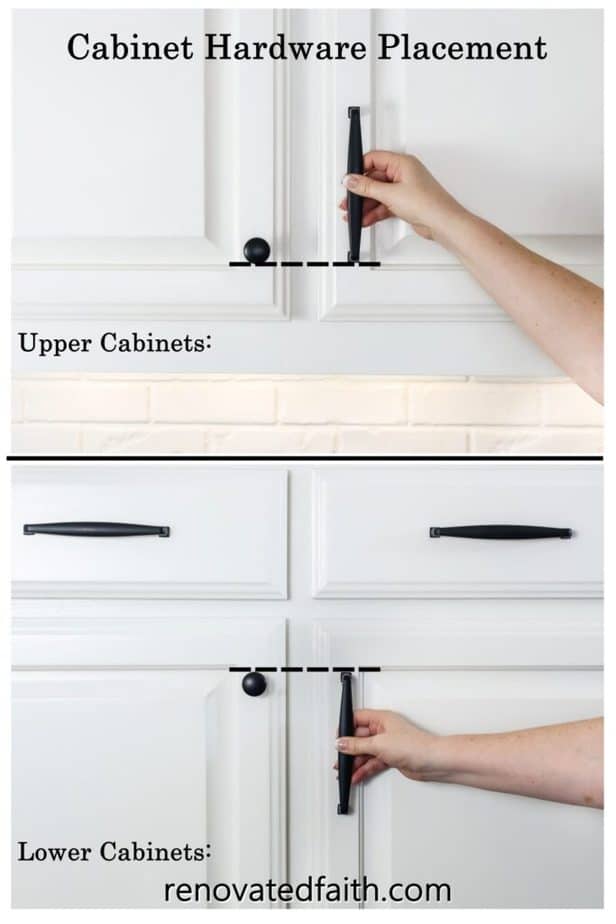
Credit: renovatedfaith.com
Maintaining Your Cabinet Hardware
Maintaining your kitchen cabinet hardware keeps your cabinets looking fresh and working well. Regular care prevents damage and extends hardware life. Small efforts make a big difference in the kitchen’s overall appearance and function.
Cleaning Tips
Clean hardware with a soft cloth and mild soap. Avoid harsh chemicals that can damage finishes. Dry pieces fully to stop rust or stains. Wipe handles and knobs often to remove grease and dirt.
Tightening Loose Pieces
Check screws and bolts regularly. Tighten any loose parts with a screwdriver. Loose hardware can cause damage or fall off. Keep your tools nearby for quick fixes.
Replacing Worn Hardware
Replace hardware that is broken or worn out. Choose pieces that match your cabinet style. New hardware can update your kitchen’s look easily. Remove old screws carefully to avoid cabinet damage.
Credit: truepositiontools.com
Frequently Asked Questions
How Do I Choose The Right Cabinet Hardware Size?
Select hardware size based on cabinet door size and style. Larger doors suit bigger pulls, while smaller doors need compact knobs for balance and ease of use.
What Tools Are Needed To Mount Cabinet Hardware?
You need a drill, screwdriver, measuring tape, pencil, and level. These tools ensure accurate placement and secure installation of your cabinet hardware.
How Do I Measure For Cabinet Hardware Placement?
Measure from the cabinet edge to the desired hardware center. Use a template or ruler for consistency across all doors and drawers.
Can I Mount Hardware On Existing Kitchen Cabinets?
Yes, you can install hardware on existing cabinets. Use proper tools and measure carefully to avoid damaging the cabinet surface.
Conclusion
Mounting kitchen cabinet hardware is simple with the right steps. Measure carefully and mark your spots clearly. Use the right tools to avoid mistakes. Take your time to keep everything straight and secure. Small details make a big difference in the final look.
Enjoy the new style and function of your cabinets. This task saves money and adds a personal touch to your kitchen. Try it yourself and see how easy it can be.