Are you tired of your old cabinet hardware dragging down the look of your kitchen or bathroom? Changing those worn-out knobs and handles can instantly refresh your space.
But maybe you’re worried about damaging your cabinets or don’t know where to start. Don’t worry—you’re about to discover simple, step-by-step tips that make removing old cabinet hardware easy and stress-free. Keep reading, and you’ll gain the confidence to tackle this quick update yourself, giving your cabinets a fresh new look in no time.

Credit: www.youtube.com
Tools Needed
Removing old cabinet hardware requires some basic tools to work safely and efficiently. Having the right tools makes the job easier and faster. Gather everything before starting to avoid interruptions. A few optional supplies can help protect your cabinets and speed up the process.
Basic Tools
- Screwdriver (Phillips or flathead depending on screws)
- Drill with screwdriver bit (for faster removal)
- Pliers (for stubborn or stripped screws)
- Putty knife (to gently pry off stuck hardware)
- Cloth or rag (to protect cabinet surface)
Optional Supplies
- Masking tape (to label hardware and screws)
- WD-40 or lubricant (to loosen rusty screws)
- Small container (to keep screws safe)
- Gloves (to protect your hands)
- Wood filler (for filling old screw holes)
Preparation Steps
Preparing to remove old cabinet hardware is an important first step. It helps keep your work area safe and clean. Taking time to prepare will make the process easier and faster. Follow these simple preparation steps for the best results.
Clear The Area
Remove all items from the cabinets and nearby counters. This gives you space to work freely. Clearing the area prevents accidents and damage to your belongings. Keep tools and supplies close for easy access.
Protect Surfaces
Cover countertops and floors with a drop cloth or old towels. This protects surfaces from scratches and dust. Use painter’s tape to secure protective coverings. Protect cabinet doors and frames from damage during removal.
Removing Cabinet Hardware
Removing old cabinet hardware is the first step in updating your kitchen or bathroom. It helps prepare the surface for new handles or knobs. The process is simple but requires care to avoid damage. Follow the right steps to make the job smooth and safe.
Start by gathering basic tools like a screwdriver and a cloth. Make sure the area is clear and well-lit. This will help you work comfortably and see screws clearly.
Unscrewing Handles And Knobs
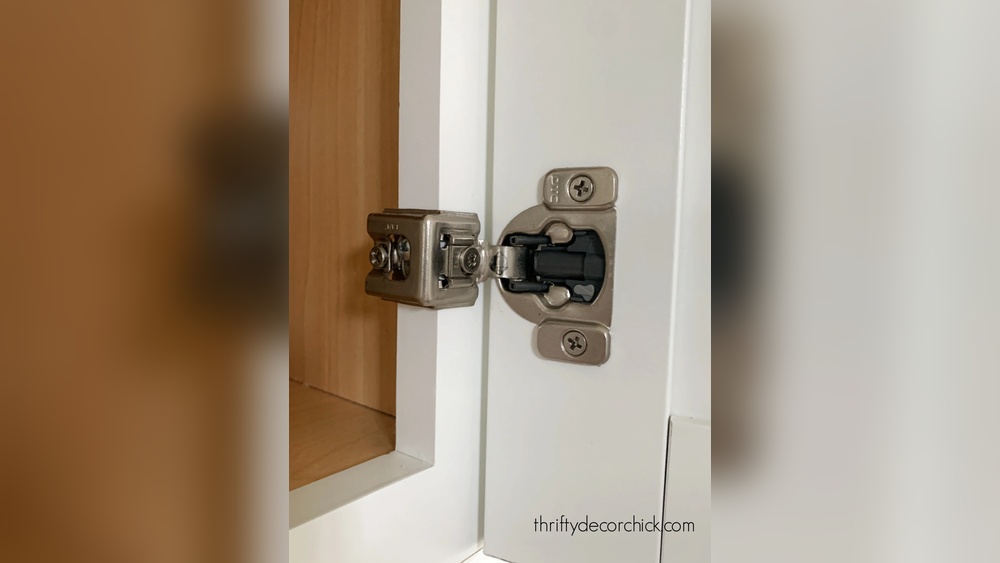
Most cabinet handles and knobs attach with screws on the inside of the door or drawer. Open the door or drawer to access these screws. Use a screwdriver that fits the screw head exactly. Turn the screwdriver counterclockwise to loosen the screws.
Hold the handle or knob with one hand to prevent it from falling. Remove the screws completely and take off the hardware. Keep the screws in a small container if you plan to reuse them. This step is quick and usually does not require much force.
Dealing With Stubborn Screws
Sometimes screws get stuck due to rust or paint. Spray a small amount of lubricant on the screw head. Let it sit for a few minutes to loosen the grip. Use a screwdriver with a firm grip to try again.
If the screw still won’t budge, try pressing the screwdriver down hard while turning. Use a rubber band between the screwdriver and screw for extra grip. Avoid using too much force to prevent stripping the screw head.
For very stubborn screws, a screw extractor tool can help. It grips the screw tightly to remove it without damage. Take your time and be patient. Proper removal prevents damage to your cabinets.

Credit: www.youtube.com
Cleaning The Surface
Cleaning the surface after removing old cabinet hardware is important. It prepares the area for new hardware or paint. Dirt, glue, and old finish often remain. Removing these helps new finishes stick better and look smooth.
Removing Residue
Use a soft cloth and warm soapy water to clean the surface first. Gently rub to remove dirt and grease. For sticky glue or paint bits, try a plastic scraper. Avoid metal tools to prevent scratches. Use a mild adhesive remover if residue stays. Test it on a small spot before full use.
Sanding And Smoothing
Light sanding evens out rough patches and old finish. Use fine-grit sandpaper for gentle work. Sand in the direction of the wood grain. This stops scratches and keeps the surface smooth. After sanding, wipe dust off with a damp cloth. The surface should feel clean and even.
Repairing And Touching Up
Removing old cabinet hardware often leaves marks or holes on the surface. Repairing and touching up these spots helps your cabinets look fresh and smooth. This step is key to a clean, finished look before adding new hardware or repainting.
Filling Old Holes
Start by cleaning the holes of dust and loose wood. Use wood filler or putty to fill the gaps. Press the filler firmly into the holes with a putty knife. Let the filler dry completely. Sand the area smooth with fine-grit sandpaper. This creates a flat surface ready for painting or staining.
Matching Paint Or Stain
Match the paint or stain to your cabinet’s original color. Test a small area first to check the color match. Apply the paint or stain gently with a brush or cloth. Use several thin coats for better coverage. Allow each coat to dry before adding the next. This restores the cabinet’s original look and hides repairs.

Credit: www.reddit.com
Tips For Installing New Hardware
Installing new cabinet hardware can change the look of your kitchen or bathroom. Careful planning helps you avoid mistakes. Simple tips make the process smooth and quick. Follow these ideas for a perfect finish.
Measuring And Marking
Measure the old holes to keep the same spots. Use a ruler or tape measure for accuracy. Mark new holes with a pencil before drilling. Double-check your marks to avoid mistakes. Straight lines make the hardware look neat. Take time to measure twice and mark once.
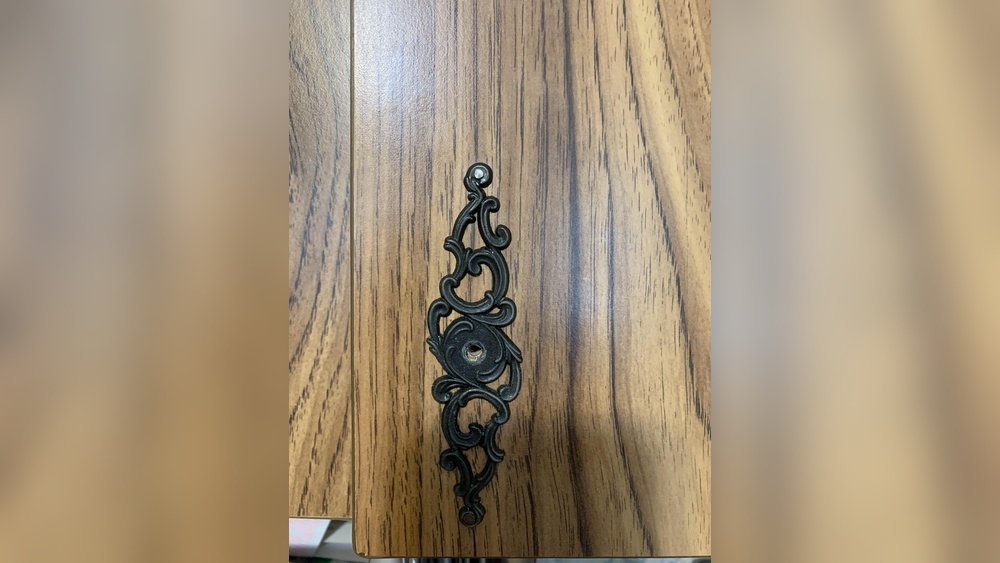
Choosing The Right Hardware
Pick hardware that matches your cabinet style. Consider the size, shape, and finish. Small knobs suit small drawers well. Longer handles work better for wide doors. Choose durable materials like metal or sturdy plastic. Think about comfort when you open doors. Hardware should look good and feel good.
Frequently Asked Questions
How Do I Safely Remove Old Cabinet Hardware?
Use a screwdriver to unscrew the hardware gently. Hold the cabinet door steady to avoid damage. Work slowly to prevent stripping screws or scratching surfaces.
What Tools Are Needed To Remove Cabinet Hardware?
You need a screwdriver matching screw heads, a putty knife, and possibly pliers. These tools help loosen and pry off hardware without harming cabinets.
How Can I Avoid Damaging Cabinets During Hardware Removal?
Remove screws carefully and avoid forcing hardware. Use protective padding if needed and work slowly. This prevents scratches and maintains cabinet integrity.
Should I Fill Holes After Removing Old Cabinet Hardware?
Yes, fill holes with wood filler or putty. Sand smooth and paint or stain to match cabinets. This ensures a clean, finished look.
Conclusion
Removing old cabinet hardware takes some care and patience. Start by loosening screws gently to avoid damage. Use the right tools and keep all parts safe. Clean the surface well before adding new hardware. This simple process refreshes your cabinets quickly.
A little effort makes a big difference in your space. Now, your cabinets look neat and ready for a new style. Try these steps to update your kitchen or bathroom today. Easy and effective.