Is your kitchen cabinet door misaligned or sticking? Small issues with your cabinet hardware can make a big difference in how your kitchen looks and feels.
Knowing how to adjust kitchen cabinet hardware yourself saves you time and money. Plus, it gives your kitchen a fresh, polished appearance without a full renovation. In this guide, you’ll discover simple, step-by-step tips to fix and fine-tune your cabinet handles and hinges.
Keep reading to learn how easy it is to get your cabinets looking perfect again.
:max_bytes(150000):strip_icc()/SPR-how-to-adjust-cabinet-hinges-1822181-03-55fc34fddc2c45c2a99d467673356f5b.jpg)
Credit: www.thespruce.com
Tools Needed
Adjusting kitchen cabinet hardware requires the right tools to make the job easier. Having the proper tools helps you remove, align, and tighten handles or knobs smoothly. Some tools are essential, while others help with precise adjustments.
Basic Tools
A screwdriver is the most important tool for this task. Choose the correct head type, usually Phillips or flathead, to fit your screws. A drill can speed up the process but is not always needed. A tape measure helps check spacing and alignment of the hardware. A pencil is useful for marking spots before drilling new holes.
Optional Tools For Precision
A level ensures handles and knobs are straight. A small square helps keep measurements accurate at corners. A stud finder can locate solid wood behind cabinets for secure mounting. Fine sandpaper smooths edges if you need to adjust holes or surfaces. These tools are not necessary but improve the quality of your work.
Removing Old Hardware
Removing old kitchen cabinet hardware is the first step to a fresh look. It clears the way for new handles and knobs. Doing this carefully protects your cabinets from damage. Follow simple steps to make the process smooth and safe.
Unscrewing Handles And Knobs
Start by opening the cabinet doors and drawers. Use a screwdriver that fits the screw heads well. Turn the screws slowly to avoid stripping them. Keep the screws in a small container for reuse or disposal. Gently pull the handles or knobs away from the cabinet surface. If the hardware feels stuck, wiggle it slightly to loosen.
Cleaning Cabinet Surfaces
After removing the hardware, clean the cabinet surfaces. Use a soft cloth and mild soap with water. Wipe away dirt, grease, and old adhesive residue. Dry the area with a clean towel to prevent water damage. Clean surfaces help new hardware stick better and look great.
Measuring For New Hardware
Measuring for new kitchen cabinet hardware is an important step. It ensures the new handles or knobs fit perfectly. Accurate measurement saves time and avoids damage to your cabinets. It also keeps your kitchen looking neat and balanced.
Aligning Holes
Start by checking the existing holes on your cabinet doors or drawers. Use a ruler or tape measure to find the exact distance between the holes. This distance is called the hole spread. Most cabinet hardware uses a standard hole spread of 3 or 5 inches. Make sure the new hardware matches this measurement. If the holes do not align, you may need to fill old holes and drill new ones.
Marking Drill Points
When marking new drill points, use a pencil to make small, clear marks. Measure twice to avoid mistakes. Hold the hardware in place to see where the holes should be. Use a level to keep the marks straight. Proper marking helps in drilling clean, precise holes. This prevents damage and ensures the hardware fits securely.
Installing New Hardware
Installing new kitchen cabinet hardware can refresh your kitchen’s look. It also improves cabinet function. This process is simple and requires basic tools. Focus on choosing the right screws and securing handles or knobs properly. These steps ensure your new hardware fits well and lasts long.
Choosing The Right Screws
Select screws that fit your cabinet doors and drawers. Use screws long enough to hold the hardware firmly. Avoid screws that are too long; they can damage the cabinet. Check the hardware package for recommended screw size. Use screws made of rust-resistant material for durability.
Securing Handles And Knobs
Align the handle or knob with the pre-drilled holes. Insert the screws from inside the cabinet. Tighten screws carefully to avoid stripping. Hold the hardware steady while tightening. Test the hardware by pulling gently to check stability. Loose screws can cause hardware to wobble or fall off.
Adjusting Misaligned Hardware
Misaligned cabinet hardware can ruin the look of your kitchen. Doors and drawers may not close properly or look uneven. Fixing this problem is simple with the right steps. Small adjustments can make a big difference in appearance and function.
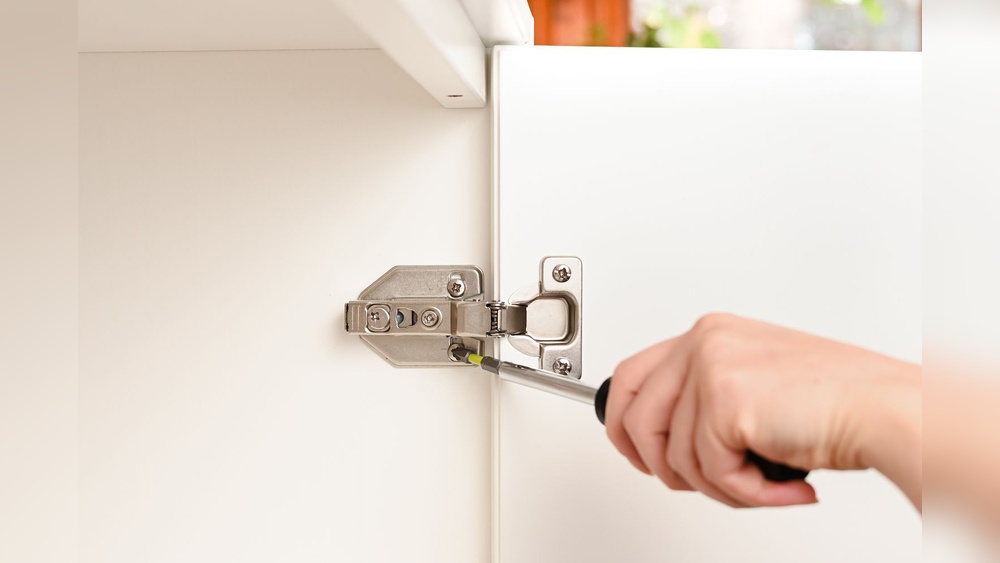
Loosening And Repositioning
Start by loosening the screws that hold the hardware. Use a screwdriver to turn them just enough to move the handle or knob. Gently shift the hardware to a better position. Check if the door or drawer lines up correctly. Tighten the screws once aligned. Make small movements and test often for the best fit.
Using Shims And Spacers
Shims are thin pieces used to fill gaps behind hardware. Place a shim behind the handle or knob to push it out slightly. Spacers can also help adjust the distance between hardware and the cabinet surface. These tools fix uneven mounting without drilling new holes. Add or remove shims until the hardware sits evenly. This keeps your cabinets looking tidy and working well.
Credit: www.youtube.com
Maintaining Hardware Fit
Maintaining the fit of your kitchen cabinet hardware is key to keeping your cabinets functional and looking good. Tight, well-aligned handles and knobs make opening and closing easy. Loose hardware can cause damage or frustration. Regular checks help catch problems early and extend the life of your cabinets.
Regular Tightening
Check screws on handles and knobs every few months. Use a screwdriver to tighten any loose screws. Loose hardware can wobble or fall off. Tight screws keep everything firm and secure. Avoid overtightening, which can strip the screw holes.
Handling Wear And Tear
Over time, hardware can wear from daily use. Look for scratches, rust, or bent parts. Replace damaged hardware to keep cabinets safe and attractive. Clean hardware gently to prevent buildup and corrosion. Small repairs prevent bigger issues later.

Credit: www.amazon.com
Frequently Asked Questions
How Do I Realign Kitchen Cabinet Hardware?
To realign hardware, first loosen screws slightly. Adjust the handle or knob to the desired position. Tighten screws securely to hold it in place. Use a level to ensure straight alignment. This simple step improves both function and appearance.
What Tools Are Needed To Adjust Cabinet Hardware?
You typically need a screwdriver matching the screw type. A measuring tape or ruler helps with placement accuracy. A level ensures hardware is straight. Optional tools include a drill for new holes and a pencil for marking.
Can I Reuse Existing Holes When Adjusting Hardware?
Yes, you can reuse holes if they align with new hardware placement. If holes don’t match, fill them with wood filler. Sand and repaint the surface before drilling new holes. This maintains cabinet aesthetics and stability.
How Do I Fix Loose Kitchen Cabinet Knobs?
Tighten the screws holding the knobs using a screwdriver. If screws spin without tightening, use a toothpick with glue to fill the hole. Let it dry, then reinsert the screw for a secure fit.
Conclusion
Adjusting kitchen cabinet hardware can improve your space quickly. Small changes make cabinets look neat and work better. Use basic tools and follow simple steps to adjust hardware. Pay attention to alignment and tightness for best results. Take your time and check each handle or knob carefully.
Enjoy a fresh, organized kitchen with easy hardware fixes. Simple updates like these save money and add style. Try it today and see the difference yourself.