Are your cabinets missing that perfect finishing touch? Adding cabinet hardware is one of the easiest and most effective ways to transform your kitchen or bathroom without a full remodel.
But you might be wondering, “Where do I start? How do I get the placement just right? ” Don’t worry—you’re about to learn a simple, step-by-step method to install knobs and pulls with confidence. By the end of this guide, you’ll not only have beautifully upgraded cabinets but also the skills to tackle similar projects on your own.
Ready to give your space that fresh, polished look? Let’s dive in!

Credit: www.youtube.com
Tools And Materials
Adding cabinet hardware enhances your kitchen’s look and functionality. Preparing the right tools and materials makes the job easier. This section covers what you need before starting the installation. Gather everything to save time and avoid interruptions.
Essential Tools
You need a drill with drill bits for making holes. A screwdriver, either manual or electric, will help fasten screws securely. A measuring tape ensures proper placement of hardware. A pencil is useful for marking drill points. A level keeps knobs and pulls straight. Some projects require a template to position hardware evenly. Safety glasses protect your eyes from dust and debris. Have a small container ready to hold screws and small parts.
Types Of Hardware
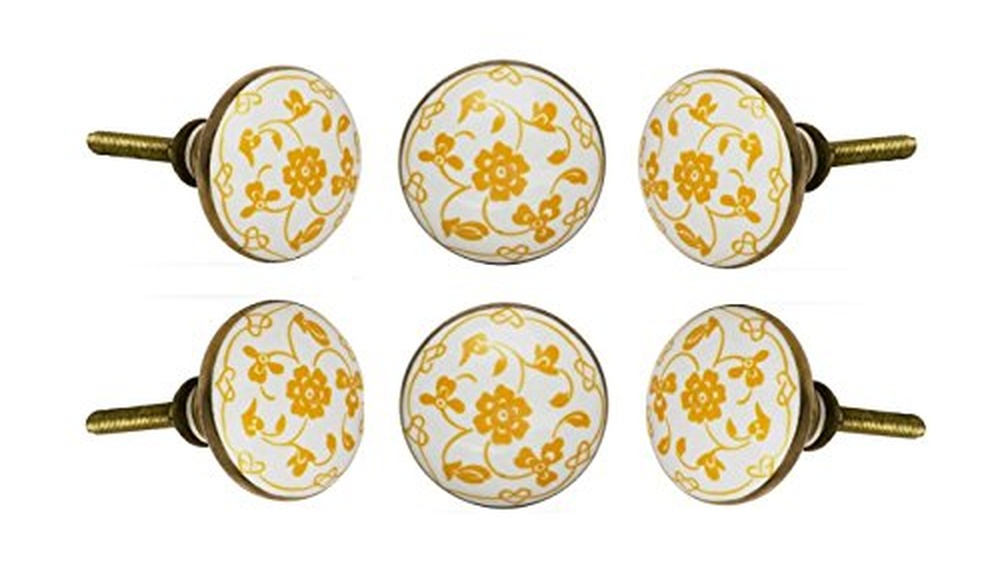
Cabinet hardware includes knobs, pulls, and handles. Knobs are small, round, and easy to install. Pulls are longer and provide a better grip. Handles can vary in shape and size for style. Choose hardware that fits your cabinet doors and drawers. Measure the width and height to find the right size. Consider the weight of your cabinet doors; heavier doors may need sturdier hardware.
Choosing The Right Finish
Hardware finishes affect the cabinet’s overall look. Popular finishes include chrome, brushed nickel, oil-rubbed bronze, and matte black. Match the finish with your kitchen’s style and color scheme. Brushed finishes hide fingerprints and smudges better. Shiny finishes add a modern, clean look. Make sure all hardware pieces have the same finish for a uniform appearance.
Preparing Cabinets
Preparing your cabinets is a key step before adding new hardware. It sets the stage for a smooth installation and a polished look. Taking time to prep helps avoid mistakes and damage. Clean, clear, and protected surfaces make a big difference in the final result.
Cleaning Surfaces
Start by wiping down all cabinet doors and drawer fronts. Use a mild cleaner and a soft cloth. Remove dirt, grease, and dust that could block adhesive or scratch surfaces. Clean surfaces help hardware stick better and look nice.
Removing Old Hardware
Next, take off any old knobs, pulls, or hinges. Unscrew them carefully to avoid damaging the wood. Keep screws if you plan to reuse them. Removing old hardware clears the way for new pieces and fresh holes.
Taping For Protection
Apply painter’s tape around the areas where you will drill. This protects the cabinet finish from scratches and splinters. The tape also helps guide your drill bit for accurate holes. Taping is a simple step to keep cabinets looking their best.
Measuring And Marking
Measuring and marking are the first steps in adding cabinet hardware. Accurate measurements ensure the hardware fits perfectly. Marking drill points carefully prevents mistakes and damage. Taking time here saves effort later. Follow simple steps to measure and mark with confidence.
Using Templates
Templates help place hardware evenly. Use a paper or plastic template matching your hardware size. Tape the template on the cabinet door or drawer. Check the position before marking holes. This method reduces guesswork and speeds up the process.
Marking Drill Points
Mark drill points with a pencil or fine-tip pen. Hold the template steady to avoid movement. Mark the center of each hole clearly. Double-check marks for accuracy before drilling. Clear marks help drill in the right spot the first time.
Ensuring Symmetry
Symmetry makes cabinets look balanced and neat. Measure distances from edges or corners for each piece of hardware. Use a ruler or tape measure for precision. Compare marks on opposite doors or drawers. Adjust marks as needed for a uniform look.
Drilling Holes
Drilling holes is an essential step in adding cabinet hardware. Accurate holes ensure the hardware fits well and looks neat. Careful drilling prevents damage to the cabinet surface. Follow simple steps to drill clean and precise holes.
Selecting Drill Bits
Choose a drill bit that matches the screw size of your hardware. A bit that is too large will make the hole loose. A bit that is too small may split the wood. Use a high-quality bit for smooth drilling. For wood cabinets, brad point bits work best. They create clean holes without tearing the wood.
Drilling Techniques
Start by marking the exact spot for the hole with a pencil. Use a small pilot hole first to guide the larger bit. Hold the drill steady and perpendicular to the cabinet surface. Drill slowly to avoid splintering the wood. Stop drilling as soon as the hole is deep enough. Remove the drill bit carefully to keep the hole clean.
Avoiding Damage
Place painter’s tape over the drilling spot to reduce wood splintering. Drill from the front side and finish from the back if possible. Support the cabinet door or drawer firmly before drilling. Avoid pressing too hard to prevent cracking. Double-check measurements before drilling to avoid mistakes. Clean any dust or wood chips before installing hardware.
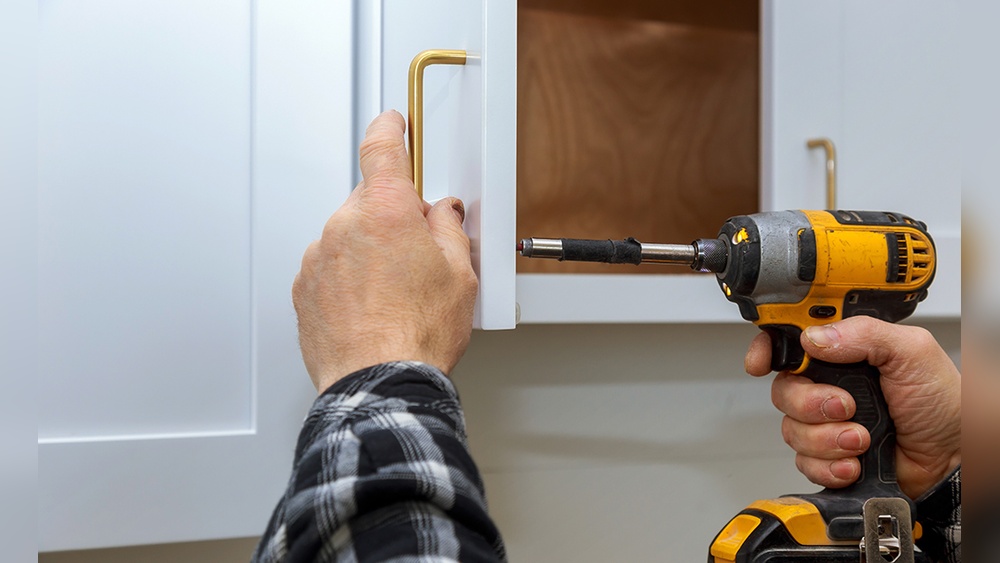
Installing Hardware
Installing cabinet hardware is a key step to enhance your kitchen or bathroom cabinets. Proper installation ensures your handles and knobs look great and function well. Follow these simple steps to install hardware with confidence.
Aligning Handles And Knobs
Start by marking the exact spot for each handle or knob. Use a ruler or template to keep marks even. Align handles horizontally or vertically depending on the cabinet style. Check that knobs are centered on doors or drawers. Accurate alignment improves the overall look and usability.
Using Loctite Or Thread Lock
Apply a small amount of Loctite or thread lock to screws before installation. This prevents screws from loosening over time. It is especially helpful in kitchens where doors open and close often. Use just a drop to avoid excess that can damage wood or finish.
Securing Screws Properly
Insert screws carefully to avoid stripping the hole. Tighten screws firmly but do not over-tighten. Over-tightening can damage the cabinet or hardware. Use a screwdriver that fits the screw head perfectly for best control. Check that the hardware feels secure and does not wiggle.
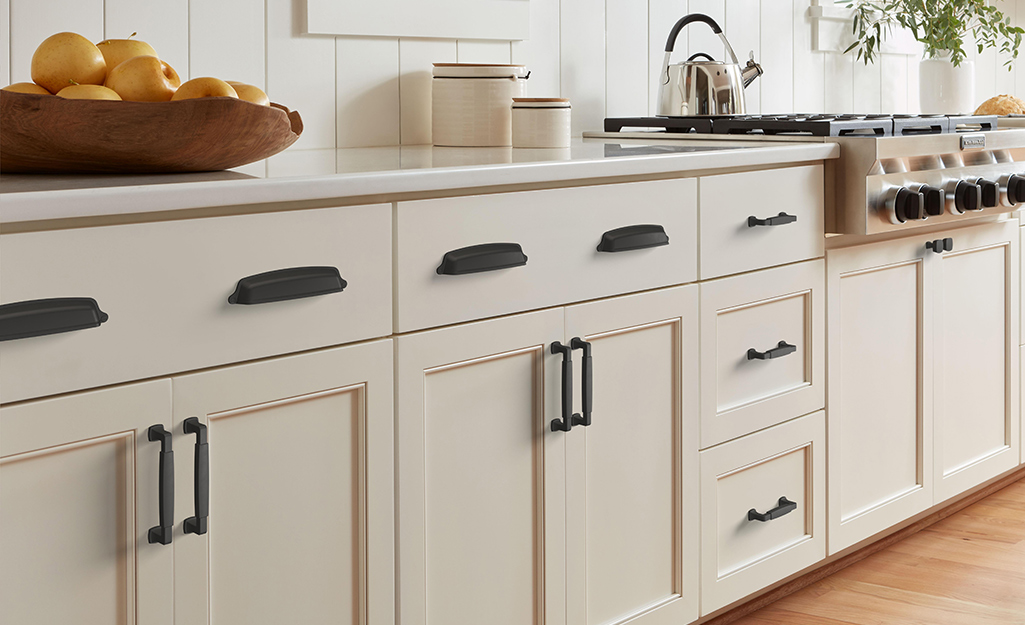
Mixing Knobs And Pulls
Mixing knobs and pulls on cabinets can add character and style. It breaks the monotony of using one type of hardware. This technique offers visual interest while keeping functionality. You can create a unique look by combining different shapes and sizes. Careful selection helps avoid a cluttered appearance. Here are some tips to guide your choices.
Design Tips
Choose knobs and pulls that share a similar finish. This unifies the hardware despite different styles. Match the scale of the hardware to the cabinet size. Small knobs work well on narrow doors. Larger pulls fit better on wide drawers. Consider the room’s overall style before mixing hardware.
Balancing Styles
Use knobs on cabinet doors and pulls on drawers. This approach balances visual weight and function. Pair simple knobs with detailed pulls for contrast. Avoid mixing too many styles in one space. Stick to two or three complementary designs. Balance modern and traditional elements carefully.
Maintaining Consistency
Keep the hardware finish consistent throughout the kitchen. This ties the look together even with mixed shapes. Align hardware placement precisely for a neat appearance. Use templates to ensure even spacing and height. Regularity in placement helps maintain a professional look. Consistency in style and placement is key to success.
Soft-close Hardware Upgrade
Upgrading to soft-close hardware transforms your cabinets with smooth, quiet closing. This feature prevents slamming and protects your cabinet doors. It adds a touch of luxury without much effort or cost. Soft-close hardware works with many existing cabinets, making it a smart upgrade for any kitchen or bathroom.
Retrofit Options
You can retrofit soft-close hardware to your current cabinets easily. Soft-close adapters fit on standard hinges without full replacement. Some kits include special hinges that replace old ones for better performance. Choose the option that matches your cabinet style and skill level. Most retrofit kits require only simple tools like a screwdriver and drill.
Installation Steps
Start by removing the cabinet door from its hinges carefully. Attach the soft-close adapter or new hinge to the door and cabinet frame. Align hardware parts so the door closes smoothly and quietly. Use a drill to fix screws tightly, ensuring stability. Test the door by opening and closing it several times. Make small adjustments if needed for perfect operation. Reattach the door securely once satisfied with the fit.
Benefits Of Soft-close
Soft-close hardware reduces noise by preventing door slams. It extends cabinet life by cushioning the closing motion. This upgrade adds safety by avoiding finger pinches from fast-closing doors. The smooth close enhances daily comfort and convenience. Soft-close cabinets improve home value by modernizing your space. They offer a simple way to upgrade without replacing the entire cabinet system.
Credit: www.homedepot.com
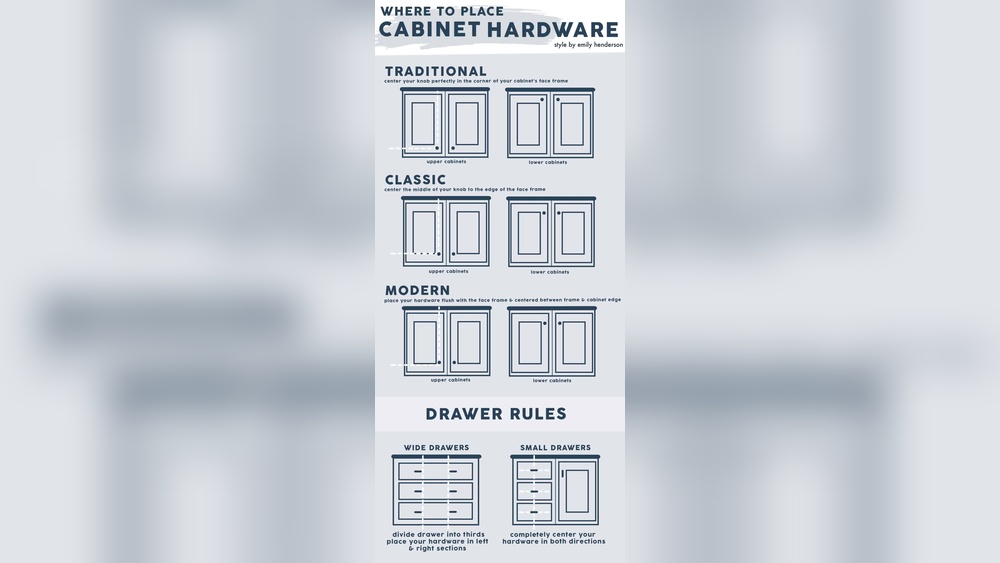
Placement Rules
Proper placement of cabinet hardware ensures both beauty and function. It guides how knobs and pulls fit on doors and drawers. Following clear placement rules creates a balanced look. It also makes cabinets easier to use every day.
Understanding where to position hardware helps avoid mistakes. Each type of hardware has its own ideal spot. This section explains key placement rules for knobs, pulls, and alignment with panels.
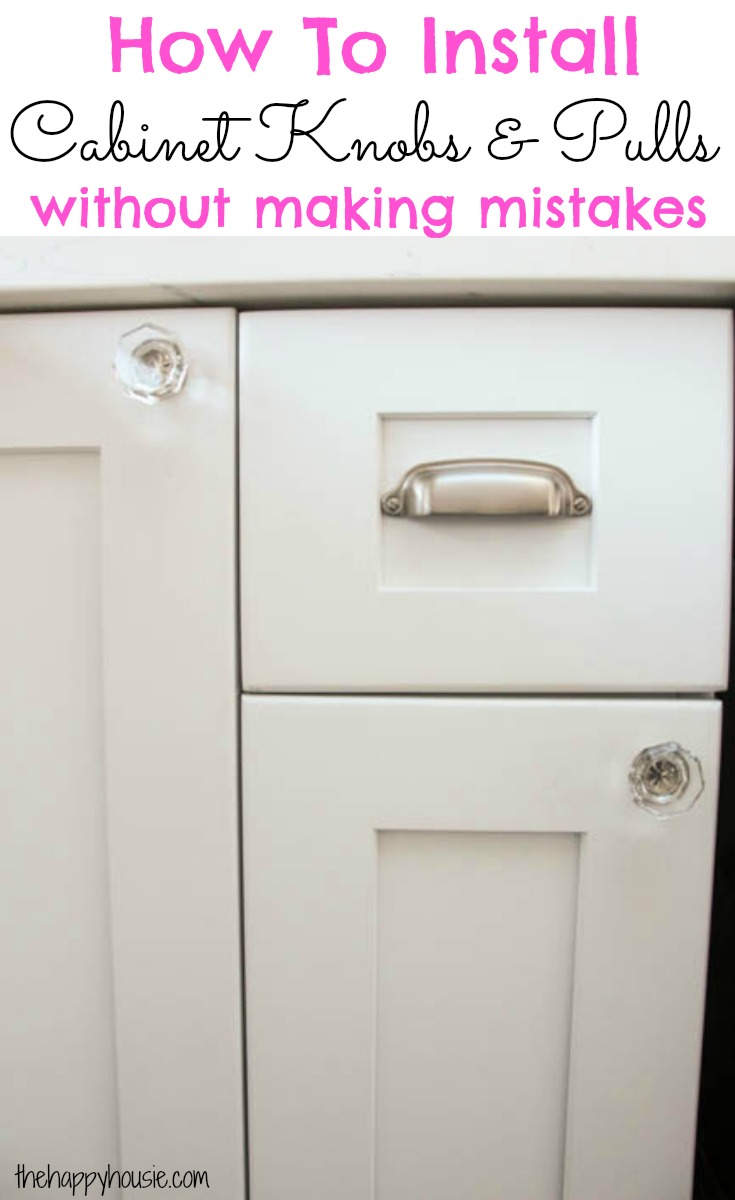
Knobs On Doors
Place knobs 2 to 3 inches from the door edge. This distance feels natural to reach. Position them near the center height of the door panel. Avoid placing knobs too close to the corners.
Keep knobs consistent across all doors. This creates a clean, uniform appearance. Use a measuring tool or template for accuracy. Small, round knobs work well on most door styles.
Pulls On Drawers
Center pulls horizontally on drawers under 12 inches wide. This balances the pull with the drawer size. For wider drawers, use longer pulls. Place them about 1 to 2 inches from the top edge.
Align pulls so fingers can grip easily without hitting the drawer below. Choose pull length based on drawer width for best function. Use a level to keep pulls straight and even.
Aligning With Panels
For paneled doors, align hardware with the stile or rail edge. This shows off door design and looks modern. Hardware should not cover panel details. Keep spacing consistent on all cabinet fronts.
Match hardware height across doors and drawers for a neat look. Use a template or ruler to mark spots before drilling. Proper alignment helps cabinets look well planned and stylish.
Troubleshooting Tips
Adding cabinet hardware can be simple, but sometimes problems occur. Troubleshooting helps fix common issues quickly. This section covers tips to solve typical hardware problems. Follow these tips for a smooth installation and lasting results.
Fixing Misaligned Holes
Misaligned holes cause handles to sit unevenly. Use wood filler to fill old holes. Let it dry fully before drilling new ones. Measure carefully and mark the exact spot. Drill slowly to avoid splintering. Check alignment by holding hardware in place before screwing.
Handling Loose Hardware
Loose screws make knobs and pulls wobbly. Tighten screws with a screwdriver first. If screws won’t tighten, try longer screws or wall anchors. For stripped holes, fill with toothpicks and glue, then reinsert screws. This gives a tighter hold. Test hardware after fixing to ensure stability.
Avoiding Snags And Catches
Snags happen when hardware hits other parts. Check for door or drawer misalignment first. Adjust hinges or slides to improve fit. Sand rough edges on hardware or cabinet surfaces if needed. Make sure screws are flush and not sticking out. Proper spacing between hardware and surfaces prevents catches.
Credit: www.thehappyhousie.com
Frequently Asked Questions
How Do You Add Hardware To Your Cabinets?
Mark hardware placement using a template, tape the cabinet to protect it, drill holes, then screw in the hardware securely.
What Is The 1/3 Rule For Cabinet Hardware?
The 1/3 rule for cabinet hardware means placing knobs or pulls one-third of the way down or across the cabinet door or drawer for balanced, aesthetic alignment.
Can You Add Soft Close Hardware To Existing Cabinets?
Yes, you can add soft close hardware to existing cabinets by installing retrofit adapters or replacing hinges. This upgrade reduces noise and extends cabinet life.
What Are The Rules For Cabinet Knobs And Pulls?
Place knobs centered on doors and small drawers; align pulls horizontally on wider drawers. Use knobs on doors and pulls on drawers for function and style. Match finishes for consistency. Avoid pulls that snag clothing. Test placement with tape before drilling to ensure proper look and feel.
Conclusion
Adding cabinet hardware is a simple way to refresh your space. Measure carefully and mark the spots before drilling. Use the right tools for a smooth installation. Choose hardware that matches your style and cabinet size. Take your time to align knobs and pulls evenly.
Small steps create a big impact in your kitchen or bathroom. Enjoy the new look and improved function of your cabinets. This easy project saves money and boosts home value. Try it yourself and see how hardware changes your room.