
Are you ready to upgrade your cabinets but unsure how to drill the perfect hole for your new hardware? Drilling holes might seem tricky, but with the right steps, you can do it easily and avoid costly mistakes.
Imagine how satisfying it will feel to open your cabinets with stylish knobs or handles that you installed yourself. In this guide, you’ll discover simple tips and tricks that make drilling holes precise and stress-free. Keep reading, and by the end, you’ll have the confidence to tackle this project like a pro.

Credit: plankhardware.com
Tools Needed
Drilling holes for cabinet hardware needs the right tools for a clean, accurate job. Using proper tools makes your work easier and ensures good results. Gather all tools before starting to avoid interruptions and mistakes.
Essential Drill Bits
Choose drill bits that fit your cabinet hardware screws. A standard 3/16-inch bit works for most knobs and pulls. Use a brad-point bit for clean holes in wood. A countersink bit helps screws sit flush with the surface.
Measuring Tools
Accurate measurements prevent misaligned hardware. Use a tape measure or ruler for precise spacing. A small level helps keep handles straight. A combination square ensures right angles and consistent placement.
Marking Supplies
Mark hole spots clearly before drilling. Use a pencil or fine-tip marker for visible marks. A center punch creates a small dent to guide the drill bit. This stops the bit from slipping during drilling.
Choosing Hardware Placement
Choosing the right hardware placement is key to a neat and functional cabinet. Proper placement makes cabinets easier to use and looks balanced. You need to think about standard heights, door and drawer sizes, and how handles and knobs line up. This helps create a clean, uniform look.
Standard Heights And Distances
Most cabinet knobs go 2 to 3 inches from the edge. Handles usually sit 3 to 4 inches from the edge. Standard heights for handles on drawers are about 1 to 2 inches from the top edge. On cabinet doors, knobs are often placed 2 to 3 inches from the corner. These measurements help keep hardware consistent.
Consider Door And Drawer Size
Large drawers need bigger hardware or multiple handles. Small drawers look better with smaller knobs or a single handle. For tall cabinet doors, place handles in the middle or slightly above center. This makes opening easier. Adjust placement based on the size for comfort and style.
Aligning Handles And Knobs
Keep hardware at the same height on all drawers in one row. Align knobs on cabinet doors so they form a straight line. This gives a clean, organized look. Use a ruler or template to mark spots before drilling. Consistent alignment improves both look and use.
Measuring And Marking
Measuring and marking are the first steps to drill holes for cabinet hardware. Precise marks help you place handles and knobs perfectly. Small mistakes here cause problems later. Take your time and work carefully. Use the right tools and methods to get accurate points for drilling.
Using A Template
Templates make measuring easy and consistent. They guide where to place each hole on the cabinet door or drawer. Use a plastic or metal template made for cabinet hardware. Align it with the edge of the cabinet. Hold it steady before marking. Templates save time and reduce errors.
Marking Drill Points Accurately
Use a sharp pencil or fine-tip marker to mark drill points. Make small dots, not big circles. Place the mark exactly where the hole will go. Check the hardware’s size and design for correct hole spacing. A misplaced mark leads to crooked or loose handles.
Double-checking Measurements
Always measure twice before drilling. Double-check the distance from edges and between holes. Use a ruler or tape measure for accuracy. Confirm the marks line up on all doors or drawers. Mistakes here can waste materials and time. Careful checks prevent costly errors.
Preparing To Drill
Preparing to drill holes for cabinet hardware is a crucial step. It ensures accuracy and prevents damage to your cabinets. Taking time to prepare makes the process smoother and safer. Follow these key steps before starting to drill.
Securing Cabinet Doors
Keep cabinet doors steady to avoid slipping. Use clamps to hold doors in place firmly. This prevents mistakes and uneven holes. A steady door helps drill straight and clean holes. Make sure clamps do not damage the surface.
Protecting Surfaces
Cover surrounding areas with painter’s tape. This stops scratches and marks during drilling. Tape also helps mark drilling points clearly. Use a scrap piece of wood behind the door. It prevents drill bits from going through and damaging the wall or floor.
Setting Drill Speed
Choose a low drill speed for better control. Slow speed reduces heat and prevents wood splintering. Use a drill speed between 500 and 1000 RPM. Adjust speed based on the drill bit size and material. Always test on a scrap piece before drilling the door.
Drilling Techniques
Drilling holes for cabinet hardware needs care and good technique. Proper drilling helps parts fit well and keeps the wood strong. Using the right methods makes the work easier and cleaner. Here are important tips for drilling holes with precision and care.
Starting With A Pilot Hole
Begin by making a small pilot hole. This guides the drill bit and stops it from slipping. Use a drill bit smaller than the screw size. Mark the spot clearly before drilling. Drill slowly and straight to keep the hole accurate.
Maintaining Drill Stability
Hold the drill steady and straight. Keep your hands firm to avoid shaking. Use a drill guide or clamp if possible. Move the drill slowly and apply light pressure. This control helps make a clean, exact hole without mistakes.
Avoiding Splintering
Prevent wood splinters by supporting the back side. Place a piece of scrap wood behind the drilling spot. Drill slowly and do not rush the final part. Using a sharp drill bit also reduces splintering. Clean holes improve the look and strength of the hardware fit.
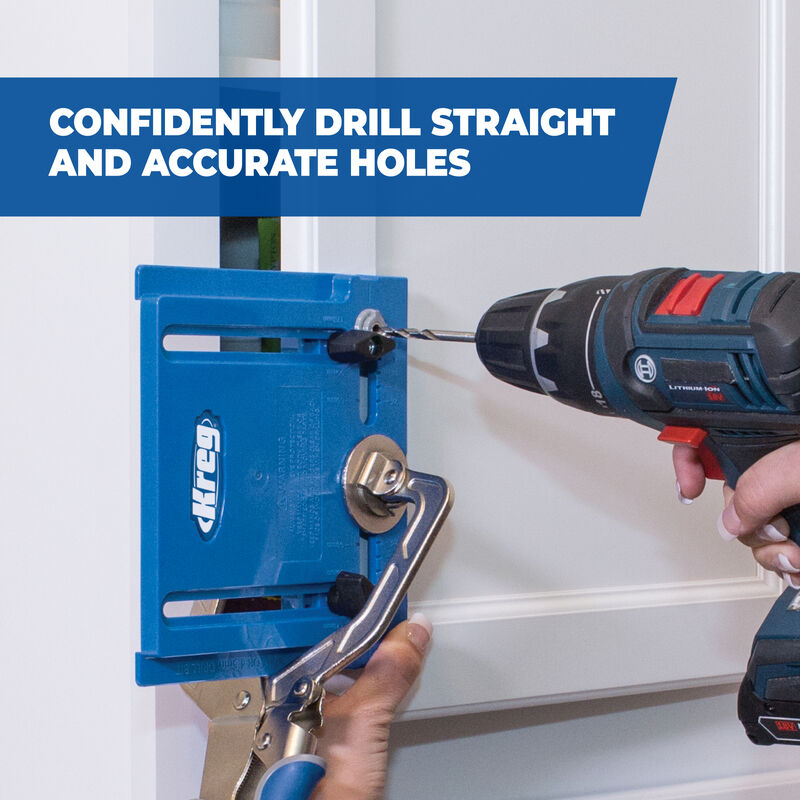
Credit: www.kregtool.com
Finishing Touches
Finishing touches make a big difference in cabinet hardware installation. They ensure your work looks clean and professional. Taking time with these steps helps your cabinets look their best. Attention to detail at this stage avoids problems later.
Cleaning Drill Holes
Clear all dust and debris from the drill holes. Use a small brush or compressed air. Removing wood chips helps screws fit tightly. Clean holes prevent hardware from loosening over time.
Installing Hardware
Place the hardware on the cabinet surface. Align the holes carefully with drilled spots. Insert screws gently to avoid splitting the wood. Tighten screws just enough to hold firmly. Over-tightening can damage the cabinet or hardware.
Adjusting For Perfect Fit
Check if the hardware sits straight and works well. Slightly loosen screws if needed to adjust position. Tighten screws again once hardware fits perfectly. Test handles and knobs by opening and closing doors. Smooth movement shows a good installation.
Troubleshooting Tips
Troubles can happen when drilling holes for cabinet hardware. These problems can slow your work and cause frustration. Knowing simple fixes helps keep the project on track. Use these troubleshooting tips to solve common issues quickly. They help you fix mistakes and protect your cabinets.
Fixing Misaligned Holes
Misaligned holes make hardware look uneven. To fix this, fill the wrong hole with wood filler or a wooden dowel. Let it dry completely. Then, mark the correct spot carefully. Drill the hole slowly and check alignment before finishing. Use a template for precise placement next time.
Handling Stripped Screws
Stripped screws lose their grip inside the hole. To remove a stripped screw, try using a rubber band under the screwdriver. This adds extra grip. If that fails, use a screw extractor tool. Replace stripped screws with new ones that fit well. Avoid overtightening to prevent this problem.
Repairing Damaged Surfaces
Drilling can chip or damage cabinet surfaces. Sand the damaged area gently to smooth it out. Apply wood putty to fill deep chips or cracks. After drying, sand again for a smooth finish. Paint or stain to match the cabinet color. This makes the repair blend in nicely.

Credit: us.plankhardware.com
Frequently Asked Questions
How Do I Measure For Drilling Cabinet Hardware Holes?
Measure accurately from the cabinet edge using a tape measure or ruler. Mark the drill spot with a pencil for precision. Consistent measurements ensure hardware aligns properly and looks professional.
What Drill Bit Size Is Best For Cabinet Hardware?
Use a drill bit size that matches the hardware screws, usually 3/16 or 1/4 inch. Check the hardware package for exact bit size recommendations. Proper bit size prevents wood splitting and ensures a snug fit.
How Can I Avoid Splitting Wood When Drilling?
Drill a pilot hole smaller than the screw size to reduce splitting. Use a sharp drill bit and drill slowly. Clamping the wood firmly also helps maintain stability during drilling.
Should I Use A Drill Guide For Cabinet Hardware?
Yes, a drill guide helps maintain straight, accurate holes. It prevents angled drilling and improves consistency across multiple holes. Using a guide saves time and enhances the hardware installation quality.
Conclusion
Drilling holes for cabinet hardware is simple with the right steps. Mark the spots carefully. Use a drill bit that fits the screws. Drill straight and slow to avoid mistakes. Check your work often to stay precise. Taking time makes the hardware fit well and look good.
Practice helps you gain confidence and skill. Soon, you will handle cabinet projects with ease. Keep tools ready and follow safety rules. Enjoy the satisfaction of a job done right.


