Removing shutter fasteners might seem tricky at first, but with the right approach, you can tackle it smoothly and confidently. Whether you’re updating your home’s look or fixing a broken shutter, knowing how to remove these fasteners quickly saves you time and frustration.
In this guide, you’ll discover simple, step-by-step methods that work for different types of fasteners, including those stubborn plastic “Shur-Lok” clips and traditional screws. By the end, you’ll feel ready to handle your shutters like a pro—no special tools or experience needed.
Keep reading to learn exactly how to remove your shutter fasteners without hassle or damage.
Tools Needed
Removing shutter fasteners requires the right set of tools. Using proper tools makes the job easier and safer. Preparing all necessary tools beforehand saves time and effort. The main tools include screwdrivers, pliers, and rotary devices. Each tool serves a specific purpose in removing fasteners from shutters.
Screwdrivers And Drills
Screwdrivers are essential for loosening screws on shutter fasteners. Both flathead and Phillips screwdrivers are useful. A power drill speeds up the process of removing screws. Choose drill bits that fit the screw heads exactly. Avoid stripping the screws by using the right size and type.
Pliers And Pry Bars
Pliers help grip and pull out stubborn fasteners. Needle-nose pliers work well in tight spaces. Pry bars assist in lifting fasteners without damaging the shutter. Use small pry bars to avoid scratching the surface. These tools provide leverage to remove nails or pins holding the shutter.
Rotary And Masonry Tools
Rotary tools can cut through tough fasteners or nails. Attach cutting discs designed for metal or plastic fasteners. Masonry tools may be needed if shutters are fixed into brick or stone walls. A hammer drill with a masonry bit helps loosen fasteners embedded in hard surfaces. Use these tools carefully to protect shutters and walls.

Credit: www.reddit.com
Removing Phillips Head Screws
Removing Phillips head screws is a common step in taking off shutter fasteners. These screws have a cross-shaped slot on top. They provide good grip for screwdrivers, but they can be tricky without the right method. Proper tools and techniques help avoid damage and make removal easier.
Using The Right Screwdriver
Choose a screwdriver that fits the screw head size exactly. A Phillips screwdriver with the correct tip size prevents slipping. Avoid using flathead screwdrivers on Phillips screws. This can strip the screw and make removal harder. Hold the screwdriver firmly and align it straight with the screw head.
Applying Pressure To Prevent Spinning
Press the screwdriver down firmly while turning it. This keeps the screwdriver tip in the screw head slot. Without enough pressure, the screwdriver can slip and round off the screw edges. Turn the screwdriver slowly and steadily. Quick twisting can strip the screw or damage the shutter.
Handling Stripped Screw Heads
Stripped screws have damaged slots that make removal difficult. Try using a rubber band between the screwdriver and screw for extra grip. If that fails, use a screw extractor tool. Drill a small hole in the screw and insert the extractor. Turn it counterclockwise to pull the screw out gently.
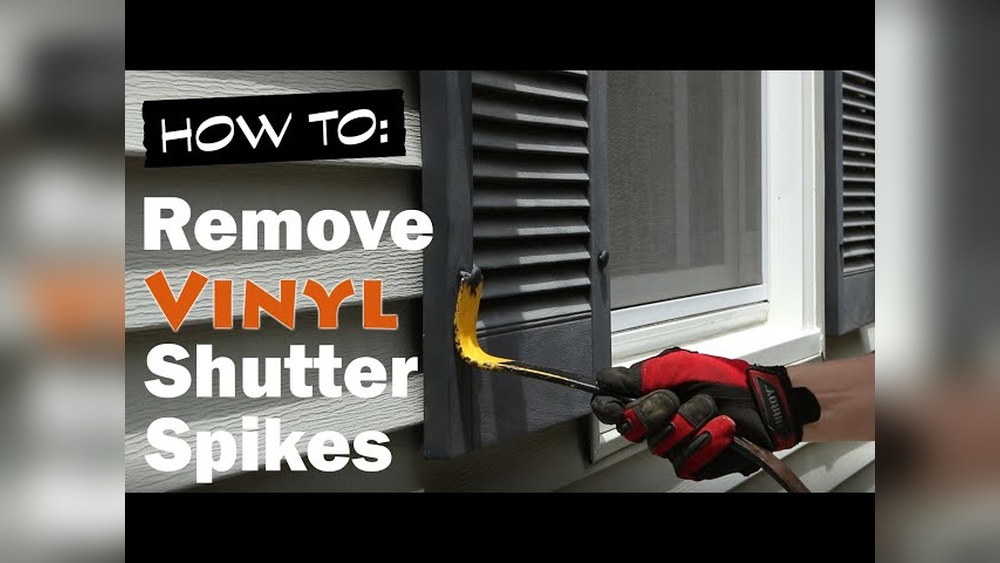
Dealing With Plastic Shur-lok Fasteners
Plastic Shur-Lok fasteners secure shutters firmly but removing them is manageable. These fasteners snap into place, holding shutters tight against walls or siding. Careful removal avoids damage to shutters and exterior surfaces. Follow simple steps to detach shutters and clear fastener pieces from the wall.
Detaching Attached Shutters
Start by locating the plastic Shur-Lok fasteners along the shutter edges. Gently pull the shutter away from the wall, applying steady pressure. The fasteners will release with a soft pop or click sound. Avoid using excessive force to prevent cracking the plastic fasteners or shutters. Work along the shutter’s length, releasing each fastener one at a time. Once all fasteners detach, the shutter will come free easily.
Removing Fastener Pieces From Walls
After shutters come off, some plastic fastener parts may remain in the wall. Use needle-nose pliers or a flathead screwdriver to carefully pry out these pieces. Insert the tool between the fastener and wall, then gently lever them out. Clean the wall surface to remove any debris or residue. Removing all fastener remnants prepares the surface for new shutters or repairs. Take care not to damage siding or brick during this process.

Credit: www.youtube.com
Removing Stuck Or Broken Fasteners
Removing stuck or broken shutter fasteners can be a tough task. These fasteners often get rusted or damaged over time. They make shutter removal frustrating and slow. Using the right methods helps avoid damage to the shutters or walls. The following techniques work well to handle difficult fasteners safely and efficiently.
Using Long Screws And Pliers
Long screws can grip stuck fasteners firmly. Insert a long screw into the fastener’s center. Turn it slowly to get a good hold. Use pliers to twist the screw and fastener together. This method loosens the fastener for easy removal. Pliers give extra grip and control. Work carefully to avoid breaking the fastener further.
Drilling Out Fasteners
Drilling is useful when fasteners are broken or stripped. Choose a drill bit slightly smaller than the fastener. Drill into the center of the fastener slowly. This weakens the fastener’s hold in the wall. After drilling, use pliers or a screwdriver to pull it out. Wear safety goggles to protect your eyes from metal shards.
Grinding Down Remaining Parts
Grinding is the last option for stubborn fasteners. Use a small angle grinder or rotary tool. Carefully grind down the fastener head until it is flush with the surface. This allows the shutter to come off without pulling on the fastener. Take care not to damage the shutter or wall finish. Wear protective gloves and eye protection during this process.
Safety Tips
Removing shutter fasteners can involve risks. Following safety tips helps avoid injuries and damage. Prepare well and stay alert throughout the process.
Checking For Insect Nests
Look closely for wasps or bees near the shutters. Insect nests may hide behind or inside fasteners. Disturbing nests can cause painful stings and allergic reactions. Use a flashlight to inspect dark corners carefully. If you find nests, delay removal until professionals handle the insects safely.
Protective Gear Recommendations
Wear gloves to protect your hands from sharp edges and nails. Safety glasses shield your eyes from flying debris during removal. Long sleeves and pants prevent scratches and insect bites. Use a dust mask if working in dusty or moldy areas. Proper gear keeps you safe and comfortable while working.

Credit: www.reddit.com
Frequently Asked Questions
How Do You Remove Shutter Fasteners?
To remove shutter fasteners, unscrew Phillips head screws with a screwdriver or drill. For plastic Shur-Lok fasteners, pull the shutter off carefully, then use pliers to remove remaining fastener pieces. Hold the shutter securely to prevent falls during removal.
How To Remove Shutter Fasteners From Vinyl Siding Youtube?
Use a screwdriver or drill to unscrew Phillips head fasteners gently. For plastic Shur-Lok fasteners, pull the shutter off carefully. Remove remaining fastener pieces with pliers or push them through the siding holes. Wear gloves and watch for insects during removal.
How Are Vinyl Shutters Attached To Vinyl Siding?
Vinyl shutters attach to vinyl siding using screws through shutter holes into the siding’s nailing flange. Seal around screws to prevent water damage.
Can Shutters Be Removed Easily?
Shutters can be removed easily using the right tools like screwdrivers or hammers. Unscrew or pry fasteners carefully. Hold the shutter securely to prevent falls. Some fasteners may require pliers or special tools for removal. Take precautions against insects or debris behind shutters.
Conclusion
Removing shutter fasteners does not have to be hard. Use the right tools for the job. Take your time to avoid damage to shutters or walls. Watch for hidden nails or pins that may hold the shutter tight. Always work carefully and safely.
With practice, you can remove shutters quickly and cleanly. This simple skill saves time and effort in home projects. Keep your tools ready for future shutter work. Your shutters will look good and stay secure when reinstalled.