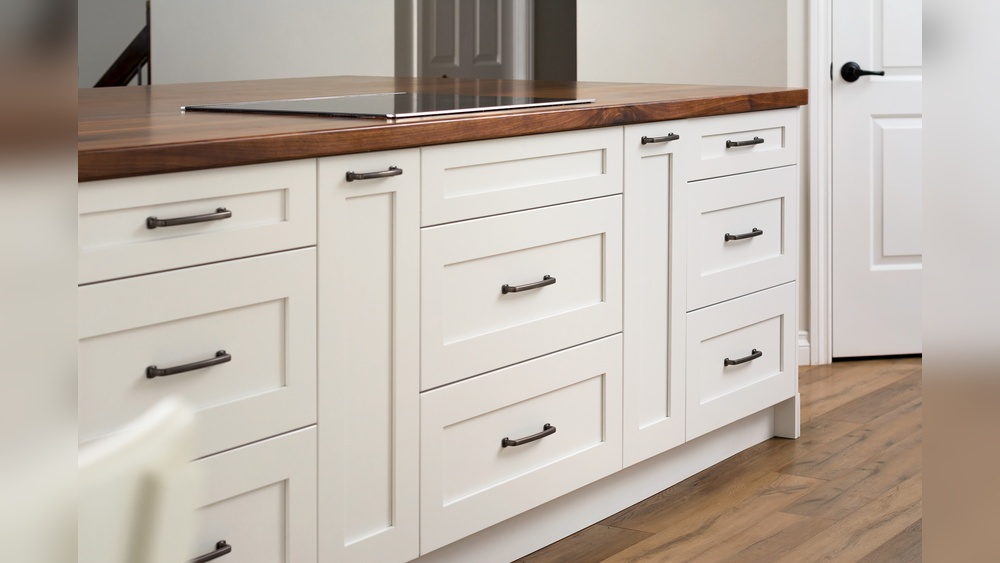
Are your old kitchen cabinet hardware looking dull and outdated? You don’t have to replace them to give your kitchen a fresh, new look.
Painting your cabinet hardware is a simple and affordable way to transform your space without breaking the bank. In this guide, you’ll discover easy steps and expert tips to make your hardware look brand new. Ready to breathe new life into your kitchen?
Let’s get started!

Credit: www.youtube.com
Choosing The Right Paint
Choosing the right paint is a key step in painting old kitchen cabinet hardware. The paint must stick well and resist wear. It should also look good and match your kitchen style. Picking the right type, color, and finish will help your hardware look fresh and last longer.
Types Of Paint For Hardware
Metal hardware needs special paint. Spray paint made for metal works best. It dries fast and gives a smooth coat. Another option is enamel paint. It is strong and holds up well. Avoid regular wall paint. It peels easily on metal surfaces.
Color Selection Tips
Choose colors that fit your kitchen’s look. Neutral colors like black, white, or silver match most styles. Bright colors add a fun touch. Test small spots first to see how the color looks. Think about the cabinet color and kitchen decor too.
Finish Options
Hardware paint comes in different finishes. Glossy finishes shine and catch the eye. Matte finishes are soft and hide fingerprints. Satin finish is a mix of both. Pick a finish that fits your kitchen style and is easy to clean.
Gathering Supplies
Gathering the right supplies is the first step to painting old kitchen cabinet hardware. Having everything ready helps the process go smoothly. It saves time and avoids frustration. This section covers the essential tools, protective gear, and cleaning materials you need. Prepare well for a neat and lasting finish.
Essential Tools
Start with basic tools for the job. You need a screwdriver to remove hardware from cabinets. Use fine-grit sandpaper to smooth surfaces before painting. A small paintbrush or foam brush works best for detailed parts. Have a container for paint and a tray for easy access. These tools ensure accuracy and clean work.
Protective Gear
Protect yourself during this project. Wear gloves to keep paint off your skin. Use a mask to avoid breathing in dust or paint fumes. Safety glasses protect your eyes from dust and splashes. Dress in old clothes to prevent stains. Protective gear keeps you safe and comfortable.
Cleaning Materials
Clean hardware before painting for better paint adhesion. Use mild soap and warm water to remove dirt and grease. A soft cloth or sponge helps clean surfaces gently. For stubborn grime, try a degreaser or rubbing alcohol. Make sure hardware is completely dry before sanding or painting. Clean hardware leads to a smooth, lasting finish.
Removing Cabinet Hardware
Removing old cabinet hardware is the first step in painting it. Careful removal protects the cabinet surface and hardware. This process saves time and effort later. Preparation is key for a smooth painting project.
Safe Removal Techniques
Start by opening the cabinet doors fully. Use a screwdriver that fits the screw heads well. Turn screws slowly to avoid stripping them. Support the hardware with your other hand. Gently pull the hardware away from the cabinet. For stuck screws, apply a small amount of penetrating oil. Let it sit a few minutes before trying again. Avoid using force that can damage the wood or hardware. Keep a steady hand and take your time.
Organizing Screws And Parts
Collect all screws and hardware pieces carefully. Place them in small containers or trays. Label each container for specific cabinets or drawers. This organization speeds up reassembly after painting. Use a magnetic tray to prevent losing metal parts. Keep everything in one workspace to avoid confusion. Double-check that you have all parts before painting starts.
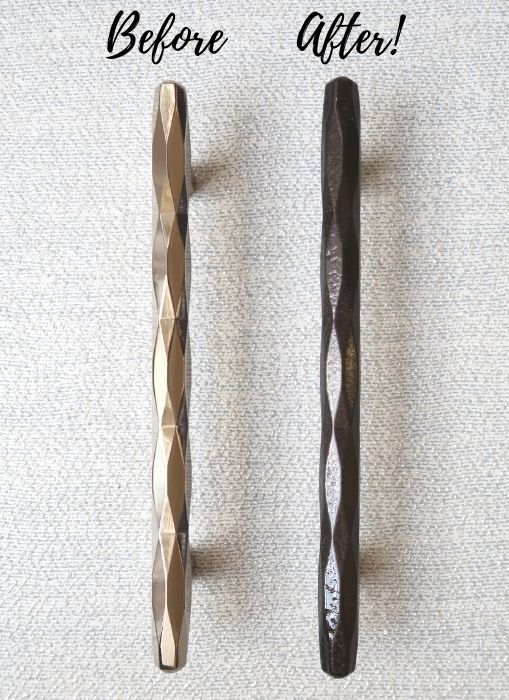
Cleaning And Prepping Hardware
Cleaning and prepping your old kitchen cabinet hardware is key for a smooth paint job. Dirt, grease, and old paint can stop new paint from sticking well. Taking time to clean, sand, and prime helps the paint last longer and look better.
Removing Dirt And Grease
Start by washing the hardware with warm, soapy water. Use a soft brush or cloth to scrub off grease and grime. For tough spots, try a mixture of vinegar and water. Rinse the pieces well and dry them completely before moving on.
Sanding For Better Adhesion
Lightly sand the hardware with fine-grit sandpaper. This roughs up the surface, so paint sticks better. Focus on shiny or smooth areas. After sanding, wipe away dust with a damp cloth. Let the hardware dry fully before priming.
Priming The Surface
Apply a thin coat of metal primer to each piece. Primer helps paint stick and stops rust. Use a brush or spray primer for even coverage. Allow the primer to dry as the label directs. Now your hardware is ready for painting.
Painting Techniques
Painting old kitchen cabinet hardware is a smart way to refresh your kitchen. Choosing the right painting technique affects the final look and durability. This section explains key painting methods to help you achieve smooth, lasting results.
Brush Vs Spray Painting
Brush painting gives you control and precision. It works well for small, detailed hardware. You can reach tight spots easily. Spray painting covers hardware evenly and quickly. It creates a smooth finish without brush marks. Use spray paint outdoors or in a ventilated area. Choose the method that fits your tools and skill level.
Applying Thin Coats
Thin coats help prevent drips and uneven layers. Apply several light coats instead of one thick coat. Each layer dries faster and sticks better. Light coats make the paint look smooth and professional. Use steady, even strokes for brush painting. Hold the spray can about 6-8 inches away from the surface.
Drying Time Between Coats
Allow enough drying time between coats. This avoids smudging and peeling. Follow the paint label for exact drying times. Usually, wait 15 to 30 minutes before the next coat. If you paint too soon, the layers won’t bond well. Patience leads to a stronger, cleaner finish.
Sealing And Protecting
Sealing and protecting painted kitchen cabinet hardware is essential. It keeps the finish fresh and guards against scratches and wear. A good sealer also helps the paint last longer in a busy kitchen environment.
Choosing The Right Sealer
Select a sealer made for metal surfaces. Clear polyurethane and acrylic sealers work well. Pick a water-based sealer for easy cleanup and low odor. Avoid oil-based sealers as they can yellow over time. Check if the sealer is compatible with your paint type.
Application Tips
Apply the sealer in thin, even coats. Use a small brush or spray for smooth coverage. Avoid drips by not overloading the brush. Let each coat dry fully before adding the next one. Light sanding between coats can improve adhesion.
Curing Time
Curing time is how long the sealer needs to harden fully. It can take from 24 to 72 hours. Avoid heavy use of hardware during this period. The longer you wait, the better the finish will hold up. Check the product label for exact curing times.
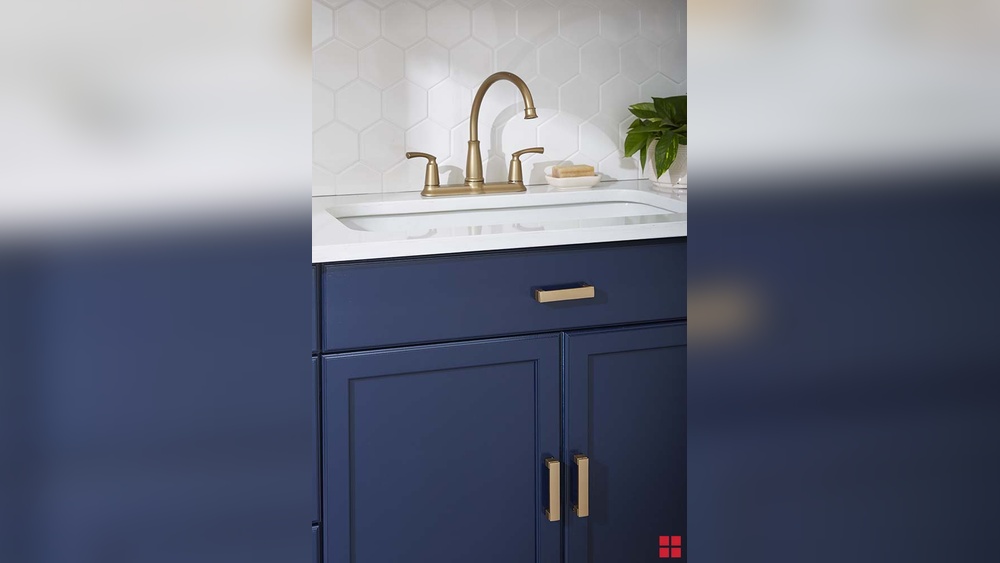
Reinstalling Hardware
Reinstalling your kitchen cabinet hardware is the final step after painting. It brings your cabinets back to life and completes the fresh look. Take your time to ensure everything fits perfectly and looks neat. Proper reinstallation keeps the hardware secure and easy to use.
Aligning And Securing
Start by placing the hardware on the cabinet doors or drawers. Make sure the holes line up with the screws. Hold the hardware steady while you insert screws. Use a screwdriver to tighten screws carefully. Avoid over-tightening to prevent damage. Check the hardware sits flat and straight. Adjust if needed before fully tightening.
Final Touches
Wipe away any fingerprints or dust from the hardware. Test each piece by opening and closing doors or drawers. Make sure the hardware feels sturdy and smooth to use. Touch up any small paint chips around the hardware edges. Enjoy the refreshed look of your cabinets with new hardware shine.
Credit: porchdaydreamer.com
Maintenance Tips
Maintaining painted kitchen cabinet hardware keeps your kitchen looking fresh and stylish. Proper care extends the life of your paint job. It also protects the hardware from damage and wear. Simple steps help preserve the finish and avoid frequent repainting.
Cleaning Painted Hardware
Use a soft cloth to clean painted hardware. Avoid abrasive sponges or rough materials. Mild soap and water work best for removing dirt. Gently wipe the surface without scrubbing hard. Dry the hardware with a clean towel after cleaning. Regular cleaning prevents buildup and keeps the paint bright.
Touch-up Advice
Keep some leftover paint for touch-ups. Small chips or scratches can happen over time. Lightly sand the damaged area before repainting. Use a small brush for precise application. Let the paint dry completely before use. Regular touch-ups help maintain a smooth, even finish.

Credit: www.kylieminteriors.ca
Frequently Asked Questions
How Do I Prepare Old Cabinet Hardware For Painting?
Clean the hardware thoroughly to remove dirt and grease. Sand lightly to create a rough surface for paint adhesion. Remove any rust or old paint using a wire brush or sandpaper. Ensure the hardware is dry before painting.
What Type Of Paint Works Best On Cabinet Hardware?
Use spray paint specifically designed for metal surfaces. Look for paint that is durable and resistant to chipping. Primer spray paint is recommended for better adhesion and longevity. Choose a finish like satin or gloss for a polished look.
Can I Paint Cabinet Hardware Without Removing It?
It’s best to remove hardware before painting to avoid mess and ensure even coverage. If removal isn’t possible, cover surrounding areas carefully with painter’s tape. Painting without removal may lead to uneven paint and drips.
How Long Does Paint Take To Dry On Hardware?
Spray paint typically dries to touch within 15-30 minutes. Full curing takes 24-48 hours for maximum durability. Avoid handling hardware until paint is fully dry to prevent smudges or damage.
Conclusion
Painting old kitchen cabinet hardware can refresh your space quickly. It saves money and adds a personal touch. Clean and sand the pieces well before painting. Choose the right paint for metal surfaces. Allow enough drying time for best results.
Small changes make a big difference in your kitchen’s look. Try this simple project to enjoy a fresh, updated feel. Your cabinets will look brand new without much effort. Give it a go and see the transformation yourself!