Are you tired of struggling to install cabinet hardware perfectly every time? Imagine having a simple tool that helps you place knobs and handles in the exact same spot on every door and drawer.
Making a cabinet hardware jig is easier than you think, and it can save you hours of frustration and mistakes. In this guide, you’ll discover step-by-step how to create your own jig that fits your cabinets perfectly, so your hardware looks professional and consistent.
Keep reading, and you’ll never worry about crooked or uneven cabinet handles again!
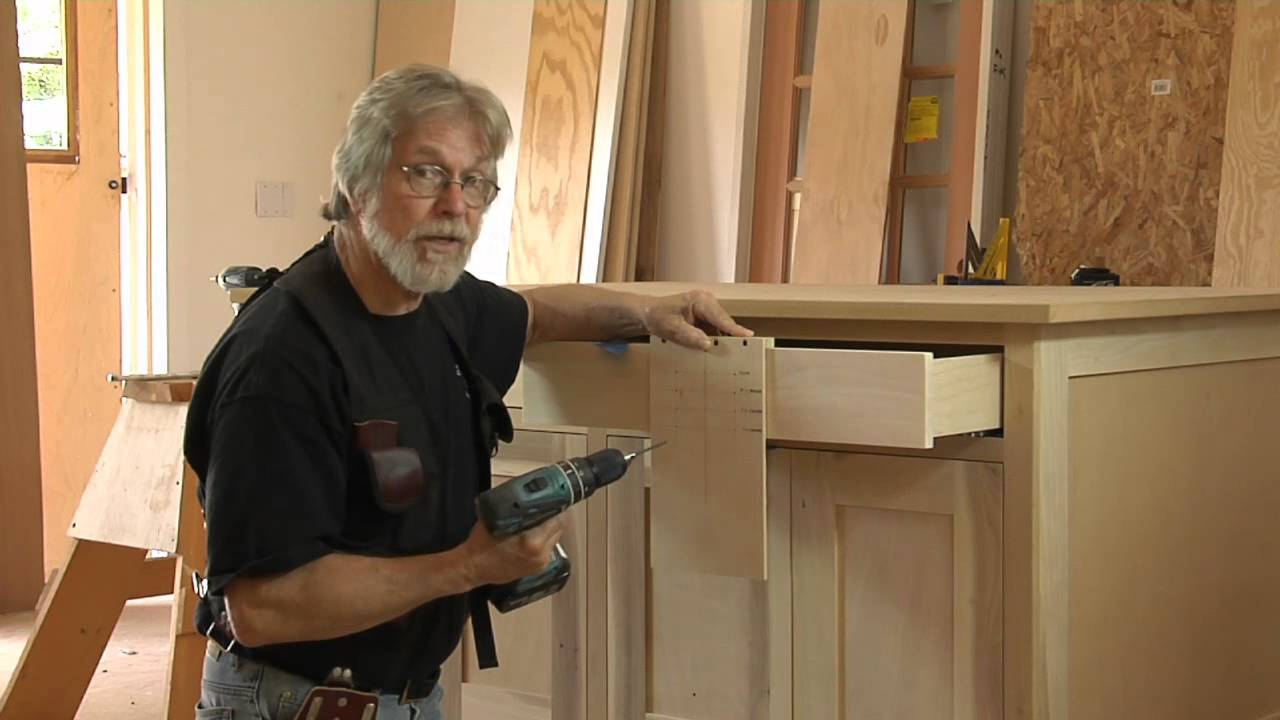
Credit: www.youtube.com
Choosing The Right Materials
Choosing the right materials is key to making a durable cabinet hardware jig. The materials affect the jig’s strength and accuracy. Picking good wood and hardware ensures your jig works well for many projects. Careful selection saves time and effort during construction and use.
Selecting Wood Types
Use hardwood for the jig base. Hardwoods like maple, oak, or birch offer strong support. These woods resist warping and wear over time. Avoid softwoods like pine, which may dent easily. Choose wood with a smooth surface for better markings and measurements. A stable wood type keeps your jig precise and reliable.
Essential Tools And Hardware
Gather basic tools such as a saw, drill, and clamps. These tools help shape and hold the jig parts. Use quality screws or bolts to join wood pieces firmly. Small metal hardware like washers improve strength and movement. Make sure all hardware fits well and moves smoothly for easy adjustments.
Designing Your Jig
Designing your cabinet hardware jig is the first step to a precise and efficient project. A well-designed jig helps you place handles and knobs evenly every time. This saves time and avoids mistakes. Focus on accuracy and simplicity while planning your jig.
Measuring For Accuracy
Start by measuring the cabinet doors or drawers carefully. Use a ruler or tape measure for exact numbers. Measure the distance between holes on your hardware. Write down these numbers clearly. Double-check your measurements to avoid errors later.
Accurate measurements ensure your hardware fits perfectly. Small mistakes can cause misaligned handles. Take your time and measure twice for safety.
Sketching The Layout
Draw a simple sketch of your jig on paper. Mark the exact spots for drilling holes. Use your measurements to place these marks correctly. Keep the sketch clear and easy to follow.
This sketch acts as a guide when building the jig. It helps you visualize the final product. Adjust the layout if something looks off before cutting any wood. A good sketch leads to a better jig.
Cutting And Shaping Parts
Cutting and shaping parts is a key step in making a cabinet hardware jig. It ensures the pieces fit together well. Precise cuts help create a strong, accurate jig. This step needs care and attention to detail. Using the right tools and methods makes the process safer and easier.
Safe Cutting Techniques
Always wear safety glasses to protect your eyes. Use clamps to hold parts firmly while cutting. Keep your fingers away from the blade path. Cut slowly and steadily to avoid mistakes. Use a sharp blade for clean cuts. Turn off power tools before adjusting or moving parts. Work in a well-lit area to see clearly.
Sanding And Finishing Edges
Sand edges to remove rough spots and splinters. Use fine-grit sandpaper for a smooth finish. Sand along the edge, not across it. Check edges with your hand to feel smoothness. Clean dust off before assembling parts. Smooth edges help parts fit better and last longer. Finishing edges also improves the jig’s look and safety.

Credit: www.youtube.com
Assembling The Jig
Assembling the cabinet hardware jig is a key step for accurate drilling. This process ensures your hardware fits perfectly every time. Careful assembly makes the jig durable and easy to use.
Joining Components Securely
Start by gathering all parts of the jig. Use screws or bolts to fasten the pieces tightly. Avoid loose connections to prevent wobbling. Tight joints keep the jig steady during work. Double-check each connection before moving on.
Ensuring Stability And Alignment
Place the jig on a flat surface to test stability. Adjust parts until the jig sits without rocking. Use a square tool to check angles and alignment. Proper alignment guarantees precise hole placement. Stability and alignment reduce errors and save time.
Calibrating For Precision
Calibrating your cabinet hardware jig is key to achieving perfect results. Accurate calibration ensures every hole lines up exactly where it should. This step saves time and avoids mistakes during installation.
Taking time to calibrate makes your jig reliable for every project. It helps maintain consistent spacing and alignment for cabinet handles and knobs. Follow these steps to fine-tune your jig for precision.
Setting Drill Guide Positions
Start by marking the positions for your drill guides. Measure the distance between holes on your hardware carefully. Use a ruler or tape measure for exact spacing.
Attach the drill guides to the jig at the marked points. Tighten screws so the guides do not move during drilling. Double-check all guide positions before moving on.
Testing And Adjusting
Test your jig on a scrap piece of wood. Drill holes using the set guides and check their alignment. Measure the hole spacing to confirm it matches your hardware.
Make small adjustments to guide positions if needed. Repeat testing until holes are perfectly aligned. This step ensures accuracy before working on your cabinets.
Using The Jig Effectively
Using the cabinet hardware jig correctly makes your work easier and more precise. It helps place handles and knobs in the right spots every time. This reduces mistakes and saves time. Follow simple steps for the best results.
Marking Cabinet Doors
Start by placing the jig on the cabinet door. Align it with the edge or center, depending on the hardware style. Use a pencil to mark holes through the jig’s guide holes. Make light marks to avoid visible mistakes. Double-check the marks to ensure they are level and even on all doors.
Drilling Holes With Confidence
Choose a drill bit that matches your hardware screws. Insert the bit into your drill and set it to a slow speed. Hold the jig firmly to stop movement. Drill straight down on each marked spot. Keep the drill steady to avoid angled holes. Clean any wood dust before attaching hardware.
Maintenance And Storage Tips
Maintaining and storing your cabinet hardware jig correctly helps it last longer. Proper care keeps it working well and saves money on repairs or replacements. Follow these simple tips for cleaning and storing your jig.
Cleaning After Use
Remove dust and debris from the jig after every use. Use a soft brush or cloth to wipe all parts gently. Avoid water on wooden parts to prevent swelling or damage. Use a mild cleaner for metal parts to stop rust. Dry the jig completely before storing it away. Regular cleaning keeps the jig accurate and smooth.
Proper Storage Methods
Store the jig in a dry, cool place to avoid rust and warping. Use a protective case or box to keep it safe from dust. Keep all small parts and accessories in labeled containers. Avoid stacking heavy items on top of the jig. Organizing your tools helps find them quickly and prevents damage.
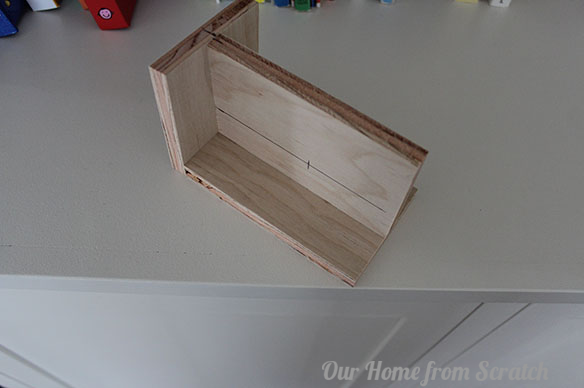
Credit: ourhomefromscratch.com
Frequently Asked Questions
What Tools Are Needed To Make A Cabinet Hardware Jig?
You need a drill, measuring tape, clamps, a ruler, and plywood. These tools help ensure precise hole placement for cabinet handles and knobs. Using these tools correctly results in a consistent and professional finish on your cabinets.
How Do You Measure For Cabinet Hardware Placement?
Measure the cabinet door width and height. Mark the center point and desired handle height. Accurate measurements prevent misaligned hardware, ensuring a neat and functional installation every time.
Can A Cabinet Hardware Jig Be Reused?
Yes, a well-made jig can be reused multiple times. It speeds up installation and maintains consistent hardware placement across all cabinets. Proper storage keeps it accurate and ready for future projects.
What Materials Are Best For Making A Hardware Jig?
Plywood or MDF are ideal due to their durability and ease of cutting. These materials provide a stable base for drilling accurate holes without warping or damage.
Conclusion
Making a cabinet hardware jig is simple and saves time. It helps place handles and knobs evenly every time. You only need basic tools and materials to start. This jig improves your woodworking projects and gives a professional look. Practice a few times to get perfect results.
Enjoy making your cabinets look neat and well-finished. Try this easy method and see the difference yourself.