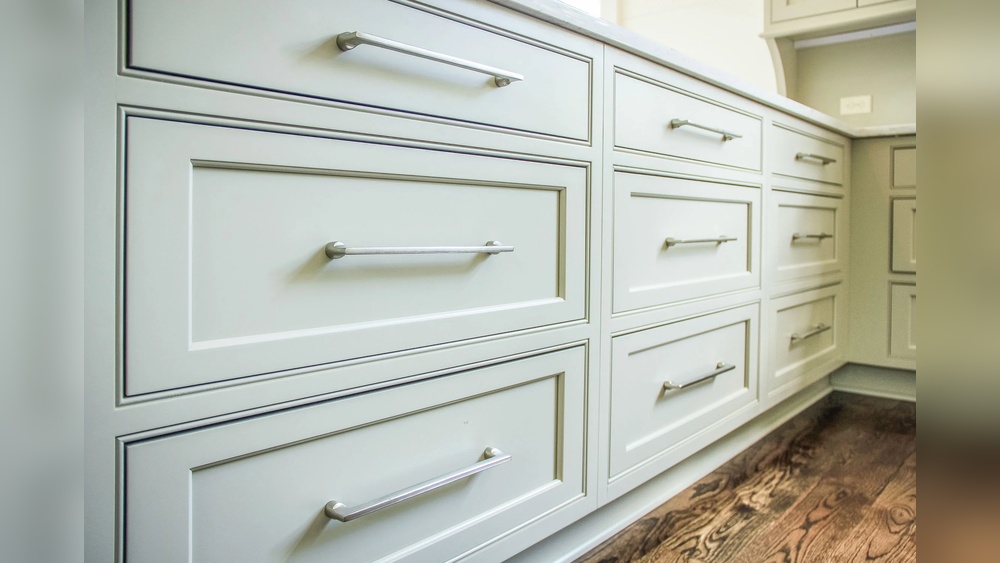
If you’ve ever tried to remove hardware from your filing cabinet, you know it’s not always as simple as it looks. Whether you want to replace worn handles, upgrade the lock, or fix a stuck drawer, knowing the right steps can save you time and frustration.
In this guide, you’ll discover easy, clear instructions to help you remove handles, locks, and other hardware from your filing cabinet safely and efficiently. By the end, you’ll feel confident tackling this task yourself—no need to call a professional or risk damaging your cabinet.
Ready to get started? Let’s dive in and make your filing cabinet look and work like new again!
Credit: www.cltregionrestore.org
Prepare The Cabinet
Preparing your filing cabinet before removing any hardware is crucial. It ensures safety and makes the process smoother. Start by organizing and clearing the space around the cabinet. This helps prevent accidents and gives you enough room to work comfortably.
Next, check the cabinet for any hidden parts or attachments. Knowing what tools you will need saves time and avoids frustration later. Taking these steps sets a solid foundation for removing the hardware efficiently.
Clear Out Contents
Remove all files and items from the cabinet drawers. Emptying the drawers reduces weight and prevents items from falling out. It also gives you full access to the hardware and drawer mechanisms. Make sure to place the contents in a safe spot to avoid losing important papers.
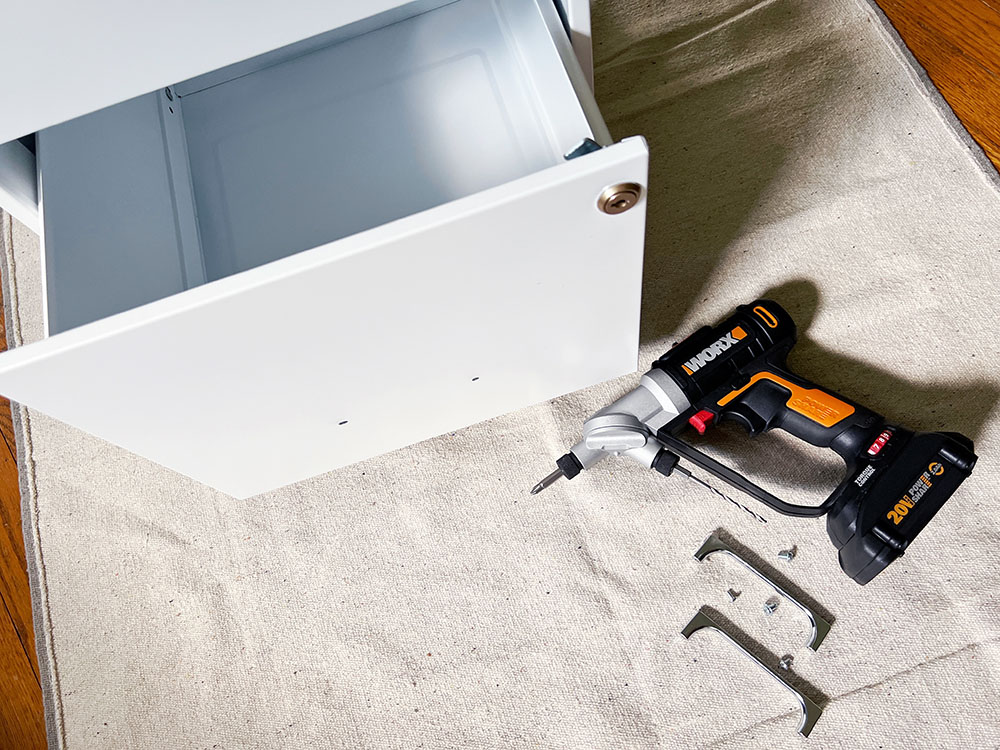
Gather Necessary Tools
Collect all tools needed for the hardware removal before starting. Common tools include screwdrivers, pliers, and a flashlight. Having everything ready helps avoid interruptions. Check the screws and bolts to know which screwdriver type to use. Prepare a small container to hold screws and parts safely.

Credit: www.amazon.com
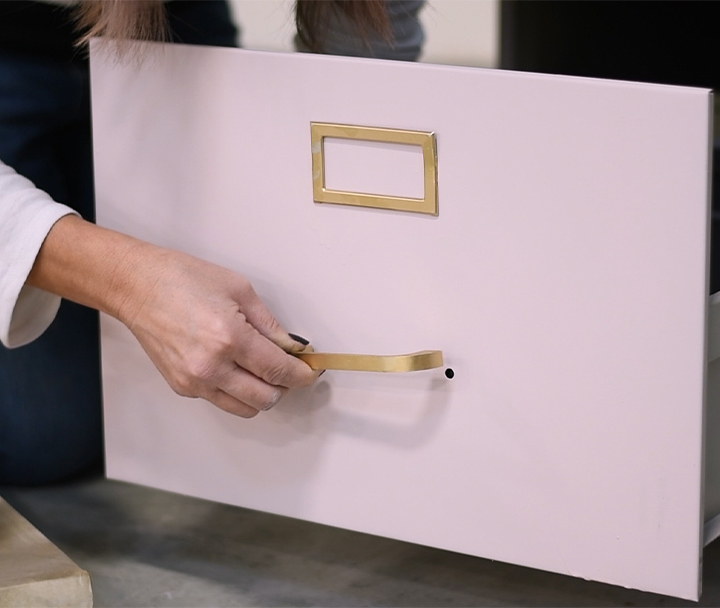
Remove Drawer Handles
Removing drawer handles is a key step when taking hardware off a filing cabinet. Handles often hold the drawer front firmly, so removing them first makes the process easier. This step helps prepare for any repairs, replacements, or painting.
Locate Handle Screws
Open the drawer to find the screws holding the handle in place. Screws usually sit on the inside of the drawer front. Use a flashlight if needed to see clearly. Some handles have two screws, one on each side. Others may have more, depending on the design.
Unscrew Handles Carefully
Use the right screwdriver to avoid stripping the screws. Turn screws counterclockwise to loosen them. Keep a firm grip on the handle to stop it from falling. Place screws and handles in a small container. This keeps parts safe and easy to find later.
Detach Drawer Locks
Removing the locks from filing cabinet drawers is a simple task. It helps in replacing old or broken locks. Start by understanding the lock type and how it fits into the drawer. Proper removal protects the drawer’s surface and hardware.
Each lock has different parts. Knowing these parts makes it easier to detach them. Follow these steps to remove drawer locks safely and quickly.
Identify Lock Mechanism
Look closely at the lock on the drawer front. Most filing cabinets have cam locks or cylinder locks. Cam locks use a flat metal piece that turns to lock or unlock. Cylinder locks have a round keyhole and a cylinder inside.
Check if the lock has visible screws or clips. These hold the lock in place. Identifying the type helps select the right tools and method for removal.
Remove Lock Cylinder
Open the drawer before removing the lock cylinder. This step gives access to the lock’s back. Use a screwdriver to remove any screws holding the lock cylinder. Some locks require pushing or pulling the cylinder out gently.
Do not force the cylinder. Forcing can damage the drawer or lock parts. If stuck, try turning the key slightly while pulling. This often frees the cylinder smoothly.
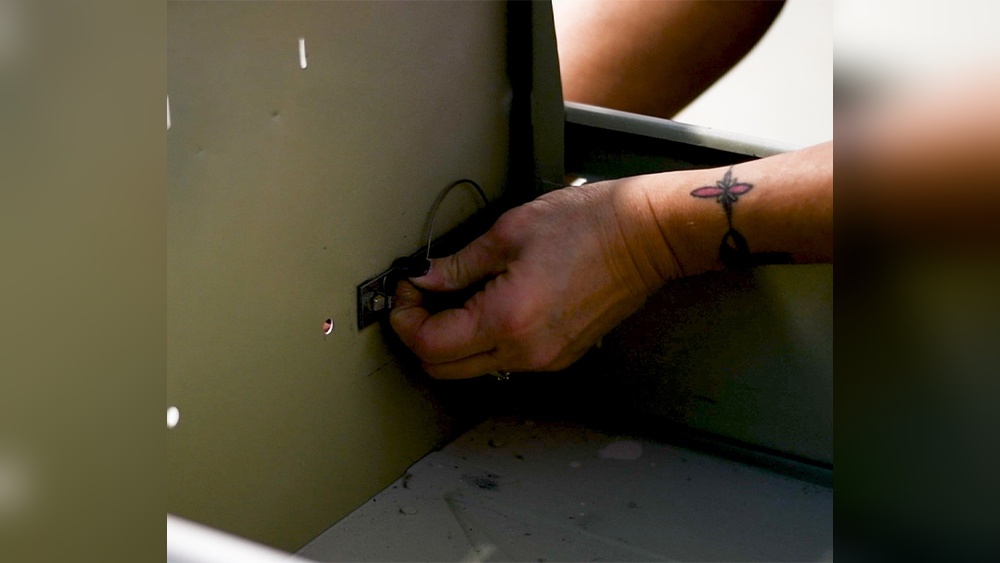
Handle Nut Or Clip Removal
Behind the drawer front, the lock cylinder is secured by a nut or clip. Use pliers or a wrench to unscrew the nut carefully. For clips, press or pry them gently with a flat tool.
Keep all nuts and clips safe if you want to reuse them. Removing these pieces releases the lock from the drawer. After this, the lock should come out easily.
Take Out Drawers
Removing the drawers is the first key step to take hardware off a filing cabinet. Drawers need to come out carefully to avoid damage. This makes the hardware accessible for removal or replacement. Follow these simple steps to take out the drawers safely and smoothly.
Fully Extend Drawer
Pull the drawer straight out as far as it will go. Stop when you feel resistance. Avoid forcing the drawer beyond this point. Full extension reveals the drawer’s retaining clips or tabs. This is essential for the next steps.
Locate Retaining Clips Or Tabs
Look along the sides of the drawer near the front. You will find small clips or tabs on both sides. These hold the drawer in place and prevent it from sliding out completely. Identifying their position helps to remove the drawer without damage.
Disengage Clips Or Tabs
Press or lift the retaining clips or tabs gently. Do this on both sides at the same time. This action releases the drawer from the cabinet’s track. Be patient and avoid bending or breaking the clips.
Slide Out Drawer Gently
With clips disengaged, pull the drawer out slowly. Keep it level to avoid scraping the sides. If the drawer feels stuck, check the clips again. Removing the drawer carefully prevents damage to the cabinet and drawer hardware.
Handle Drawers Without Visible Release
Removing handles from drawers without visible release can be tricky. These drawers often hide the mechanism, requiring a careful approach. Knowing how to check and release hidden clips or screws helps avoid damage.
Check For Spring Clips Or Metal Tabs
Look along the sides of the drawer for small metal tabs. These spring clips hold the drawer securely in place. Sometimes these tabs blend with the drawer slide, so check carefully. They usually sit near the front or middle of the slide.
Lift Or Press Tabs To Release
Once located, gently lift or press the metal tabs. This action releases the drawer from the track. Do not force the drawer out; apply steady pressure on the tabs. Some clips require lifting, others need pressing down.
Remove Screws If Present
Some drawers have screws securing handles or slides. Check under the drawer or inside the cabinet for these screws. Use a screwdriver to remove them carefully. After screws are out, the drawer handle or slide should come free easily.
Manage Drawer Slides And Runners
Managing drawer slides and runners is key to safely removing hardware from a filing cabinet. These components guide the drawer as it opens and closes. Understanding their types and how to release the drawer helps prevent damage. Proper handling ensures smooth removal and easy reassembly.
Identify Internal And External Runners
Internal runners attach to the sides of the drawer. External runners are fixed inside the cabinet frame. Check both sides of the drawer to spot these runners. They often have small clips or levers to secure the drawer in place. Knowing their location helps plan the removal process.
Release Drawer From Runners
Look for release tabs or clips on the runners. Press or lift these tabs gently. This action frees the drawer from the runners. If no tabs appear, try lifting the drawer slightly while pulling it out. Avoid forcing the drawer to prevent bending or breaking the slides.
Test Drawer Movement
After releasing the drawer, slide it back in and out. Check if it moves smoothly along the runners. If the drawer sticks, inspect the slides for dirt or damage. Clean or adjust the runners as needed. Smooth movement means the hardware is ready for removal or reinstallation.
Remove Cabinet Hardware
Removing the hardware from a filing cabinet is a simple task that anyone can do. This step is important for repairs, replacements, or cleaning. Taking off the handles, knobs, or locks carefully keeps the cabinet safe and ready for the next steps.
Locate Screws And Fasteners
Start by opening the cabinet drawers fully. Look closely at the hardware to find screws or fasteners. These are usually at the back of handles or knobs. Sometimes screws hide under small caps or covers. Use a flashlight if the screws are hard to see. Check both sides of the drawer front for all fasteners. Knowing exactly where each screw is makes removal easier.
Use Proper Tools For Removal
Use the right tools to avoid damage. A screwdriver with the correct head type works best. Most filing cabinets use Phillips or flathead screws. Keep a magnetic screwdriver handy to catch falling screws. Avoid using too much force to prevent stripping the screws. If screws are tight, try a lubricant to loosen them. Work slowly and carefully for the best results.
Credit: www.homedepot.com
Tips For Vintage Or Metal Cabinets
Removing hardware from vintage or metal filing cabinets requires extra care. These cabinets often have delicate parts that can break easily. Treating the hardware gently helps preserve the cabinet’s original look and function. Follow simple steps to avoid damage and keep your cabinet in good shape.
Handle Fragile Components Carefully
Vintage cabinets have fragile handles and locks. Use a soft cloth to protect your hands and the hardware. Loosen screws slowly with the right screwdriver size. Avoid forcing parts that feel stuck. Small metal clips or springs can bend or break easily. Keep all removed pieces organized to avoid losing them. Take your time to prevent damage.
Use Metal Polish For Hardware Maintenance
Metal hardware can tarnish or rust over time. Clean parts gently with a metal polish suitable for the hardware type. Apply polish with a soft cloth in small amounts. Rub carefully to remove dirt and rust without scratching. After polishing, wipe with a dry cloth to remove residue. Regular maintenance keeps metal shiny and extends its life.
Frequently Asked Questions
How Do You Remove A Drawer With No Visible Release?
Fully extend the drawer. Check sides for hidden clips or levers; press or lift them. If none, gently lift while pulling to clear stops. Avoid forcing to prevent damage.
How To Remove Drawers From An Old Metal Filing Cabinet Without?
Empty the drawer first. Pull it out fully. Find and press or lift retaining clips on both sides. Gently lift and slide the drawer out. Avoid forcing to prevent damage.
How To Remove Drawers With Metal Glides And No Levers On The Bottom?
Fully extend the drawer. Locate and press any spring clip or metal tab on the slide. Lift or depress it while pulling the drawer out. If no clip appears, check under the drawer for screws securing it. Remove screws, then slide the drawer free.
Avoid forcing to prevent damage.
How To Unlock A Metal Filing Cabinet?
To unlock a metal filing cabinet, insert the key and turn it gently. If lost, try a lock pick or contact a locksmith. Avoid forcing the lock to prevent damage.
Conclusion
Removing hardware from a filing cabinet is simple with the right steps. Start by emptying the drawers for easy access. Identify any clips, screws, or levers holding the hardware. Use basic tools like a screwdriver to loosen screws carefully. Always pull drawers straight out to avoid damage.
Take your time and work patiently. Following these tips helps keep your cabinet in good shape. Now you can update or repair your filing cabinet hardware easily. This task saves money and extends your cabinet’s life. Give it a try, and see how smooth the process can be.