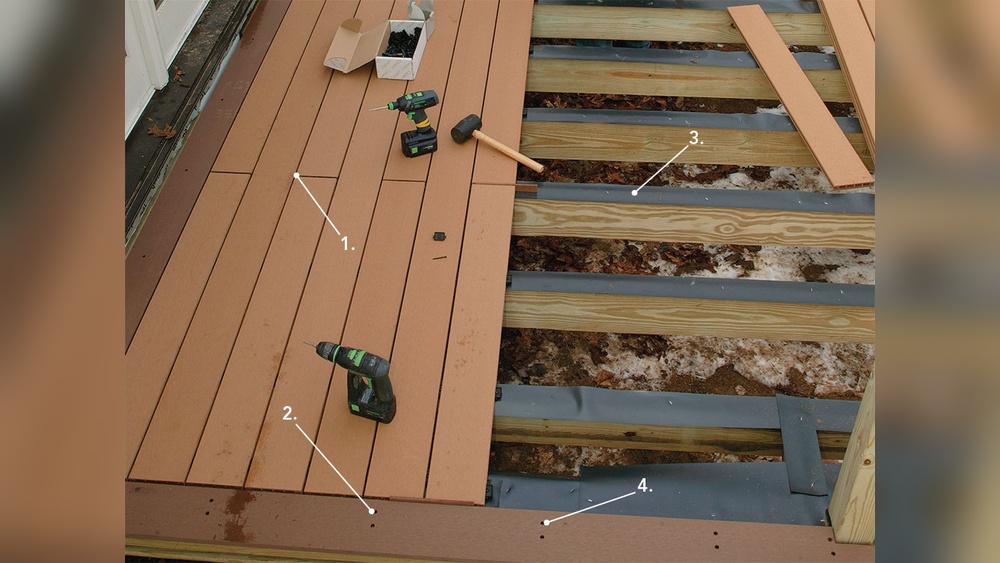
Are you ready to give your deck a clean, polished look without visible screws or nails? Picture framing a deck with hidden fasteners is the secret to creating smooth, professional edges that make your outdoor space stand out.
In this guide, you’ll discover simple steps to transform your deck into a sleek, stylish retreat that friends and family will admire. Keep reading, and you’ll learn how to achieve that flawless finish easily—no expert skills needed!

Credit: www.renaissancebuildingco.com
Choosing Hidden Fasteners
Choosing hidden fasteners is a smart step in framing a deck. These fasteners keep your deck’s surface smooth and clean. No screws or nails show on top. This choice improves both the look and safety of your deck. It also helps prevent wood damage caused by exposed fasteners.
Types Of Hidden Fasteners
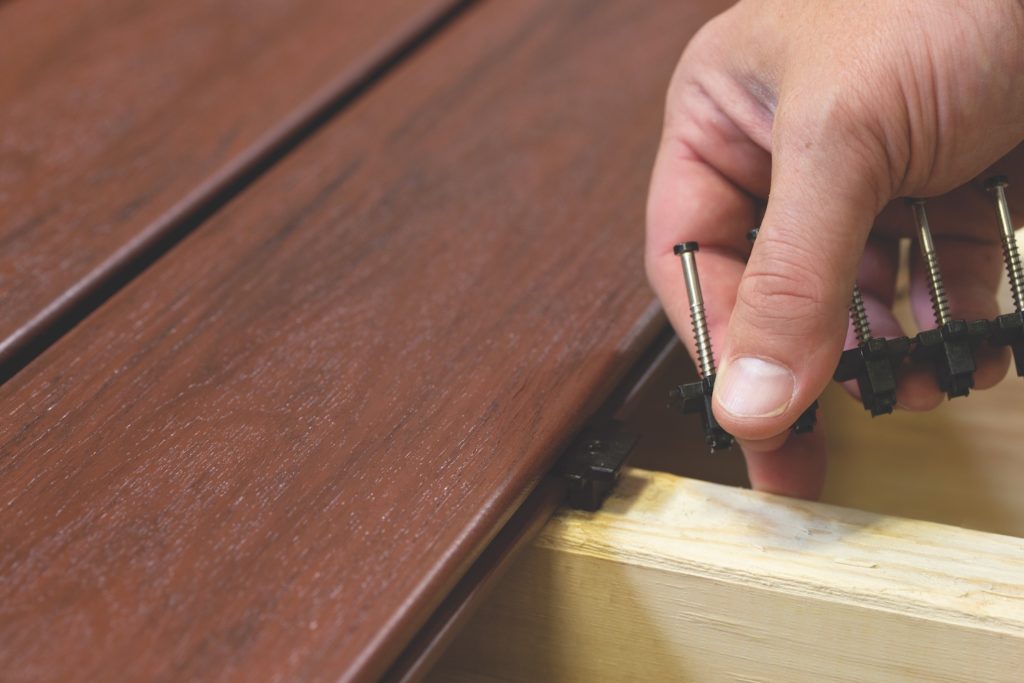
There are several types of hidden fasteners to pick from. Some clip between deck boards, holding them tight without screws on top. Others screw into the side of boards, out of sight. Some use clips that fit into grooves on the boards. Each type works best with certain deck styles and materials.
Materials Compatibility
Not all fasteners fit every deck material. Wood, composite, and PVC decks need different fasteners. For wood, stainless steel or coated fasteners resist rust and last longer. Composite decks often need special clips made for that material. Check your deck boards before choosing fasteners. Match the fastener type to your deck material for best results.
Tools Needed
You need basic tools for installing hidden fasteners. A drill with the right bits is essential. Some fasteners require a special driver or clip tool. Measuring tape and a level help keep your deck boards straight. Having the right tools makes the job faster and easier. Prepare tools before starting for smooth installation.
Credit: armadillodeck.com
Preparing The Deck
Preparing the deck is the first step to picture framing with hidden fasteners. A well-prepared surface ensures a clean, strong frame that lasts. Take time to measure, remove old materials, and clean the area. These tasks help the new frame fit perfectly and look great.
Measuring And Planning
Start by measuring the deck’s edges carefully. Use a tape measure to get exact lengths. Mark the spots where the frame will go. Plan the corners and how the boards will join. Accurate measuring avoids gaps and uneven edges. Good planning saves time and materials.
Removing Old Frame
Remove any old frame or trim around the deck. Use a pry bar or hammer to lift nails and boards. Clear all debris to create a smooth work area. Old fasteners can cause bumps and prevent proper fitting. A clean slate makes the new frame easier to install.
Cleaning And Leveling Surface
Clean the deck surface thoroughly using a broom or blower. Remove dirt, leaves, and dust that can block fasteners. Check for uneven boards or loose nails. Level the surface by sanding high spots or tightening screws. A flat, clean deck ensures hidden fasteners sit flush.
Installing The Frame
Installing the frame for your deck with hidden fasteners gives a clean, polished look. This step needs careful measuring and steady hands. Each part of the frame must fit perfectly for strength and style. Follow these simple steps to install your frame right.
Cutting Frame Boards
Measure the length of each side of your deck. Mark the frame boards with a pencil at these lengths. Use a saw to cut the boards straight and clean. Check each cut board against the deck edge. Adjust if needed to ensure a snug fit.
Attaching Fasteners
Choose fasteners designed for hidden deck framing. Place them on the inside edge of the frame boards. Screw the fasteners into the deck surface firmly. Make sure the fasteners are secure but do not split the wood. Space fasteners evenly for a solid hold.
Aligning And Securing Frame
Position the cut boards around the deck edges. Align the corners tightly to avoid gaps. Press the boards firmly against the deck surface. Secure each board by tightening the hidden fasteners. Double-check that the frame sits flush and level.
Finishing Touches
Finishing touches give your deck frame a polished look. They protect the wood and keep it strong for years. Small steps now save time and money later. Focus on sanding, sealing, and checking gaps carefully. Follow simple maintenance tips to keep your deck safe and beautiful.
Sanding And Sealing
Start by sanding the deck frame. Use fine-grit sandpaper to smooth rough edges and surfaces. Sanding helps the wood absorb sealant better. Apply a high-quality sealant to protect against water and sun damage. Seal all sides of the frame for full protection. Let the sealant dry completely before using the deck.
Inspecting For Gaps
Check the frame for any gaps or spaces. Gaps let water and dirt get inside. Use wood filler or caulk to close small gaps. Larger gaps may need extra boards or trim pieces. Make sure hidden fasteners are tight and secure. Proper inspection prevents damage and keeps your deck strong.
Maintenance Tips
Clean the deck regularly to remove dirt and debris. Reseal the frame every one to two years for protection. Check for loose boards or fasteners and tighten them. Remove leaves and water quickly after rain. Regular care extends the life of your deck frame.
Common Mistakes To Avoid
Framing a deck with hidden fasteners can create a clean and polished look. Avoiding common mistakes ensures your project lasts longer and looks great. Small errors can cause big problems later. Learn what to watch for to save time and effort.
Incorrect Fastener Placement
Placing fasteners in the wrong spot can damage the wood. It may cause boards to split or become loose. Always follow the manufacturer’s guide for exact placement. Keep fasteners evenly spaced for better stability and appearance. Incorrect placement often leads to costly repairs.
Ignoring Wood Expansion
Wood expands and contracts with weather changes. Not allowing space for this movement can cause buckling or gaps. Leave small gaps between boards to let wood breathe. Ignoring expansion can ruin the deck’s look and function quickly. Proper spacing keeps the deck safe and attractive.
Using Wrong Tools
Using the wrong tools makes the job harder and less precise. It can also damage the hidden fasteners or wood surface. Use recommended drills and drivers for hidden fasteners. The right tools help achieve a neat finish and save time. Avoid makeshift tools to protect your work quality.

Credit: www.trex.com
Frequently Asked Questions
What Are Hidden Fasteners For Deck Framing?
Hidden fasteners secure deck boards without visible screws. They create a clean, smooth surface and enhance deck aesthetics. These fasteners also reduce wood damage and prolong deck life by preventing water infiltration around screw holes.
How Do You Install Hidden Fasteners On A Deck?
First, align deck boards and attach hidden fasteners to joists. Then, slide boards into fasteners and secure tightly. Use a special driver bit for fasteners. This method ensures a seamless, gap-consistent deck surface without exposed screws.
What Tools Are Needed For Picture Framing A Deck?
You need a circular saw, drill, tape measure, and hidden fastener system. Also, a level and safety gear are essential. Proper tools ensure precise cuts and secure installation for a professional-looking framed deck.
Why Choose Picture Framing With Hidden Fasteners?
Picture framing with hidden fasteners enhances deck appearance with clean borders. It also increases structural integrity and prevents board warping. This method provides a polished finish and eliminates visible screw heads for a modern look.
Conclusion
Framing a deck with hidden fasteners creates a clean, smooth look. It keeps nails and screws out of sight. This method also protects the wood from damage. The process is simple with the right tools and steps. Take your time and follow each step carefully.
Your deck will look neat and last longer. Enjoy your beautiful, framed deck for many seasons. This small effort adds big value to your outdoor space.