Your Restoration Hardware medicine cabinet is more than just a storage space—it’s a key part of your bathroom’s style. But over time, scratches, chips, or wear can make it look less than perfect.
If you’ve noticed these little flaws, you might be wondering how to fix them without replacing the whole cabinet. The good news is, touching up your medicine cabinet is easier than you think. In this guide, you’ll discover simple, effective steps to restore its original beauty and keep it looking fresh for years.
Ready to bring your cabinet back to life? Let’s get started.
Credit: www.homedepot.com
Assessing The Damage
Assessing the damage is the first step in touching up your Restoration Hardware medicine cabinet. This helps you understand what kind of repair is needed. A careful look at the cabinet shows the type and size of the damage. It guides you to choose the right tools and materials. Taking time here saves effort later.
Common Issues With Medicine Cabinets
Medicine cabinets often face scratches and dents. Water spots and stains appear near sinks. Hinges can become loose or rusty. The finish may fade or peel over time. Small cracks in the glass or wood also happen. Identifying these problems early stops further damage.
Tools Needed For Touch Ups
Gather a few tools before starting. You will need fine sandpaper to smooth rough spots. A soft cloth helps clean the surface well. Wood filler or putty fixes dents and cracks. Touch-up markers or paint match the cabinet color. A small brush works for applying paint or finish. Screwdrivers tighten or replace loose hinges. Having these tools ready makes the process easier and faster.
Cleaning Before Repair
Cleaning before repair is an important step when touching up your Restoration Hardware medicine cabinet. Dirt and grime can hide scratches and damage. Removing these allows you to see the true condition of the surface. It also helps the repair materials stick better. Taking time to clean well leads to a smoother, longer-lasting finish.
Removing Dirt And Grime
Start by wiping the cabinet with a soft, dry cloth. This removes loose dust and particles. Next, use a mild soap mixed with warm water. Dip a clean cloth in the solution and gently clean the cabinet’s surface. Avoid soaking the wood or metal. Rinse the cloth and wipe again to remove soap residue. Let the cabinet dry completely before moving on.
Preparing The Surface
Inspect the cabinet for any remaining dirt or sticky spots. Use a soft brush to clean corners and crevices. Lightly sand any rough or peeling areas with fine-grit sandpaper. Sanding helps smooth the surface and removes old finish. Wipe away sanding dust with a tack cloth. The surface must be dry, clean, and smooth before applying touch-up products.
Fixing Scratches And Dents
Fixing scratches and dents on your Restoration Hardware medicine cabinet helps keep it looking fresh. Small damages can spoil the cabinet’s charm. A few simple steps restore its smooth finish. This guide covers easy methods to repair minor surface flaws.
Using Wood Fillers
Wood fillers fill in dents and deep scratches. Choose a filler close to your cabinet’s wood color. Apply a small amount with a putty knife. Press the filler into the damaged area firmly. Smooth the surface by scraping off extra filler. Let it dry completely before moving on.
Sanding Techniques
Sanding smooths the filled and scratched areas. Use fine-grit sandpaper for the best results. Sand gently in a circular motion to blend repairs with the rest. Avoid sanding too hard to protect the finish. Wipe dust off with a soft cloth before refinishing.

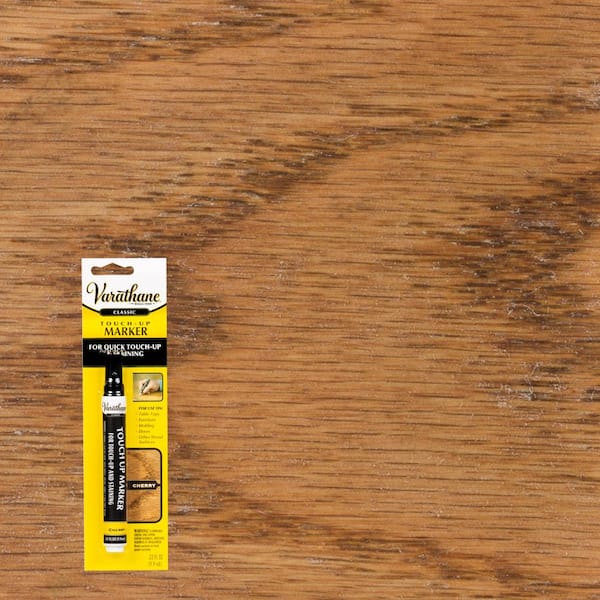
Credit: www.amazon.com
Matching Paint And Stain
Matching paint and stain is key to a seamless touch-up on your Restoration Hardware medicine cabinet. The right color keeps the cabinet looking fresh and natural. It hides scratches, chips, or worn spots without standing out.
Choosing the exact shade takes patience. Paint and stain change after drying. Testing helps avoid surprises. A good match blends with the cabinet’s finish and wood tone.
Choosing The Right Color
Start by checking the cabinet’s original color. Look inside doors or behind shelves for hidden spots. These areas show the true finish.
Buy small paint or stain samples close to this color. Apply each on a similar wood piece or a hidden cabinet spot. Let it dry fully. Compare the samples in daylight to see the best match.
Remember, stains soak into wood and show grain. Paint covers the surface. Pick the product type that matches your cabinet’s finish for a natural look.
Applying Paint Or Stain
Clean the area well before applying paint or stain. Dust and oils stop proper adhesion. Use a soft cloth and mild cleaner.
Apply paint or stain with a small brush. Use thin, even coats. Let each coat dry before adding the next. This avoids drips and blotches.
Blend edges softly into the surrounding finish. Feather out brush strokes to keep a smooth look. After drying, add a clear topcoat for protection if needed.
Repairing Hardware Components
Repairing hardware components is key to keeping your Restoration Hardware medicine cabinet in top shape. Small fixes can make the cabinet work like new again. It also stops bigger problems from forming. Proper care helps the cabinet last longer and look better.
This section shows how to fix common hardware issues. Follow these steps to tighten loose parts and replace damaged ones. These simple tasks improve both function and style.
Tightening Hinges And Handles
Loose hinges cause doors to sag or not close well. Use a screwdriver to tighten all hinge screws. Check each hinge carefully. Turn screws slowly to avoid stripping them.
Handles can also loosen over time. Tighten the screws holding handles in place. If screws are missing, replace them with similar ones. Tight handles make opening and closing easier.
Replacing Damaged Parts
Some parts may break or wear out beyond repair. Replace damaged hinges or handles with exact matches. Measure the parts before buying new ones. This ensures proper fit and style match.
Remove old parts carefully with a screwdriver. Install new hardware firmly but gently. Test the cabinet door to check function. New parts restore cabinet stability and appearance.
Sealing And Finishing
Sealing and finishing are key steps in touching up your Restoration Hardware medicine cabinet. These steps protect the wood and give your cabinet a fresh, smooth look. Proper sealing prevents moisture damage and keeps the finish looking new longer.
Choosing the right sealant and finish helps preserve your cabinet’s beauty. It also makes cleaning easier. Take your time to apply coatings evenly. A good finish brings out the natural wood grain and color.
Applying Protective Coatings
Start with a clean, dry surface. Use a soft brush or cloth to apply the protective coating. Options include varnish, polyurethane, or lacquer. Pick a product suited for wood furniture.
Apply thin, even layers. Avoid thick coats that can drip or bubble. Let each coat dry before adding the next. Light sanding between coats helps the finish stick better. This step smooths out rough spots.
Drying And Curing Times
Drying time depends on the product and room conditions. Allow at least 4 to 6 hours for each coat to dry. Cooler or humid rooms may need more time. Avoid touching the surface during drying.
Curing takes longer than drying. It can take several days to weeks for the finish to fully harden. Handle the cabinet gently during this period. This helps the finish last and resist scratches.
Maintenance Tips
Proper maintenance keeps your Restoration Hardware medicine cabinet looking fresh and new. Small efforts prevent large problems later. Follow simple steps to protect the cabinet’s surface and structure. Regular care extends its lifespan and beauty.
Regular Cleaning
Dust the cabinet weekly to avoid buildup. Use a soft, dry cloth for this task. For deeper cleaning, dampen the cloth slightly with water. Avoid harsh chemicals that can damage the finish. Wipe spills immediately to prevent stains. Clean glass with a gentle glass cleaner and a soft cloth.
Preventing Future Damage
Keep the cabinet away from direct water exposure. Use a bathroom fan to reduce moisture. Avoid placing heavy objects on shelves that can cause dents. Check hinges and screws regularly and tighten if loose. Use felt pads under items to stop scratches. Handle doors gently to avoid chips and cracks.

Credit: www.edwardmartin.com
Frequently Asked Questions
How Do I Clean A Restoration Hardware Medicine Cabinet?
Use a soft cloth with mild soap and water to clean the cabinet. Avoid harsh chemicals that damage the finish. Dry thoroughly to prevent moisture damage and maintain the cabinet’s original look.
What Materials Are Best For Touching Up Scratches?
Use a matching wood stain or paint pen for minor scratches. For deeper damage, consider wood filler before staining. Always test on a hidden area first to ensure color match.
Can I Restore The Cabinet’s Mirror Frame Myself?
Yes, lightly sand the frame and apply a matching finish or paint. Use gentle strokes to preserve details. Let it dry fully before rehanging the mirror.
How Often Should I Touch Up My Medicine Cabinet?
Touch up your cabinet every 6 to 12 months or when scratches appear. Regular maintenance keeps the finish fresh and prolongs the cabinet’s life.
Conclusion
Restoring your Hardware Medicine Cabinet can feel simple with these steps. Small touch-ups bring back its fresh look fast. Keep tools ready and take your time. A neat cabinet adds charm to your bathroom. Regular care helps it stay beautiful longer.
Try these tips to enjoy your cabinet again. You can do this yourself without extra help. Save money and feel proud of your work. Happy restoring!