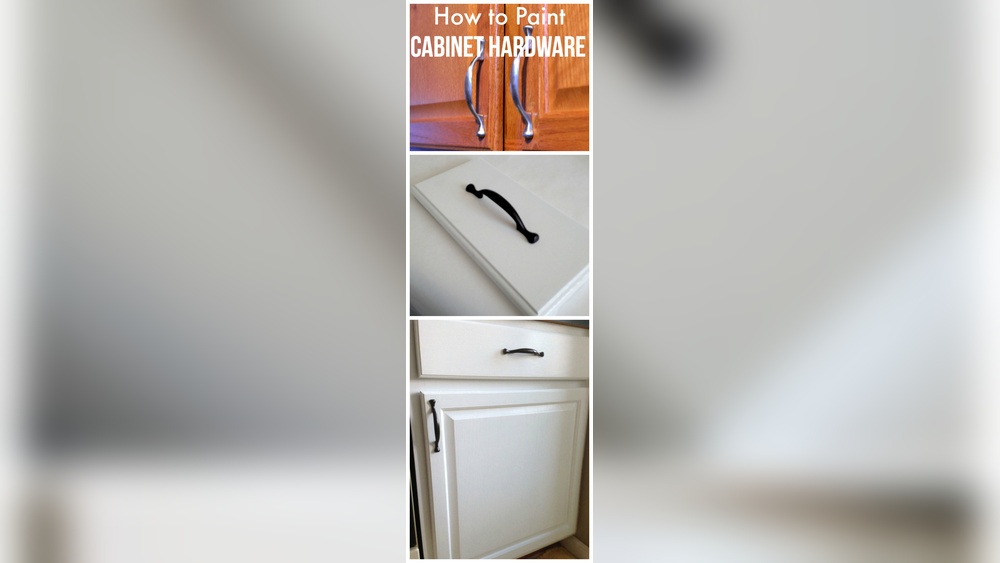
Are your cabinet hardware looking dull or outdated? You might think replacing them is the only option, but what if you could give them a fresh, stylish look with just a little paint?
Painting your cabinet hardware is easier than you think, and it can completely transform the feel of your kitchen or bathroom. In this guide, you’ll discover simple, step-by-step tips to get professional-looking results without spending a fortune. Ready to upgrade your space and impress everyone who walks in?
Keep reading, because your cabinets are about to get a stunning new look!
Choosing The Right Paint
Choosing the right paint is key to a successful cabinet hardware makeover. The paint must stick well and resist wear from frequent use. It should also look smooth and match your style. Picking the correct type and color makes your hardware stand out beautifully.
Types Of Paint For Hardware
Metal hardware needs paint made for hard surfaces. Spray paints designed for metal work best. They dry fast and give a smooth finish. Acrylic enamel paints offer strong coverage and durability. Oil-based paints last long but take more time to dry. Avoid regular wall paint; it peels quickly on hardware.
Selecting The Perfect Color
Choose colors that match your room’s style and color scheme. Classic metals like black, gold, or silver suit most cabinets. Bright colors add a fun and modern touch. Matte finishes hide fingerprints better than glossy ones. Test a small piece first to see the true color after drying.
Gathering Necessary Tools
Before painting cabinet hardware, gather all the tools needed. Having everything ready makes the process smooth and easy. It saves time and avoids frustration.
Essential Supplies
Start with the basics. You need sandpaper to roughen the surface for paint. Use fine-grit sandpaper for a smooth finish. Choose spray paint or brush-on paint made for metal. Primer helps paint stick better and last longer. A small paintbrush or foam brush works well for detailed areas. Prepare a container to hold screws and small parts. Use painter’s tape to protect areas you don’t want to paint. Clean cloths remove dust and dirt before painting.
Safety Equipment
Protect yourself while working. Wear gloves to keep paint off your hands. Safety goggles shield your eyes from paint splashes. Use a mask to avoid breathing in fumes. Work in a well-ventilated area or outdoors for fresh air. Cover your workspace with newspaper or plastic to catch paint drips.
Preparing Cabinet Hardware
Preparing cabinet hardware is the first step in a smooth painting project. It sets the stage for a clean, even finish that lasts. Taking time here saves effort later.
Good preparation means removing old dirt, grease, and rough spots. It helps the paint stick well and look great. This section covers safe removal and proper cleaning.
Removing Hardware Safely
Start by gathering the right tools, like a screwdriver. Turn screws slowly to avoid damage. Keep parts in a safe place to avoid loss.
Work gently to protect cabinet surfaces. Use a cloth to hold the hardware steady. Avoid pulling hard; it can crack wood or chip paint.
Cleaning And Sanding
Wash hardware with warm, soapy water to remove grease. Use a soft brush for corners and crevices. Rinse and dry completely before sanding.
Lightly sand hardware with fine-grit sandpaper. This creates a rough surface for paint to grip. Wipe off dust with a clean cloth before painting.
Credit: www.lifesahmazing.com
Priming The Hardware
Priming cabinet hardware is a key step before painting. It helps paint stick better and last longer. Without primer, paint may peel or chip quickly. Taking time to prime ensures smooth and even coverage. This section covers how to choose and apply primer for the best results.
Selecting A Primer
Choose a primer made for metal surfaces. Look for one labeled rust-resistant if your hardware is metal. This prevents rust and keeps hardware looking new. Spray primers work well on small pieces. They cover all sides easily. Water-based primers dry fast and clean up with water. Oil-based primers are stronger but take longer to dry. Pick a primer that matches your paint type for best adhesion.
Applying Primer Evenly
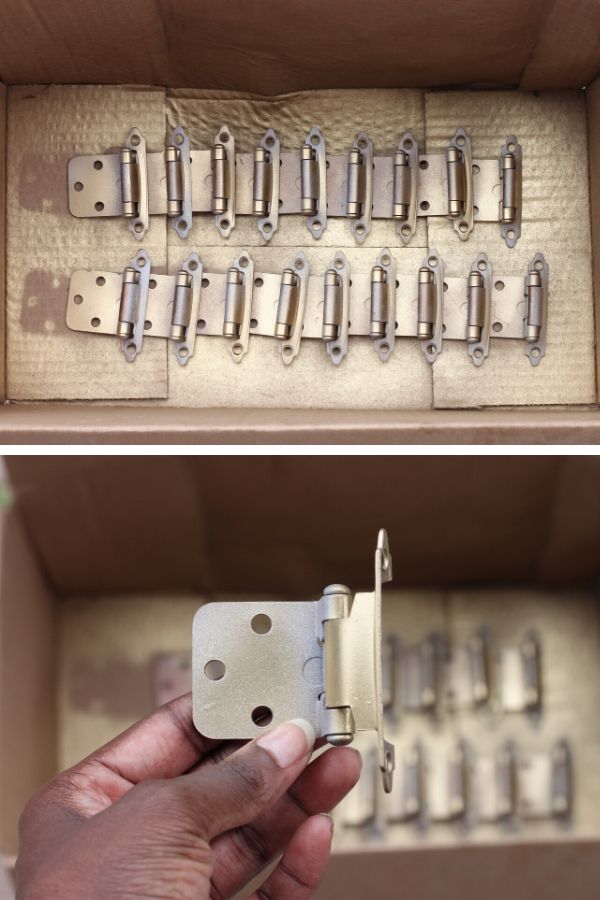
Clean hardware before priming. Use soap and water or rubbing alcohol. Dry completely to avoid paint problems. Hold the spray can about 6 to 8 inches away. Apply thin, even coats to avoid drips. Let each coat dry fully before adding another. Usually, two coats give good coverage. Rotate hardware pieces to spray all sides. Avoid thick layers that can cause bubbles or runs. Proper priming sets a smooth base for painting.
Painting Techniques
Painting cabinet hardware can change the look of your kitchen or bathroom. The right painting techniques help you get smooth and lasting results. This section explains two key methods: brush painting and spray painting. It also covers how to apply multiple coats properly.
Brush Vs. Spray Painting
Brush painting is easy and needs little equipment. You can control the paint better on small areas. It works well for detailed hardware with grooves. Use a small, soft brush for best results. Brush strokes may show but can add texture.
Spray painting covers hardware evenly and fast. It creates a smooth, factory-like finish. Spray paint reaches tight spots better than a brush. Use spray paint outdoors or in a well-ventilated area. Protect nearby surfaces from overspray with paper or cloth.
Applying Multiple Coats
Applying several thin coats is better than one thick coat. Thin coats dry faster and avoid drips or runs. Let each coat dry completely before adding the next. Lightly sand between coats to remove bumps. This creates a smooth surface and helps paint stick well.
Repeat the process until you get the desired color and coverage. Patience is key for a durable and attractive finish. Multiple coats also protect hardware from scratches and wear.
Drying And Curing
Drying and curing are key steps after painting cabinet hardware. This stage ensures the paint sets well and lasts longer. Proper drying prevents damage and keeps the finish smooth. Patience during this process improves the final look.
Recommended Drying Times
Allow the paint to dry for at least one hour before touching. Some paints may need longer drying times, up to 24 hours. Check the paint can for specific instructions. Avoid rushing to keep the finish flawless and strong.
Avoiding Smudges And Imperfections
Handle the hardware carefully to avoid smudges. Use clean, dry hands or wear gloves. Place hardware on a soft, clean surface while drying. Keep dust and dirt away to prevent bumps or marks. Let the paint fully cure before reinstalling the hardware.
Reinstalling Painted Hardware
Reinstalling painted cabinet hardware is the final step in your painting project. It brings the fresh look to life and completes your cabinet makeover. This process requires care to protect your new paint and ensure the hardware fits perfectly.
Handling Painted Pieces Carefully
Painted hardware is delicate. Avoid touching it too much. Hold pieces by edges or unpainted areas. Use soft gloves if possible. Set hardware on a clean, soft surface while working. This prevents scratches and paint chips. Take your time to keep the finish smooth and flawless.
Securing Hardware Back In Place
Check that screws and holes are clean and clear. Align the hardware gently with the holes. Use the right screwdriver to avoid stripping screws. Tighten screws slowly and evenly. Do not overtighten; it can crack the paint or damage the hardware. Test each piece to make sure it is secure and works well.

Credit: porchdaydreamer.com
Maintenance Tips
Maintaining painted cabinet hardware helps keep it looking fresh and new. Simple care steps make a big difference. Regular attention prevents wear and damage.
Cleaning Painted Hardware
Use a soft cloth to clean painted hardware. Avoid harsh chemicals or abrasive materials. Mild soap and water work well for most dirt. Gently wipe to remove dust and grime. Dry the hardware completely to avoid water spots.
Touch-up Strategies
Small chips or scratches can be fixed easily. Keep some paint from your original project handy. Use a fine brush to apply paint on damaged spots. Let it dry fully before using the hardware. This keeps your cabinets looking neat and cared for.

Credit: www.youtube.com
Frequently Asked Questions
How Do I Prepare Cabinet Hardware For Painting?
Remove hardware from cabinets and clean thoroughly. Sand lightly to remove old finish and create a smooth surface. Use a degreaser to eliminate oils. Ensure hardware is dry before painting for better adhesion.
What Type Of Paint Is Best For Cabinet Hardware?
Use spray paint designed for metal surfaces. Choose enamel or acrylic spray paints for durability. These paints provide a smooth, long-lasting finish suitable for frequent handling.
Should I Prime Cabinet Hardware Before Painting?
Yes, applying a metal primer is essential. Primer improves paint adhesion and prevents rust. Use a spray primer for even coverage and faster drying times.
How Many Coats Of Paint Do Cabinet Hardware Need?
Typically, two to three thin coats are ideal. Allow each coat to dry completely before applying the next. This prevents drips and ensures a smooth, even finish.
Conclusion
Painting cabinet hardware can freshen up any room quickly. Choose the right paint and prep the pieces well. Take your time to apply smooth, even coats. Let each layer dry fully before the next. Small details make a big difference in the final look.
With patience, you can achieve a neat and lasting finish. This simple project saves money and adds style. Try it yourself and enjoy a fresh, new feel in your home. Easy steps, great results. Why wait?