Are you ready to give your cabinets a sleek, modern look? Installing flushmount cabinet hardware is easier than you might think, and it can instantly transform your space.
Whether you’re updating your kitchen, bathroom, or any room with cabinets, this guide will walk you through every step. By the time you finish reading, you’ll have the confidence and know-how to handle the installation yourself—no extra tools or skills needed.
Let’s get started and make your cabinets look sharp and stylish!

Credit: www.amazon.com
Tools And Materials Needed
Installing flushmount cabinet hardware requires specific tools and materials. Preparing these ahead makes the process smoother. Using the right tools ensures a neat and secure fit. Safety gear protects you while working on cabinets.
Types Of Flushmount Hardware
Flushmount hardware sits flat against cabinet doors. Common types include recessed pulls and edge pulls. Recessed pulls fit inside the door face. Edge pulls attach to the door edge. Choose hardware that matches your cabinet style.
Essential Tools
Start with a measuring tape to mark drill spots. A drill with the correct bit size is needed. A screwdriver helps tighten screws. A pencil or marker is useful for marking. A level ensures hardware is straight. Sandpaper smooths any rough edges after drilling.
Safety Gear
Wear safety goggles to protect your eyes from dust. Use gloves to avoid cuts and splinters. A dust mask keeps you safe from inhaling wood particles. Work in a well-lit area to see clearly. Keep your workspace clean to prevent accidents.
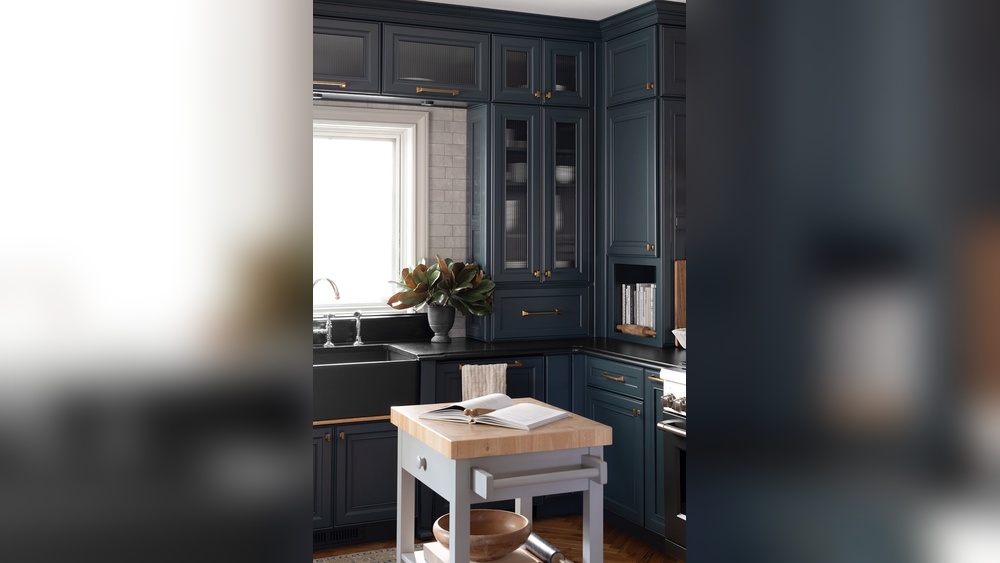
Credit: www.rensup.com
Preparing Your Cabinets
Preparing your cabinets is an important first step before installing flushmount cabinet hardware. This stage helps ensure a smooth and accurate installation. Taking time now saves effort later.
Start by cleaning and clearing the cabinet surfaces. Then, measure and mark where the hardware will go. Finally, pick the right spots to mount the hardware for the best look and function.
Cleaning And Clearing
Remove all items from inside and around the cabinets. Wipe down surfaces with a damp cloth to remove dirt and grease. Dry the area well to help hardware stick and fit properly. Clean surfaces reduce the chance of damage during installation.
Measuring And Marking
Use a tape measure and pencil to mark the hardware positions. Measure carefully to keep marks straight and even. Double-check all measurements before drilling holes. Accurate marks make the installation look neat and professional.
Selecting Mounting Locations
Choose spots on the cabinet doors or drawers that are easy to reach. Avoid edges or areas that may crack or split. Consider the cabinet design and size of the hardware. Proper placement improves both function and style.
Installing Flushmount Handles
Installing flushmount handles can update your cabinets with a sleek look. This type of hardware sits flat against the surface. It creates a clean and modern appearance. The process is simple but requires care and accuracy. Follow these steps to install handles that fit perfectly and last long.
Drilling Pilot Holes
Start by marking the exact spots for holes on the cabinet. Use a pencil and a ruler to measure carefully. Choose a drill bit slightly smaller than the screws. Drill pilot holes at the marked spots. These small holes guide the screws and prevent wood from splitting. Drill straight to keep the holes clean and precise.
Attaching Handles Securely
Place the flushmount handle over the pilot holes. Align the screw holes on the handle with the pilot holes. Insert screws through the handle into the cabinet. Use a screwdriver to tighten the screws firmly. Avoid over-tightening to prevent damage. Check that the handle feels stable and does not wiggle.
Checking Alignment
Step back and look at the handles from different angles. Make sure they line up evenly on all cabinets. Measure distances between handles to confirm uniform spacing. Adjust screws slightly if needed to improve alignment. Proper alignment ensures a neat and professional finish. It also makes the cabinets easier to open and close.
Installing Flushmount Knobs
Installing flushmount knobs on your cabinets is a straightforward task. These knobs sit flat against the surface, creating a sleek look. This section breaks down the steps to install them correctly. Follow each step to ensure a perfect fit.
Positioning The Knobs
Mark the spot where you want the knob. Usually, it is near the edge of the cabinet door. Measure carefully to keep the placement consistent on all doors. Use a pencil to make a small mark. Double-check the spot before drilling.
Drilling And Mounting
Choose a drill bit that matches the screw size. Drill a hole through the cabinet door at the mark. Drill slowly to avoid splitting the wood. Insert the knob’s screw from the inside of the door. Push the knob onto the screw on the outside.
Tightening And Testing
Use a screwdriver to tighten the screw from inside. Do not overtighten to avoid damaging the knob or door. Check the knob’s stability by pulling gently. It should feel secure and not wiggle. Adjust the tightness if needed for a snug fit.
Troubleshooting Common Issues
Installing flushmount cabinet hardware can be simple, but sometimes problems arise. These issues can make your cabinets look uneven or feel loose. Fixing these common problems keeps your cabinets working well and looking good. Here are easy ways to solve the most frequent troubles.
Fixing Misaligned Hardware
Misaligned hardware makes cabinets look crooked. Check the screws and holes carefully. Loosen the screws slightly, then move the hardware to align it properly. Tighten the screws once the hardware is straight. Use a level tool to ensure accuracy. This step prevents uneven gaps and keeps your cabinets neat.
Dealing With Loose Screws
Loose screws cause handles to wobble or fall off. Remove the hardware and inspect the screw holes. If holes are too big, fill them with wood filler or toothpicks dipped in glue. Let it dry, then reinsert the screws tightly. This fixes the grip and stops wobbling. Tight screws improve handle strength and reliability.
Adjusting Handle Fit
Handles that do not fit flush look unfinished. Check if the screws are the right length. Too long or short screws affect fit. Replace with correct screws if needed. Also, make sure the hardware sits flat against the cabinet surface. Slight sanding or cleaning the surface helps the handle fit better. A good fit enhances cabinet style and function.
Maintenance Tips
Maintaining flushmount cabinet hardware keeps cabinets looking neat and working well. Regular care helps avoid damage and extends hardware life. Small efforts can save time and money later.
Cleaning Flushmount Hardware
Use a soft cloth to wipe hardware gently. Avoid harsh chemicals that can damage the finish. Mild soap mixed with water works well for cleaning. Dry the hardware fully to stop rust or water spots.
Preventing Wear And Tear
Open and close cabinets carefully to avoid stress on hardware. Tighten screws regularly to keep hardware secure. Avoid hanging heavy items on cabinet doors. Use hardware that fits well to prevent extra pressure.
When To Replace Hardware
Replace hardware if it is loose, rusty, or broken. Check for signs like difficulty opening doors or visible damage. Old hardware can affect cabinet function and appearance. Choose new hardware that matches your cabinet style and size.
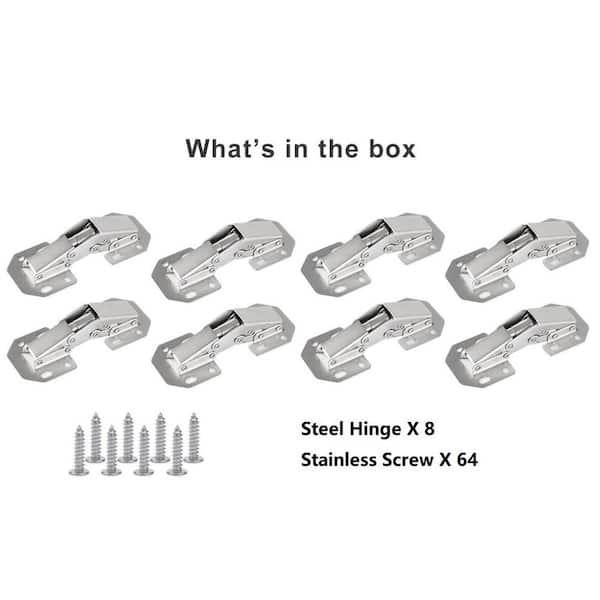
Credit: www.homedepot.com
Frequently Asked Questions
What Tools Are Needed To Install Flushmount Cabinet Hardware?
You need a drill, screwdriver, measuring tape, pencil, and flushmount hardware. These tools ensure precise installation and secure fitting.
How Do I Measure For Flushmount Cabinet Hardware Placement?
Measure the cabinet door width and height. Mark the center point where the hardware will sit for accurate alignment.
Can I Install Flushmount Hardware On Existing Cabinets?
Yes, you can retrofit flushmount hardware on existing cabinets. Just remove old hardware and follow proper measurements for new fitting.
How Do I Avoid Damaging Cabinets During Installation?
Use a drill with a depth stop and pre-drill holes carefully. Work slowly to prevent splitting or cracking the wood.
Conclusion
Installing flushmount cabinet hardware can be simple and quick. Follow the steps carefully and use the right tools. Take your time to measure and mark the spots. Tighten screws firmly, but do not force them. Check that the hardware fits well and works smoothly.
A neat installation improves your cabinet’s look and function. Try this project to update your space with ease. Enjoy the new style and convenience it brings.