Are you tired of struggling with tricky snaps that just won’t stay put? Using the right tool can make all the difference, and that’s where Dritz Snap Fastener Pliers come in.
These handy pliers make attaching snap fasteners quick and easy, even if you’re new to sewing or crafting. In this guide, you’ll discover simple, step-by-step instructions to help you get perfect snaps every time. By the end, you’ll have the confidence to tackle all your projects with ease.
Ready to transform your sewing experience? Let’s dive in!
Choosing The Right Snap Fasteners
Choosing the right snap fasteners is key to a smooth project. The right snaps fit well with your Dritz Snap Fastener Pliers and your fabric. Using the correct snaps ensures strong, neat attachments. It also saves time and prevents damage to materials.
Types Of Snaps Compatible With Dritz Pliers
Dritz Snap Fastener Pliers work best with metal snaps. These include brass and nickel snaps. Plastic snaps usually do not fit well with these pliers. Metal snaps come in various sizes. Check the package to confirm compatibility with your pliers. Matching snap size and plier size is important for a secure fit.
Materials Suitable For Snap Application
Snap fasteners attach well to medium to heavy fabrics. Denim, canvas, and leather are ideal choices. Thin fabrics like silk or chiffon may tear under snap pressure. Use a fabric stabilizer for delicate materials. Avoid snaps on stretchy fabrics unless reinforced. Proper fabric choice helps snaps stay secure and last longer.
Preparing Your Tools And Workspace
Preparing your tools and workspace is the first step for using Dritz snap fastener pliers. It makes the process smooth and efficient. A neat workspace helps you focus and avoid mistakes. Proper tools keep your work neat and safe.
Gathering Necessary Supplies
Start by collecting all the supplies needed for the project. You will need Dritz snap fastener pliers and snap fasteners. Keep fabric or material for the snaps close. Have a small hammer or mallet nearby, if required. A ruler or measuring tape helps place snaps evenly. Keep scissors or a seam ripper ready for adjustments. Organize these items on your work table before starting.
Setting Up A Comfortable Work Area
Choose a flat, well-lit surface to work on. Good light helps you see small details clearly. Use a table with enough space for all tools and fabric. Sit on a comfortable chair to avoid strain. Keep your workspace clean and free from clutter. Arrange tools within easy reach to save time. A stable surface prevents slips while pressing snaps. Take short breaks if you feel tired to keep focus.
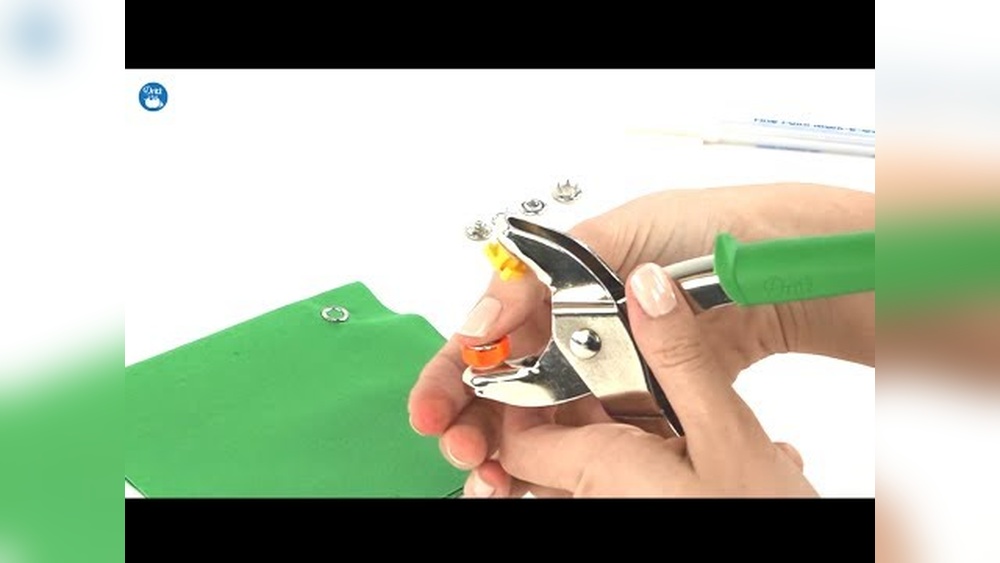
Loading The Snap Fastener Pliers
Loading the Dritz Snap Fastener Pliers is the first step to attaching snaps easily. Proper loading ensures the snaps fit firmly and work well. Follow clear steps to place the snap parts correctly and adjust the pliers for different snap sizes.
Inserting The Snap Components
Start by identifying the top and bottom parts of the snap. The cap goes on the top side of the pliers. Place the socket on the bottom side, matching it with the cap. Hold the fabric between these parts. Make sure the snap pieces are aligned straight to avoid damage.
Adjusting The Pliers For Different Snap Sizes
Dritz Snap Fastener Pliers come with interchangeable dies. Choose the die that matches your snap size. Remove the current die by unscrewing it gently. Attach the new die firmly to the pliers. Tighten the screw to keep it stable. This adjustment helps the pliers fit all snap sizes accurately.

Credit: www.amazon.com
Marking And Positioning Snaps
Marking and positioning snaps is a key step when using Dritz Snap Fastener Pliers. Proper placement ensures the snaps work well and look neat. Marking the exact spot on fabric helps avoid mistakes. This section covers how to choose snap placement and mark it clearly.
Choosing Snap Placement On Fabric
Pick a spot that is strong enough to hold the snap. Avoid thin or stretchy fabric areas. Common places include edges of pockets, cuffs, or waistband. Measure carefully to keep snaps even and aligned. Use a ruler or measuring tape for accuracy. Check how the fabric folds and moves before deciding.
Using Chalk Or Fabric Markers
Use chalk or fabric markers to mark snap spots clearly. These tools show well on most fabrics. Make small dots or crosses where the snaps will go. Avoid large marks that may be hard to remove. Test the marker on a scrap piece first. Chalk usually brushes off easily after sewing. Fabric markers may need water or heat to disappear.
Attaching Snaps To Fabric
Attaching snaps to fabric is a simple and useful skill for many sewing projects. Dritz snap fastener pliers make the job easier and faster. This tool helps you press the snap parts together without damaging the fabric. You get a clean, secure snap that lasts through wear and washing.
Using the pliers correctly will give the best results. The key steps are aligning the snap parts properly and applying the right pressure. Both steps ensure the snap holds tight and looks neat on your fabric.
Aligning Snap Parts Correctly
Start by placing the fabric between the two snap parts. Make sure the top snap fits over the bottom snap perfectly. The snap’s prongs should go through the fabric without bending. Hold the parts steady before using the pliers. Check alignment from all angles to avoid crooked snaps.
Applying Even Pressure With Pliers
Hold the pliers firmly and squeeze gently at first. Increase pressure slowly until the snaps click together. Avoid squeezing too hard or too fast. Uneven pressure can bend the snap or damage the fabric. Keep your hand steady and apply force evenly across the snap. Release the pliers once the snap feels secure.
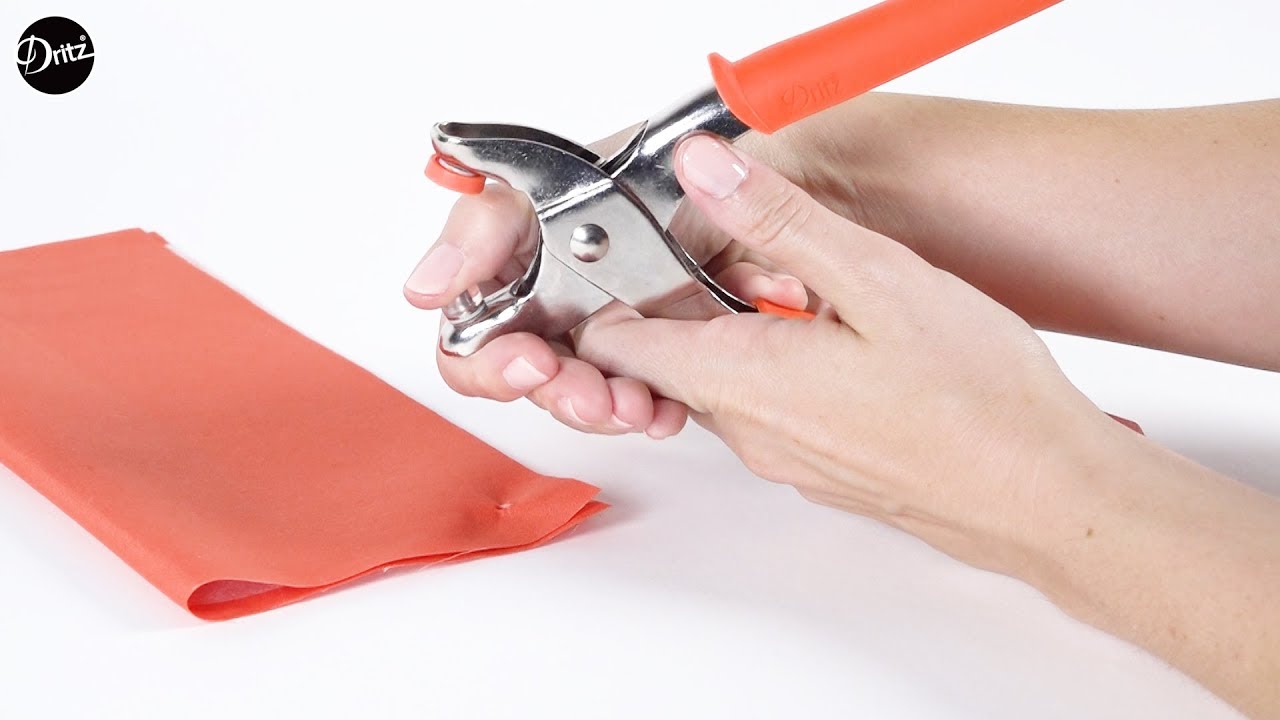
Credit: www.youtube.com
Troubleshooting Common Issues
Troubles can happen while using Dritz Snap Fastener Pliers. These issues may stop your project or cause poor results. Knowing how to fix common problems saves time and frustration.
Some problems are easy to fix with small adjustments. Others need careful handling to avoid damage to fabric or snaps. This guide helps you solve two frequent issues.
Fixing Misaligned Snaps
Misaligned snaps do not close properly or look uneven. Check that the snap parts sit straight before pressing. Adjust the position gently by hand or with the pliers.
Use a flat surface to line up the snaps. Make sure the fabric is smooth and not folded. Press slowly and watch the snap’s position during the process.
If a snap is crooked, remove it carefully. Replace it with a new snap and try again. Avoid pressing too hard, which can cause misalignment.
Dealing With Fabric Damage
Fabric can tear or stretch during snap installation. Choose the right snap size for your fabric thickness. Thin fabric needs smaller snaps and gentle pressure.
Place a scrap piece of fabric under the project to protect it. Use a soft cloth between the pliers and fabric to prevent marks. Press the snap slowly to control the force.
If the fabric tears, repair it before adding snaps again. Reinforce weak areas with interfacing or extra fabric layers. This helps snaps hold firmly without damage.
Maintaining Your Snap Fastener Pliers
Maintaining your Dritz Snap Fastener Pliers helps keep them working well for a long time. Regular care makes your tool reliable and safe. It also saves money by avoiding early replacements.
Cleaning And Storage Tips
After each use, wipe the pliers with a dry cloth. Remove any dirt or fabric pieces stuck in the jaws. Use a small brush for hard-to-reach spots. Avoid water to prevent rust. Store the pliers in a dry place. Keep them in a pouch or box to protect from dust. Do not leave them in humid areas.
Replacing Worn Parts
Check the pliers often for worn or damaged parts. Look at the jaws and springs closely. Replace any parts that look bent or broken. Use original Dritz replacement parts for best fit. Follow instructions carefully when changing parts. This keeps your pliers working smoothly and safely.

Credit: www.handicraft.com
Frequently Asked Questions
How Do Dritz Snap Fastener Pliers Work?
Dritz Snap Fastener Pliers press snap parts together firmly. They align the snap components and apply even pressure for secure attachment. This tool simplifies snap installation on fabric, making the process faster and cleaner without sewing.
What Materials Are Compatible With These Pliers?
These pliers work well on fabric, leather, and light vinyl. Avoid very thick or hard materials, as they may damage snaps or the tool. Always test on a scrap piece to ensure proper snap attachment.
Can Beginners Easily Use Dritz Snap Fastener Pliers?
Yes, beginners find these pliers user-friendly due to their simple design. Instructions are straightforward, and the tool requires minimal effort. Practice helps improve snap placement and pressure control for professional results.
How Do I Maintain Dritz Snap Fastener Pliers?
Keep the pliers clean and dry after each use. Wipe metal parts to prevent rust and occasionally oil the hinge. Store in a dry place to maintain functionality and prolong tool life.
Conclusion
Using Dritz Snap Fastener Pliers makes attaching snaps easy and quick. These pliers help you add snaps to clothes or crafts with little effort. Follow the steps carefully to avoid mistakes and get strong snaps. Practice a few times to feel confident using the tool.
Snap fasteners stay secure and look neat on your projects. Keep the pliers clean and store them safely after use. This simple tool saves time and improves your sewing results. Give it a try and see how handy it can be.