Are your kitchen cabinets missing that perfect finishing touch? Installing hardware like handles and knobs can completely transform the look and feel of your kitchen.
But where do you start? If you’ve ever felt unsure about how to attach hardware properly, you’re not alone. This guide will walk you through every simple step, helping you avoid common mistakes and achieve a professional look. Keep reading, and you’ll soon be able to upgrade your kitchen cabinets with confidence and ease.
Choosing The Right Hardware
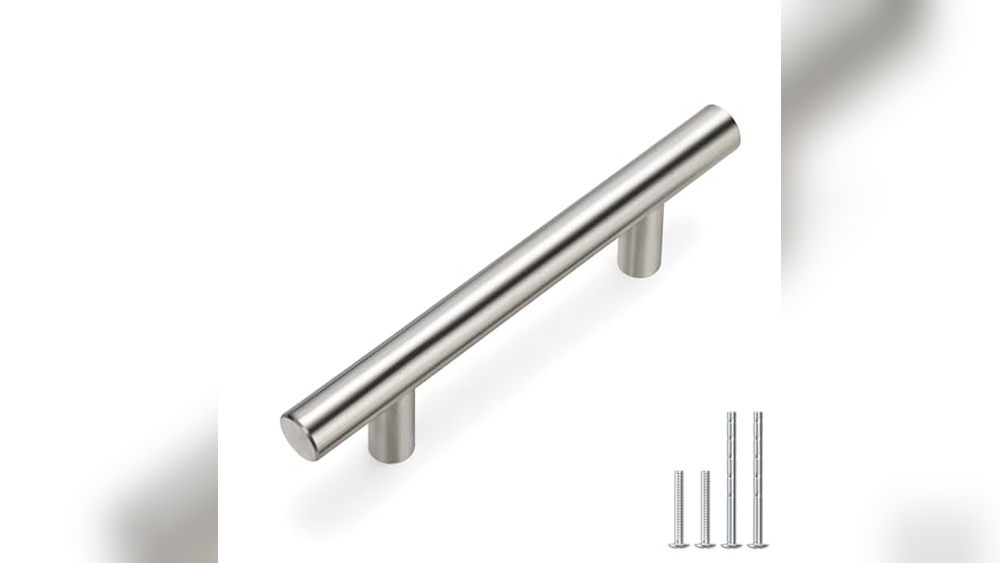
Choosing the right hardware for kitchen cabinets is important. It affects both function and style. The hardware should be easy to use and match the kitchen’s look. This helps create a balanced and attractive space. Picking the right hardware makes opening and closing cabinets smooth. It also protects the cabinets from wear and tear. Hardware comes in many types, materials, and finishes. Each choice changes the kitchen’s feel.
Types Of Cabinet Hardware
Cabinet hardware includes knobs, pulls, and handles. Knobs are small and round, easy to grip. Pulls are longer and provide more space for hands. Handles come in different shapes and sizes. Choose hardware that fits your hand comfortably. Consider how often you use cabinets. Some hardware suits heavy use better than others. Think about the cabinet door style too. Some hardware matches traditional cabinets; others suit modern designs.
Material And Finish Options
Hardware materials include metal, plastic, and wood. Metal is strong and lasts long. Common metals are stainless steel, brass, and bronze. Plastic is less durable but can be colorful and cheap. Wood matches wooden cabinets well. Finishes change the hardware’s look and feel. Popular finishes are matte, shiny, brushed, and antique. Choose a finish that fits your kitchen’s color scheme. Finishes also affect how easy hardware is to clean.
Matching Hardware To Kitchen Style
Kitchen style guides hardware choice. Modern kitchens suit sleek, simple hardware. Traditional kitchens look good with detailed knobs and pulls. Rustic kitchens match wood or bronze hardware. Minimalist kitchens need small, plain hardware. The hardware should blend with cabinet color and countertop. Think about the overall theme and mood. The right hardware ties the kitchen design together. It makes the space feel complete and inviting.
Tools And Materials Needed
Installing hardware on kitchen cabinets requires the right tools and materials. Having everything ready helps the job go smoothly and saves time. Proper tools make sure the hardware fits well and works properly. This section lists the essential tools and hardware parts you need before starting.
Essential Tools For Installation
Start with a cordless drill for fast and easy screw driving. A drill bit set is necessary to match screw sizes. Use a screwdriver to tighten screws in tight spots. A tape measure helps to position hardware correctly and evenly. A pencil marks where to drill holes. A level ensures handles and knobs are straight. A ruler or square guides precise measurements. Safety glasses protect your eyes from dust and debris.
Hardware Components Checklist
Check that you have all hardware parts before installation. Handles or knobs are the main pieces. Screws come in different lengths; choose the correct size for your cabinet thickness. Mounting plates hold some types of hardware. Washers may be needed to protect surfaces. Anchors can help if cabinets are hollow or fragile. Keep extra screws and parts handy for mistakes or replacements.
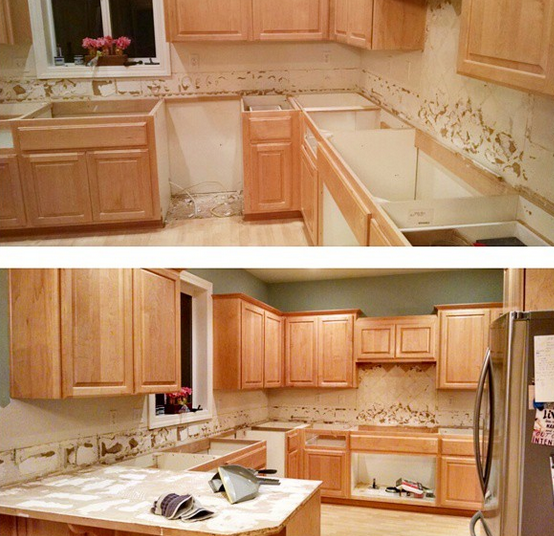
Preparing Cabinets For Installation
Preparing your kitchen cabinets before installing hardware is key to a smooth process. Clean and clear cabinets make it easier to work and avoid mistakes. Measuring and marking the exact spots ensures your hardware fits perfectly. Taking time here saves effort later.
Cleaning And Clearing Cabinets
Start by emptying the cabinets completely. Remove all items to have full access to surfaces. Wipe the inside and outside with a damp cloth. Remove dust, grease, and dirt that might block screws.
Check for any damage or loose parts on the cabinet doors. Fix these before installing new hardware. A clean, clear surface helps the hardware sit well and last longer.
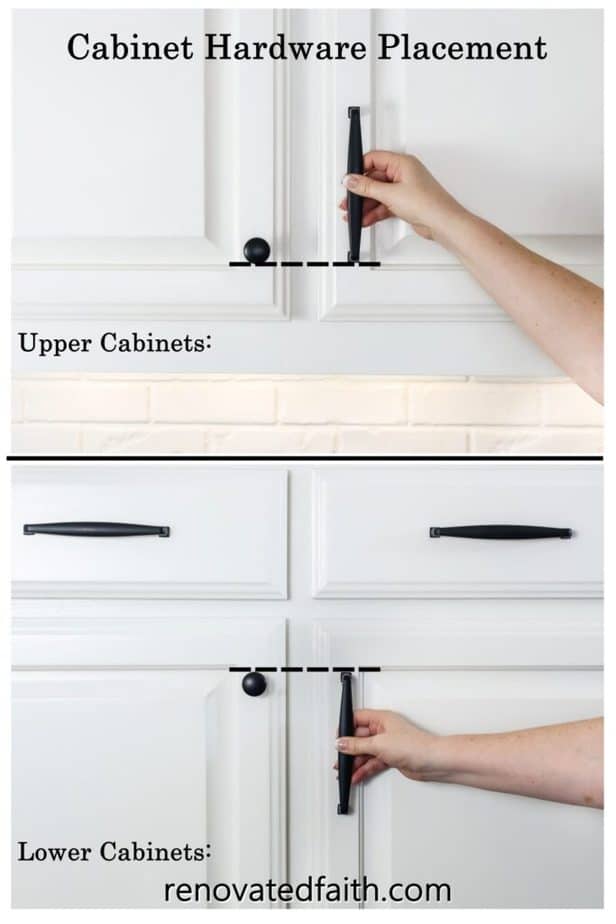
Measuring And Marking Placement
Use a tape measure to find the exact spots for handles or knobs. Measure from the edges to keep the hardware even on each door. Mark light pencil dots where screws will go.
Double-check your marks before drilling holes. Measure twice, mark once. Correct placement makes your kitchen look neat and professional.

Credit: www.youtube.com
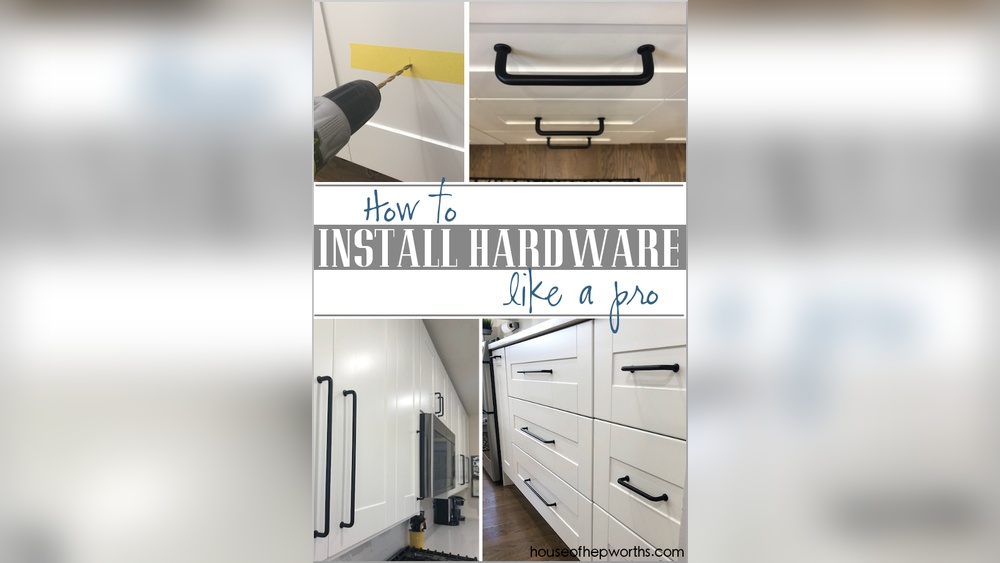
Step-by-step Installation Guide
Installing hardware on kitchen cabinets can change the room’s look quickly. The process is simple with the right steps. Follow this guide to add handles, knobs, and hinges with ease. Each step helps avoid mistakes and saves time. Let’s start by preparing the cabinet surface and tools.
Drilling Pilot Holes
Mark the exact spots for screws on the cabinet. Use a pencil and ruler for accuracy. Drill small pilot holes to guide screws easily. This step prevents wood from splitting. Use a drill bit smaller than the screw size. Drill straight and steady to keep holes clean.
Attaching Handles And Knobs
Align the handle or knob with pilot holes. Insert screws through the cabinet back and into the hardware. Tighten screws by hand first, then use a screwdriver. Check the hardware is secure but avoid over-tightening. Test by pulling the handle gently to ensure it holds.
Securing Hinges And Pulls
Position hinges on the cabinet door and frame. Use the pilot holes to guide screws. Screw in all hinge screws firmly to avoid loose doors. Attach pulls by aligning with holes and securing with screws. Open and close the door to check the fit and function. Adjust screws if needed for smooth movement.
Tips For A Professional Finish
Achieving a professional finish on kitchen cabinet hardware makes a big difference. It improves the look and the function. Small details matter. Careful installation gives your kitchen a polished, clean appearance. Follow these tips for the best results.
Ensuring Even Alignment
Measure carefully before drilling holes. Use a ruler or a level for accuracy. Mark the spots clearly with a pencil. Check twice to avoid mistakes. Align handles and knobs evenly on all cabinets. Consistent spacing keeps the kitchen looking neat. Use a template to keep the same distance. This saves time and prevents uneven placement.
Avoiding Common Installation Mistakes
Do not rush the process. Take your time to avoid errors. Avoid overtightening screws that can damage the cabinet. Use the right size drill bit for pilot holes. Pilot holes stop the wood from splitting. Double-check the hardware type before installation. Some handles need special screws or backing plates. Keep all tools and parts organized to prevent loss. These small steps help your work last longer.
Credit: craftingintherain.com
Maintaining Your New Hardware
Maintaining your new kitchen cabinet hardware keeps your kitchen looking fresh and neat. Clean hardware lasts longer and works smoothly. Small care steps prevent damage and wear. Check your hardware often to catch problems early. This simple routine saves time and money.
Cleaning And Care Tips
Wipe hardware with a soft cloth daily. Use mild soap and water for deeper cleaning. Avoid harsh chemicals that can damage finishes. Dry hardware immediately to stop water spots. Polish metal hardware with a gentle polish once a month. Tighten screws regularly to keep handles secure. Avoid using abrasive sponges or brushes on hardware.
When To Replace Hardware
Replace hardware if it shows rust or corrosion. Loose or broken handles need quick replacement. If the finish peels or fades, consider new hardware. Hardware that sticks or is hard to use should be swapped. Upgrading hardware can refresh your kitchen’s style easily. Choose replacement pieces that match your cabinet design.
Credit: renovatedfaith.com
Frequently Asked Questions
What Tools Do I Need To Install Kitchen Cabinet Hardware?
You need a drill, screwdriver, measuring tape, pencil, and level. These tools ensure accurate and secure hardware installation on cabinets.
How Do I Measure For Cabinet Hardware Placement?
Measure the cabinet door width and height. Mark the center or preferred spot with a pencil for consistent hardware alignment.
Can I Install Hardware On Existing Kitchen Cabinets?
Yes, you can install hardware on existing cabinets. Just ensure proper measurements and use suitable screws for your cabinet material.
What Is The Best Hardware Type For Kitchen Cabinets?
Popular hardware types include knobs and pulls. Choose based on cabinet style, ease of use, and personal preference.
Conclusion
Installing hardware on kitchen cabinets can be simple and quick. Measure carefully and mark spots before drilling holes. Use the right tools and take your time. Proper hardware improves cabinet function and kitchen look. Small steps lead to big changes in your space.
Enjoy your upgraded kitchen with neat, sturdy handles and knobs. Keep these tips handy for future projects too.