Are you noticing worn-out Trex boards on your deck and wondering how to replace them without ruining the clean, fastener-free look? You’re in the right place.
Replacing a Trex board with hidden fasteners might sound tricky, but with the right steps, you can do it yourself and keep your deck looking flawless. In this guide, you’ll learn exactly how to remove the old board and install a new one smoothly, so your deck stays strong and beautiful.
Ready to bring your deck back to life? Let’s dive in.

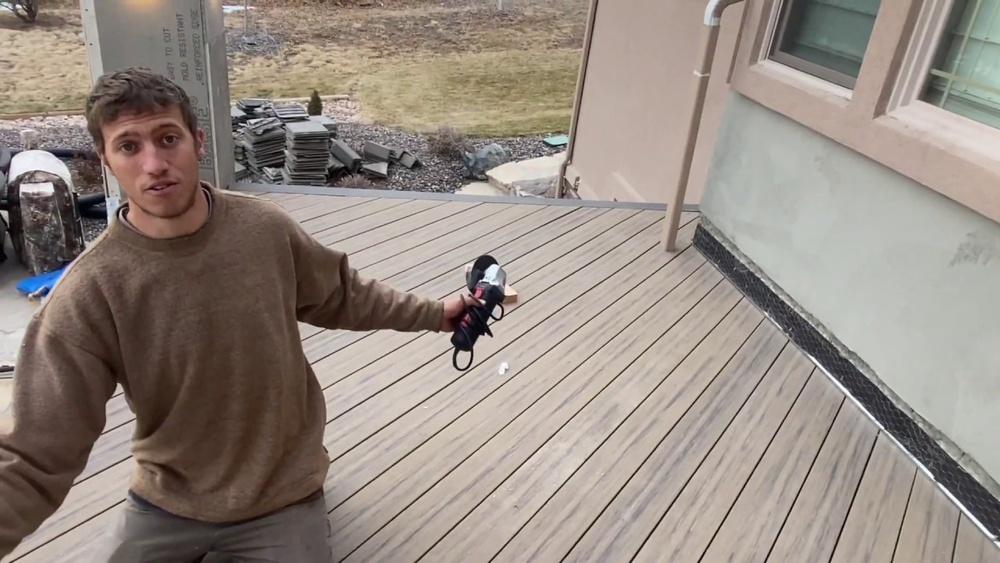
Credit: www.youtube.com
Tools And Materials Needed
Replacing a Trex board with hidden fasteners requires specific tools and materials. Choosing the right items ensures a smooth and secure installation. This section covers what you need before starting the project.
Trex Board Selection
Select Trex boards that match your deck’s style and color. Choose boards designed for durability and weather resistance. Check the length and thickness to fit your deck frame perfectly. Opt for boards with grooved edges to work with hidden fasteners.
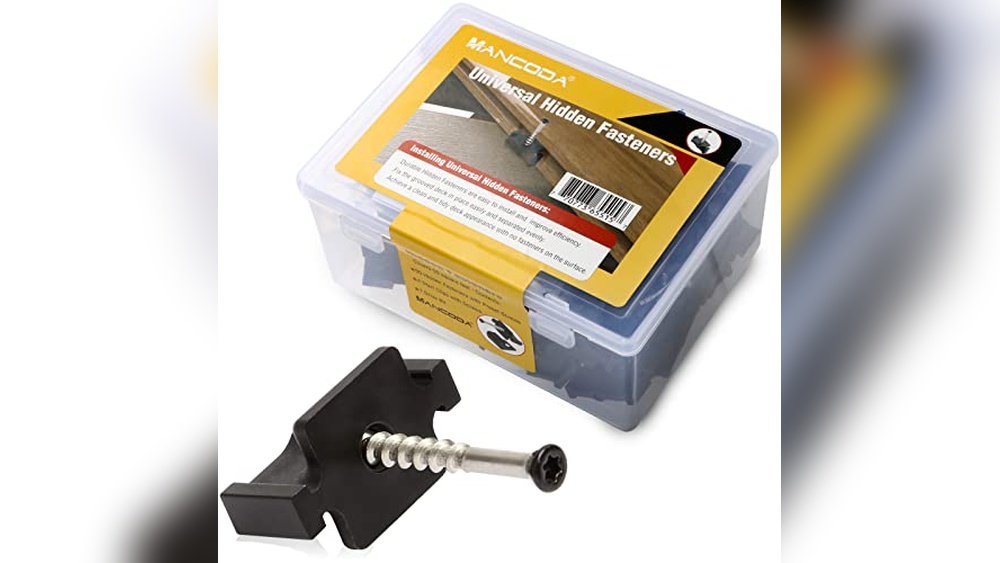
Hidden Fasteners Types
There are several hidden fasteners made for Trex decks. Some use clips that snap into grooves on the boards. Others require screws that attach to the joists without showing on the surface. Choose fasteners that suit your deck’s layout and material. Pick stainless steel or corrosion-resistant options for long-lasting strength.
Essential Tools List
Gather all necessary tools before starting the replacement. You will need a drill with screwdriver bits for fasteners. A pry bar helps remove old boards carefully. Use a tape measure for precise cuts and placement. A circular saw or miter saw is needed to trim boards to size. Safety gear like gloves and goggles protects you during work.
Preparing The Deck
Preparing the deck is the first step in replacing Trex boards with hidden fasteners. A clean, safe workspace makes the job easier and faster. Proper preparation helps you avoid mistakes and damage during installation.
Take time to inspect the deck thoroughly. Spotting problems early saves you trouble later. Removing damaged boards is key for a strong, lasting deck.
Clear The Work Area
Remove furniture, plants, and any objects from the deck. Clear space allows easy movement and access to all boards. Sweep away dirt and debris for a clean surface. A tidy area improves safety and efficiency.
Inspect Existing Deck Boards
Look closely at all deck boards. Check for cracks, warping, or soft spots. Look under the boards for hidden damage. Mark any boards that need replacement. This step ensures you only remove what is necessary.
Remove Damaged Boards
Use a pry bar or drill to remove damaged boards carefully. Avoid harming the surrounding boards and joists. Remove nails or screws left behind. Keep the deck frame intact for the new boards. Dispose of old boards properly.
Removing The Old Trex Board
Removing the old Trex board is the first step in replacing decking with hidden fasteners. This process needs care to avoid damaging the surrounding boards. Proper removal helps save time and effort during installation of the new board.
Locate Hidden Fasteners
Hidden fasteners are usually clipped under the board edges. Check the grooves on the sides of the board for these clips. They hold the board firmly to the joists beneath. Use a flashlight to see clearly in shaded areas.
Careful Fastener Removal
Use a pry bar or special tool to lift the fasteners gently. Avoid bending or breaking the clips as they may be reusable. Work slowly along the board’s length to release all fasteners. Do not force the board up suddenly.
Board Extraction Techniques
After releasing fasteners, lift the board carefully at one end. Slide it out sideways to clear the clips and joists. If the board sticks, tap gently with a rubber mallet. Remove any nails or screws left behind for a smooth surface.

Credit: www.trex.com
Installing The New Trex Board
Installing the new Trex board is a key step to make your deck look fresh and last longer. The process needs careful attention to ensure the board fits well and stays secure. Hidden fasteners keep the deck surface smooth and safe. Follow these steps to install the new board correctly and neatly.
Aligning The Board
Place the new Trex board in the gap left by the old one. Make sure the ends sit evenly on the joists below. Check the board is straight along its length. A well-aligned board looks better and fits better with hidden fasteners.
Securing With Hidden Fasteners
Use the recommended hidden fasteners for your Trex board type. Slide the fasteners into the board groove along the edge. Attach each fastener to the joist with screws. Tighten screws carefully to avoid damage. Hidden fasteners keep the board firmly in place without visible screws.
Checking For Proper Fit
After securing, check the board’s alignment again. Make sure there are no gaps or uneven edges. The board should sit flush with the deck surface. Walk on the board to test stability. Adjust fasteners if the board feels loose or uneven.
Finishing Touches
After replacing your Trex board with hidden fasteners, the final steps matter a lot. These finishing touches keep your deck safe and looking great. Proper care helps your deck last longer and stay strong.
Cleaning The Deck Surface
Start by cleaning the deck surface carefully. Remove dirt, leaves, and dust using a broom or blower. Use a mild soap mixed with water to scrub the boards gently. Rinse well with a garden hose. Avoid harsh chemicals that can damage the deck.
Inspecting For Loose Boards
Check the deck for any loose boards. Walk slowly and listen for creaks or movement. Push down on boards to feel if they shift. Tighten any loose hidden fasteners using the right tool. Secure boards keep the deck safe and stable.
Maintenance Tips
Keep your deck in good shape with regular care. Clean it at least twice a year. Check for damage after storms or heavy use. Avoid placing heavy furniture in one spot for long. Use protective pads under chairs to prevent scratches. Simple steps protect your investment and keep your deck beautiful.

Credit: www.trex.com
Frequently Asked Questions
How Do I Remove A Damaged Trex Board?
Start by unscrewing or prying out hidden fasteners carefully. Use a pry bar to lift the board gently. Avoid damaging adjacent boards. Remove the board once fasteners are free. Clean the area before installing the new board.
What Tools Are Needed For Hidden Fastener Replacement?
You need a drill, pry bar, hidden fastener tool, and safety gear. A screwdriver or impact driver helps remove screws. Use a rubber mallet for adjusting boards. Measuring tape ensures proper alignment of the replacement board.
Can I Reuse Hidden Fasteners When Replacing Boards?
It’s best to use new hidden fasteners for secure attachment. Reusing old fasteners may cause weak grip or corrosion issues. New fasteners ensure longevity and proper spacing. Always follow manufacturer recommendations for hidden fasteners.
How Do I Align A New Trex Board Properly?
Place the new board in position with even spacing. Use spacers or a gauge for consistent gaps. Secure the board with hidden fasteners starting from one end. Check alignment frequently to avoid warping or uneven gaps.
Conclusion
Replacing a Trex board with hidden fasteners is simple and effective. Follow the steps carefully to avoid damage and ensure a clean look. Use the right tools and materials for best results. Take your time and work safely. This method keeps your deck strong and neat without visible screws.
Now, your deck looks fresh and lasts longer. Try this easy fix to maintain your outdoor space well.