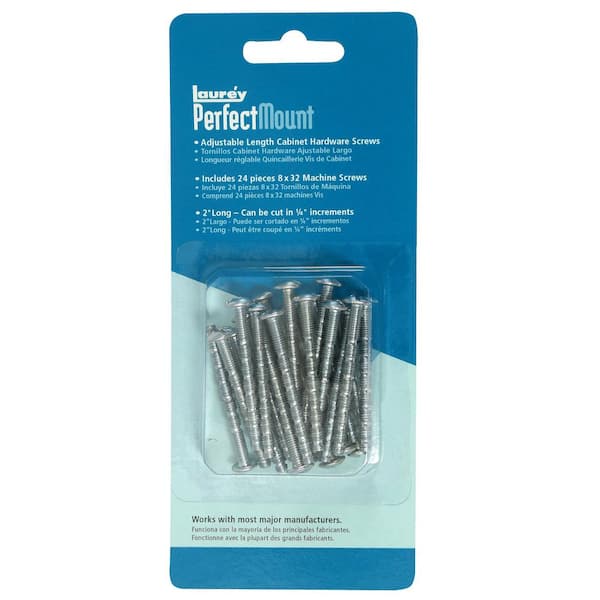
Are your cabinet hardware screws too long and causing trouble during installation? You’re not alone.
Cutting screws to the right length might seem tricky, but it’s easier than you think. In this guide, you’ll discover simple, step-by-step methods to trim your screws quickly and safely. By the end, you’ll have the confidence to handle any cabinet hardware project like a pro.
Keep reading to learn the best tools and techniques to get the perfect fit every time.
Credit: www.woodworkerexpress.com
Tools Needed
Cutting cabinet hardware screws requires the right tools. Using proper tools makes the task safe and precise. It also saves time and effort. Below are essential tools to help you cut screws cleanly and easily.
Types Of Screw Cutters
Wire cutters or diagonal cutters are common for cutting screws. They work well for thin screws and small adjustments. Bolt cutters are stronger and cut thick screws fast. They are best for heavy-duty screws. A hacksaw is useful for very thick screws or when precise length is needed. It offers control but takes more time.
Additional Helpful Tools
A screwdriver helps remove the screw before cutting. Needle-nose pliers hold screws firmly without slipping. A metal file smooths rough edges after cutting. A ruler or tape measure ensures exact screw length. Safety glasses protect eyes from flying metal pieces. Gloves protect hands and improve grip.
Preparing The Screws
Preparing the screws is an important step before cutting cabinet hardware screws. It helps ensure a clean and precise cut. Taking time to measure and mark the screws correctly saves effort and avoids mistakes.
Measuring The Required Length
Use a ruler or tape measure to find the right screw length. Compare the screw length to the cabinet door thickness. Add a little extra length for the hardware and washer. Mark the exact length needed for the screw.
Marking The Cut Point
Mark the cut point clearly on the screw with a pencil or marker. Make sure the mark is visible and straight around the screw. This mark guides the cutting tool for a clean cut. Avoid guessing the cut point to prevent errors.
Cutting Techniques
Cutting cabinet hardware screws is simple with the right tools. Different methods suit different screw types and lengths. Proper cutting ensures a clean finish without damaging the screw or cabinet. Choose a technique that matches your tools and skill level. Safety is important, so wear eye protection and work slowly.
Using Wire Cutters
Wire cutters work well for thin screws and soft metals. Grip the screw firmly near the tip. Use steady pressure to snip through the screw. This method is fast and easy for small jobs. Avoid twisting the screw while cutting to prevent damage.
Using A Hacksaw
A hacksaw cuts thicker screws or hard metals cleanly. Secure the screw in a clamp or vise. Saw slowly back and forth with light pressure. Keep the saw blade straight for a smooth cut. This method takes more time but gives a neat result.
Using A Rotary Tool
A rotary tool with a cutting disc works on most screws. Hold the tool steady and cut slowly. Use gentle passes instead of forcing the blade. This method offers precision and works well in tight spaces. Wear a mask to avoid breathing metal dust.
Credit: www.homedepot.com
Smoothing The Edges
After cutting cabinet hardware screws, the edges are often sharp and rough. Smoothing these edges is important. It makes the screws safe to handle. It also helps the screws fit properly into the cabinet hardware. A smooth finish prevents scratches and damage during installation.
Filing The Cut Ends
Use a small metal file to smooth the cut ends of the screws. Hold the screw firmly. Move the file back and forth over the cut edge. Do this until the rough parts disappear. Check the end by running your finger gently over it. Repeat filing if you feel any sharp spots. A smooth end helps the screw go in easily and protects your fingers.
Ensuring Safe Handling
Sharp screw edges can cause cuts or scratches. Wear gloves when filing or handling cut screws. Keep the screws away from children. Store them in a small container to avoid accidents. Always check the screws for sharp points before use. Safe handling means fewer injuries and smoother installation.
Testing The Fit
Testing the fit is an important step after cutting cabinet hardware screws. It ensures the screws are the right length for your cabinet doors or drawers. Proper fit prevents damage and keeps your hardware secure. Take your time and check carefully.
Inserting Screws Into Hardware
Start by inserting the cut screws into the cabinet hardware. Push the screw through the hole on the handle or knob. The screw should slide in smoothly without force. If it feels tight, check the cut end for rough edges or burrs.
Insert the screw until it reaches the back of the hardware. The screw head should sit flush against the hardware surface. This confirms the length is close to what you need.
Adjusting Length If Necessary
Next, test the screw by attaching the hardware to the cabinet. Screw it into the cabinet door or drawer. The screw should hold firmly without sticking out too far inside.
If the screw is too long, it may damage the cabinet or block drawer movement. If it is too short, the hardware will be loose. Mark the screw and cut more if needed.
Trim small amounts at a time. Reinsert and test again until the fit is perfect. Smooth the cut end with a file to avoid splinters or sharp edges.
Tips For Best Results
Cutting cabinet hardware screws can be tricky without the right approach. Small mistakes can ruin the screw or damage the cabinet. Follow these simple tips for the best results. Proper preparation and care make the job easier and cleaner.
Using the correct screw type and keeping your tools sharp will help you cut screws smoothly. This section explains how to choose screws and maintain tools for clean cuts.
Choosing The Right Screw Type
Select screws that match your cabinet hardware and project needs. Some screws are softer and easier to cut than others. Brass and aluminum screws cut more smoothly than steel. Steel screws often require stronger tools.
Pick screws with the right length before cutting. Starting with a longer screw gives room to adjust. Avoid screws with coatings that might chip when cut. Plain or zinc-plated screws are good choices for cutting.
Maintaining Tools For Clean Cuts
Sharp tools make cutting screws faster and cleaner. Use a new or well-maintained hacksaw blade or wire cutters. Dull blades crush the screw instead of cutting it.
Clean tools after each use to prevent rust and buildup. Lubricate moving parts of cutters to keep them working smoothly. Store tools in a dry place to avoid damage.
Check your tool’s condition before starting. Tighten any loose parts and replace worn blades. Proper care ensures neat cuts and less frustration.

Credit: www.amazon.com
Frequently Asked Questions
How Do I Cut Cabinet Hardware Screws Safely?
Use a proper cutting tool like a hacksaw or bolt cutter. Secure the screw in a vise. Cut slowly and steadily to avoid damage or injury. Always wear safety glasses to protect your eyes from metal shards.
What Tools Are Best For Cutting Cabinet Screws?
A hacksaw, bolt cutters, or a rotary tool with a cutting wheel work best. Choose based on screw thickness and accessibility. Each tool offers precise cutting with minimal effort when used correctly.
Can I Shorten Cabinet Screws Without Tools?
No, cutting screws requires tools for a clean, safe cut. Using improper methods can damage screws and hardware. Always use appropriate cutting tools for best results and safety.
How Do I Measure Screws Before Cutting?
Measure the required length with a ruler or tape measure. Mark the screw with a permanent marker or tape. This ensures accurate cutting and prevents shortening the screw too much.
Conclusion
Cutting cabinet hardware screws is simple with the right tools. Use a hacksaw or a bolt cutter for best results. Measure twice before cutting to avoid mistakes. Smooth the edges with a file to prevent injury. Taking your time ensures a clean, safe finish.
Practice on spare screws if you need more confidence. Now, you can adjust hardware easily for any project. Small steps make big improvements in your cabinet work. Keep these tips handy for future DIY tasks.