Have you ever wanted to create your own designs or technical drawings but felt stuck when it comes to adding the right details? Knowing how to draw a fastener can make your sketches look professional and complete.
Whether you’re working on a project, studying engineering, or just curious, mastering this simple skill will boost your confidence and help you communicate your ideas clearly. In this guide, you’ll discover easy steps to draw fasteners accurately, saving you time and making your work stand out.
Ready to learn how? Let’s get started!
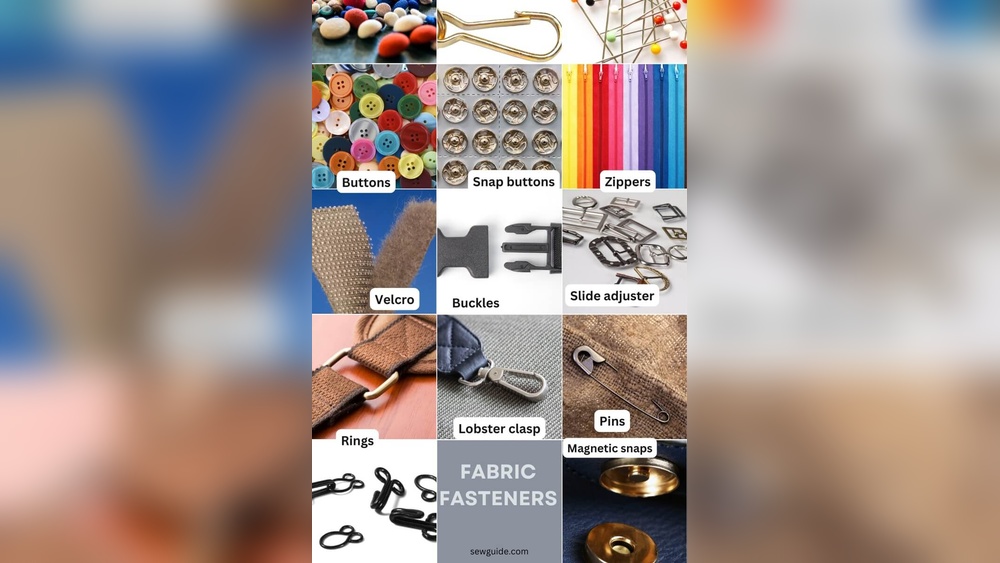
Types Of Fasteners
Fasteners are essential tools used to join materials together. They come in many types, each designed for a specific task. Understanding these types helps you draw fasteners accurately and choose the right one for your project.
Fasteners vary by shape, size, and function. Knowing common shapes and their uses simplifies the drawing process. It also helps you create detailed, realistic illustrations.
Common Fastener Shapes
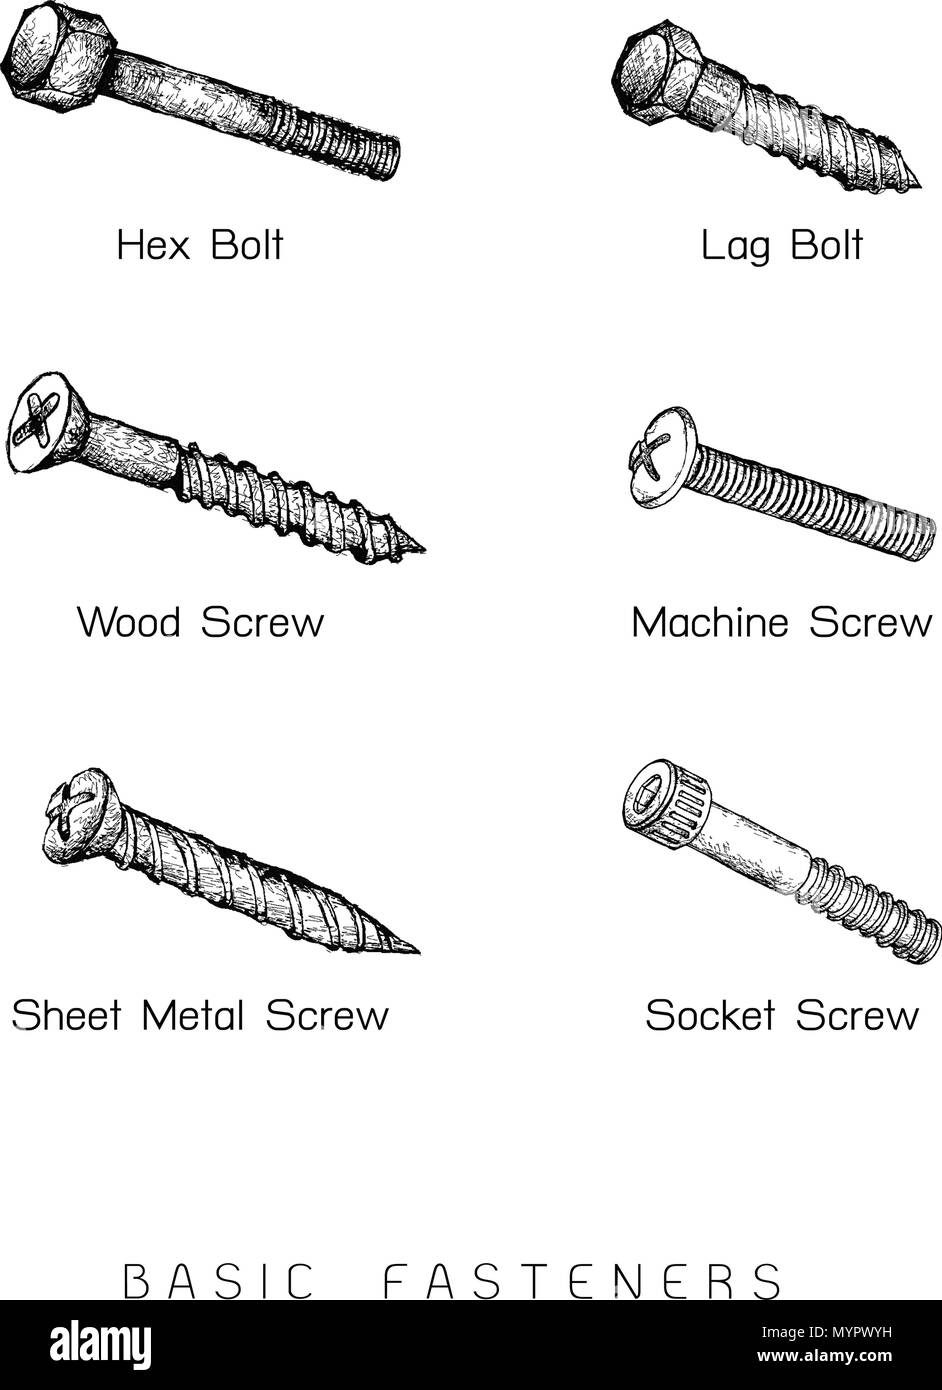
Fasteners often appear as screws, bolts, nails, or rivets. Screws have a helical ridge that helps them grip materials tightly. Bolts are similar but usually need a nut to hold things together. Nails have a smooth shaft and a flat head, used mainly in woodwork. Rivets join materials permanently by expanding inside the hole.
Each shape has unique details. Screws often show threads and a slotted or Phillips head. Bolts have hexagonal heads and sometimes washers. Nails display a simple, straight form with a pointed tip. Rivets show a rounded head and a flared end. These details are important in drawing.
Choosing The Right Fastener
Select fasteners based on material type and strength needed. Wood usually uses nails or wood screws for better hold. Metal parts need bolts or machine screws for strong joints. Rivets work well for permanent connections where removal is not required.
Consider the environment too. Outdoor projects need rust-resistant fasteners like stainless steel. Indoor use can allow regular steel or brass fasteners. Size matters. Thicker materials require longer or wider fasteners for secure attachment.
Basic Drawing Tools
Drawing a fastener accurately starts with having the right tools. Basic drawing tools help create clean and precise lines. They make the process easier and more enjoyable. Choosing the right supplies sets a strong foundation for your drawing.
Essential Supplies
Begin with a good quality pencil. Mechanical pencils offer consistent lines. Use different pencil grades for shading and details. A ruler helps keep straight edges perfect. A compass is useful for drawing circles. Erasers must be soft to avoid paper damage. A sharpener keeps your pencil points fine. Use smooth drawing paper for better results.
Tips For Using Tools
Hold your pencil lightly for better control. Use short, light strokes to sketch outlines. Apply more pressure for darker lines. Keep your ruler steady to avoid slips. Rotate the paper to draw curves easily. Clean your eraser often to prevent smudges. Sharpen pencils regularly for crisp lines. Practice tool handling to improve your drawing skills.
Sketching The Fastener Shape
Sketching the fastener shape is the first step in drawing a clear and accurate fastener. It helps set the base for the entire drawing. A simple sketch makes it easier to add details later. Start with basic shapes to form the fastener’s body and head. Keep your lines light so you can adjust them if needed. This method saves time and improves the final look.
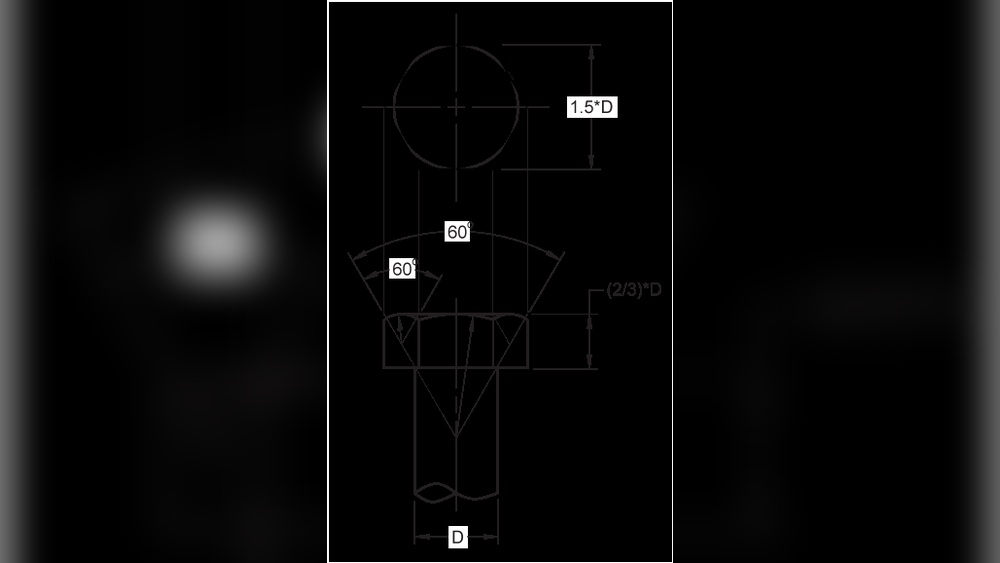
Drawing The Outline
Begin by drawing the main shape of the fastener. Most fasteners have a cylindrical body and a flat or rounded head. Use a pencil to sketch a long, narrow rectangle for the body. Draw a circle or hexagon on top for the head. Make sure the shapes are proportional. The outline does not need to be perfect at first. Focus on the general form and size. This outline guides the rest of the drawing.
Adding Details
After the outline is ready, start adding details. Sketch the threads on the body as curved lines wrapping around it. Add a slot or cross shape on the head if the fastener is a screw. Draw small edges or bevels around the head to show depth. Use short, light strokes to keep details clear but not overwhelming. Details make the fastener look realistic and complete.
Credit: www.alamy.com
Creating Thread Patterns
Creating thread patterns is key to drawing fasteners that look real. Threads give screws and bolts their grip. Without them, a fastener would look flat and fake. This section explains how to draw threads clearly and simply.
Thread Basics
Threads are spiral lines that wrap around a fastener’s body. They help screws hold tight in materials. Threads have peaks and valleys. The peaks are the raised parts, and valleys are the spaces between them.
Threads come in different types and sizes. The two main types are coarse and fine threads. Coarse threads are thicker and deeper. Fine threads are thinner and closer together. Knowing these helps you draw them correctly.
Techniques For Realistic Threads
Start by sketching the fastener’s outline. Mark where the threads will go. Use light lines to show the spiral path. Draw small diagonal lines along this path to form thread peaks.
Keep the space between lines even. This creates a natural look. Shade the valleys lightly to add depth. Use curved lines on the fastener’s body to show roundness.
Practice drawing threads on different fasteners. With time, your thread patterns will look sharp and realistic.
Shading And Texture
Shading and texture bring your fastener drawing to life. They add depth and realism, making the object look three-dimensional. Without shading, the fastener appears flat and less interesting. Texture shows the material type, such as metal or plastic. It helps viewers understand the fastener’s surface and feel.
Light And Shadow
Start by imagining a light source. Decide where the light hits the fastener. The areas facing the light should be the brightest. Shadows form on the opposite side. Use soft shading for smooth transitions between light and dark. Darker shadows create a stronger sense of depth. Pay attention to small shadows in grooves or threads. These tiny shadows make your fastener look detailed and realistic.
Surface Texture Tips
Observe the fastener’s material closely. Metal surfaces often look shiny and smooth. Use fine lines or small dots to show this shine. Rougher materials need uneven shading or small scratches. Use a sharp pencil for tiny details. Blend gently for smooth metal parts. Avoid heavy shading on shiny surfaces; it hides the shine. Simple strokes can suggest different textures clearly.

Credit: www.youtube.com
Final Touches
Final touches bring your fastener drawing to life. This step adds clarity and sharpness to your work. Small improvements here make a big difference. Focus on refining lines and fixing mistakes. These actions polish your drawing and prepare it for presentation.
Refining Lines
Use a fine pencil or pen to trace over main lines. Make lines smooth and steady. Erase any extra marks or sketch lines. Sharpen edges to show the fastener’s shape clearly. Darken important lines to create contrast. This makes your drawing look clean and professional.
Correcting Mistakes
Check for errors or uneven parts in your drawing. Lightly erase smudges or wrong lines. Redraw any parts that look off or unclear. Pay attention to symmetry and proportions. Fixing small mistakes improves the overall quality. A neat drawing is easier to understand and more pleasing to the eye.
Practice Exercises
Practice exercises help improve your drawing skills step by step. Drawing fasteners takes patience and steady hands. Regular practice builds confidence and sharpens your eye for details. Try different fastener types to understand shapes and lines better.
Simple Fastener Drawings
Start with basic shapes like screws and nails. Use circles and straight lines to form the head and shaft. Practice drawing the thread pattern with short, curved lines. Keep your lines light at first to fix mistakes easily. Repeat these exercises to get smoother and more accurate.
Advanced Fastener Designs
Move on to complex fasteners such as bolts and rivets. Focus on adding details like hexagonal heads and grooves. Pay attention to proportions and perspective to make drawings realistic. Try shading to show depth and material texture. These exercises challenge your skills and improve precision.

Credit: www.youtube.com
Frequently Asked Questions
What Basic Tools Are Needed To Draw A Fastener?
To draw a fastener, you need a pencil, ruler, compass, and eraser. These tools help create precise lines and curves for accurate fastener shapes.
How Do I Draw A Simple Bolt Step-by-step?
Start with a cylinder for the bolt shaft, add hexagonal head on top, and sketch threads as diagonal lines. Finish with shading for a 3D effect.
What Is The Best Way To Draw Fastener Threads?
Draw evenly spaced diagonal lines around the cylinder. Use light strokes for threads and darken edges to highlight the spiral pattern.
How Can I Make Fastener Drawings Look More Realistic?
Add shading and highlights to show light direction. Use thicker lines for edges and thinner lines for details to enhance realism.
Conclusion
Drawing a fastener becomes easier with clear steps and practice. Start by sketching basic shapes to outline the fastener’s form. Add details carefully, focusing on lines and proportions. Take your time to keep the drawing neat and simple. Use references to see how real fasteners look.
Keep practicing to improve your skill and confidence. Drawing fasteners can be fun and useful for many projects. Try different types to expand your drawing abilities. Stay patient and enjoy the process of creating precise drawings.