If you’re looking to remove a Baldwin deadbolt lock, you’ve come to the right place. Whether you want to upgrade your security, replace a faulty lock, or just change the look of your door, knowing how to take out your Baldwin deadbolt is key.
Don’t worry if you’ve never done this before—this guide will walk you through each simple step. By the end, you’ll feel confident handling the job yourself without calling a locksmith. Keep reading, and you’ll unlock the secret to removing your Baldwin deadbolt quickly and easily.
Tools Needed
Removing a Baldwin deadbolt lock requires specific tools. Having the right tools makes the process smoother and faster. These tools help you avoid damage to the door and lock parts.
Gathering all tools before starting saves time and prevents frustration. Keep tools close by for easy access during the task.
Phillips Head Screwdriver
A Phillips head screwdriver is essential. It removes the screws holding the lock in place. Most Baldwin deadbolts use Phillips screws. Choose a screwdriver that fits the screws well to avoid stripping them.
Flathead Screwdriver
A flathead screwdriver helps pry parts gently. It can remove the lock’s faceplate or help release clips. Use it carefully to avoid scratching the door surface.
Allen Wrench (hex Key)
Some Baldwin deadbolt models use hex screws. An Allen wrench is needed to remove these screws. Make sure you have the right size for your lock.
Needle-nose Pliers
Needle-nose pliers assist in pulling out small parts. They help grab and hold tiny pins or clips inside the lock. These pliers give better control for delicate work.
Tape Or Marker
Use tape or a marker to mark screw positions. This helps during reassembly to keep screws in the right places. It prevents mistakes and saves time.
Credit: www.youtube.com
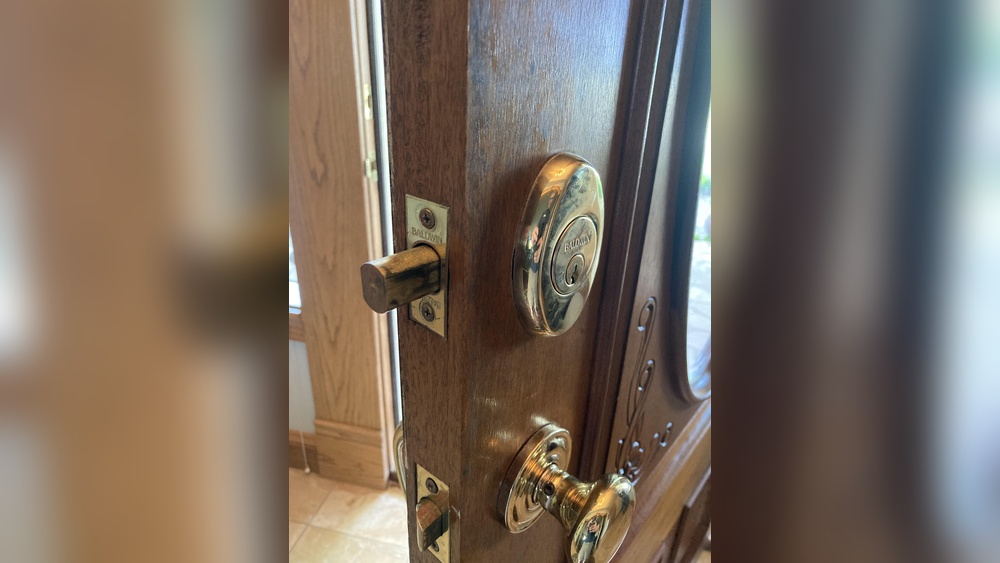
Locate The Screws
Removing a Baldwin deadbolt lock starts with locating the screws. These screws hold the lock parts firmly in place. Finding them helps you take the lock apart carefully.
Deadbolt locks have screws on the inside part of the door. These screws connect the exterior and interior sides of the lock. Knowing where to find them saves time and effort.
Identify The Interior Plate Screws
The first screws to find are on the interior plate. This plate covers the locking mechanism on the inside. Look closely around the edges for small screws.
Use a flashlight if the screws are hard to see. Usually, two or three screws hold this plate. These screws are the key to removing the lock.
Check For Hidden Screws
Some Baldwin deadbolt models hide screws under covers. These covers snap or slide off easily. Use a flat tool to remove the cover gently.
Hidden screws keep the lock secure and neat. Removing these screws allows you to separate the lock parts. Take care not to damage the cover.
Locate The Exterior Side Screws
After removing interior screws, look at the exterior side. The outside part of the lock may have visible screws. These screws attach the lock’s faceplate to the door.
Sometimes, these screws are inside the keyhole area. Use a small screwdriver to reach them. Removing these screws helps free the exterior lock piece.
Remove The Interior Knob
Removing the interior knob is the first step in taking out a Baldwin deadbolt lock. This part holds the lock mechanism inside your door. It must come off carefully to avoid damage. Follow simple steps to remove it safely and prepare for the next phase.
Locate The Set Screw
Look closely at the base of the interior knob. You will see a small screw holding it in place. This is the set screw. It keeps the knob attached to the spindle inside the door.
Use The Right Tool
Grab a screwdriver that fits the set screw. Usually, a flathead or Phillips screwdriver works best. Using the correct tool prevents stripping the screw head.
Loosen The Set Screw
Turn the screwdriver counterclockwise. Do this slowly and gently. Once the screw is loose, the knob will become free to move.
Pull the knob straight out from the door. It should slide off easily after loosening the screw. If it sticks, wiggle it slightly to loosen its grip.
Unscrew The Deadbolt
Unscrewing the deadbolt is the key first step to remove a Baldwin deadbolt lock. This step frees the lock from the door, making removal easier. You need the right tools and a little patience.
Start by locating the screws that hold the deadbolt. These screws keep the lock firmly attached to the door. Removing them carefully will prevent damage to the door or lock.
Gather The Necessary Tools
Use a screwdriver that fits the screws well. Usually, a Phillips head screwdriver works best. Avoid using tools that might strip the screws.
Locate The Screws On The Interior Side
Check the inside part of the door. The screws are often hidden behind the lock’s cover plate. Remove the cover gently if needed to see the screws clearly.
Remove The Screws Slowly And Carefully
Turn the screwdriver counterclockwise to loosen the screws. Keep a firm grip on the lock to stop it from falling. Take out all screws and store them safely.
Pull The Deadbolt Away From The Door
Once the screws are out, gently pull the deadbolt from the door. It should come off without much force. If it sticks, wiggle it slightly to loosen.
Take Out The Deadbolt Mechanism
Removing the deadbolt mechanism from a Baldwin lock is the next step after loosening the exterior parts. This process lets you take out the lock’s core and prepare for replacement or repair. The deadbolt mechanism fits inside the door’s edge and controls the locking bolt.
Handle the mechanism gently to avoid damage. Each part fits tightly, so careful steps ensure easy removal. Prepare your tools before starting.
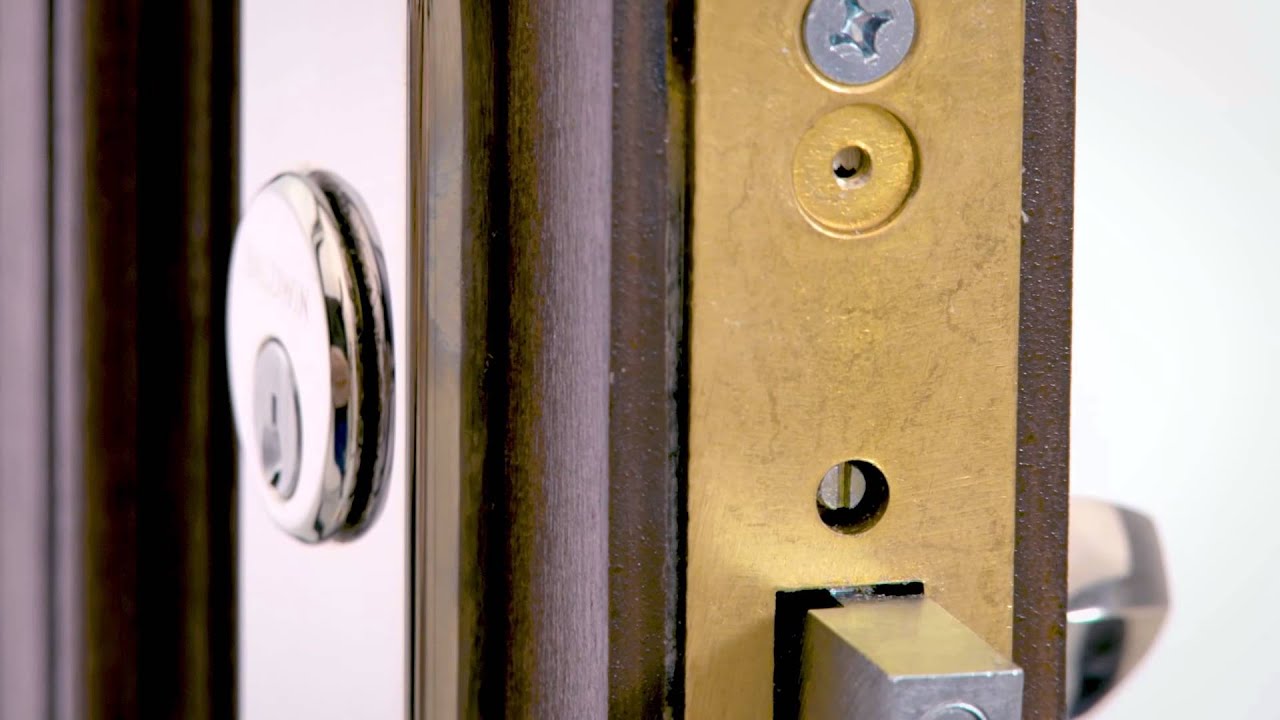
Locate The Deadbolt Mechanism
First, look at the door’s edge where the bolt slides in and out. You will see a rectangular plate held by screws. This plate covers the deadbolt mechanism. Unscrew these screws carefully and keep them safe.
Remove The Faceplate
After removing the screws, pull the faceplate away from the door edge. The deadbolt mechanism will be visible now. Sometimes, it may stick slightly. Use a flat tool to gently pry it loose if needed.
Slide Out The Deadbolt Mechanism
Hold the bolt and pull the mechanism straight out from the door edge. If it feels stuck, wiggle it gently while pulling. Avoid forcing it hard. The mechanism should slide out smoothly when free.
Check The Mechanism For Damage
Once removed, inspect the deadbolt mechanism for wear or damage. Look for broken parts or rust. This check helps decide if you can fix it or need a new one.

Credit: www.reddit.com
Handle Stubborn Locks
Removing a Baldwin deadbolt lock can be tricky when the lock sticks or does not turn smoothly. Stubborn locks need careful handling to avoid damage. Gentle techniques work best to loosen the mechanism without breaking parts.
Patience is key. Rushing can worsen the problem. Use simple tools and follow clear steps to ease the lock open. Two helpful methods are applying lubricant and using gentle force.
Use Lubricant
Spray a small amount of lubricant inside the lock. Choose a graphite or silicone-based spray for best results. Avoid oil-based lubricants; they can attract dirt and gum up the lock.
Allow the lubricant to settle for a few minutes. Then, try turning the lock with the key or thumbturn. Repeat the process if the lock still feels tight. Lubrication helps free stuck parts and smooths movement.
Apply Gentle Force
Use a screwdriver or a similar tool to apply gentle pressure. Turn the lock slowly while applying steady force. Avoid sudden or harsh movements to prevent damage.
If the lock resists, stop and add more lubricant. Let it work before trying again. Gentle force combined with lubrication often frees stubborn locks safely.
Replace Or Reinstall
After removing a Baldwin deadbolt lock, the next step is deciding whether to replace it or reinstall the same one. This choice depends on the lock’s condition and your security needs. Reinstalling saves time and money if the lock still works well. Replacing the lock gives you a chance to upgrade security or style.
Choosing A New Lock
Pick a lock that fits your door’s size and style. Check the lock’s durability and security ratings. Choose a brand known for quality and easy installation. Consider if you want a keyed or keyless deadbolt. Match the lock finish with your door handles for a uniform look.
Reassembly Tips
Keep all screws and parts organized during removal. Align the lock parts carefully before tightening screws. Test the lock function before securing it fully. Use a screwdriver that fits the screw heads to avoid damage. Make sure the latch moves smoothly and the lock turns easily.
Safety Precautions
Removing a Baldwin deadbolt lock requires care and attention. Safety is very important before starting the job. Taking the right precautions helps avoid accidents and damage to your door or lock. Follow these simple steps to work safely and confidently.
Wear Protective Gloves And Eyewear
Wear gloves to protect your hands from sharp edges. Small metal pieces or screws can cause cuts. Safety glasses keep your eyes safe from dust and flying debris. Protecting your body reduces the risk of injury during the removal process.
Turn Off Power Tools Before Adjusting
If you use power tools, unplug them before changing bits or settings. This stops accidental starts that can cause harm. Always check the tool is off before handling it. This keeps your work safe and smooth.
Keep The Work Area Clear
Clear the space around your door. Remove obstacles and clutter from the floor. A clean area prevents trips and falls. Make sure you have enough light to see every step clearly.
Handle Screws And Small Parts Carefully
Use a magnetic tray or container for screws and small parts. This stops them from getting lost or causing slips. Keep parts organized for easy reassembly or disposal. Careful handling saves time and hassle.

Credit: www.reddit.com
Frequently Asked Questions
How Do I Remove A Baldwin Deadbolt Lock?
First, remove the screws on the interior side of the lock. Then, pull both interior and exterior lock parts away from the door. Finally, unscrew and remove the latch from the door edge.
What Tools Are Needed To Remove Baldwin Deadbolt Locks?
You will need a Phillips screwdriver, a flathead screwdriver, and possibly an Allen wrench. These tools help you remove screws and pry off lock components safely.
Can I Remove A Baldwin Deadbolt Without Damaging The Door?
Yes, by carefully unscrewing all parts and gently pulling them off, you avoid door damage. Avoid forcing parts or using excessive force during removal.
How Long Does It Take To Remove A Baldwin Deadbolt?
Removing a Baldwin deadbolt typically takes 10 to 15 minutes. Time depends on your skill level and tool availability.
Conclusion
Removing a Baldwin deadbolt lock is simple with the right steps. Take your time and follow each part carefully. Using basic tools makes the job easier and safer. This process saves money and helps you understand your lock better. Remember to keep all pieces safe for reassembly or replacement.
Practice patience and stay focused to avoid mistakes. Now, you can confidently handle a Baldwin deadbolt lock removal yourself.