Have you ever tried to remove drywall anchors and ended up frustrated or worried about damaging your wall? If so, you’re not alone.
Taking drywall anchors out can seem tricky, but with the right steps, you can do it quickly and easily without leaving a big mess behind. You’ll discover simple, effective ways to remove drywall anchors and get your wall looking perfect again.
Keep reading to learn how to handle this common home task like a pro.
Tools You’ll Need
Removing drywall anchors requires the right tools. Having the correct tools makes the job easier and safer. Prepare all tools before starting to avoid interruptions.
Phillips Head Screwdriver
A Phillips head screwdriver helps to unscrew anchors from the wall. It fits most common anchor screws. Choose one that feels comfortable in your hand.
Pliers
Pliers grip the anchor firmly for pulling it out. Needle-nose pliers work best for tight spaces. Use steady pressure to avoid wall damage.
Utility Knife
A utility knife cuts around the anchor if needed. It helps to loosen paint or drywall paper. Be careful to avoid deep cuts.
Putty Knife
A putty knife lifts the anchor gently from the wall surface. It can also help to smooth the wall after removal. Choose a flexible, thin blade.
Drill With Screwdriver Bit
A drill speeds up anchor removal for stubborn screws. Use a screwdriver bit matching the screw head. Keep the drill speed low to avoid damage.

Credit: theturquoisehome.com
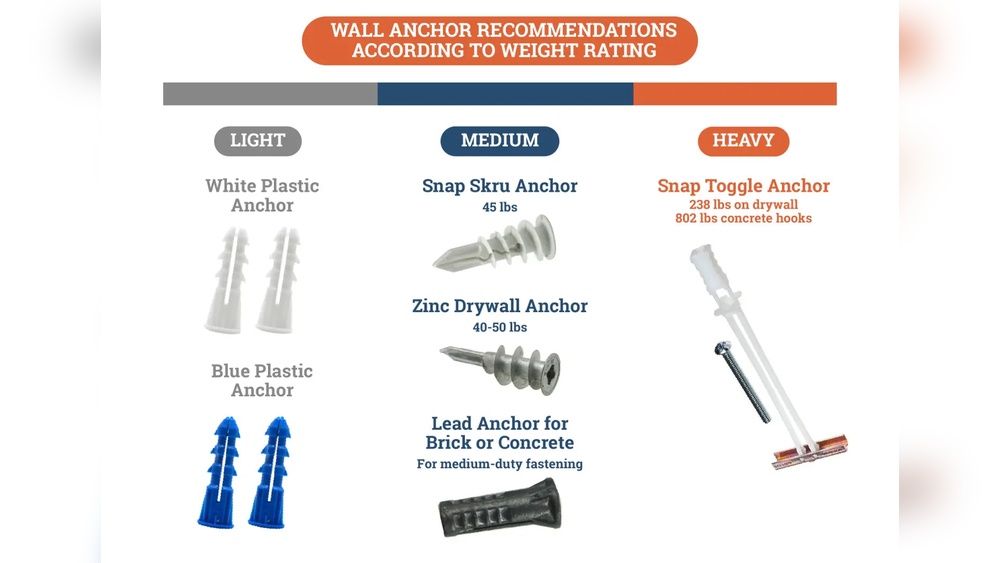
Types Of Drywall Anchors
Drywall anchors come in several types. Each type fits different wall needs and weight limits. Knowing these types helps you remove them correctly. It also prevents wall damage during removal.
Screw-in Anchors
Screw-in anchors look like large plastic screws. They twist into the drywall and hold tightly. These anchors are easy to remove by unscrewing them. They work well for medium-weight items.
Expansion Anchors
Expansion anchors open inside the wall when a screw is inserted. They create a strong hold by spreading out. Removing them can be tricky because they stay inside the wall. Sometimes, pushing or pulling is needed to take them out.
Toggle Bolts
Toggle bolts have metal wings that open behind the drywall. These wings hold heavy items firmly. To remove toggle bolts, you must first loosen the screw. Then, the wings can be pushed out or fall inside the wall cavity.
Plastic Push Anchors
Plastic push anchors are simple and cheap. You push them into a small hole in the drywall. They expand slightly to grip the wall. Removing them often requires pulling or pushing them through the wall.
Preparation Before Removal
Removing drywall anchors needs careful preparation. This step helps avoid damage to the wall and makes the process smoother. Taking time to prepare ensures safety and better results.
Gather Necessary Tools
Collect all tools before starting. Common tools include pliers, a screwdriver, and a putty knife. Having everything ready saves time and frustration.
Clear The Work Area
Remove furniture or decorations near the wall. This clears space for easy movement. It also protects your belongings from dust or damage.
Protect The Floor And Surroundings
Cover the floor with a drop cloth or old sheet. This catches debris and dust. It keeps the area clean and reduces cleanup time.
Turn Off Electricity If Needed
Check if the anchor is near electrical outlets or wiring. Switch off the power at the breaker if necessary. This prevents accidents during removal.
Examine The Type Of Anchor
Look closely at the anchor style. Different anchors need different removal methods. Identifying the type helps choose the right approach.
Removing Plastic Expansion Anchors
Plastic expansion anchors hold screws firmly in drywall. Removing them requires care to avoid wall damage. This guide shows easy steps to take out plastic anchors safely and cleanly.
Gather The Right Tools
Get pliers, a screwdriver, and a putty knife ready. These tools help loosen and pull out the plastic anchor. Prepare a small drill if the anchor is stuck.
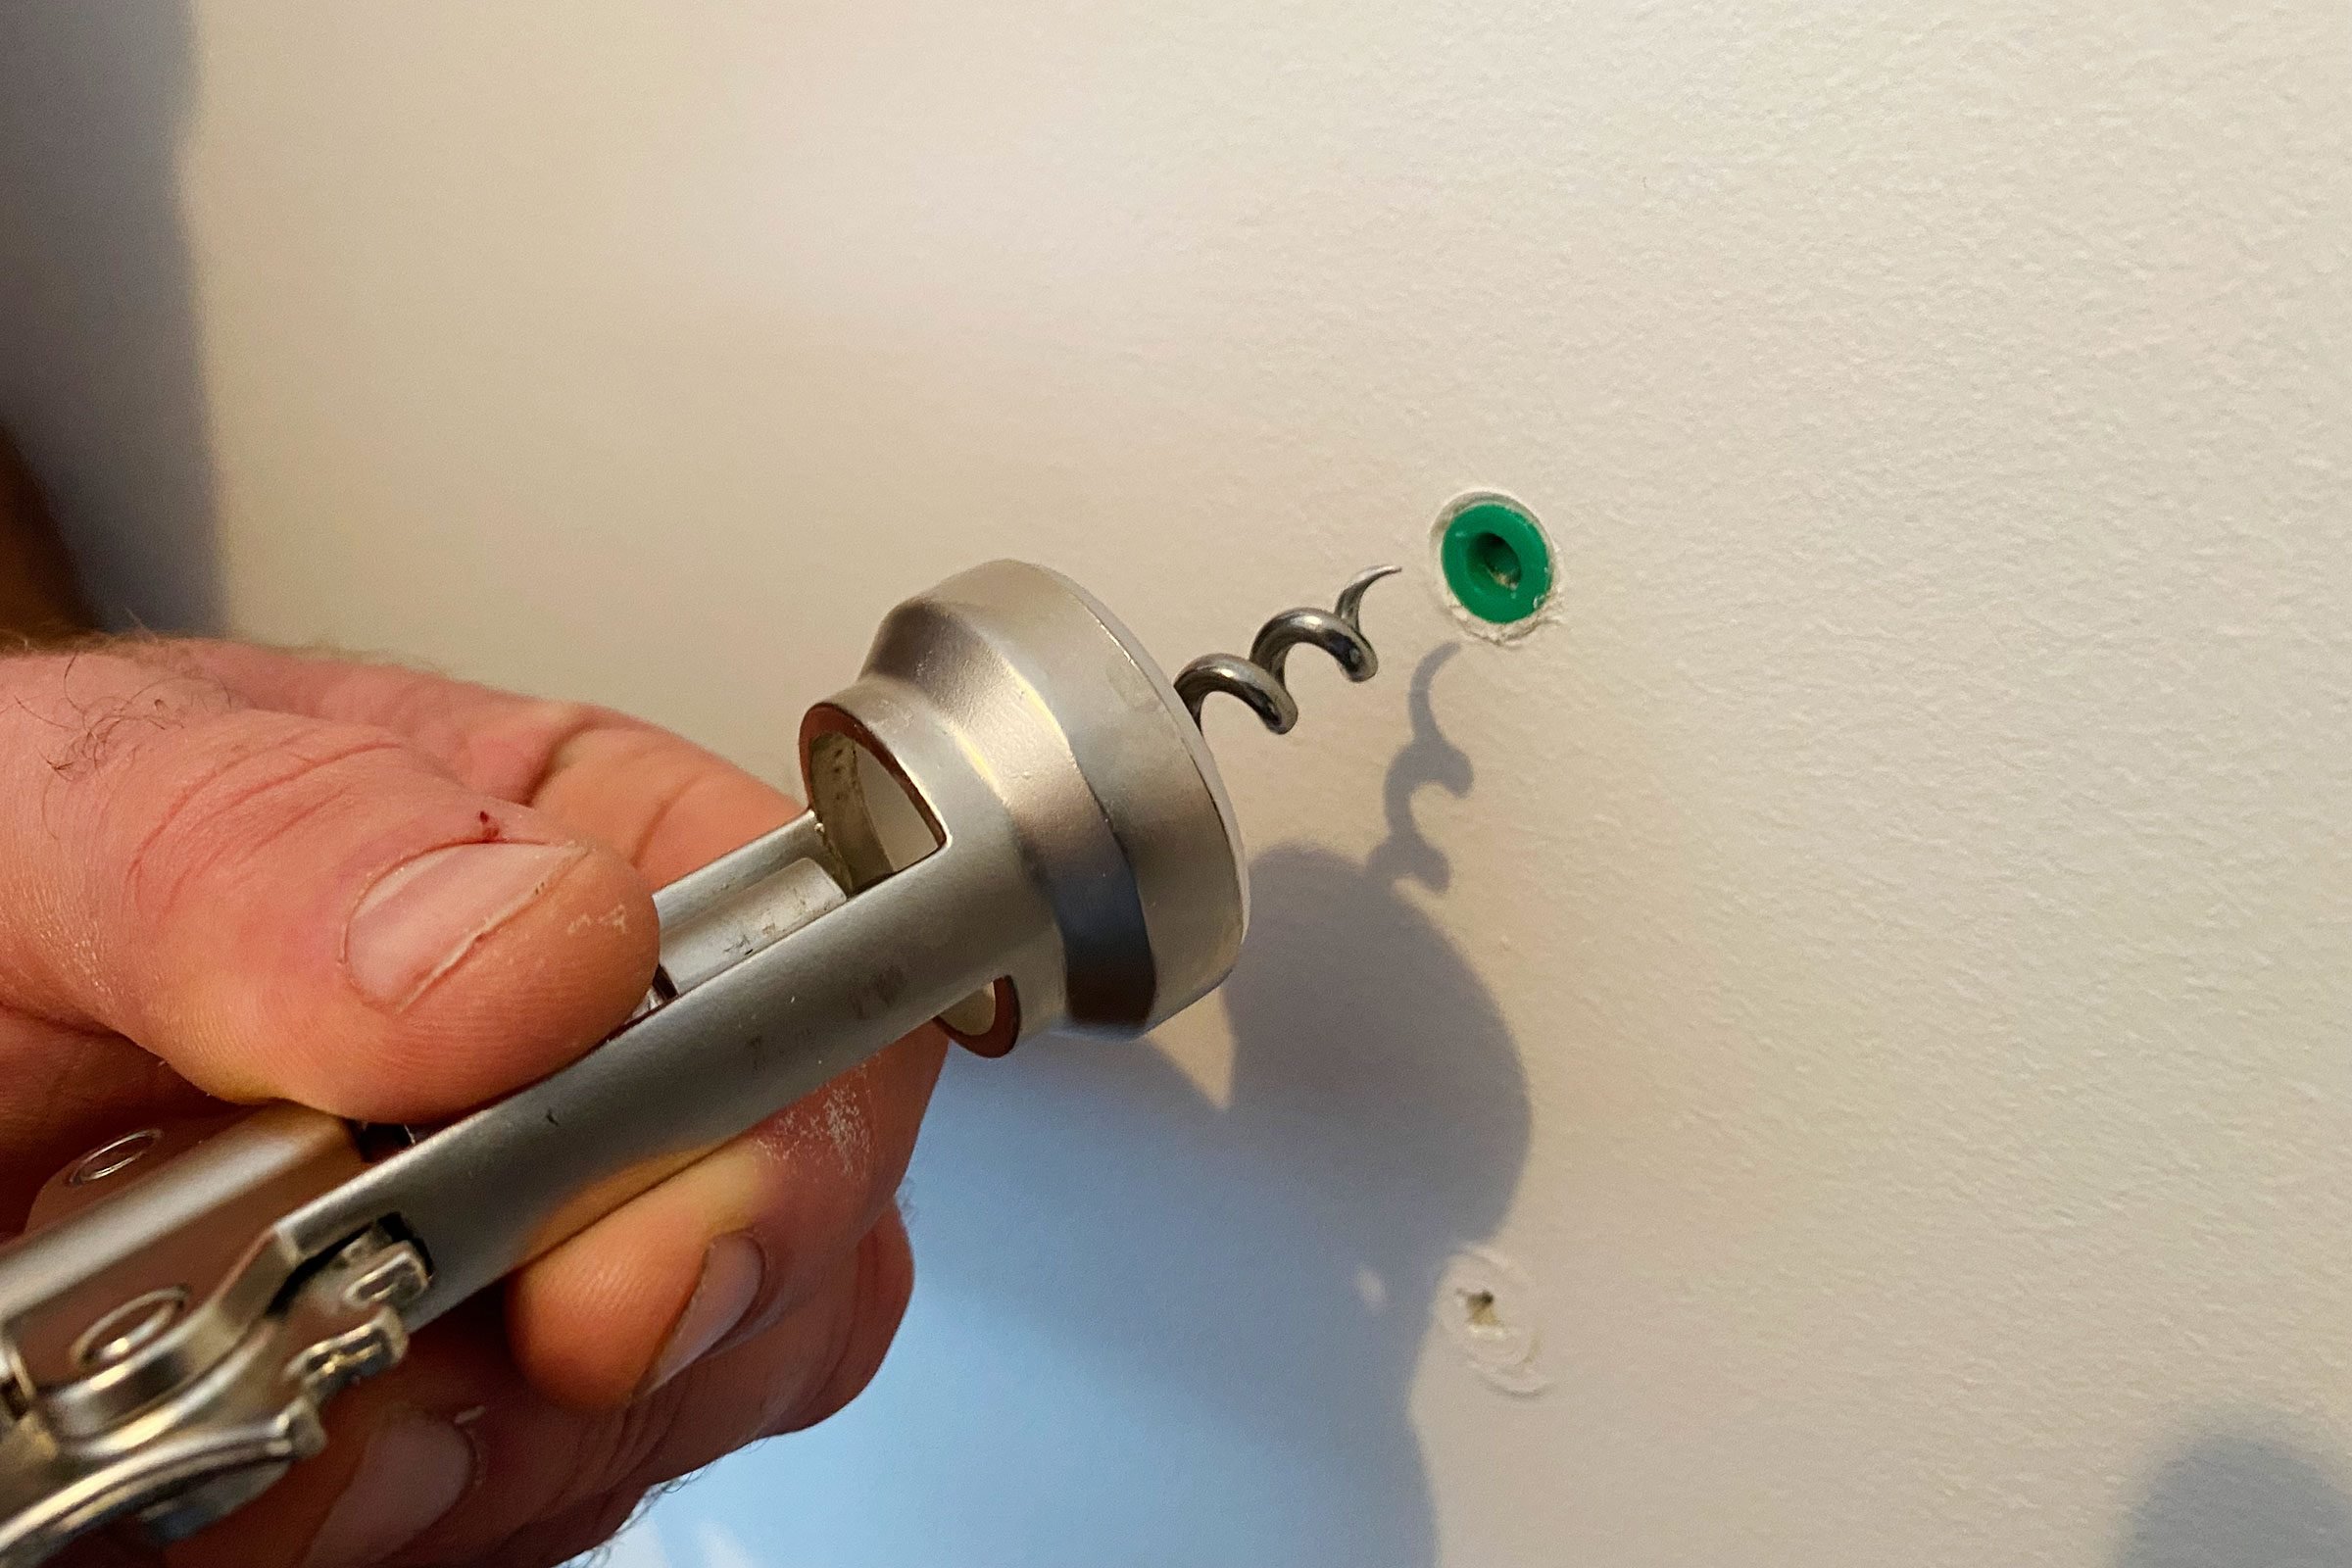
Try To Pull Out The Anchor
Use pliers to grip the anchor’s rim gently. Pull straight out without twisting too much. If it moves, keep pulling slowly. Avoid forceful yanks to protect the drywall.
Push The Anchor Inside The Wall
If pulling fails, push the anchor inside the drywall. Use a screwdriver or a narrow tool for this. Pushing it in creates space for patching later.
Drill Out The Anchor
Drill a hole in the center of the anchor. Use a drill bit slightly smaller than the anchor’s diameter. This breaks the anchor, making removal easier.
Remove Anchor Pieces
After drilling, use pliers to pull out anchor bits. Clean the hole by scraping edges with a putty knife. This makes the wall ready for repair.
Taking Out Threaded Drywall Anchors
Removing threaded drywall anchors is simple with the right tools. First, turn the anchor counterclockwise using pliers. If it won’t budge, push it gently into the wall and fill the hole afterward.
Understanding Threaded Drywall Anchors
Threaded drywall anchors are common for hanging items on walls. They screw directly into the drywall without a pre-drilled hole. This design holds weight better than simple plastic anchors. Removing them can be tricky but doable with the right steps.
Tools Needed For Removal
Gather a screwdriver that fits the anchor’s slot or cross. A pair of pliers helps for gripping. A utility knife may be needed to clean around the anchor. These tools make the process smooth and safe.
Steps To Remove Threaded Drywall Anchors
Start by turning the anchor counterclockwise with a screwdriver. Turn slowly to avoid damaging the wall. If it won’t turn, try gripping the anchor with pliers. Pull gently while twisting to loosen it. If the anchor breaks, push it inside the wall carefully.
Fixing The Wall After Removal
Fill the hole with spackling or wall filler. Use a putty knife to smooth the surface. Let it dry completely before sanding. After sanding, paint over the spot to match the wall. This restores the wall’s clean look.
Extracting Toggle Bolts Safely
Removing toggle bolts from drywall can be tricky. These anchors spread behind the wall, making them hard to pull out. Extracting toggle bolts safely requires care and the right steps. This prevents damage to your wall and keeps the area clean.
Prepare The Area And Tools
Clear the wall space around the toggle bolt. Have pliers, a screwdriver, and a drill ready. Use safety goggles to protect your eyes. Good lighting helps you see the bolt clearly. Proper tools make the process easier and safer.
Loosen The Bolt Carefully
Use a screwdriver to turn the bolt counterclockwise. Turn slowly to avoid stripping the screw head. If the bolt won’t turn, spray some lubricant. Wait a few minutes, then try again. Loosening the bolt first helps remove the toggle.
Push The Toggle Through The Wall
Once the bolt is loose, try pushing it inside the wall. The toggle wings will fold and slip into the cavity. This avoids pulling hard, which can tear drywall. If the toggle won’t push, use pliers to gently pull it out.
Patch The Hole After Removal
Toggle bolts leave large holes in drywall. Use joint compound or spackle to fill the hole. Smooth the surface with a putty knife. Let it dry fully before sanding. Paint the area to match your wall color.
Fixing Wall Damage After Removal
Removing drywall anchors carefully prevents extra wall damage. Gently pull or twist anchors out, then fill holes with spackle. Sand the area smooth before painting for a clean finish.
Assessing The Damage
After removing drywall anchors, the wall often has holes or rough spots. Check the size and depth of these damages. Small holes need simple filling, while bigger holes require extra care. Understanding the damage helps you choose the right repair method.
Preparing The Surface
Clear away any loose debris or paint around the hole. Use sandpaper to smooth the edges gently. A clean surface helps the filler stick better. Wipe the area with a damp cloth to remove dust.
Filling The Holes
Use spackle or wall putty to fill the holes. Apply it with a putty knife, pressing firmly to fill the space. Smooth the surface to match the wall. Let it dry fully before moving on.
Sanding For A Smooth Finish
Once dry, sand the patched area lightly. Use fine-grit sandpaper to blend the patch with the wall. Sand until the surface feels even and smooth. This step ensures the repair looks natural.
Painting The Repaired Spot
Apply primer to the patched area to seal it. Once the primer dries, paint over it with matching wall paint. Use a small brush for precision. Multiple coats may be needed for full coverage.
Credit: www.familyhandyman.com
Tips For Preventing Wall Damage
Removing drywall anchors can cause damage to your wall. Taking simple steps helps keep your walls smooth and clean. These tips reduce holes, cracks, and crumbles in the drywall. Follow these ideas to protect your wall’s surface during anchor removal.
Use The Right Tools For Removal
Choose tools that fit the anchor type. Needle-nose pliers work well for plastic anchors. A screwdriver can push out threaded anchors carefully. Avoid forcing tools that might tear the drywall.
Apply Gentle Pressure
Pull or twist anchors slowly and softly. Quick or strong pulls can break the wall surface. Steady, gentle pressure loosens anchors without cracking the drywall.
Fill Small Holes Immediately
Patch holes soon after anchor removal. Use lightweight spackle or wall filler. Filling holes quickly stops damage from spreading or worsening.
Sand And Smooth The Wall Surface
After the filler dries, sand the area lightly. Smooth walls help paint stick better. Use fine-grit sandpaper to avoid new dents.
Work In Good Lighting
Bright light reveals small cracks and dents. Spot damage early to fix it fast. A clear view helps you protect the wall better.
:max_bytes(150000):strip_icc()/how-to-remove-drywall-anchors-7562285-02-c01abbfe63374ad3a7bc1e52d0c15bb2.JPG)
Credit: www.thespruce.com
Frequently Asked Questions
How Do I Safely Remove Drywall Anchors?
To safely remove drywall anchors, first unscrew any attached screws. Then, use pliers to gently pull the anchor out without damaging the wall. If the anchor is stubborn, push it through the drywall and fill the hole afterward.
What Tools Are Needed To Take Out Drywall Anchors?
You typically need a screwdriver, pliers, and sometimes a drill. A putty knife and spackle are useful for wall repair after removal. These tools make the process smooth and help minimize wall damage.
Can Drywall Anchors Be Reused After Removal?
Most drywall anchors cannot be reused once removed. They often lose grip or get damaged during extraction. For secure mounting, use new anchors to ensure stability and safety.
How To Fix Holes After Removing Drywall Anchors?
Fill holes with spackle or joint compound using a putty knife. Let it dry, then sand smooth. Finally, repaint the area to restore the wall’s appearance seamlessly.
Conclusion
Removing drywall anchors does not have to be hard. Use simple tools and take your time. Pull, twist, or push the anchors carefully out. Repair small holes with spackle or putty afterward. This keeps your wall smooth and clean. You can reuse the wall space for new anchors.
Practice makes the process easier and faster. Keep your walls strong and looking good. Now, you know how to handle drywall anchors safely.