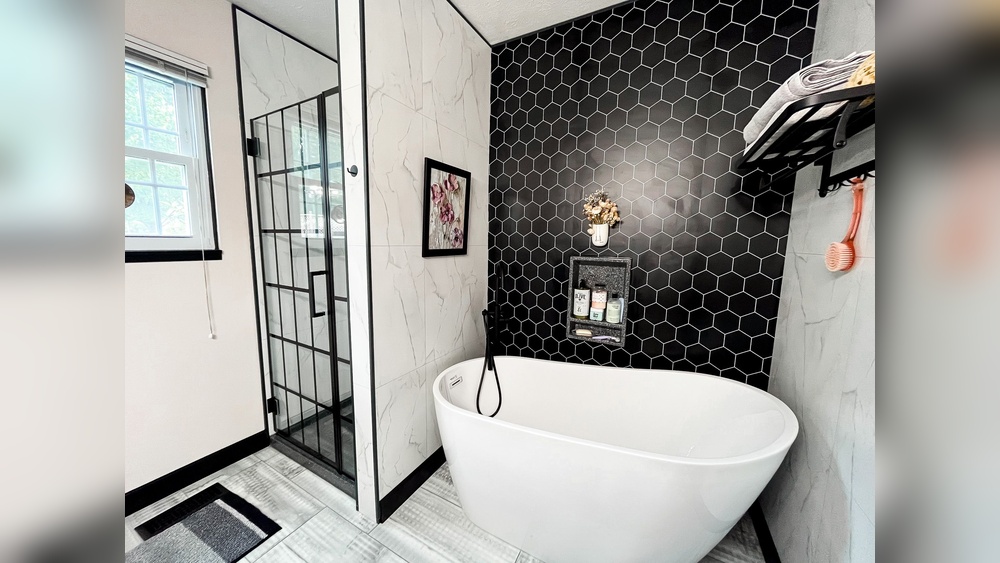
Are you ready to transform your bathroom with a stunning anchor wall bath tub? Building one yourself might sound tricky, but with the right steps, you can create a beautiful, sturdy feature that adds both style and function to your space.
Imagine relaxing in a tub that you built with your own hands—tailored exactly to your taste and needs. In this guide, you’ll find clear, simple instructions to help you build your anchor wall bath tub confidently and efficiently. Keep reading, and by the end, you’ll be ready to start your project and enjoy a bathroom upgrade that truly stands out.

Credit: www.youtube.com
Choosing The Right Location
Choosing the right location for your anchor wall bath tub is very important. It affects how the tub looks and works in your space. A well-chosen spot makes installation easier and ensures long-lasting use. Consider space, plumbing, and structure carefully before you start.
Assessing Space Requirements
Measure the area where you want to place the bath tub. Leave room for movement around the tub. Make sure the space fits the tub size comfortably. Check for doors, windows, and other fixtures nearby. This helps to avoid tight spots or awkward placements.
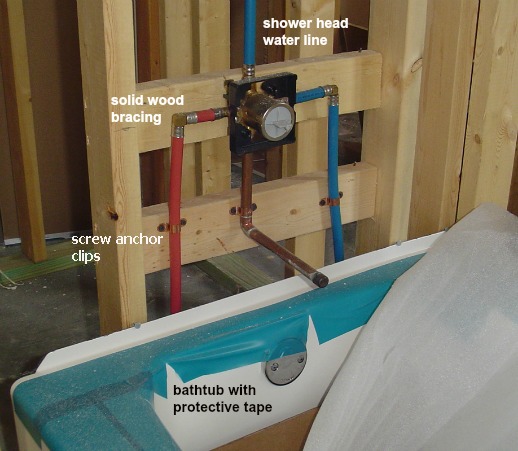
Considering Plumbing Access
Place the tub near existing water and drain lines. This reduces plumbing work and cost. Easy access to plumbing points helps with maintenance later. Avoid locations far from pipes to prevent leaks or damage. Plan the plumbing layout before finalizing the tub spot.
Ensuring Structural Support
Check the floor strength where the tub will sit. Anchor wall tubs can be heavy when full of water. Make sure the floor can hold the weight safely. Reinforce the floor if needed with extra support. This prevents damage and keeps your bath tub secure.

Credit: www.youtube.com
Gathering Materials And Tools
Building an anchor wall bath tub starts with gathering the right materials and tools. Having everything ready helps the project go smoothly. It also saves time and avoids interruptions. This section guides you through selecting components, tools, and safety gear needed for the job.
Selecting Anchor Wall Components
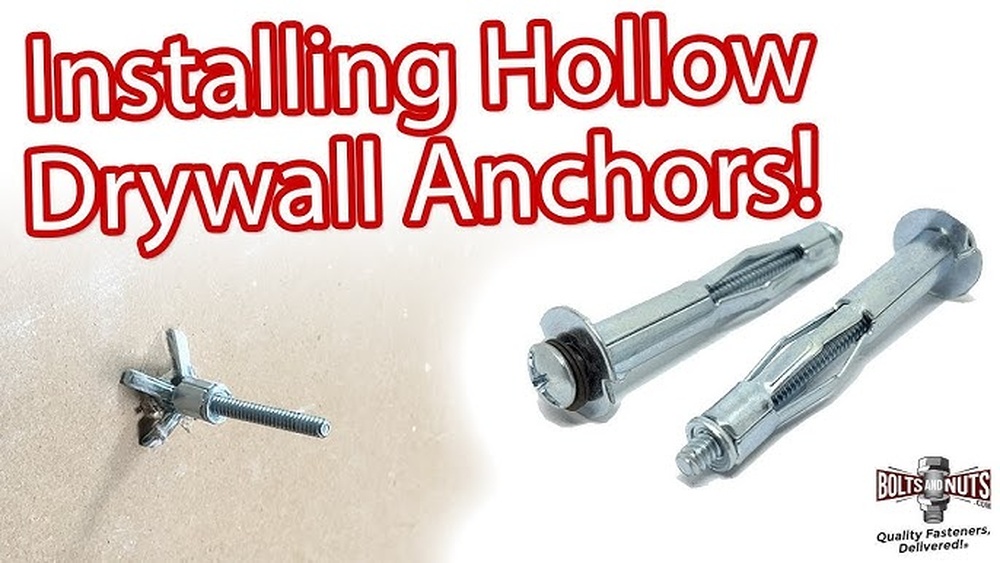
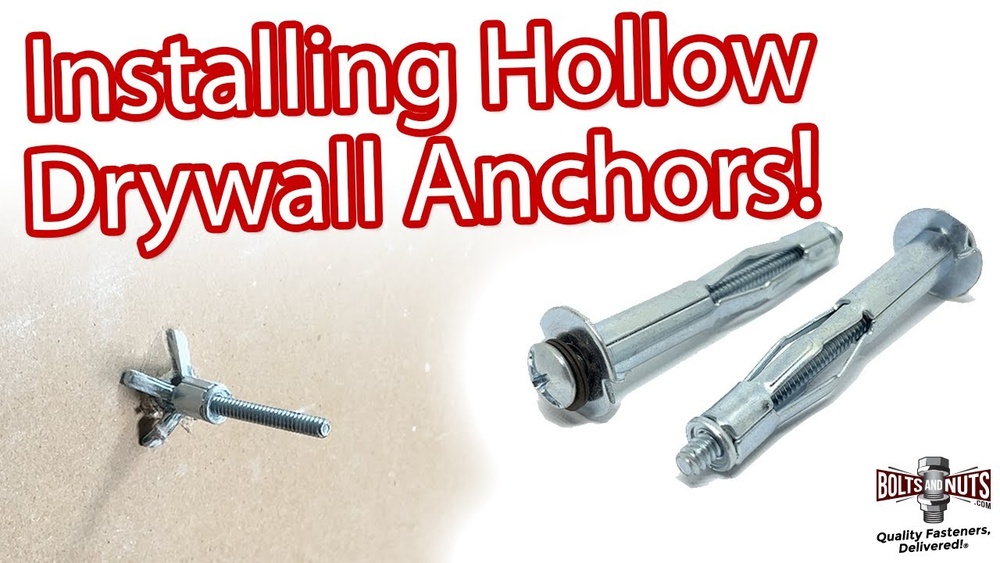
Choose durable anchor wall parts designed for bathtubs. Use strong metal anchors or brackets that support heavy weight. Buy waterproof backer boards to protect walls from moisture. Select screws and fasteners that resist rust. Ensure all materials fit your bathtub size and shape.
Essential Tools Checklist
Prepare basic tools before starting the build. You will need a drill for making holes. A screwdriver helps to fasten screws tightly. Use a level to keep the wall straight. A measuring tape ensures accurate dimensions. Have a hammer for securing anchors firmly. Keep a utility knife handy for cutting boards.
Safety Equipment
Protect yourself with safety gear during construction. Wear gloves to avoid cuts and scrapes. Safety glasses shield your eyes from dust and debris. Use a dust mask if cutting materials creates particles. Wear sturdy shoes to protect your feet. Keep a first aid kit nearby for emergencies.
Preparing The Site
Preparing the site is a key step in building an anchor wall bathtub. This stage sets the base for a strong, lasting structure. Proper site preparation helps avoid problems later. It makes the installation smoother and safer.
Clearing The Area
Start by removing all objects near the installation spot. Clear debris, plants, and loose soil. Make sure the area is flat and open. This space should be easy to work in. A clean area helps prevent accidents and damage.
Measuring And Marking
Measure the space carefully using a tape measure. Mark the exact spot for the tub and wall anchors. Use spray paint or chalk for clear lines. Double-check all measurements before moving on. Accurate marks guide your work and keep it precise.
Surface Preparation
Check the ground surface for firmness and evenness. Level the soil or concrete if needed. Compact soft areas to support the weight of the tub. Remove any loose stones or dirt. A solid surface prevents shifting or sinking over time.
Installing The Anchor Wall Frame
Installing the anchor wall frame is a key step in building a strong and safe bath tub wall. This frame supports the tub and holds it firmly in place. Proper installation ensures the wall stays stable and prevents future damage. Follow each step carefully to get the best results.
Positioning The Frame
Start by placing the frame in the exact spot where the tub will sit. Make sure it fits well against the wall studs. Leave enough space for plumbing and tub edges. Check the frame size matches the tub dimensions. Position it so the frame supports the tub evenly.
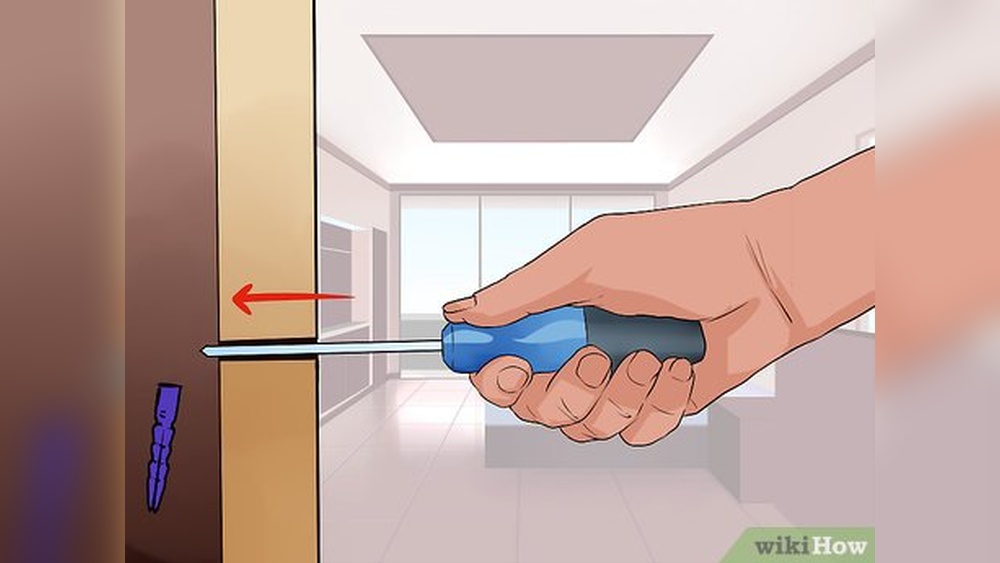
Securing Anchors
Use strong anchors to fix the frame to the wall. Drill holes into the wall studs at the frame points. Insert anchors that fit tightly and hold well. Attach the frame with screws or bolts through the anchors. Tighten them to make the frame solid and steady. Avoid loose connections that could weaken the frame.
Checking Alignment And Level
Use a level tool to check the frame’s alignment. The frame must be perfectly horizontal and vertical. Adjust the frame by loosening screws and moving it slightly. Double-check the frame’s position on all sides. Proper alignment keeps the tub balanced and safe. Take time here to avoid future problems.
Mounting The Bath Tub
Mounting the bath tub is a key step in building an anchor wall bath tub. It needs care and precision. Proper mounting ensures the tub stays secure and lasts long.
Follow these steps to place and fix the tub correctly. Each part is important for safety and durability.
Lifting And Placing The Tub
Lift the tub carefully using strong grips. Avoid lifting by the edges to prevent damage. Get help if the tub is heavy or large. Place the tub gently onto the frame. Check that it sits evenly and fits the space. Adjust the position before fastening.
Fastening The Tub To The Frame
Use screws or bolts to secure the tub to the frame. Make sure to use the right size and type for your frame. Tighten them firmly but do not over-tighten. Over-tightening can crack the tub or damage the frame. Check that the tub does not move after fastening.
Sealing And Waterproofing
Apply sealant around the edges of the tub. This stops water from leaking under the tub. Use waterproof sealant designed for bathroom use. Smooth the sealant with a finger or tool for a neat finish. Let the sealant dry fully before using the tub. Proper sealing helps avoid water damage and mold growth.
Finishing Touches
Finishing touches give your anchor wall bath tub a polished, complete look. These final steps ensure your tub is both beautiful and functional. Pay close attention to detail during this stage. It helps avoid problems later and enhances your bathroom’s style.
Installing Surround Panels
Surround panels protect walls and hide plumbing. Choose panels that match your bathroom’s style and color. Cut panels to fit precisely around the tub edges. Secure them firmly with waterproof adhesive or screws. Seal all joints with waterproof caulk. This prevents water from seeping behind the panels.
Adding Fixtures And Fittings
Fixtures include taps, showerheads, and drains. Pick fixtures that suit your tub’s design and water system. Attach fixtures carefully to avoid leaks. Tighten screws and connectors firmly but not too tight. Use plumber’s tape on threaded connections. It stops water leaks and keeps fittings secure.
Testing For Stability And Leaks
Check the tub’s stability by pressing gently along edges. The tub should not move or wobble. Fill the tub with water and watch for leaks. Inspect all fixtures and joints carefully. Fix any leaks immediately to avoid damage. This test ensures your bath tub is safe and ready to use.
Maintenance Tips For Longevity
Keeping an anchor wall bath tub in good shape takes some care. Regular maintenance helps the tub last longer and stay safe. Small tasks done often stop big problems later. Follow these simple tips to keep your tub strong and clean.
Regular Cleaning
Clean the tub surface with a soft cloth. Use mild soap and warm water. Avoid harsh cleaners that can damage the finish. Rinse well to remove all soap. Dry the tub to stop water spots. Clean at least once a week for best results.
Inspecting Anchors And Seals
Check the anchors that hold the tub in place. Look for rust, looseness, or cracks. Tighten any loose anchors carefully. Examine seals around the tub edges. Look for gaps or wear that could cause leaks. Fix or replace damaged seals quickly to prevent water damage.
Addressing Wear And Damage
Watch for chips, cracks, or stains on the tub. Small cracks can grow if not fixed. Use a repair kit made for your tub type. Replace parts that show too much wear. Keep the tub surface smooth to avoid injury and leaks. Regular care saves money on big repairs.
Credit: www.build-my-own-home.com
Frequently Asked Questions
What Materials Are Needed To Build An Anchor Wall Bathtub?
To build an anchor wall bathtub, you need cement, bricks, waterproofing materials, anchors, sealant, and tiles. These materials ensure durability and water resistance. Proper tools like trowels, levels, and drills are also essential for accurate construction.
How Do You Ensure Waterproofing In An Anchor Wall Bathtub?
Waterproofing is achieved by applying a waterproof membrane or sealant on the wall and tub surfaces. Use quality waterproofing products to prevent leaks and mold growth. Proper sealing around joints and edges is crucial for lasting protection.
Can I Build An Anchor Wall Bathtub Myself?
Yes, with basic masonry and plumbing skills, you can build an anchor wall bathtub. Follow precise measurements, waterproofing steps, and allow proper curing time. For complex plumbing, consulting a professional is recommended to avoid leaks.
How Long Does It Take To Build An Anchor Wall Bathtub?
Building an anchor wall bathtub typically takes 3 to 5 days. This includes wall construction, waterproofing, tile installation, and curing time. Drying time for waterproof layers is essential for a durable finish.
Conclusion
Building an anchor wall bathtub takes careful steps and patience. Follow each step to ensure strong support. Use the right materials and tools for safety. Take time to measure and level everything well. A sturdy anchor wall keeps your bathtub secure for years.
Enjoy your new bath space with confidence. Small effort leads to a big difference. Start your project with clear plans and focus. Success feels great after hard work. Keep these tips handy for future repairs or upgrades.