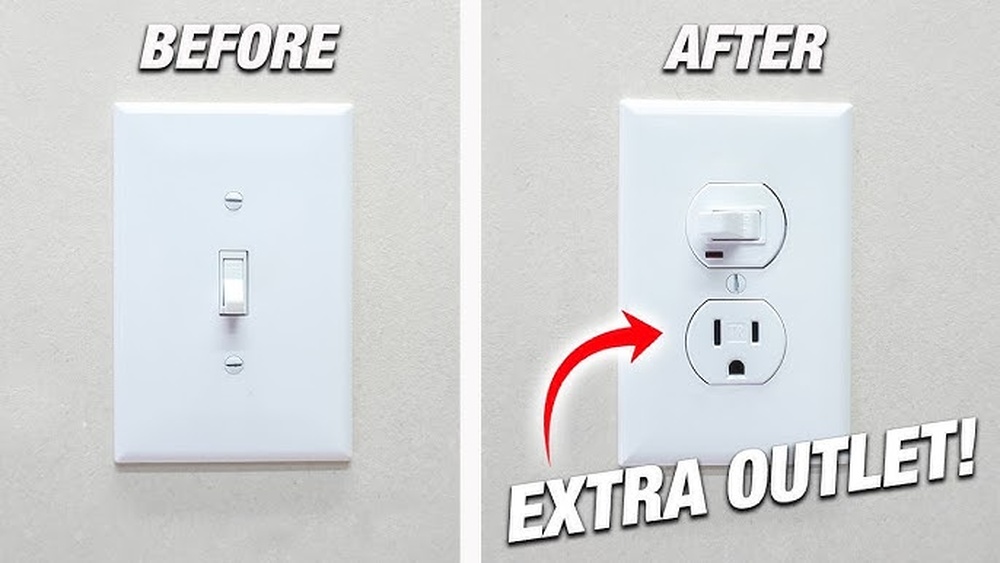
Have you ever looked at a light switch and thought, “I wish this was an outlet instead”? Maybe you need more places to plug in your devices, or you want to make your space more functional without adding extra wiring.
Converting a light switch into an outlet might sound tricky, but with the right steps, you can do it safely and easily. You’ll learn exactly how to make this simple change, saving you time and money. Ready to transform your space?
Let’s get started!
Credit: mrelectric.com
Tools And Materials Needed
Converting a light switch into an outlet is a simple project. Having the right tools and materials makes the job safer and easier. Prepare all items before starting to save time and avoid mistakes.
Basic Electrical Tools
You need a screwdriver set for removing and installing screws. A voltage tester helps check if the power is off. Wire strippers remove insulation from wires without damage. Needle-nose pliers assist in bending and shaping wires.
Materials For The Outlet
Choose a new electrical outlet that fits your needs. Use a faceplate to cover the outlet safely. Electrical tape helps secure wire connections and insulates exposed wires. Wire nuts are needed to join wires securely.
Safety Equipment
Wear insulated gloves to protect against electric shocks. Safety glasses guard your eyes from sparks or debris. A flashlight or headlamp helps see inside dark electrical boxes. Use a sturdy ladder if the switch is high on the wall.
Safety Precautions
Working with electricity needs care. Safety is the first step before changing a light switch into an outlet. Ignoring safety rules can cause shocks or fires. Follow each precaution to protect yourself and your home.
Take time to prepare. A safe workspace and right tools reduce risks. Never rush electrical work.
Turn Off Power At The Circuit Breaker
Always switch off power at the main breaker. Do not trust the light switch off position alone. Use a tester to confirm no power flows to the wires. Safety starts with no electricity in the wires.
Use A Voltage Tester
Check wires with a voltage tester before touching. This tool shows if wires are live or safe. Test all wires in the box. Do not guess. Confirm zero voltage every time.
Wear Safety Gear
Wear insulated gloves to protect hands. Safety glasses prevent sparks or debris from reaching eyes. Use tools with insulated handles. Protect yourself from unexpected accidents.
Follow Electrical Codes
Check local electrical codes before starting. Codes help ensure safe and legal work. Use correct wire types and outlet ratings. Meet all code requirements to avoid hazards and fines.
Work In A Dry Area
Keep the work area dry and clean. Water increases risk of electric shock. Avoid working in damp or wet conditions. Dry hands and tools keep you safe.
Turn Off The Power
Turning off the power is the first and most important step in this project. Working with electricity can be dangerous. It is essential to ensure no power flows to the switch you want to convert.
Before starting, locate your home’s main electrical panel. This panel controls the power to all circuits in your house. Turning off the correct breaker will stop electricity safely.
Find The Correct Circuit Breaker
Look for the breaker that controls the light switch you want to change. It is often labeled on the panel. If not labeled, you can test each switch to find the right one.
Switch Off The Breaker
Flip the correct breaker to the “off” position. This action cuts power to the switch and outlet box. Make sure it stays off during the entire work.
Double-check Power Is Off
Use a voltage tester or a simple lamp to verify no power is flowing. Test the light switch and the wires in the box. Confirming no electricity ensures your safety.

Credit: diy.stackexchange.com
Remove The Light Switch
Removing the light switch is the first step to convert it into an outlet. This process needs careful handling of electrical parts. Safety is the top priority before starting.
Switch off the power at the breaker box to avoid shocks. Confirm no power flows by testing the switch with a voltage tester. Only start when the area is safe.
Gather Necessary Tools
Prepare a screwdriver, voltage tester, and wire nuts. These tools make the removal easier and safer. Have everything ready before you begin.
Remove The Switch Cover Plate
Use the screwdriver to unscrew the cover plate. Take off the plate gently to avoid damage. Set the screws and plate aside safely.
Unscrew The Light Switch
Loosen the screws holding the switch to the electrical box. Pull the switch out slowly to access wiring. Keep the switch steady to prevent wire damage.
Test Wires For Power
Use the voltage tester on each wire to check for electricity. Confirm no wires carry current before touching them. Safety checks avoid accidents.
Disconnect The Switch Wires
Loosen screws or remove wire nuts holding wires to the switch. Carefully separate wires without pulling them hard. Label wires if needed for easy re-connection.
Check The Wiring Setup
Start by turning off the power to the switch at the breaker box. Identify the wires connected to the switch and note their positions. Confirm the wiring supports an outlet before proceeding with the conversion.
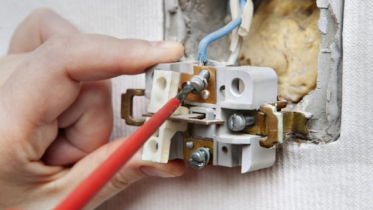
Understanding The Existing Wiring
Start by turning off the power at the circuit breaker. Safety first. Remove the switch cover plate carefully. Use a voltage tester to confirm no power is present. Look inside the switch box to see the wires. Usually, you will find a black (hot), white (neutral), and green or bare copper (ground) wire. Note how these wires connect to the switch. This step helps you understand the current setup.
Identify The Type Of Wiring
Some switches control a single circuit, others may be part of a complex setup. Check if your switch has a neutral wire. Many older homes lack a neutral in switch boxes. Without a neutral, converting to an outlet may require extra work. Look for wire colors and their connections. This information decides how to proceed safely.
Check For Wire Damage Or Wear
Inspect all wires for cracks or frays. Damaged wires can cause shorts or fires. Replace any worn or exposed wires before continuing. A clean, intact wiring setup ensures safe conversion. Take time here to avoid future hazards.
Confirm Ground Wire Connection
The ground wire is essential for safety. Make sure it is connected to the metal box or outlet grounding screw. If no ground wire exists, consult an electrician. Proper grounding protects against electric shocks and fires.
Modify The Wiring For Outlet
Modifying the wiring is the key step to turn a light switch into an outlet. This change lets you use the space for plugging in devices. Safety is important. Make sure power is off before starting any work. Follow these steps carefully for a smooth process.
Find the circuit breaker that controls the switch. Flip it to the off position. Use a voltage tester to confirm no power flows. This prevents shocks while working.
Remove The Switch
Unscrew the switch cover plate. Then, remove the screws holding the switch. Gently pull the switch out from the wall box. Keep track of the wires connected to it.
Identify The Wires
Look for the hot wire, usually black or red. The white wire is neutral. The green or bare wire is the ground. Note how these wires connect to the switch.
Disconnect The Switch Wires
Carefully loosen the screws on the switch terminals. Remove the wires from the switch. Avoid letting wires touch each other or the box.
Connect Wires To The Outlet
Attach the hot wire to the brass terminal on the outlet. Connect the neutral wire to the silver terminal. Attach the ground wire to the green terminal.
Secure The Outlet
Push the wires gently into the wall box. Screw the outlet into place firmly. Replace the outlet cover plate to finish the setup.
Install The Outlet
Installing the outlet is the key step in converting a light switch into a usable power source. This part requires careful handling to ensure safety and proper function. Follow each step closely for a smooth installation.
Turn Off Power At The Circuit Breaker
Safety first. Switch off the power to the circuit you will work on. Use a tester to confirm no electricity flows to the switch. This prevents electric shock during installation.
Unscrew the switch cover plate. Then, take out the screws holding the switch in place. Carefully pull the switch from the wall box to expose the wires.
Connect Wires To The Outlet
Identify the hot, neutral, and ground wires. Attach the hot wire to the brass terminal on the outlet. Connect the neutral wire to the silver terminal. Secure the ground wire to the green terminal.
Secure The Outlet In The Wall Box
Push the wires back into the box carefully. Screw the outlet into the box firmly. Make sure it sits flush with the wall for a clean look.
Attach The Outlet Cover Plate
Place the cover plate over the outlet. Screw it tightly but avoid over-tightening. This step finishes the installation and protects the wiring.
Restore Power And Test The Outlet
Turn the circuit breaker back on. Plug a device or use a tester to check the outlet. Confirm power flows correctly and the outlet works safely.
Test The New Outlet
Testing the new outlet is a key step after converting a light switch. It confirms the outlet works safely and correctly. This step helps avoid electrical problems later. You will need a few simple tools to test the outlet properly.
Use A Voltage Tester
First, turn the power back on at the breaker. Use a voltage tester to check the outlet slots. The tester should light up or beep if power is present. Test both the hot and neutral slots for voltage. This confirms the outlet is live and wired properly.
Check The Outlet Polarity
Correct polarity means the hot and neutral wires are in the right slots. Use a plug-in outlet tester for this. It will show if the wiring is reversed or correct. Proper polarity ensures the outlet is safe to use.
Test The Ground Connection
Grounding protects against electrical shocks. Use the outlet tester to check the ground wire. It will indicate if the ground is connected or missing. A grounded outlet is important for safety.
Plug In A Small Device
Finally, plug in a small device like a lamp or phone charger. The device should turn on without flickering. This shows the outlet delivers power steadily. It is the last check to confirm the conversion worked well.
Tips For Compliance With Electrical Codes
Converting a light switch into an outlet requires following electrical codes carefully. These rules keep your home safe and prevent electrical problems. Ignoring codes can cause fires or damage. Always check local regulations before starting work.
Understanding basic code requirements helps you plan the project right. Use proper materials and tools. Double-check every step to meet safety standards. This section shares important tips for compliance with electrical codes.
Use Correct Wiring And Components
Choose wires that match the outlet’s amperage and voltage. Use wires with proper insulation and size. Select outlets rated for your circuit load. Avoid mixing different wire types in the same box.
Install Ground Fault Circuit Interrupters (gfcis)
GFCI outlets protect against electric shock. Use GFCIs near water sources like kitchens and bathrooms. Check code requirements for GFCI placement. Test the GFCI after installation to ensure it works properly.
Maintain Proper Box Size And Outlet Spacing
Use a box large enough to hold wires and devices safely. Overcrowded boxes can cause overheating. Follow rules for outlet spacing on walls. Keep outlets accessible and not blocked by furniture.
Turn Off Power Before Starting Work
Always switch off the circuit breaker before changing wiring. Use a voltage tester to confirm power is off. Never work on live wires. Safety first to avoid electric shocks or injuries.
Label Circuits And Update Electrical Panel
Label new outlets on your electrical panel clearly. Keep a map of circuits for future reference. Update your panel if adding many new outlets. Proper labeling helps with maintenance and repairs later.
Troubleshooting Common Issues
Converting a light switch into an outlet is useful but can come with some problems. Troubleshooting these issues helps ensure safety and function. Many common problems arise from wiring mistakes or incompatible parts. Understanding these issues saves time and frustration.
Start by checking the wiring setup carefully. Small errors often cause big problems. Proper tools and careful inspection make a difference. Read each step slowly to find easy fixes.
Check For Power Supply Issues
Confirm power is off before starting any work. Use a tester to check voltage at the box. Sometimes power might not reach the switch box. This stops the outlet from working. Make sure the circuit breaker is on and not tripped.
Verify Correct Wiring Connections
Wires must match the outlet’s terminals properly. The hot wire usually connects to the brass screw. The neutral wire goes to the silver screw. Ground wire must be attached to the green screw. Loose or swapped wires cause failure or shock risks.
Test The Outlet For Functionality
Use a plug-in tester to check the outlet. It shows wiring errors or no power. Try plugging in a small device to confirm power. No response means double-check wiring or power supply. Replace the outlet if damage is visible.
Ensure Proper Switch Box Size
The box must be large enough for an outlet. Some switch boxes are too small. Overcrowding wires causes overheating or shorts. Use a box rated for outlets and circuits. This keeps installation safe and code-compliant.
Inspect For Tripped Gfci Or Afci Breakers
Outlets on certain circuits use GFCI or AFCI breakers. These breakers may trip if wiring is wrong. Reset them and test the outlet again. Persistent trips need a professional’s review.

Credit: www.reddit.com
Frequently Asked Questions
Can I Convert A Light Switch Into An Electrical Outlet?
Yes, you can convert a light switch into an outlet by rewiring the existing switch box. Ensure power is off before starting. Follow electrical codes and use a proper outlet device. This upgrade adds convenience in rooms lacking outlets.
What Tools Are Needed For This Conversion?
You will need a screwdriver, voltage tester, wire stripper, electrical tape, wire nuts, and a new outlet. Safety gear like gloves and goggles is recommended. These tools help safely disconnect the switch and install the new outlet.
Is It Safe To Replace A Switch With An Outlet?
Yes, it’s safe if you follow electrical codes and turn off power first. Proper wiring and grounding are essential. If unsure, consult a licensed electrician to avoid hazards like shocks or fires.
How Long Does Converting A Switch To An Outlet Take?
The process usually takes 30 to 60 minutes for someone with basic electrical skills. Time varies based on wiring complexity and experience. Always double-check connections before restoring power.
Conclusion
Converting a light switch into an outlet can be simple and useful. Always turn off the power before starting any work. Follow safety steps carefully to avoid accidents. Using the right tools makes the job easier. This change can add convenience to your room.
Take your time and double-check all connections. With patience, you can do this yourself. A little effort can make your space more functional. Feel confident to improve your home safely.