Are you tired of struggling with fog lights that won’t turn on when you need them most? Connecting your fog lights with a switch might seem tricky, but it’s easier than you think.
Imagine having full control over your fog lights right at your fingertips, boosting your safety and visibility in bad weather. In this guide, you’ll discover simple, step-by-step instructions that anyone can follow—no special skills required. By the end, you’ll have your fog lights wired perfectly and ready to shine whenever you want.
Ready to take control? Let’s get started.
Choosing The Right Fog Lights
Choosing the right fog lights is important for safety and style. Good fog lights improve your vision during fog, rain, or snow. They help you see the road clearly and make your vehicle more visible to others.
Choosing fog lights that fit your needs and vehicle is key. This guide explains different types of fog lights and their compatibility with your vehicle.
Types Of Fog Lights
There are three main types of fog lights: halogen, LED, and HID. Halogen lights are common and affordable. They produce a warm yellow light that cuts through fog well. LED fog lights last longer and use less power. They give a bright, white light. HID lights are very bright and use gas to create light. They are less common and cost more. Each type has pros and cons based on brightness, price, and energy use.
Compatibility With Your Vehicle
Not all fog lights fit every vehicle. Check your vehicle’s make, model, and year before buying. Some fog lights fit into existing mounts. Others may need new brackets or wiring. Also, confirm if your car supports the fog light’s power and switch type. Proper fit ensures easy installation and good performance. Choose fog lights that match your vehicle’s electrical system and mounting points.

Credit: www.amazon.com
Gathering Necessary Tools And Materials
Before starting the connection of fog lights with a switch, gather all necessary tools and materials. This step ensures a smooth and safe installation process. Having everything ready helps avoid interruptions and errors.
Essential Tools
Prepare a few basic tools for the job. A screwdriver set will help remove panels and secure screws. Wire strippers are important to strip insulation from wires cleanly. A multimeter checks electrical connections and voltage. Pliers assist in bending and holding wires. Electrical tape protects and insulates wire joints. A drill may be needed for mounting the switch or fog lights. Keep these tools close for easy access.
Required Wiring Components
Choose the right wiring parts for a reliable setup. Use automotive-grade wire that can handle the fog light’s power. A relay is necessary to protect your vehicle’s electrical system. Include a fuse to prevent short circuits and damage. Connectors and terminals ensure secure wire joints. A switch, preferably with an indicator light, controls the fog lights easily. Proper wiring components guarantee safety and functionality.
Locating The Installation Area
Choosing the right place to install fog lights and their switch is key. Proper location helps the lights work well and keeps everything safe. This step makes the whole process easier and neater.
Fog Light Mounting Spots
Fog lights should be low on the front of your vehicle. This helps them cut through fog and mist better. Look near the bumper or under the grille. Make sure the spot is strong and flat. Avoid areas that block airflow or get too hot.
Check for space around the area. You need room for wiring and to secure the lights firmly. Also, avoid spots that can get splashed by water or dirt too much.
Switch Placement Options
The switch must be easy to reach while driving. Most people place it on the dashboard or near the steering wheel. Pick a spot where your hand moves naturally. Avoid places that distract you from driving.
Ensure the switch location has space behind for wiring. The area should also be safe from moisture and heat. A well-placed switch improves control and safety.
Wiring The Fog Lights
Wiring the fog lights is a key step in the installation process. It lets you control the lights safely and effectively. Proper wiring ensures the fog lights work without any problems. Follow clear steps for a strong connection and long-lasting use.
Each part of the wiring process has an important role. From power connection to grounding and relay installation, every detail matters. This guide will explain these steps simply and clearly.
Connecting To Power Source
Start by finding a suitable power source. Use the vehicle’s fuse box or battery for a stable supply. Connect the positive wire from the fog lights to this power point. Use a fuse to protect the circuit from overload. Secure all connections with crimp connectors or solder.
Grounding The Lights
Grounding stops electrical faults and ensures safety. Attach the fog light’s ground wire to a clean, metal part of the vehicle’s frame. Remove paint or rust for a good metal-to-metal contact. Tighten the connection firmly to prevent loosening.
Installing The Relay
A relay controls the power flow to the fog lights safely. Connect the relay’s input to the power source and output to the fog lights. Wire the relay coil to the fog light switch and ground. This setup allows the switch to control high power without damage.
Installing The Switch
Installing the switch for your fog lights is a simple but important step. It lets you control the lights easily from inside the vehicle. This section explains how to connect the switch to the relay and where to place it in the cabin. Follow these steps carefully to ensure proper installation and safe operation.
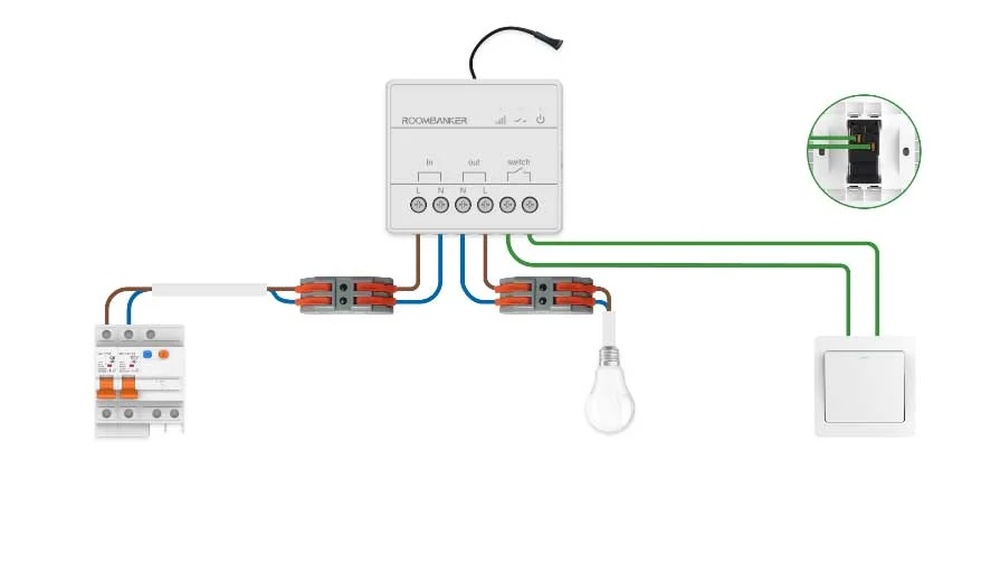
Wiring The Switch To The Relay
Start by finding the relay that controls your fog lights. The switch needs to connect to this relay to work correctly. Use a wire to link the switch’s output terminal to the relay’s control terminal. Make sure to use the right wire gauge to handle the current safely.
Also, connect the switch’s power input to a fuse or the vehicle’s fuse box. This protects the circuit from overload. Finally, connect the switch’s ground terminal to the vehicle’s chassis. A good ground ensures the switch operates without issues.
Mounting The Switch In The Cabin
Choose a spot inside the cabin that is easy to reach while driving. Common places include the dashboard or near the steering column. Avoid locations that block air vents or important controls.
Use screws or adhesive pads to secure the switch firmly. Make sure the wiring is neat and does not interfere with pedals or other controls. Test the switch by turning the fog lights on and off to confirm it works properly.

Credit: www.chinadaier.com
Testing The Setup
Testing the setup is an important step after connecting fog lights to a switch. It ensures everything works safely and correctly. This process helps you find any wiring errors before finalizing the installation.
Start by checking all electrical connections. Then, verify the light operation to make sure the fog lights turn on and off with the switch.
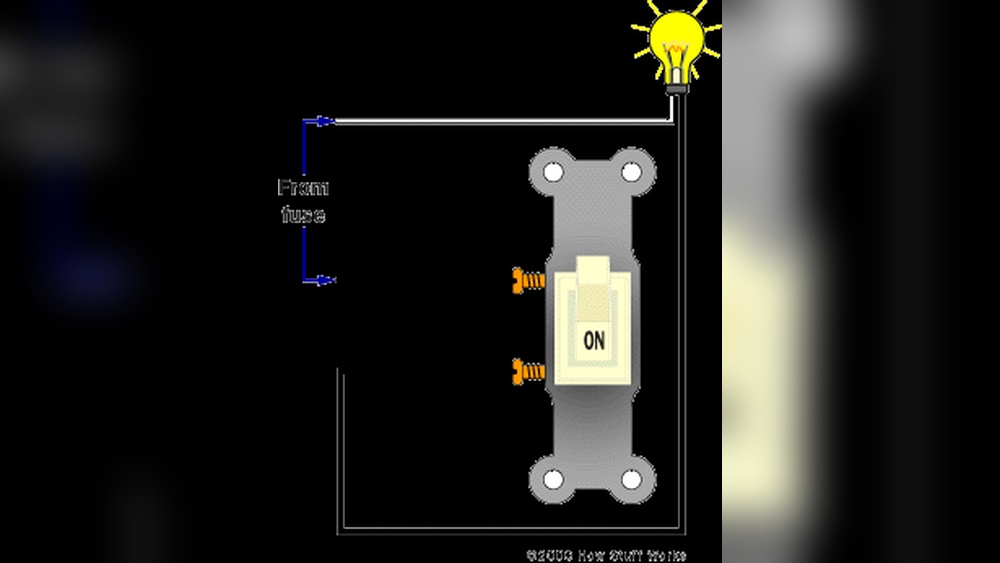
Checking Electrical Connections
First, inspect each wire connection carefully. Make sure wires are tight and secure. Loose wires can cause flickering or no power. Look for exposed wires or damaged insulation. Use a multimeter to check for voltage at the switch and fog lights. Confirm the ground wire is properly attached to the vehicle’s frame. A good ground is necessary for the lights to work.
Verifying Light Operation
Turn the switch on and off several times. Watch the fog lights to see if they respond instantly. Check both fog lights to confirm they light up evenly. If one light stays off, recheck its wiring. Test the switch in different vehicle modes if needed. Ensure the fog lights only operate when the vehicle’s power is on. This prevents battery drain when the vehicle is off.
Safety Tips And Best Practices
Connecting fog lights with a switch requires careful attention to safety and best practices. Proper wiring ensures your lights work well and avoid electrical problems. Following safety tips prevents damage and keeps your vehicle safe. This section covers key points to help you install fog lights correctly and maintain their performance.
Avoiding Common Wiring Mistakes
Use the correct wire size to prevent overheating. Avoid crossing wires that can cause shorts. Always connect the ground wire to a clean metal surface. Use proper connectors, not just twisting wires together. Test the circuit with a multimeter before finalizing connections. Secure wires away from moving parts and heat sources. Follow the vehicle’s wiring diagram for accurate installation.
Maintaining Fog Light Performance
Clean fog light lenses regularly to keep brightness high. Check wiring and connections for corrosion or damage. Replace bulbs as soon as they dim or fail. Avoid using high wattage bulbs that can damage the wiring. Inspect the switch for smooth operation and signs of wear. Keep the fog lights aligned to improve visibility and safety. Regular maintenance extends the life of your fog lights.

Credit: www.chinadaier.com
Frequently Asked Questions
How Do I Wire Fog Lights To A Switch Safely?
Use a relay and fuse for safety. Connect the switch to the relay’s coil. Power the fog lights through the relay. Always ground the fog lights properly to avoid electrical issues.
What Tools Are Needed To Connect Fog Lights With A Switch?
You’ll need wire strippers, crimpers, a relay, fuse, electrical tape, and a multimeter. A screwdriver and drill may be required for mounting the switch and lights securely.
Can I Connect Fog Lights To The Car’s Existing Switch?
It’s possible but not recommended. Existing switches may overload or cause malfunctions. Using a dedicated switch ensures better control and safety for fog light operation.
Where Should I Install The Fog Light Switch In My Vehicle?
Install the switch within easy reach of the driver, usually on the dashboard or near the steering wheel. Ensure it doesn’t obstruct driving controls and is clearly visible for quick access.
Conclusion
Connecting fog lights with a switch is simple and useful. It gives you control over your lights anytime you want. Always check your wiring carefully for safety. Use the right tools and follow steps one by one. This way, you avoid mistakes and keep your car safe.
Taking time to do it right saves trouble later. Enjoy better visibility in foggy weather with ease. Your car looks better, and you feel more confident. Try this project and see the difference it makes.