Have you ever wanted to control a light fixture right from the same spot as your outlet? Connecting a light switch with an outlet can make your space more convenient and efficient.
But if you’re unsure how to do it safely and correctly, this guide is for you. By the end, you’ll know exactly what steps to take to make your setup work smoothly. Keep reading to discover simple tips that will save you time, money, and frustration.
Your home lighting is about to get a smart upgrade!
Tools And Materials Needed
Connecting a light switch with an outlet requires certain tools and materials. Having the right items makes the job easier and safer. This section lists all the essentials you need before starting the work.
Essential Tools
- Screwdriver (flathead and Phillips)
- Wire stripper
- Voltage tester
- Pliers
- Electrical tape
- Drill (optional for mounting)
- Wire cutters
Required Materials
- Light switch
- Electrical outlet
- Electrical wire (14 or 12 gauge)
- Wire nuts
- Outlet and switch covers
- Wall box (if needed)
Basic Electrical Safety Tips
Working with electrical wiring needs care and caution. Basic safety tips protect you from shocks and accidents. Understanding these tips makes your work safer and easier. Follow these simple rules before connecting a light switch with an outlet.
Power Shutoff Procedures
Always turn off the power before starting any electrical work. Locate the circuit breaker that controls the area. Flip the breaker switch to the off position. Use a voltage tester to confirm no power flows to the wires. Never skip this step. It prevents dangerous electric shocks. Keep the power off until your job is complete.
Safety Gear Recommendations
Wear proper safety gear to protect your body. Use insulated gloves to avoid electric shocks. Safety glasses guard your eyes from sparks and debris. Wear shoes with rubber soles to reduce risk. Avoid loose clothing that can catch on wires. Keep a fire extinguisher nearby in case of emergencies. Safety gear helps you work with confidence and care.
Understanding Light Switch And Outlet Wiring
Understanding how to wire a light switch and outlet is important for safe and effective electrical work. Knowing the basics helps avoid mistakes and ensures your connections work properly. This section explains the common wiring types and how to identify wires clearly.
Common Wiring Types
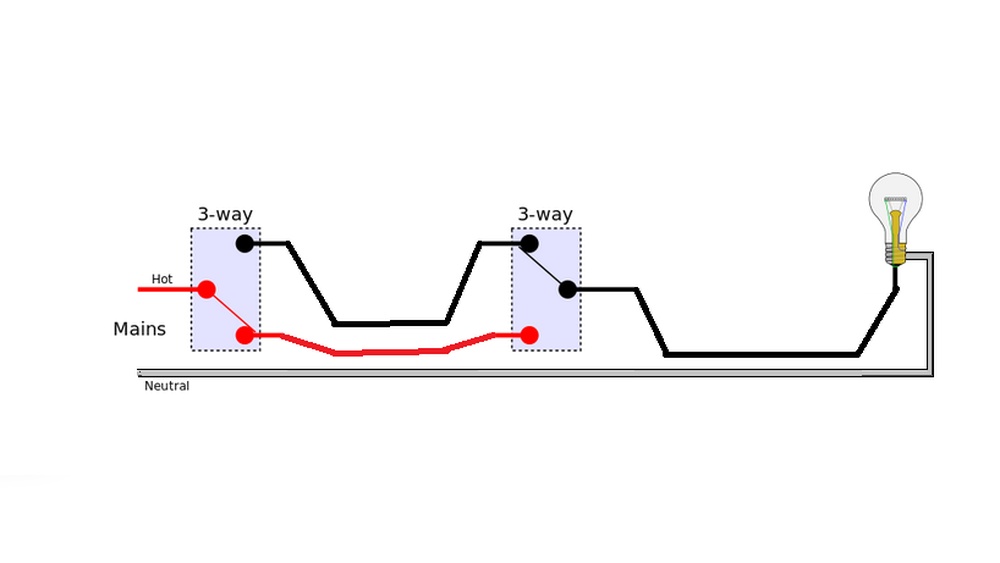
Most homes use three main wires in light switches and outlets. These are the hot wire, neutral wire, and ground wire. The hot wire carries electricity to the device. The neutral wire completes the electrical circuit. The ground wire provides safety by directing electricity away from faults.
Wires usually come in specific colors. Black or red wires are hot. White wires are neutral. Green or bare copper wires are ground. Some older homes may have different color codes, so careful checking is important.
Identifying Wires
To connect a light switch with an outlet, first identify each wire. Use a voltage tester to find the hot wire. It will show power when tested. Neutral wires do not carry current and usually have white insulation.
Ground wires have green insulation or no cover at all. They connect to the metal box or green screw on the device. Labeling wires during work helps keep track. Proper identification prevents wiring errors and electrical hazards.
Preparing The Work Area
Preparing the work area is the first step in connecting a light switch with an outlet. A clean and safe workspace helps you work faster and avoid accidents. Take time to gather tools and clear the area around the switch and outlet. Safety is the top priority, so make sure the power is off before starting any work.
Removing Existing Fixtures
Start by removing the cover plates from the switch and outlet. Use a screwdriver to take out the screws carefully. Pull the switch and outlet gently from the wall box. Keep track of all screws and parts for reassembly. This step helps you see the wiring and prepare for new connections.
Checking Wire Conditions
Look closely at the wires inside the wall box. Check for any damage like frayed or broken wires. Make sure the wires are clean and not corroded. Damaged wires can cause poor connections or safety hazards. Replace any wires that look worn or unsafe before proceeding.
Step-by-step Wiring Process
Wiring a light switch with an outlet can seem tricky. Follow this step-by-step guide to do it safely and correctly. Each step breaks down the connections clearly. Take your time and check your work as you go.
Connecting The Switch To Power Source
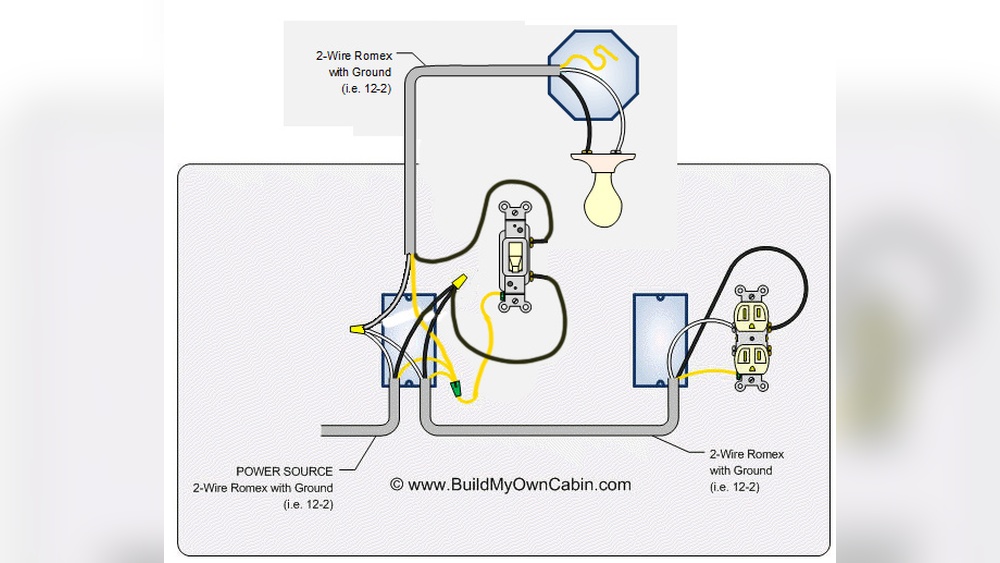
First, turn off the main power at the breaker box. Use a voltage tester to ensure no power flows to the wires. Find the black (hot) wire coming from the power source. Connect this black wire to the switch’s input terminal. Secure the connection tightly with a screwdriver. Attach the ground wire (bare or green) to the switch’s ground screw. This step ensures the switch receives power safely.
Wiring The Outlet
Identify the outlet’s terminals. The brass screws are for hot wires, silver screws for neutral wires. Connect the white (neutral) wire from the power source to the silver terminal on the outlet. Attach the black wire that will feed the outlet to the brass terminal. Connect the ground wire to the outlet’s ground screw. Check that all wires are firmly attached without loose ends.
Linking The Switch And Outlet
Use a short black wire (called a jumper) to connect the switch’s output terminal to the outlet’s hot terminal. This wire controls power flow to the outlet through the switch. Confirm the neutral wires are connected together in the box but not to the switch. Ground wires should be linked and connected to both devices. Double-check all connections before restoring power.
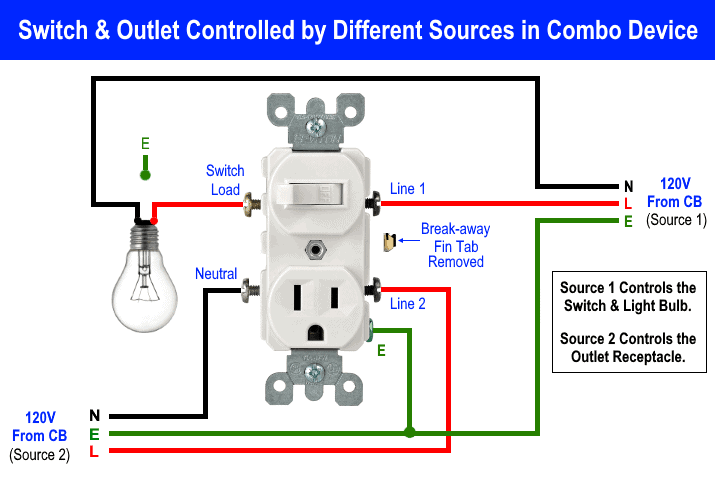
Credit: www.electricaltechnology.org
Testing The Connection
Testing the connection between a light switch and an outlet is a crucial step. It confirms the wiring is correct and safe to use. This step helps avoid electrical issues and ensures everything works properly. Follow these instructions carefully to test your connection without risks.
Restoring Power Safely
Before testing, restore power at the circuit breaker. Turn the breaker on carefully. Avoid touching wires or terminals directly. Use insulated tools if needed. Stand on a dry surface to stay safe. Never test while your hands are wet. Safety first to prevent shocks or accidents.
Checking Functionality
Switch on the light switch and watch the outlet. Plug in a small device or lamp to test the outlet. The device should turn on when the switch is active. Turn the switch off to see if the device powers down. This confirms the switch controls the outlet properly. If it does not work, check your wiring again.
Troubleshooting Common Issues
Troubleshooting common issues helps fix problems fast. Connecting a light switch to an outlet can sometimes cause unexpected issues. Knowing how to solve these helps save time and effort. Below are common problems and easy solutions.
Switch Not Controlling Outlet
Check if the switch is wired correctly to the outlet. A loose wire can stop the switch from working. Turn off power before inspecting wires. Use a screwdriver to tighten connections. Test the switch after fixing wires.
Sometimes the switch or outlet is faulty. Replace the switch if it feels loose or does not click. Try a new outlet if it does not receive power. Use a voltage tester to check if power flows through the switch.
Power Fluctuations
Flickering lights or inconsistent power can signal poor wiring. Worn wires or loose connections cause power fluctuations. Turn off the circuit breaker before checking. Tighten all wire connections and replace damaged wires.
Check the switch rating to match the outlet load. Using a low-rated switch causes problems. Ensure the switch can handle the outlet’s power needs. If unsure, consult a professional electrician for safety.

Credit: www.youtube.com
Tips For Neat And Safe Wiring
Neat and safe wiring is important for any electrical project. It keeps your connections secure and easy to check later. Messy wires can cause shorts and make repairs hard. Follow simple steps to keep wires tidy and safe.
Organizing Wires
Group wires by function and length. Avoid crossing wires over each other. Use cable ties or clips to hold wires together. Leave some slack to avoid stress on connections. Label wires with tags or colored tape for easy ID.
Using Wire Connectors Properly
Choose the right connector size for your wires. Strip wires evenly without damaging the metal inside. Twist wires together firmly before adding a connector. Screw on connectors tightly to prevent loose contacts. Check connectors for damage and replace if needed.
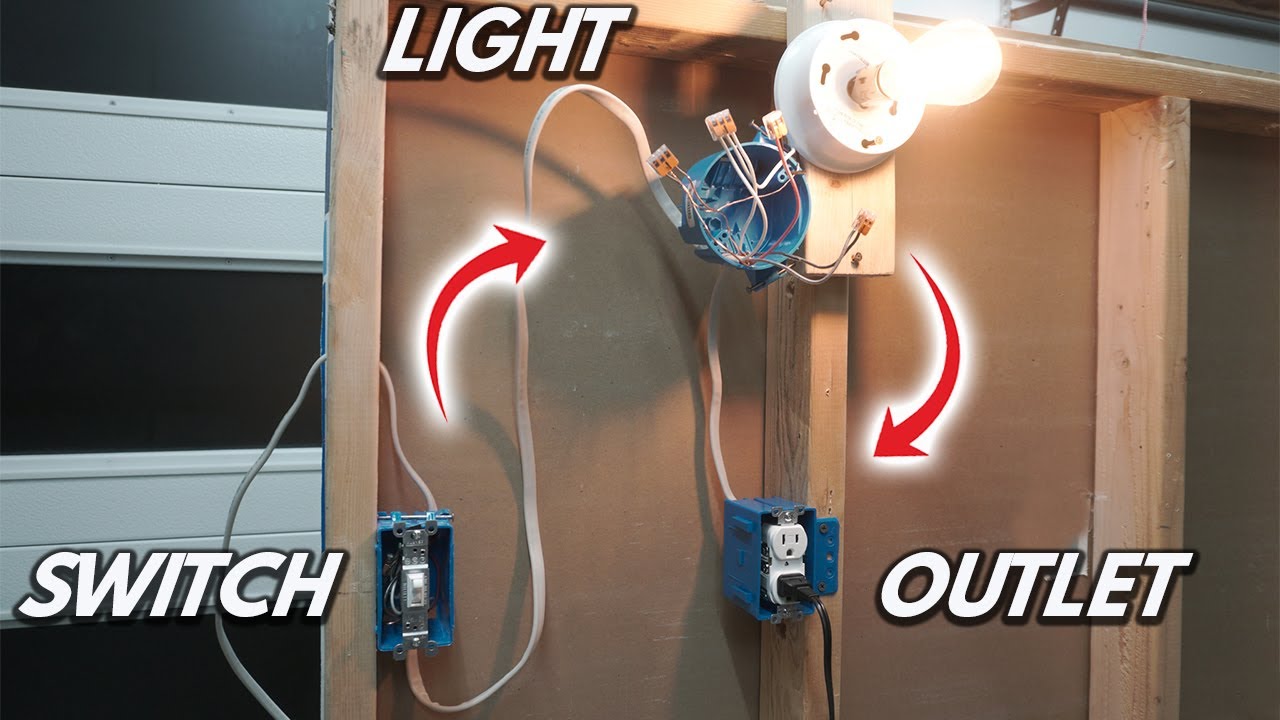
Credit: www.youtube.com
Frequently Asked Questions
How Do I Connect A Light Switch To An Outlet Safely?
Turn off power at the breaker before starting. Use a voltage tester to confirm no power. Connect the switch’s wires following the outlet’s wiring diagram. Use wire nuts and electrical tape to secure connections. Always follow local electrical codes for safety.
Can I Control An Outlet With A Light Switch?
Yes, you can wire a switch to control an outlet. This allows turning the outlet on or off with the switch. Use a switched hot wire from the switch to the outlet. Ensure proper grounding and follow electrical codes for safety.
What Tools Are Needed To Connect Switch With Outlet?
You will need a voltage tester, wire stripper, screwdriver, wire nuts, and electrical tape. A multimeter can help verify connections. Always use insulated tools for safety. Having a wiring diagram or guide is also useful for correct connections.
Is It Legal To Wire A Light Switch To Control An Outlet?
Yes, it is legal if done according to local electrical codes. Many homes use switched outlets for lamps or appliances. Always obtain necessary permits if required. Ensure all wiring is inspected and meets safety standards.
Conclusion
Connecting a light switch with an outlet is a useful skill. It lets you control power from one spot. Always turn off the electricity before starting work. Follow safety rules to avoid accidents. Use the right tools and check your wiring twice.
Take your time and stay careful. This simple task can improve your home’s function. Now, you can try it yourself with confidence.