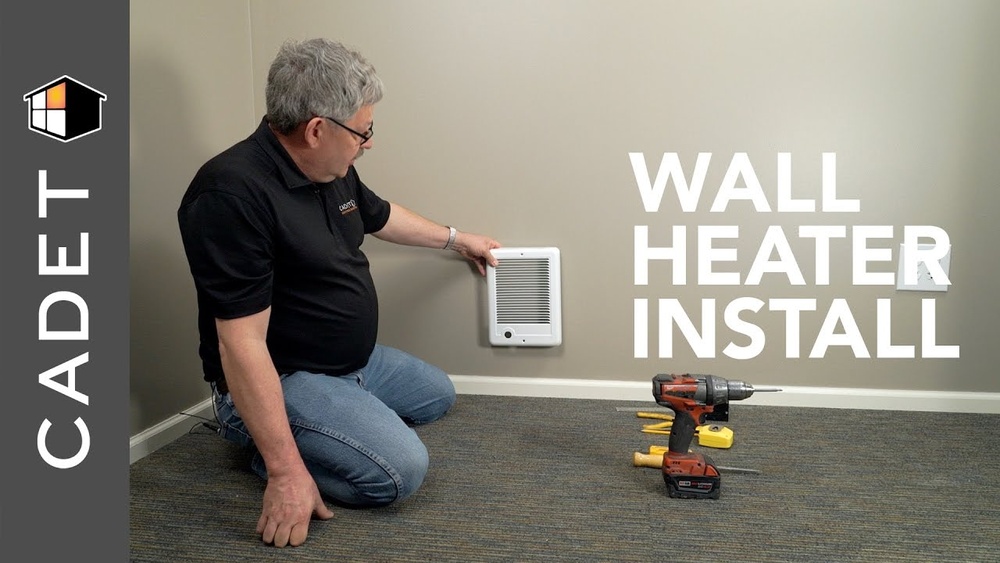
Are you looking to add warmth and comfort to your space quickly and efficiently? Knowing how to hook up a wall heater can save you time and money, while giving you control over your home’s heating.
Whether you’re upgrading your current system or installing a new one, this guide will walk you through the simple steps to get your wall heater up and running safely. By the end, you’ll feel confident handling the installation yourself and enjoy the cozy atmosphere you deserve.
Keep reading to discover everything you need to know!
Choosing The Right Wall Heater
Choosing the right wall heater is important for comfort and safety. A proper heater warms your space efficiently without wasting energy. Picking the correct type and size will save money and keep your home cozy. Safety certifications ensure your heater meets important standards.
Types Of Wall Heaters
There are several types of wall heaters. Electric heaters are easy to install and maintain. Gas heaters provide strong heat but need ventilation. Convection heaters warm the air slowly and evenly. Infrared heaters heat objects directly for quick warmth. Choose the type that fits your room and needs.
Sizing Your Heater
Size matters when choosing a wall heater. A small heater may not warm the room enough. A large heater wastes energy and can overheat the space. Measure the room size in square feet. Use the rule: 10 watts per square foot for good heating. This helps you find the right heater size.
Safety Certifications
Safety is key for any wall heater. Look for heaters with UL, ETL, or CSA marks. These certifications show the heater passed safety tests. Certified heaters reduce fire risk and electrical problems. Always buy heaters with proper safety labels. It protects your home and family.

Credit: www.mitindore.co.in
Tools And Materials Needed
Before hooking up a wall heater, gather the right tools and materials. This step makes the job easier and safer. Having everything ready saves time and reduces errors. Here is a clear list of what you need.
Essential Tools
- Screwdriver set – flathead and Phillips
- Wire stripper
- Voltage tester
- Drill with drill bits
- Measuring tape
- Level tool
- Adjustable wrench
- Electrical tape
- Utility knife
Required Materials
- Wall heater unit
- Electrical wires (correct gauge)
- Wire connectors
- Mounting brackets or screws
- Conduit or cable clamps
- Breaker switch (if needed)
- Wall anchors (for drywall installation)
Safety Gear
- Insulated gloves
- Safety goggles
- Dust mask
- Long-sleeve shirt and pants
- Closed-toe shoes
- Flashlight or headlamp
Preparing The Installation Site
Preparing the installation site is the first step to hook up a wall heater safely and efficiently. A well-prepared site makes the installation easier and ensures the heater works properly. This phase involves choosing the right spot, verifying the electrical setup, and getting the wall ready for mounting.
Selecting The Location
Choose a spot on the wall that allows good heat flow. Avoid placing the heater near curtains or furniture. Pick a location away from moisture and direct sunlight. The heater should be at least 12 inches above the floor. This height helps spread warm air evenly in the room. Also, check for any obstructions that could block the heater.
Checking Electrical Supply
Confirm the electrical circuit can handle the heater’s power needs. Check the voltage and amperage ratings on the heater label. Use a dedicated circuit if possible. Avoid sharing the circuit with heavy appliances. Turn off the main power before working on wiring. This step keeps you safe during installation.
Wall Preparation Tips
Clean the wall surface and remove any dust or debris. Make sure the wall is flat and strong enough to hold the heater. Use a stud finder to locate studs for secure mounting. Mark the drill points accurately to avoid mistakes. If the wall has drywall, consider using anchors for extra support.

Credit: www.youtube.com
Wiring The Wall Heater
Wiring the wall heater is a key step for safe and efficient operation. Proper wiring ensures the heater works without electrical issues. This part focuses on handling wires carefully and following safety rules.
Attention to detail is important. Mistakes can cause damage or hazards. Follow each step closely to avoid problems.
Turning Off Power
Start by cutting power to the circuit. Find the breaker that controls the heater’s area. Switch it off to stop electricity flow. Use a voltage tester to confirm no power is present. This step prevents shocks during wiring.
Connecting Wires
Match each wire by color and function. Connect the black (hot) wire to the heater’s black wire. Attach the white (neutral) wire to the heater’s white wire. Use wire nuts to secure the connections tightly. Avoid loose connections to prevent overheating. Keep wires neat and avoid crossing them.
Grounding And Safety Checks
Attach the green or bare copper wire to the heater’s ground screw. This step protects against electrical faults. Double-check all connections are tight and secure. Restore power and test the heater operation. Watch for unusual sounds or smells. Stop immediately if anything seems wrong.
Mounting The Heater
Mounting the heater correctly is important for safety and performance. This step ensures the heater stays secure and works well. Follow each instruction carefully to avoid problems later.
Marking Drill Points
Start by holding the heater against the wall. Use a pencil to mark the spots for the screws. Make sure the heater is level. Check the manual for the exact points to mark. Double-check the marks before drilling.
Securing The Heater
Drill holes at the marked points using the right drill bit. Insert wall anchors if needed for extra support. Align the heater with the drilled holes. Use screws to fasten the heater tightly. Avoid overtightening to prevent damage.
Final Adjustments
Check if the heater is firmly attached and level. Adjust screws slightly if the heater tilts. Clean any dust or debris around the heater. Plug in the heater or connect it to power. Test it to confirm it works properly.
Testing And Troubleshooting
Testing and troubleshooting your wall heater is key to making sure it works safely. This step helps find problems early. It also ensures your heater warms the room well. Follow these simple checks after hooking up your wall heater.
Powering On
Start by turning on the power switch. Watch for lights or sounds from the heater. If it stays quiet, check the circuit breaker. Make sure the heater is plugged in properly. Adjust the thermostat to a higher temperature. Listen for the heater to start running. If nothing happens, the heater may have a power issue.
Common Issues
Sometimes the heater runs but does not warm the room. This could mean a faulty thermostat or heating element. Another problem is the heater turning off too soon. This may signal overheating or a safety switch issue. Strange noises or smells mean stop using the heater. These signs show something is wrong inside.
When To Call A Professional
Call an expert if the heater won’t power on after checks. Also call if you smell burning or see smoke. Don’t try fixing electrical parts yourself. If the heater shuts off often, get professional help. A trained technician can safely find and fix problems.
:max_bytes(150000):strip_icc()/SPR-install-240-volt-electric-baseboard-heater-3954745-step-04_30596-2db2ce77baba466aab17e40323e66a59.jpg)
Credit: www.controllabolletta.it
Frequently Asked Questions
How Do I Safely Wire A Wall Heater?
Turn off the power before wiring. Connect the heater’s wires to the circuit according to the manual. Use proper connectors and secure all connections tightly for safety.
What Tools Are Needed To Hook Up A Wall Heater?
You need a screwdriver, wire stripper, voltage tester, drill, and wire nuts. These tools help ensure a safe and proper installation.
Can I Install A Wall Heater Without Professional Help?
Yes, if you have basic electrical knowledge and follow instructions carefully. However, hiring a licensed electrician is safer and often required by code.
How Do I Choose The Right Circuit For My Wall Heater?
Check your heater’s wattage and voltage requirements. Use a dedicated circuit that matches these specs to avoid overloads and ensure safe operation.
Conclusion
Hooking up a wall heater is easier than it seems. Follow each step with care and patience. Always check your work to ensure safety. Use the right tools and materials for best results. Proper installation keeps your home warm and safe.
Take your time and don’t rush the process. Enjoy the comfort that a well-installed heater brings. Stay safe and warm all winter long.