Are you tired of your tubing lying around, tangled and out of reach? Imagine having a neat, organized space where your tubing is securely hooked to the wall, ready whenever you need it.
It’s easier than you think, and you don’t need to be a DIY expert to do it. In this guide, you’ll discover simple steps to hook tubing to your wall quickly and safely. Keep reading, and you’ll transform your cluttered area into a clean, efficient workspace in no time.
Choosing The Right Tubing
Choosing the right tubing is key to a strong and safe wall installation. The tubing must match the task and environment. This choice affects durability and ease of use. Picking the right material and size helps avoid leaks and damage. It also makes the setup cleaner and more efficient.
Types Of Tubing Materials
Plastic tubing is light and easy to cut. It resists water and many chemicals. Good for indoor use and low pressure. Metal tubing is stronger and lasts longer. Copper and stainless steel handle heat and pressure well. Best for plumbing and outdoor setups. Vinyl tubing is flexible and clear. Useful for visible runs and gentle flows. Choose based on strength, flexibility, and exposure.
Selecting Suitable Diameter And Length
The diameter affects how much fluid passes through. Too small slows flow and causes pressure. Too large wastes space and costs more. Measure the needed flow to pick diameter. Length depends on the wall size and path. Add extra length for bends and connections. Cut carefully to keep ends clean. Proper size prevents leaks and keeps the system working well.

Credit: www.youtube.com
Gathering Necessary Tools
Before starting to hook tubing to a wall, gather all necessary tools. This step saves time and makes the process smoother. Having the right tools helps avoid mistakes and frustration. Prepare a clean workspace to keep everything organized.
Essential Hardware
Start with the right hardware. You will need tubing clamps or brackets to hold the tubing. Screws and wall anchors are important for securing the clamps. Choose anchors based on your wall type—drywall, concrete, or wood. Use tubing that fits well inside the clamps for a tight hold.
Recommended Tools For Installation
Prepare basic tools to install the hardware. A power drill or screwdriver is necessary for driving screws. Use a level to keep tubing straight along the wall. A tape measure helps mark exact points for drilling. Pencil or marker is useful for marking spots. Safety glasses protect your eyes from dust and debris.
Preparing The Wall
Preparing the wall is the first step to hook tubing securely. A strong and well-prepared surface ensures your tubing stays in place. Taking time to prepare avoids damage and keeps your installation neat. Follow clear steps to get the wall ready for mounting.
Identifying Mounting Location
Choose a spot on the wall that supports the tubing weight. Look for solid areas like studs or thick drywall. Avoid weak surfaces such as hollow spots or drywall without support. The location should allow easy access and proper tubing direction. Check for pipes or wires behind the wall before drilling.
Marking Drill Points
Use a pencil to mark exact spots for drilling holes. Measure the tubing length and spacing between hooks carefully. Mark points evenly to keep tubing straight and stable. Double-check measurements before drilling to prevent mistakes. Clear markings guide drilling and help align the hooks perfectly.

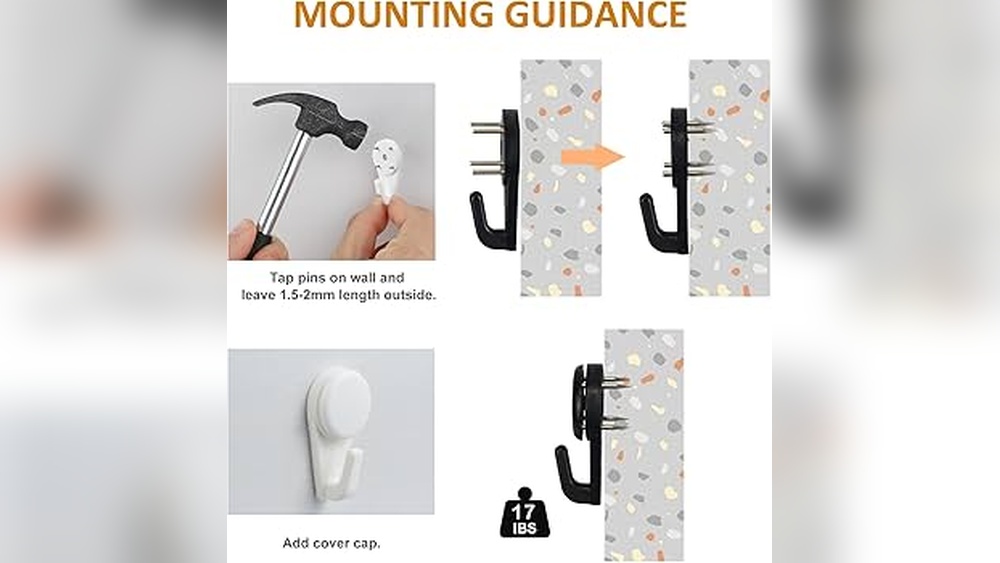
Credit: the-competitive-store.com
Installing Wall Hooks
Installing wall hooks is a simple way to hang tubing securely. Proper hook installation keeps tubing organized and prevents damage. It also saves space and makes your workspace tidy. Follow these steps to install wall hooks correctly.
Drilling Pilot Holes
Start by marking where you want the hooks. Use a pencil to make small marks on the wall. Choose a drill bit smaller than the hook screws. Drill pilot holes on the marks. These holes guide the screws and stop the wall from cracking.
Securing Hooks Properly
Insert the hooks into the pilot holes. Turn them slowly, so they go in straight. Use a screwdriver if needed to tighten the screws. Make sure hooks are firm and do not wobble. Check that hooks hold the tubing weight safely before hanging.
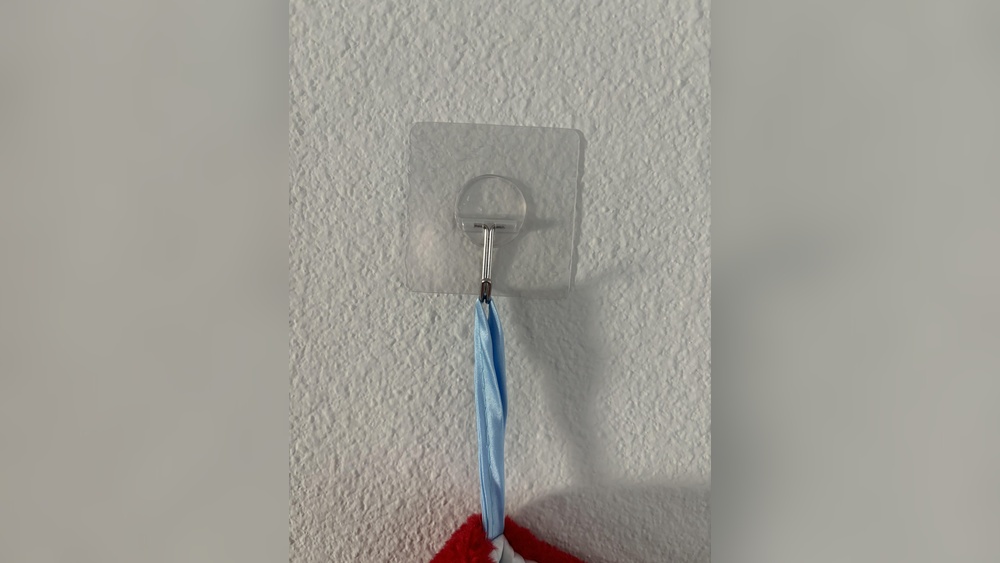
Attaching Tubing To Hooks
Attaching tubing to hooks is a key step in organizing your space. Proper attachment ensures the tubing stays in place. It also prevents damage and keeps the area tidy. Use the right method to secure the tubing safely and neatly.
Positioning Tubing Correctly
Place the tubing on the hook without bending it too much. Keep the tubing straight to avoid kinks or breaks. Position the tubing so it rests evenly on the hook. Make sure the tubing does not slip off easily.
Ensuring A Tight And Safe Hold
Check the hook size matches the tubing thickness. Use hooks that grip the tubing firmly without squeezing it. If needed, add rubber sleeves on hooks for extra grip. Test the tubing by gently pulling it to confirm it holds well.
Testing Stability
Testing the stability of tubing hooks on a wall is important for safety. It ensures the tubing will stay secure and not fall. This step helps avoid accidents and damage. Take time to check each hook carefully after installation.
Applying Pressure Safely
Gently press the tubing near each hook. Use your hand to push down and side to side. Do not use too much force at once. Check if the hooks hold the tubing firmly. Listen for any creaking or movement sounds.
Apply pressure slowly to see how the hooks react. Keep your fingers clear of sharp edges. This prevents injury during testing. If tubing shifts or hooks bend, do not use it yet.
Adjusting Hooks If Needed
Loose hooks need tightening or repositioning. Loosen screws slightly and move hooks closer to tubing. Tighten screws firmly but avoid stripping them. Use a level to keep hooks straight on the wall.
Replace any damaged hooks to ensure safety. After adjustments, test pressure again. Repeat this process until tubing stays stable and secure. Proper adjustment prevents future problems and accidents.
Maintenance Tips
Maintaining tubing hooked to a wall is essential for long-lasting use. Regular care keeps the tubing safe and working well. Small efforts can stop big problems later.
Regular Inspection
Check the tubing and hooks often. Look for cracks, rust, or loose fittings. Early fixes prevent damage and accidents. Inspect after bad weather or heavy use. Tighten screws and replace worn parts quickly.
Preventing Wear And Tear
Keep tubing clean and dry to avoid damage. Avoid sharp bends or heavy weight on the tubing. Use protective covers if tubing is outside. Store unused tubing in a cool, dry place. These steps help tubing last longer and stay strong.

Credit: www.amazon.com
Frequently Asked Questions
How Do I Choose The Right Tubing Hooks For Walls?
Select hooks based on tubing size and wall type. Use plastic or metal hooks for durability. Ensure hooks fit tubing snugly to prevent slipping.
What Tools Are Needed To Hook Tubing To A Wall?
You will need a drill, screws, wall anchors, tubing hooks, and a measuring tape. These tools ensure secure and precise installation.
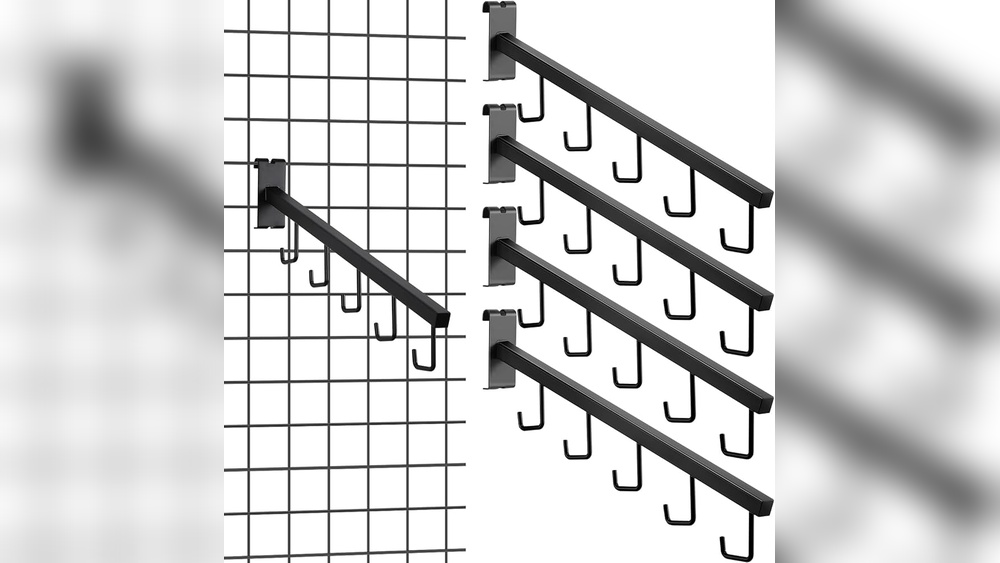
How Far Apart Should Tubing Hooks Be Placed?
Place hooks 12 to 18 inches apart to support tubing evenly. Closer spacing prevents sagging and keeps tubing aligned neatly.
Can I Hook Tubing On Drywall Without Studs?
Yes, use wall anchors or toggle bolts for drywall without studs. These provide strong support and prevent damage to the wall.
Conclusion
Hooking tubing to a wall keeps your space neat and safe. Choose the right clips and tools for a strong hold. Measure carefully and attach tubing with steady hands. Check your work to avoid leaks or damage. Small steps make a big difference in your project.
Now, you can enjoy a tidy and organized area. Easy and useful—just what you need.