Are you ready to boost your home’s security by installing a deadbolt? One of the trickiest parts is making the right hole in your door frame.
If you get it wrong, your lock won’t fit properly, leaving your home vulnerable or making the door hard to close. But don’t worry—you can do this yourself with the right steps. In this guide, you’ll learn exactly how to make a clean, precise hole in your door frame for your deadbolt.
Keep reading, and you’ll gain the confidence to protect your home the right way.

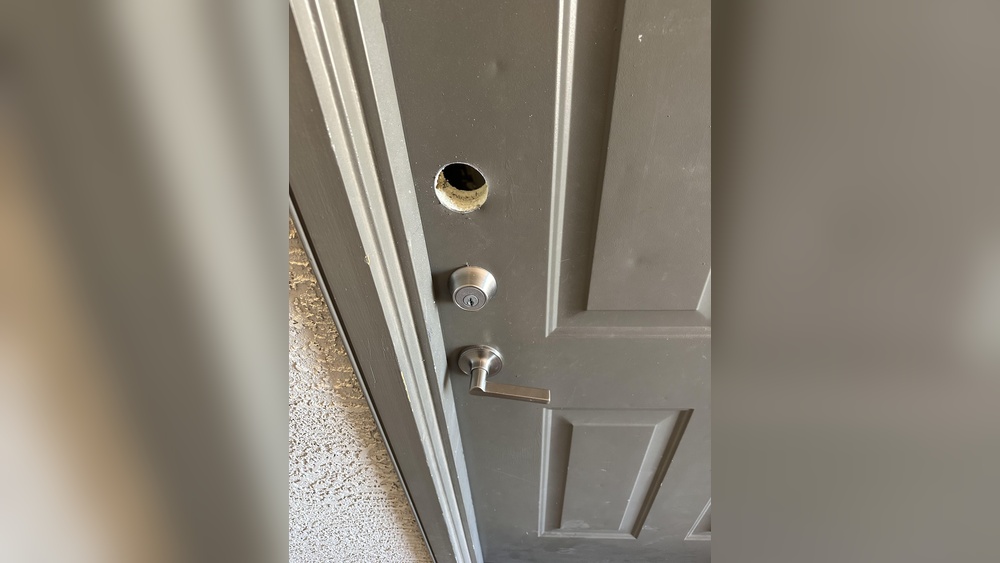
Credit: www.familyhandyman.com
Tools And Materials Needed
Before drilling a hole in your door frame for a deadbolt, gather the right tools and materials. Having these ready makes the job easier and safer. Use tools that fit well in your hands. Choose materials that last and work well together.
Essential Tools
- Power drill with a 1-inch spade bit
- Hole saw kit for the deadbolt cylinder
- Chisel and hammer for mortising
- Measuring tape for precise marks
- Pencil to mark drill spots
- Screwdriver for screws
- Safety goggles to protect your eyes
Recommended Materials
- Deadbolt lock set with strike plate
- Wood filler to fix any mistakes
- Sandpaper to smooth edges
- Wood screws for mounting the lock
- Painter’s tape to mark drill points
- Drop cloth to keep the area clean

Credit: www.youtube.com
Choosing The Right Deadbolt
Choosing the right deadbolt is important for door security and ease of use. The right lock fits well and works smoothly. It also keeps your home safe from unwanted entry. Understanding different types and sizes helps make a smart choice.
Types Of Deadbolts
Single-cylinder deadbolts use a key outside and a thumb turn inside. They are common for front doors. Double-cylinder deadbolts need a key on both sides. They add security but can be hard to use in emergencies. Keyless deadbolts use codes or fingerprints for access. They offer convenience but need batteries or power. Pick a type that fits your needs and door type.
Measuring For Fit
Measure the door thickness before buying a deadbolt. Most deadbolts fit doors 1 3/8 to 1 3/4 inches thick. Check the backset, the distance from door edge to hole center. Standard backsets are 2 3/8 or 2 3/4 inches. Measure the diameter of the hole for the lock cylinder. Most deadbolts need a 2 1/8 inch hole. Accurate measuring ensures the deadbolt fits well and works properly.
Preparing The Door Frame
Preparing the door frame is the first step in installing a deadbolt. This process ensures a strong fit and proper alignment. It also helps the lock work smoothly and securely.
Taking time to prepare well makes the whole installation easier. It reduces mistakes and keeps your door safe and functional.
Marking The Hole Location
Start by measuring the correct height for the deadbolt. Usually, this is about 6 to 12 inches above the door handle. Use a pencil to mark the spot clearly on the door frame.
Check the mark twice. Make sure it lines up with the lock on the door. A well-marked spot guides your drilling and keeps the deadbolt straight.
Safety Precautions
Wear safety glasses to protect your eyes from wood chips. Use gloves to avoid splinters and cuts. Work in a well-lit area to see clearly.
Keep tools in good condition. Sharp drill bits make cleaner holes and reduce slipping. Always follow the tool instructions to avoid accidents.
Drilling The Hole
Drilling the hole in a door frame for a deadbolt requires care and accuracy. The hole must be the right size and depth to fit the lock parts perfectly. This step is critical for the deadbolt to work well and keep your door secure.
Selecting Drill Bits
Choose drill bits that match the size of your deadbolt. A hole saw bit is best for the main hole. Use a spade bit for smaller holes like the latch. Sharp bits make cleaner cuts and reduce splintering. Check the bit size before starting to avoid mistakes.
Step-by-step Drilling Process
Mark the spot on the door frame clearly. Use a pencil and a template if available. Start drilling slowly to guide the bit. Keep the drill straight to avoid angled holes. Drill through the door frame until you reach the other side. Clean out wood chips regularly to see progress. Drill the smaller latch hole next, following the same care. Test fit the deadbolt parts before finishing. Adjust the hole if needed for a snug fit.
Installing The Deadbolt
Installing the deadbolt is the key step after making the hole in the door frame. This process ensures your door locks securely and works smoothly. Follow each step carefully to fit and secure the deadbolt correctly.
Fitting The Deadbolt Components
Start by inserting the deadbolt latch into the hole on the door edge. Make sure the latch faceplate sits flush with the door frame. Use a screwdriver to fasten the screws tightly but avoid over-tightening.
Next, attach the exterior part of the deadbolt with the key cylinder. Align the tailpiece through the latch mechanism. Then, fit the interior thumb turn on the inside of the door. Connect both parts by guiding the tailpiece into the thumb turn slot.
Check that all parts fit snugly and move without resistance. Adjust the alignment if the deadbolt feels loose or stiff.
Securing The Deadbolt
After fitting the components, secure the deadbolt by tightening all screws firmly. Focus on the screws on the interior and exterior plates. These hold the deadbolt firmly in place.
Test the deadbolt by turning the thumb turn and using the key outside. The bolt should extend and retract smoothly into the door frame.
Make sure the strike plate on the door frame is aligned with the bolt. Screw the strike plate tightly to reinforce the lock’s strength.
Testing And Adjustments
After drilling the holes and installing the deadbolt, testing and adjustments are important. This step ensures the lock works smoothly and keeps your door secure. A poorly fitted deadbolt can cause problems locking or unlocking.
Take your time during testing. Small fixes can improve the lock’s function and your door’s security.
Checking Lock Functionality
Start by turning the key or thumb turn slowly. The bolt should move in and out without resistance. If it sticks, the hole might be too small or misaligned.
Check the bolt’s full extension into the door frame. It should slide easily and fit tightly into the strike plate. Gaps or tightness can reduce security or damage the lock.
Test the lock from both sides of the door. Make sure it locks and unlocks smoothly each time. Listen for any unusual sounds like grinding or clicking.
Making Necessary Adjustments
Adjust the strike plate first if the bolt does not fit well. Loosen screws and move the plate slightly for better alignment. Tighten screws once the bolt slides easily.
If the hole is too small, carefully enlarge it with a chisel or drill. Remove small amounts of wood to avoid weakening the door frame.
Check the deadbolt alignment with a level. The bolt should move straight without tilting. Adjust the lock or frame if needed.
Test the lock again after each adjustment. Repeat until the deadbolt works smoothly and securely.
Tips For A Professional Finish
Finishing the hole for your deadbolt neatly is key to a strong and clean look. Small details make a big difference in how the door frame looks and lasts. Taking time to smooth edges and fix paint will give a professional touch.
Smoothing Edges
After drilling, rough edges or splinters may appear around the hole. Use fine sandpaper to gently smooth these spots. Sand in a circular motion to blend the edges with the door frame surface. This step prevents splinters and helps the deadbolt fit perfectly.
Check the edges by running your finger around the hole. It should feel smooth without sharp parts. Clean away any dust with a soft cloth before moving on.
Touching Up Paint
Drilling can chip paint or expose bare wood. Use matching paint to cover these spots. Apply paint carefully with a small brush to keep the finish even. This protects the wood from moisture and keeps the door frame looking new.
Allow the paint to dry fully before installing the deadbolt. Multiple thin coats work better than one thick coat. This step helps the hole blend in with the rest of the door frame.

Credit: www.reddit.com
Frequently Asked Questions
How Do I Mark The Door Frame For A Deadbolt Hole?
Measure the deadbolt template and align it on the door frame. Use a pencil to mark the exact drill points accurately. This ensures the hole is positioned perfectly for the deadbolt lock installation.
What Drill Bit Size Is Needed For Deadbolt Holes?
Use a 1-inch hole saw drill bit for the main hole and a 7/8-inch spade bit for the latch hole. These sizes fit standard deadbolt locks and ensure smooth installation.
How Deep Should The Hole Be For A Deadbolt?
Drill the hole at least 2 1/8 inches deep to accommodate the deadbolt cylinder. Check your lock’s specifications for exact depth to avoid improper fitting.
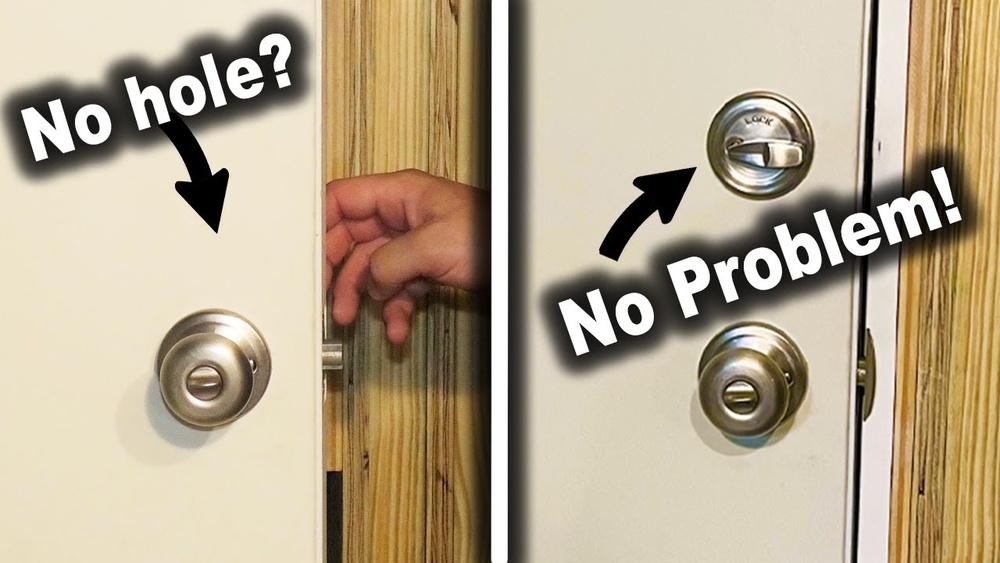
Can I Install A Deadbolt Without A Hole Saw?
While possible with spade bits, a hole saw provides cleaner, precise holes. Using the right tool reduces damage and ensures the deadbolt fits securely.
Conclusion
Making a hole in a door frame for a deadbolt is simple with the right steps. Measure carefully and mark the spots clearly. Use proper tools to drill clean, straight holes. Take your time to avoid mistakes or damage. A well-installed deadbolt adds safety and peace at home.
Practice patience and follow instructions closely. Soon, you will secure your door like a pro. Safety starts with small, smart actions.