If you need to take off a deadbolt lock, you might feel stuck or unsure where to start. But don’t worry—removing a deadbolt is easier than you think.
Whether you’re replacing an old lock, fixing a jam, or upgrading your security, this guide will walk you through every step clearly and simply. By the end, you’ll have the confidence to handle your deadbolt like a pro. Ready to get started?
Let’s dive in and make this task quick and stress-free for you.

Credit: www.youtube.com
Tools Needed
Removing a deadbolt lock requires some basic tools. Having the right tools makes the process easier and faster. Prepare everything before starting the job to avoid interruptions.
Basic Tools List
- Screwdriver (Phillips and flathead)
- Allen wrench (hex key)
- Pliers
- Hammer
- Utility knife
These tools help you remove screws and parts safely. A screwdriver is the most important tool here. The Allen wrench is needed for some lock models.
Optional Tools For Stubborn Locks
- Power drill with screwdriver bits
- Lubricant spray (like WD-40)
- Putty knife
- Small pry bar
Some deadbolts are hard to remove. Lubricant spray helps loosen tight parts. A power drill speeds up screw removal. A pry bar or putty knife helps with stuck pieces.
Prepare The Door
Preparing the door before removing a deadbolt lock is an important step. It helps make the process smoother and safer. Taking time to get ready can save effort later.
Clear The Work Area
Remove any objects near the door. Clear the floor space to avoid tripping. Keep tools close for easy reach. A tidy area helps you focus on the task.
Ensure Safety Measures
Wear safety glasses to protect your eyes. Use gloves to avoid cuts from sharp parts. Make sure the door is stable and will not move. Safety keeps accidents away during the work.
Remove The Interior Thumb Turn
Start by locating the screws on the interior thumb turn of the deadbolt. Unscrew them carefully, then gently pull the thumb turn away from the door. This step frees the lock for further removal.
Locate Screws
Start by finding the screws that hold the interior thumb turn in place. They are usually on the face of the thumb turn or under a small cover. Use a flat tool to gently pry off any cover hiding the screws. Check both sides of the thumb turn to be sure. Clear view of the screws makes removal easier and faster.
Unscrew The Thumb Turn
Use a screwdriver to carefully remove the screws. Turn the screwdriver counterclockwise until each screw comes out. Keep the screws safe for reassembly or disposal. Once screws are out, gently pull the thumb turn away from the door. If it feels stuck, wiggle it slightly to loosen it. Removing this part frees the lock’s inner mechanism for further steps.
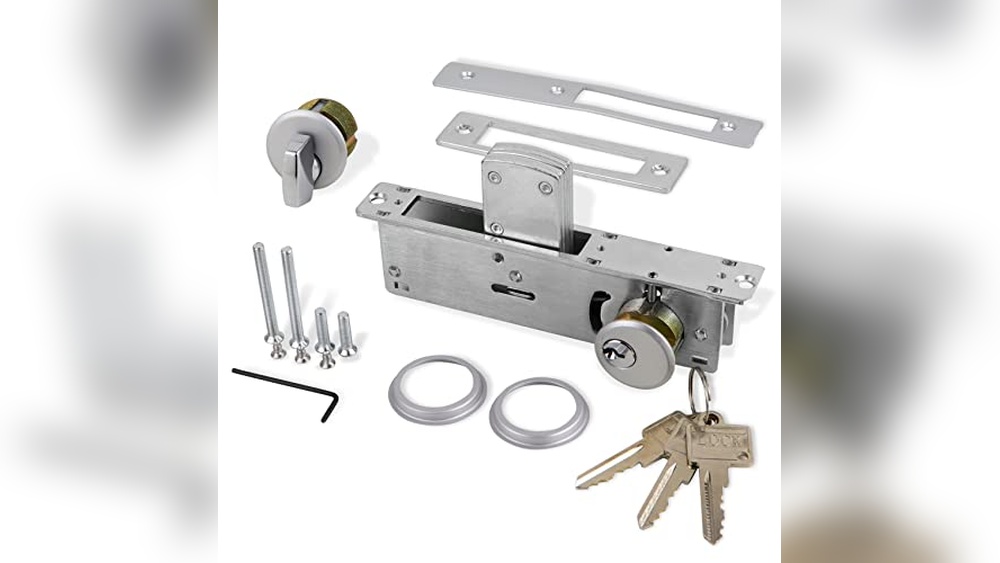
Take Off The Exterior Plate
Taking off the exterior plate of a deadbolt lock is the first step in removing the entire lock. This plate holds the outer parts of the lock firmly to the door. Removing it allows access to the internal parts and screws. Follow the steps carefully to avoid damage.
Make sure you have a screwdriver ready. Most deadbolts use either a Phillips or flathead screwdriver. You will need to work slowly and gently to prevent stripping the screws or scratching the door.
Identify Mounting Screws
Look closely at the exterior plate to find the screws. These screws usually sit on the faceplate or under a small cover. Sometimes the screws are hidden behind a decorative piece. Use a flathead screwdriver to gently pry off any covers.
Check if the screws are visible or hidden. You might need a flashlight to see better. Most deadbolt locks have two or three screws holding the plate. Remember their location for easier reassembly later.
Remove The Exterior Hardware
Use the correct screwdriver to unscrew the mounting screws carefully. Turn the screws counterclockwise to loosen them. Keep the screws in a safe place to avoid losing them.
Once the screws are out, gently pull the exterior plate from the door. If it feels stuck, wiggle it slightly but do not force it. The plate should come off with light pressure. Now you can access the inside parts of the lock.
Unscrew The Deadbolt Mechanism
Unscrewing the deadbolt mechanism is a key step in removing the lock. It helps you separate the lock parts from the door. This step requires care to avoid damage.
Start by locating the screws that hold the deadbolt in place. These screws keep the lock attached firmly to the door. Removing them lets you access the inner parts of the lock.
Access The Bolt Assembly
Open the door to reach the side edge where the bolt sticks out. Look for the cover plate on the door’s edge. This plate hides the bolt assembly and screws.
Use a screwdriver to remove the cover plate. This exposes the bolt and the screws holding it. Keep the plate and screws safe for later.
Remove Mounting Screws
Find the screws on the interior side of the door. These screws hold the deadbolt mechanism tightly. Use a screwdriver that fits the screw heads well.
Turn the screws counterclockwise to loosen and remove them. Keep the screws in a safe place. After removing all screws, gently pull the deadbolt parts off the door.

Credit: diy.stackexchange.com
Extract The Deadbolt
Extracting the deadbolt is a key step in removing the lock from your door. This part keeps your door secure by sliding inside the door frame. Removing it carefully helps you take off the entire lock without damage.
Slide Out The Bolt
Start by locating the bolt inside the door edge. Push or pull it gently to slide it out. Sometimes, you need to turn the key or knob to move the bolt. Keep steady pressure to avoid breaking the mechanism.
Use a screwdriver if needed to nudge the bolt out. Avoid forcing it, as this might cause damage. The bolt should come out smoothly when free of screws or catch plates.
Check For Obstructions
Look inside the bolt hole for any dirt or debris. Dust or rust can block the bolt from sliding out. Clean the area with a cloth or small brush.
Check the screws and plates holding the bolt. Remove any that stop the bolt from moving. Make sure nothing catches on the bolt’s edges. Clear space allows easy removal.
Troubleshooting Stuck Deadbolts
Stuck deadbolts cause frustration and delay. They block the lock from turning smoothly. This makes removing the deadbolt difficult. Troubleshooting stuck deadbolts helps solve this issue quickly. Simple tools and easy steps often fix the problem. Let’s explore effective methods to free a jammed deadbolt.
Lubrication Tips
Use a lubricant designed for locks. Spray a small amount into the keyhole. Avoid using oil-based lubricants like WD-40. They can attract dirt and cause more problems. Graphite powder works best for smooth operation. Insert the key and turn it gently after applying. Repeat if the lock still feels tight.
Using A Flathead Screwdriver
Sometimes the deadbolt’s mechanism jams inside the door. A flathead screwdriver can help release it. Insert the screwdriver between the lock and the door frame. Apply gentle pressure to push or pry the deadbolt free. Be careful not to damage the door or lock parts. This method helps if the lock is stuck due to misalignment.
Reinstall Or Replace Deadbolt
After removing a deadbolt lock, decide whether to reinstall it or replace it. Reinstalling keeps things simple and saves money. Replacing lets you upgrade to a better, more secure lock. Both options need care to ensure proper function and safety.
Choosing A New Lock
Select a lock that fits your door and needs. Look for durability and good security ratings. Consider key types: traditional keys or smart locks. Pick a style that matches your home’s look. Read reviews to find reliable brands. Buy a lock that is easy to install and use.
Installation Tips
Prepare your door by cleaning the area first. Align the lock parts carefully to avoid jamming. Use a screwdriver that fits screws tightly. Tighten screws evenly to keep the lock stable. Test the lock several times before finishing. Check the key turns smoothly and the bolt slides fully. Adjust if the lock feels stiff or loose.
Credit: www.reddit.com
Frequently Asked Questions
How Do I Remove A Deadbolt Lock Safely?
To remove a deadbolt lock safely, first unscrew the interior and exterior plates. Then, carefully pull out the lock cylinder. Always ensure the door is open and use proper tools to avoid damage.
What Tools Are Needed To Take Off A Deadbolt Lock?
You need a screwdriver, usually Phillips or flat-head, to remove screws. Sometimes, a drill or Allen wrench is required for specific models. Having these tools ready makes the removal process smooth and efficient.
Can I Remove A Deadbolt Without Damaging The Door?
Yes, by using the correct screwdriver and gently unscrewing the components, you avoid door damage. Avoid forcing parts or using excessive force. This ensures the door and lock remain intact for future use.
How Long Does It Take To Remove A Deadbolt Lock?
Removing a deadbolt lock typically takes 10 to 20 minutes. The time depends on your experience and lock type. Preparing tools beforehand speeds up the process significantly.
Conclusion
Removing a deadbolt lock can be simple with the right steps. Take your time and follow each part carefully. Use the correct tools to avoid damage. Always keep safety in mind during the process. Now, you can replace or repair your lock easily.
Practice makes this task easier over time. Trust yourself to handle it well. This guide helps you feel confident and prepared.