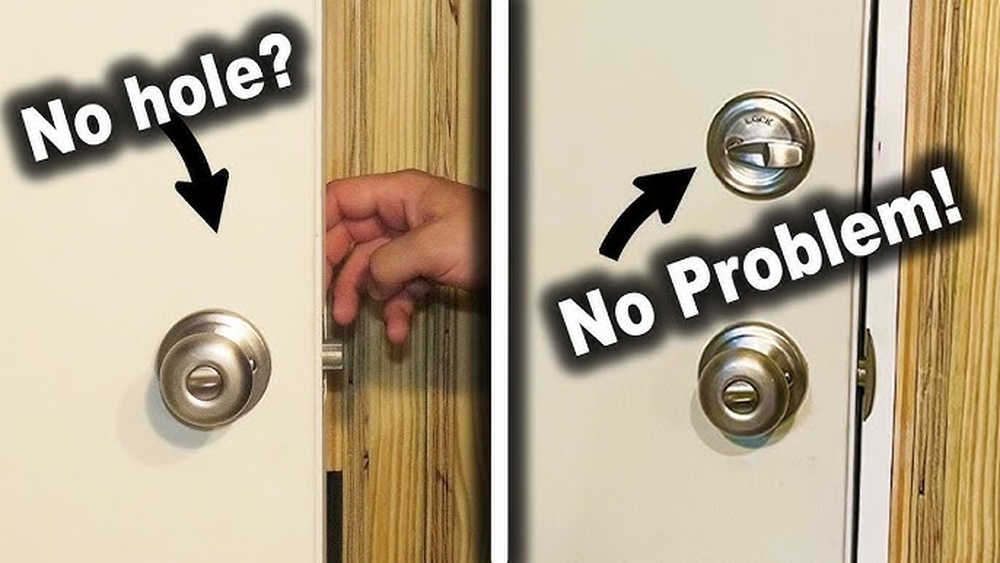
Struggling to remove a Kwikset deadbolt with no visible screws? You’re not alone.
Many people find themselves stuck, unsure how to get the lock off without damaging the door. But don’t worry—removing this type of deadbolt is easier than you think. In this guide, you’ll discover simple, step-by-step methods to take off your Kwikset deadbolt quickly and safely.
Keep reading, and you’ll have your lock removed in no time.
Identify Kwikset Deadbolt Model
Identifying the Kwikset deadbolt model is the first step to remove a lock without visible screws. Different models have unique features and removal methods. Knowing the model helps find the right way to take it apart safely. It also saves time and prevents damage to the door or lock.
Check For Hidden Release Mechanisms
Some Kwikset deadbolts hide their release parts. Look closely around the knob or thumb turn. Search for small slots, buttons, or holes. These may release the lock’s faceplate or interior parts. Use a thin tool like a flathead screwdriver to press or slide these releases gently. This allows the lock to come apart without screws.
Distinguish Between Smart And Standard Models
Kwikset makes both smart and standard deadbolts. Smart models often have electronic parts and batteries. They might have extra covers or panels hiding screws or release buttons. Standard models are simpler with fewer parts. Identifying the type helps decide how to open or remove the lock carefully. Always check for battery compartments or digital keypads on smart locks before removal.

Credit: www.youtube.com
Gather Necessary Tools
Gathering the right tools is the first step to remove a Kwikset deadbolt with no visible screws. Having the correct tools makes the process easier and safer. Without proper tools, you may damage the lock or the door. Prepare everything before starting the removal.
List Of Common Tools Needed
- Flathead screwdriver – useful for prying parts gently
- Phillips screwdriver – needed for hidden screws
- Allen wrench – some models use hex screws
- Small putty knife – helps to slide between the lock and door
- Needle-nose pliers – grab small parts or pins
- Flashlight – to see inside tight spaces
Optional Tools For Stubborn Deadbolts
- Plastic card – to slide and release the latch
- Hairdryer – softens paint or adhesive around the lock
- Rubber mallet – taps gently to loosen stuck parts
- Lubricant spray – eases moving parts inside the lock
- Magnifying glass – helps to spot hidden screws or clips
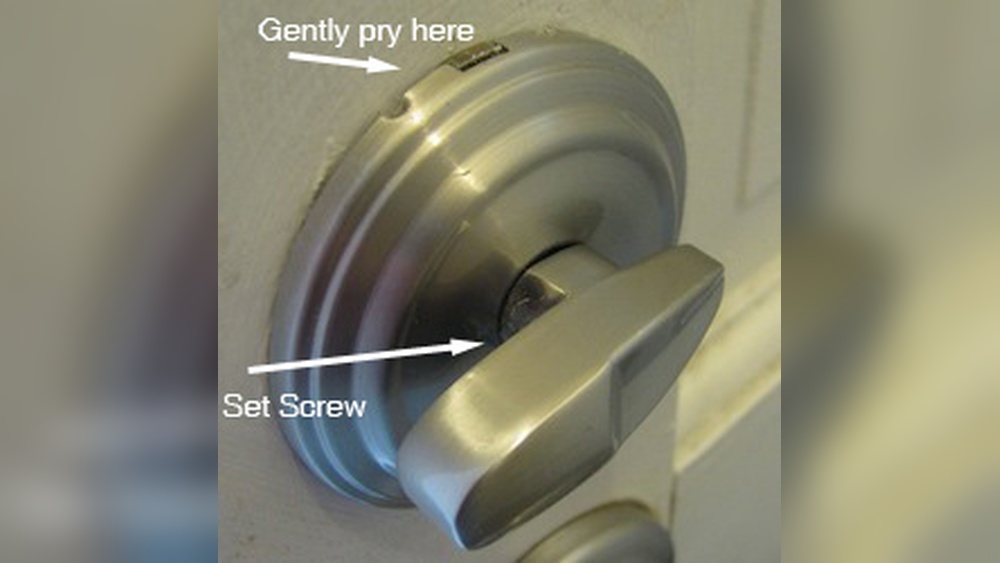
Locate The Release Tab
Locating the release tab is a crucial step to remove a Kwikset deadbolt without visible screws. This small part holds the lock in place and allows easy removal once found. Knowing its exact position helps avoid damage and saves time.
Accessing The Interior Side Of The Deadbolt
Start by going to the inside part of the door. The release tab is only on the interior side of the lock. Remove any cover plates gently if they block access. Sometimes, the interior knob or thumb turn needs to be turned or pulled slightly to expose the mechanism. This step is essential for reaching the hidden release tab safely.
How To Find The Release Tab Or Clip
Look for a small plastic or metal tab near the base of the interior knob. It may be a tiny lever or a push-button clip. Pressing this tab firmly will release the lock cylinder. Use your fingers or a flat tool to press it carefully. The deadbolt should then slide out smoothly. Take your time to feel around the edges for the tab if it is not visible right away.
Remove The Deadbolt Assembly
Removing the deadbolt assembly from a Kwikset lock without visible screws can seem tricky. The design hides the screws to give a clean look. You need to understand how to release the lock parts carefully. This step is important before you can replace or fix the deadbolt.
Start by focusing on the main lock cylinder. This piece holds the keyhole and controls the deadbolt movement. Removing it properly allows you to access the inner parts of the lock. Follow simple steps to press the release tab and slide out the cylinder.
Pressing The Release Tab Correctly
Find the small release tab on the side of the lock cylinder. It is often hidden behind the faceplate. Use a flathead screwdriver or a thin tool to press the tab gently. Apply steady pressure without forcing it. Pressing the tab unlocks the cylinder from the mounting plate.
Hold the cylinder firmly while pressing the tab. This prevents damage or slipping. If you cannot find the tab, try turning the key slightly. This action can help align the lock parts to reveal the tab. Patience and careful movements are key.
Sliding Out The Deadbolt Cylinder
With the release tab pressed, start sliding the cylinder out. Pull the cylinder straight from the door. Avoid twisting or bending it. The cylinder should slide out smoothly. If it sticks, press the tab again and try moving it slowly.
After removing the cylinder, you can access the deadbolt assembly. This step allows you to see the screws or parts inside. Removing the deadbolt assembly is easier once the cylinder is out. Handle all parts gently to prevent damage.
Handle Difficult Deadbolts
Removing a Kwikset deadbolt without visible screws can be tricky. These locks often hide their release mechanisms well. Getting stuck is common during removal. Understanding how to handle these problems saves time and frustration.
Patience and the right methods help. This section explains simple ways to remove difficult deadbolts safely.
When The Release Tab Is Stuck
The release tab is inside the lock, holding the knob in place. Sometimes it gets stuck due to dirt or wear. Try pressing the tab with a flat tool gently. Spray a small amount of lubricant to loosen it.
Push and wiggle the knob while pressing the tab. This can free the mechanism. Avoid forcing it hard to prevent damage to the lock or door.
Using Alternative Removal Methods
If the release tab won’t budge, try other ways. One method is to use a thin blade or plastic card. Slide it between the knob and door to press the tab.
Another option is to remove the interior trim plate. This often hides screws or clips. Use a flat screwdriver to pry it off carefully. Once exposed, you can access screws or the release tab more easily.
Reinstall Or Replace The Deadbolt
After removing a Kwikset deadbolt with no visible screws, reinstalling or replacing it is the next step. This process ensures your door stays secure and works smoothly. Pay close attention to how you place each part. Proper alignment helps the lock operate correctly and lasts longer.
Aligning Components Properly
Start by fitting the deadbolt into the door hole. Make sure the bolt slides into the strike plate on the door frame easily. Check that the tailpiece connects well with the lock mechanism inside. Tighten any hidden screws or clips firmly to hold parts in place. Avoid forcing pieces together; they should fit naturally.
Testing The Deadbolt Function
Turn the key or thumb turn several times after installation. Listen for smooth, quiet movement without sticking or jamming. Check that the bolt fully extends and retracts. Test the lock from both sides of the door. Confirm the door locks and unlocks securely every time. Adjust if the deadbolt feels tight or loose.
Prevent Future Removal Issues
Removing a Kwikset deadbolt without screws can be tricky. Preventing future removal issues saves time and effort. Taking simple steps keeps your lock easy to manage. These tips help avoid damage and frustration later.
Regular Maintenance Tips
Clean your deadbolt regularly. Dust and dirt can cause parts to stick. Use a soft cloth and mild cleaner. Check for loose or worn parts. Tighten any loose screws if visible. Lubricate the lock with graphite powder. Avoid oil-based lubricants that attract dirt. Test the lock monthly to ensure smooth operation.
Choosing Easy-to-remove Deadbolt Models
Select deadbolt models designed for easy removal. Look for ones with visible screws or quick-release features. Choose locks with clear instructions for removal. Avoid models that hide screws or require special tools. Simple designs save time during repairs or replacements. Check customer reviews for ease of maintenance before buying.

Credit: www.youtube.com

Credit: diy.stackexchange.com
Frequently Asked Questions
How Do You Remove A Kwikset Deadbolt Without Visible Screws?
Start by locating the small slot on the interior knob. Insert a flathead screwdriver or pin to press the release mechanism. Pull the knob off gently, then remove the exterior plate to access the lock cylinder and remove the deadbolt.
What Tools Are Needed To Remove A Kwikset Deadbolt?
You will need a flathead screwdriver or a thin pin to release the knob. Optionally, a Phillips screwdriver may help with the interior mounting plate. A flashlight can assist in seeing small components clearly during removal.
Can A Kwikset Deadbolt Be Removed Without Damaging The Door?
Yes, by carefully pressing the release slot and removing the knob, you avoid damage. Avoid using excessive force to prevent scratches or dents. Following proper steps ensures the door and lock remain intact.
Why Are There No Visible Screws On Kwikset Deadbolts?
Kwikset often hides screws for a cleaner look and added security. The screws are usually concealed behind the interior knob or cover plate. This design requires using a release mechanism instead of traditional screw removal.
Conclusion
Removing a Kwikset deadbolt without screws is easier than it seems. Follow the simple steps carefully to avoid damage. Use the right tools and take your time. Practice patience and stay safe during the process. This method saves time and prevents frustration.
Now, you can handle deadbolt removal with confidence. Keep these tips handy for future use. Don’t let a tricky lock stop you. You got this!