Are you struggling to hang shelves, pictures, or heavy items securely on your walls? Using wall anchors might seem tricky at first, but once you know the right steps, it becomes simple and stress-free.
This video guide will show you exactly how to use wall anchors the right way, so your items stay safe and sturdy. Keep reading and watch closely—you’ll learn easy tips that save you time, avoid mistakes, and make your walls stronger than ever.
Your next DIY project just got a whole lot easier!
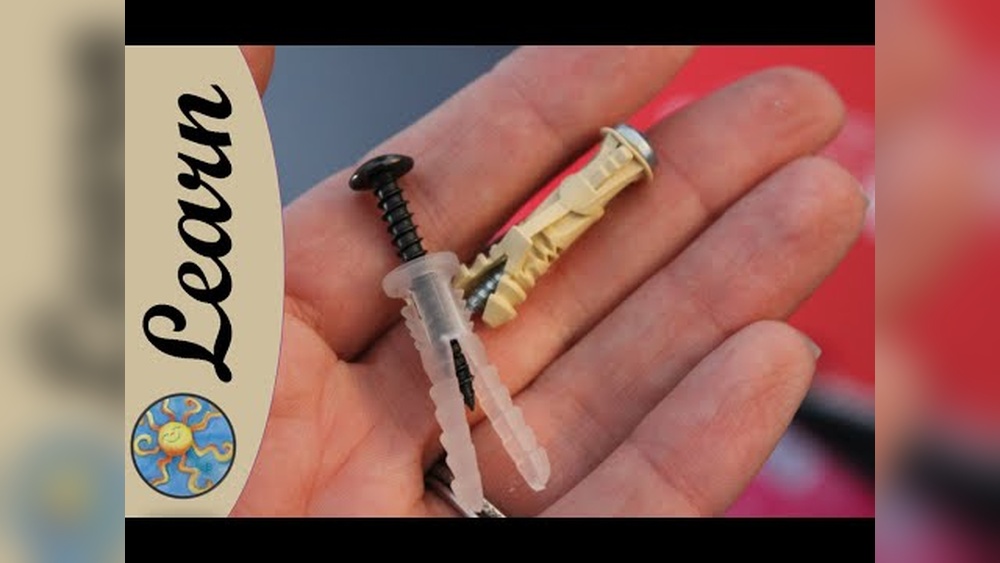
Types Of Wall Anchors
Wall anchors hold screws tightly in drywall or plaster. They stop screws from pulling out easily. Different anchors fit different needs. Choosing the right one makes your project strong and safe.
Plastic Expansion Anchors
These anchors are the most common type. Made of plastic, they expand when you insert a screw. They work well for light objects like picture frames. Easy to install with just a drill and screwdriver.
Toggle Bolts
Toggle bolts have metal wings that open inside the wall. They hold heavy items like shelves or mirrors. The wings spread the weight over a larger area. Good for hollow walls where strength matters.
Molly Bolts
Molly bolts are metal anchors that expand inside the wall. They create a strong hold for medium-weight items. Once inserted, the sleeve expands to grip the wall firmly. Perfect for hanging cabinets or curtain rods.
Self-drilling Anchors
Self-drilling anchors do not need a pre-drilled hole. They screw directly into drywall using a screwdriver. Made of metal or plastic, they save time during installation. Ideal for quick, easy, and reliable support.

Credit: www.youtube.com
Choosing The Right Anchor
Choosing the right wall anchor is key to a strong and safe hold. Different anchors fit different walls and weights. Picking the correct anchor ensures your item stays secure. This section guides you through simple steps to find the best anchor for your needs.
Assessing Wall Material
Identify the wall type before choosing an anchor. Drywall, plaster, brick, and concrete all need different anchors. Drywall anchors work best in hollow walls. Masonry anchors fit brick or concrete. Match your anchor to the wall for better support and safety.
Weight Capacity Considerations
Check the item’s weight before selecting an anchor. Heavy items need stronger anchors with higher weight limits. Light anchors suit small pictures or decorations. Choose an anchor that can handle more weight than your item to stay safe.
Anchor Size Selection
Anchor size matters for strength and fit. Bigger anchors hold more weight but need larger holes. Small anchors fit tight spaces but carry less weight. Pick an anchor size that matches your wall and item size for a perfect fit.
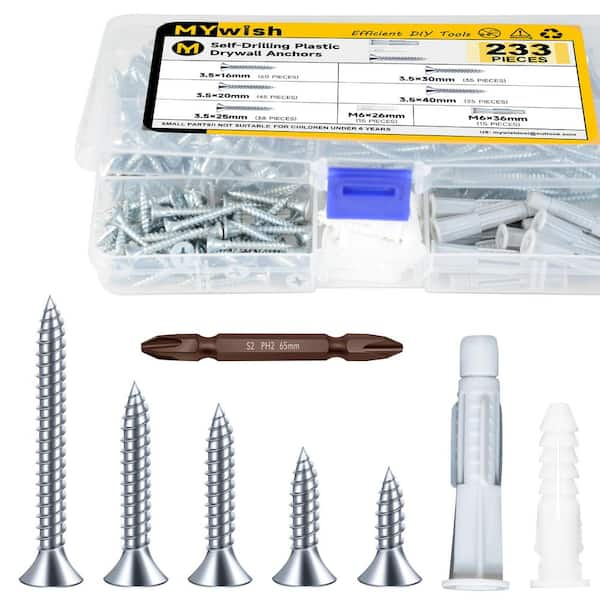
Tools Needed For Installation
Before installing wall anchors, gather the right tools. Having proper tools makes the job easier and safer. This section covers the basic tools needed for a smooth installation.
Drill And Drill Bits
A drill is essential to create holes for wall anchors. Choose a drill bit that matches the anchor size. Using the correct drill bit avoids damaging walls or anchors. A power drill with variable speed is best for control. Always wear safety glasses during drilling.
Screwdriver Options
Screwdrivers help tighten screws into the anchors. Use a Phillips or flathead screwdriver based on the screw type. A manual screwdriver offers more control for delicate tasks. An electric screwdriver speeds up the process for many screws. Keep the screwdriver tip clean and in good shape.
Measuring Tools
Measuring tools ensure accurate placement of wall anchors. A tape measure or ruler helps mark the exact spot. Use a pencil to make light marks on the wall. A level ensures anchors are straight and aligned. Correct measurements prevent uneven or loose installations.
Credit: bona-store.com
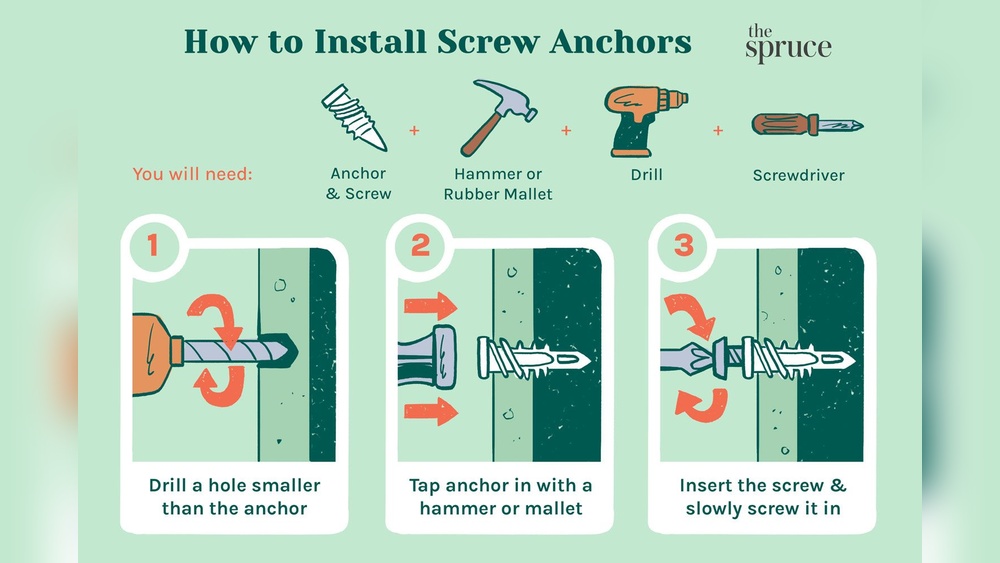
Step-by-step Installation Guide
Follow this step-by-step guide to install wall anchors with ease. Each step is clear and simple. You will secure items safely on your wall. Watch the video alongside for better understanding.
Take your time with each step. Correct installation ensures strong support. Let’s start with marking the fixing point.
Marking The Fixing Point
Find the exact spot on the wall where you want to place the anchor. Use a pencil to mark it clearly. Double-check the position before moving on. Accurate marking helps avoid mistakes later.
Drilling The Hole
Choose a drill bit that matches the anchor size. Drill a hole straight into the marked point. Drill slowly to prevent wall damage. Clean out any dust from the hole with a brush or cloth.
Inserting The Anchor
Push the wall anchor gently into the hole. Tap lightly with a hammer if needed. Ensure the anchor sits flush with the wall surface. A tight fit is important for strong holding power.
Securing The Screw
Place the screw into the anchor’s opening. Use a screwdriver to turn it clockwise. Tighten the screw until it is firm but not over-tightened. The screw should hold the item securely to the wall.
Common Mistakes To Avoid
Using wall anchors can be simple. Mistakes can cause problems. These errors make your wall anchor weak or useless. Avoiding common mistakes helps your project last longer. Here are some frequent errors to watch for.
Incorrect Anchor Choice
Pick the right anchor for your wall type. Drywall, plaster, and concrete need different anchors. Using the wrong one can make the anchor fail. Check the weight limit of the anchor. Do not guess. Choose the anchor that fits your wall and load.
Over-drilling Holes
Drill the hole size that matches the anchor. Too big a hole makes the anchor loose. The anchor won’t hold weight properly. Too small a hole can break the anchor. Measure and drill carefully. Follow the anchor instructions for hole size.
Improper Screw Tightening
Do not overtighten the screw. It can crack the wall or damage the anchor. Loose screws make the anchor unstable. Tighten screws until firm, not forced. Use steady pressure and check the fit. Stop once the anchor feels secure.
Tips For Stronger Fixings
Strong fixings hold your items safely on walls. Using wall anchors correctly makes a big difference. Small steps can improve the strength of your fixings. These tips help you get the best hold and avoid damage.
Pre-drilling Pilot Holes
Pre-drilling pilot holes guides the anchor into the wall. It prevents cracks and splits in the material. Use a drill bit slightly smaller than the anchor. Drill straight and steady for a clean hole. This step helps the anchor fit tightly and hold better.
Using Washers For Extra Support
Washers spread the pressure over a larger area. Place a washer between the screw head and the item. This reduces the chance of the screw pulling through. Washers add strength to soft or thin materials. They keep your fixings secure for longer.
Checking Anchor Stability
Check the anchor after installation by gently tugging the item. The fixing should feel solid without movement. Loose anchors need to be redone for safety. Also, inspect for cracks or damage around the hole. Stable anchors ensure your items stay firmly in place.
When To Use Wall Anchors
Wall anchors provide extra support for heavy items on walls. They stop screws from slipping out of drywall or plaster. Use them when you cannot find a stud or the weight is too much for screws alone. Wall anchors spread the load and keep items secure. Knowing when to use them makes your project safer and easier.
Hanging Shelves
Shelves hold books, decorations, and more. Drywall alone cannot support heavy shelves. Use wall anchors to keep shelves steady and prevent falling. Choose anchors rated for the shelf’s weight. This protects your wall and items on the shelf.
Mounting Tvs
Flat-screen TVs are heavy and need strong support. Mounting directly into drywall risks damage. Use wall anchors to hold the TV mount firmly. This ensures the TV stays in place without pulling out the screws. Safety first for your electronics and walls.
Installing Cabinets
Cabinets store dishes, food, or tools. They add weight on the wall. Screws alone may not hold cabinets securely. Wall anchors give extra strength to hold the load. This stops cabinets from loosening over time or falling off.

Credit: www.arlo.com
Frequently Asked Questions
What Are Wall Anchors Used For?
Wall anchors provide extra support for screws in drywall or hollow walls. They prevent screws from pulling out. Anchors distribute weight evenly, allowing you to hang heavier items safely.
How Do You Install Wall Anchors Correctly?
First, drill a hole matching the anchor size. Then, insert the anchor flush with the wall surface. Finally, drive the screw into the anchor securely without overtightening.
Which Type Of Wall Anchor Is Best?
Plastic expansion anchors suit light loads. Metal anchors handle medium weights. Toggle anchors are ideal for heavy objects. Choose based on wall type and item weight.
Can Wall Anchors Damage Walls?
If installed properly, wall anchors cause minimal damage. Removing anchors may leave small holes needing patching. Using the correct size and type reduces wall damage risks.
Conclusion
Using wall anchors makes hanging items easier and safer. Choose the right anchor for your wall type. Drill a hole, insert the anchor, and then screw in your item. This method prevents damage and keeps things secure. Practice a few times to gain confidence.
Soon, you will hang shelves, pictures, and more with ease. Simple steps lead to strong results. Try the video tips and see the difference yourself.