Have you ever tried to remove a wall anchor and ended up frustrated or worried about damaging your wall? You’re not alone.
Taking wall anchors out can seem tricky, but with the right approach, it’s easier than you think. You’ll discover simple, effective steps to remove wall anchors without making a mess or leaving big holes behind. Keep reading, and you’ll gain the confidence to handle this common home task like a pro.
:max_bytes(150000):strip_icc()/how-to-remove-drywall-anchors-7562285-02-c01abbfe63374ad3a7bc1e52d0c15bb2.JPG)
Credit: www.thespruce.com
Types Of Wall Anchors
Wall anchors hold objects on walls when screws alone are not enough. Different types suit various wall materials and weights. Knowing these types helps with proper removal and replacement.
Each anchor works differently. Some expand inside the wall, others use wings or threads for grip. Understanding these types makes wall repair easier.
Plastic Expansion Anchors
Plastic expansion anchors are common and easy to use. Inserted into a drilled hole, they expand as the screw goes in. They hold light items and work well in drywall and plaster.
Toggle Bolts
Toggle bolts have metal wings that open inside the wall. These wings spread the load over a large area. They support heavy items on hollow walls or ceilings.
Molly Bolts
Molly bolts are metal anchors that expand behind the wall. They create a strong hold in drywall or plaster. They are good for medium to heavy loads and permanent fixtures.
Threaded Drywall Anchors
Threaded drywall anchors screw directly into drywall without pre-drilling. Their threads grip the wall tightly. They are easy to install and remove, ideal for medium weight objects.

Credit: www.wikihow.com
Tools Needed For Removal
Removing wall anchors requires the right tools to do the job safely and cleanly. Using the proper tools helps protect your wall from damage. It also makes the removal process easier and faster. Below are the main tools you need for taking out wall anchors.
Screwdriver
A screwdriver is essential for removing anchors that use screws. Choose the correct type, either flathead or Phillips, to match the screw head. Turn the screwdriver counterclockwise to unscrew the anchor. This tool helps loosen the anchor before pulling it out.
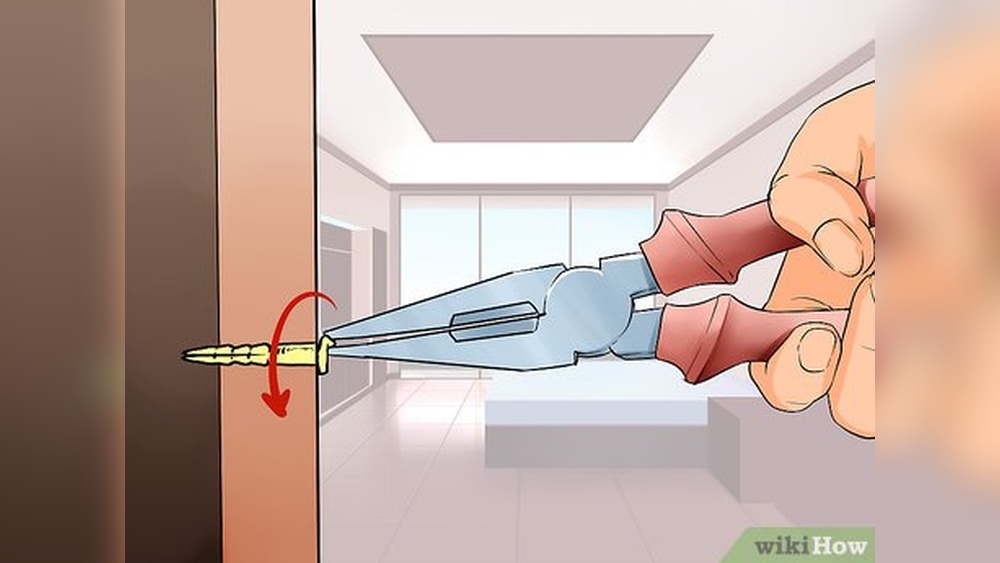
Pliers
Pliers are useful for gripping and pulling out anchors stuck in the wall. Needle-nose pliers work well for small anchors. Use a firm grip and pull gently to avoid damaging the wall. Pliers also help twist anchors free if they are difficult to remove.
Drill
A drill can speed up the removal of anchors that are tightly fixed. Use a drill bit slightly smaller than the anchor. Drill slowly to loosen the anchor inside the wall. This tool is helpful for plastic or metal anchors that won’t come out easily.
Putty Knife
A putty knife helps pry out anchors flush with the wall surface. Slide the blade carefully under the anchor’s edge. Gently push to lift the anchor away from the wall. This tool also helps smooth any wall damage after removal.
Preparing The Wall
Before removing wall anchors, prepare the area carefully. This step helps prevent damage and makes the process easier. Take time to get the space ready for safe work.
Proper preparation protects your walls and saves time during cleanup. Follow simple steps to clear and protect the work zone.
Clear The Area
Remove furniture and objects near the wall. A clear space gives you room to work comfortably. It also stops items from getting dirty or damaged. Move fragile or valuable things far from the wall.
Keep the floor empty too. This prevents tripping or knocking things over. A tidy area helps focus on the task at hand.
Protect Surrounding Surfaces
Cover floors with a drop cloth or old sheet. This catches dust and debris from anchor removal. Use painter’s tape to secure the covering in place. Protect baseboards and nearby walls with masking tape.
Wear gloves to keep your hands safe. Keep a damp cloth handy to wipe away dust as you work. These small steps guard your home and make cleanup quick.
Removing Plastic Expansion Anchors
Removing plastic expansion anchors can be simple with the right steps. These anchors hold firmly in walls but need careful handling for removal. Follow these easy methods to take them out without damaging your wall.
Unscrew The Anchor
Start by unscrewing the screw inside the plastic anchor. Use a screwdriver that fits well. Turn it counterclockwise until the screw comes out completely. Sometimes, the anchor will come out with the screw. If not, try the next method.
Pull Out With Pliers
Grip the plastic anchor’s edge with pliers. Pull gently but firmly. The anchor should slide out of the wall. Avoid pulling too hard to prevent wall damage. If the anchor feels stuck, try loosening it first by twisting.
Use A Drill If Stuck
For tough anchors, use a drill with a small bit. Carefully drill into the center of the anchor. This will break or loosen it inside the wall. Once loose, pull out the pieces with pliers. Clean the hole for reuse or patching.
Removing Toggle Bolts
Removing toggle bolts can be tricky but manageable with the right steps. Toggle bolts have a spring-loaded wing that opens behind the wall. This wing holds the bolt firmly in place. To remove it, you must handle both the bolt and the toggle carefully. Follow these simple steps to take out toggle bolts without damaging your wall.
Unscrew The Bolt
Start by turning the bolt counterclockwise. Use a screwdriver that fits the bolt head well. Keep turning until the bolt comes free from the wall. The toggle will stay inside the wall at this point. Do not try to pull the bolt out forcefully.
Push The Toggle Through The Wall
Once the bolt is out, push the toggle into the wall cavity. Use a long, thin object like a screwdriver or a coat hanger. Gently push the toggle until it falls inside the wall. This step clears the hole for patching later. Avoid pulling the toggle back through the hole.
Patch The Hole
After removing the toggle, the hole remains visible. Fill it with wall putty or spackle. Apply the filler smoothly and let it dry completely. Sand the area lightly for a flat finish. Finally, paint over the patch to match the wall color.
Removing Molly Bolts
Removing molly bolts from a wall can seem tricky. These anchors hold tight in drywall and provide strong support. Knowing how to take them out correctly helps avoid wall damage.
Molly bolts have a metal sleeve that expands behind the wall. This expansion keeps them secure. To remove them, follow a few clear steps.
Unscrew The Bolt To Expand
First, use a screwdriver to turn the bolt counterclockwise. This action expands the sleeve inside the wall. It loosens the grip of the anchor.
Collapse The Sleeve
Next, push the bolt inward slightly. This collapses the metal sleeve. The anchor becomes smaller and easier to remove.
Pull Out The Anchor
Finally, use pliers or your hand to pull the anchor out. Pull gently but firmly to avoid tearing the wall. The hole left can be filled later.
Removing Threaded Drywall Anchors
Removing threaded drywall anchors is a straightforward task with the right method. These anchors are designed to grip the drywall tightly, making removal a bit tricky. A careful approach helps avoid damage to the wall. Follow these simple steps to remove them cleanly and prepare your wall for repair or reuse.
Unscrew The Anchor
Start by trying to turn the anchor counterclockwise using a screwdriver. Often, the anchor will back out like a screw. Apply steady pressure and keep the screwdriver aligned with the anchor. If it moves, continue turning until the anchor comes out completely. This step works best for anchors that are not deeply embedded.
Use Pliers For Grip
If the anchor won’t unscrew, use needle-nose pliers for a better grip. Grab the anchor’s outer edge firmly and twist it gently. Pull the anchor out while twisting. Be careful not to squeeze too hard and crush the anchor. This method helps remove stubborn anchors without causing extra wall damage.
Repair The Hole
After the anchor is removed, a hole will remain in the drywall. Fill the hole with spackling paste or wall filler. Use a putty knife to smooth the surface flush with the wall. Let it dry completely, then sand it gently for a smooth finish. This prepares the wall for painting or hanging new items.
Fixing Wall Damage
Removing wall anchors leaves holes that need fixing. Repairing these spots restores your wall’s smooth look. It also prepares the surface for painting. This section guides you through fixing wall damage step by step.
Cleaning The Hole
Start by clearing any loose debris from the hole. Use a small brush or a vacuum cleaner. Make sure the hole is dry and dust-free. This helps the filler stick better to the wall.
Filling With Spackle
Apply spackle to fill the hole completely. Use a putty knife to spread the spackle evenly. Press the spackle firmly to avoid air pockets. Let it dry according to the product instructions.
Sanding And Painting
Once dry, sand the patched area smooth with fine sandpaper. Wipe away the dust with a damp cloth. Paint over the patch with matching wall paint. Use light coats for a seamless finish.
Tips For Damage-free Removal
Removing wall anchors without causing damage can be tricky. The right approach keeps your walls smooth and ready for new use. Follow simple tips to pull out anchors safely and cleanly.
Work Slowly And Carefully
Take your time during removal. Rushing may tear the wall surface. Use gentle, steady pressure. Small, careful movements reduce damage risk. Patience helps keep walls intact.
Use The Right Tools
Select tools that fit the anchor type. Pliers, screwdrivers, or a drill may help. A proper grip avoids slipping or cracking. Use tools designed for light, precise work. Avoid forcing anchors out with wrong gear.
Know Your Anchor Type
Identify the anchor before removal. Plastic anchors need pulling or twisting. Metal anchors may require unscrewing first. Toggle anchors need special care to collapse properly. Correct methods prevent wall harm and ease removal.

Credit: theturquoisehome.com
Frequently Asked Questions
How Do You Safely Remove Wall Anchors?
To safely remove wall anchors, first unscrew any attached screws. Then, gently pull the anchor out using pliers. For stubborn anchors, push them into the wall cavity carefully to avoid damage. Always patch and paint the area afterward for a clean finish.
What Tools Are Needed To Remove Wall Anchors?
You need a screwdriver to remove screws and pliers to pull anchors out. A utility knife helps score around the anchor if stuck. For heavy-duty anchors, a drill or hammer may assist in removal. Always use safety goggles during this process.
Can Wall Anchors Damage My Drywall?
Yes, improper removal of wall anchors can damage drywall. Pulling too hard may tear the drywall paper or create holes. Using the right tools and techniques minimizes damage. Patch any holes with spackle and sand smooth for best results.
How Do You Remove Plastic Wall Anchors?
Remove plastic anchors by first unscrewing the screw. Then, use pliers to grip and pull the anchor straight out. If it resists, gently push it into the wall cavity. Avoid twisting or jerking to prevent wall damage.
Conclusion
Removing wall anchors can be simple with the right steps. Start by loosening the anchor gently. Use tools like pliers to pull it out carefully. Avoid damaging the wall by working slowly. Once removed, fill holes with putty or spackle.
Sand the area smooth when dry. Paint over it to match your wall color. These steps help keep your walls neat and ready. Taking your time makes the process easier. You can do it yourself without much trouble.


