Are you looking to install a deadbolt on your metal door but unsure how to drill the perfect hole? You’re not alone.
Drilling into metal can feel tricky and even intimidating if you’ve never done it before. But with the right steps and tools, you can create a clean, precise hole that ensures your deadbolt fits securely. Keep reading, and you’ll learn exactly how to drill a deadbolt hole in your metal door safely and efficiently—giving you the confidence to upgrade your door’s security today.

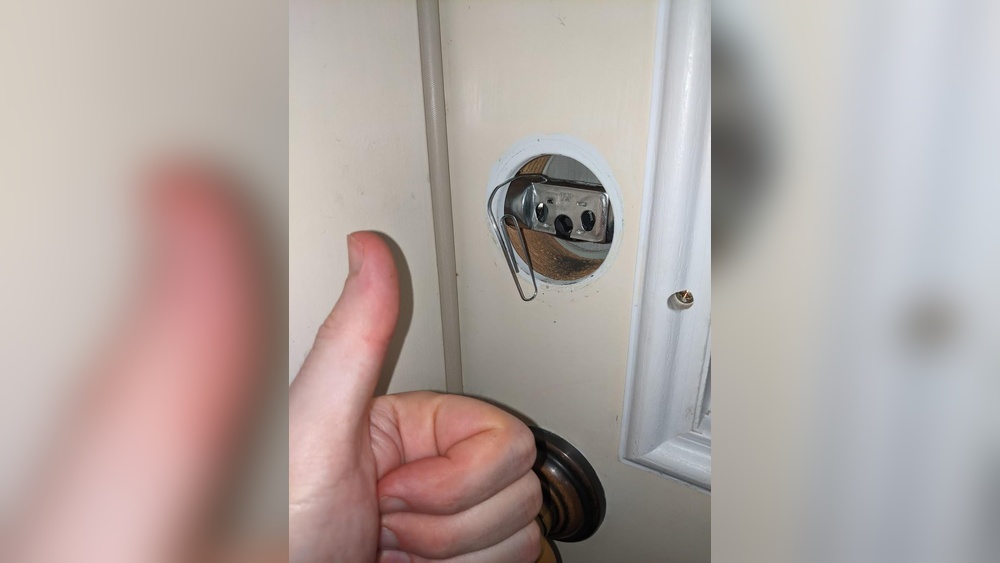
Credit: www.youtube.com
Tools And Materials Needed
Drilling a deadbolt hole in a metal door needs the right tools and materials. Having these ready makes the job easier and safer. Using proper tools helps avoid mistakes and keeps the door intact. Preparing your workspace with the right supplies saves time and effort.
Essential Drilling Tools
A power drill with variable speed is key for metal doors. Use drill bits made for metal, like cobalt or titanium ones. A hole saw bit sized for the deadbolt fits perfectly. A center punch helps mark the drilling spot. Clamps secure the door and prevent movement during drilling.
Safety Gear
Wear safety glasses to protect your eyes from metal shavings. Use ear protection to reduce drill noise. Gloves protect your hands from sharp edges and heat. A dust mask stops inhaling small metal particles. Proper safety gear keeps accidents and injuries away.
Marking And Measuring Supplies
A tape measure ensures correct hole placement. A pencil or marker makes visible guide marks. A square or ruler helps keep measurements straight. Marking the door carefully before drilling ensures accuracy. Proper measurement prevents costly mistakes and fits the deadbolt well.
Preparing The Metal Door
Preparing a metal door for drilling a deadbolt hole is an important step. It ensures the hole is in the right place and the drilling process is safe and smooth. Taking time to prepare helps avoid mistakes and damage.
Choosing The Right Spot
Pick a spot that fits the deadbolt size and function. Usually, the deadbolt goes about 6 to 12 inches above the doorknob. Check the door thickness and metal type before marking. Avoid areas with wiring or metal reinforcements inside the door.
Marking The Hole Location
Use a pencil or marker to mark the exact spot for the hole. Measure carefully from the door edge and top or bottom. Double-check measurements to make sure the hole lines up with the lock. Mark both the hole for the lock and the hole for the latch.
Securing The Door For Drilling
Keep the door steady by locking it in place or using clamps. This stops the door from moving during drilling. Place a piece of wood under the drilling area to protect the surface beneath. Wear safety glasses and gloves for protection.
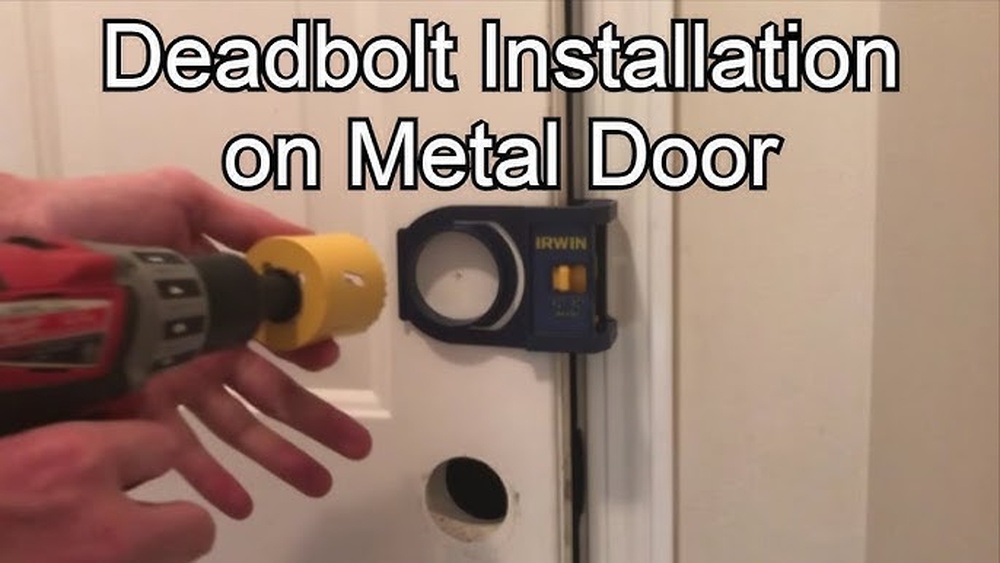
Drilling The Deadbolt Hole
Drilling a deadbolt hole in a metal door needs care and the right steps. This process ensures the lock fits perfectly and works well. Metal doors are tough, so drilling requires the right tools and technique. Follow these steps to drill your deadbolt hole safely and accurately.
Selecting The Drill Bit
Choose a drill bit made for metal. High-speed steel (HSS) bits work best. Pick the size that matches your deadbolt’s hole. Using the wrong bit can damage the door or your tools. Always check the bit’s condition before you start drilling.
Creating A Pilot Hole
Start with a small pilot hole. This guides the larger bit and prevents slipping. Mark the spot clearly with a center punch. Drill slowly and keep the bit straight. The pilot hole makes the next steps easier and safer.
Enlarging The Hole To Size
Use a larger bit to widen the pilot hole. Do this in steps if needed. Drill at a steady speed without forcing the bit. Cool the bit by pausing or using water. This prevents overheating and keeps the hole clean.
Avoiding Common Drilling Mistakes
Do not rush the drilling process. Avoid pushing too hard on the drill. Keep the drill steady and straight. Wear safety glasses to protect your eyes from metal shavings. Check your progress often to avoid making the hole too big.

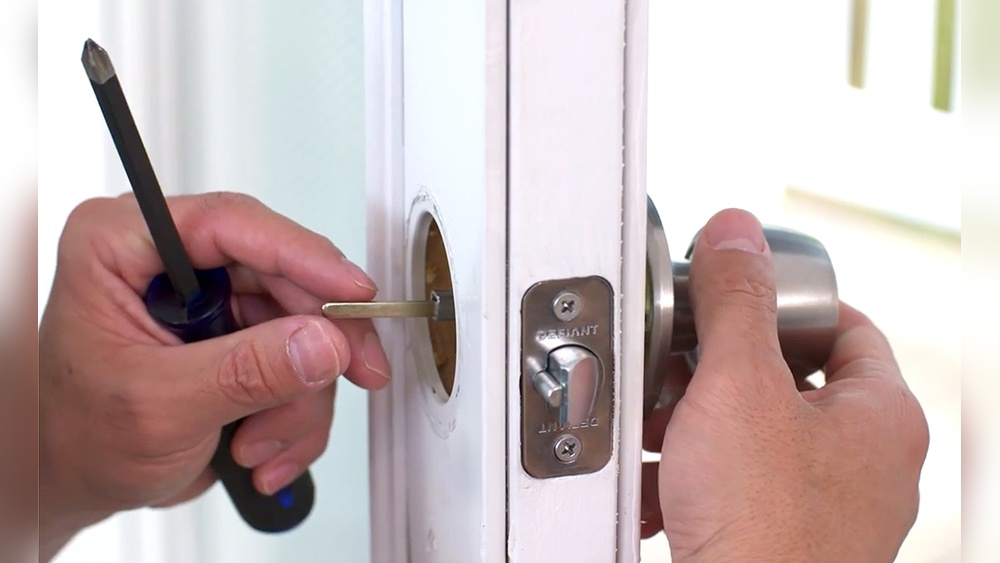
Credit: www.reddit.com
Installing The Deadbolt
Installing the deadbolt is a key step after drilling the hole in your metal door. Proper installation ensures your lock works smoothly and keeps your home safe. Follow these steps carefully to fit, align, and test the deadbolt.
Fitting The Deadbolt Components
Start by placing the deadbolt mechanism inside the drilled hole. Make sure it fits snugly without forcing it. Attach the faceplate on the edge of the door. Use screws to hold the mechanism firmly in place. Next, install the exterior and interior parts of the lock. Align them with the deadbolt mechanism. Check that the keyhole and thumb turn are positioned correctly.
Aligning And Securing The Lock
Align the lock parts so they work together smoothly. Tighten all screws but avoid overtightening. This can damage the door or lock. Ensure the lock sits flush against the door surface. Use a level to check the alignment. Adjust if needed to prevent sticking or jamming. Make sure the strike plate on the door frame matches the deadbolt position.
Testing The Deadbolt Functionality
Test the lock by turning the key or thumb turn several times. The deadbolt should slide in and out easily. Check the lock from both sides of the door. Confirm it locks and unlocks without resistance. If the lock sticks, loosen screws and realign parts. Repeat testing until the deadbolt operates smoothly. Proper testing ensures security and ease of use.
Tips For Drilling In Metal
Drilling into a metal door for a deadbolt requires care and the right approach. Metal is tough and can wear down your tools quickly. Using proper techniques helps make the job easier and safer. These tips improve your drilling accuracy and extend the life of your drill bits.
Lubricating The Drill Bit
Lubrication reduces heat and friction during drilling. Use cutting oil or light machine oil on the drill bit. Apply oil regularly to keep the bit cool. This prevents the bit from dulling or breaking. A well-lubricated bit cuts smoother and lasts longer.
Maintaining Drill Speed
Keep a steady, moderate drill speed for metal. High speed creates excessive heat and can damage the bit. Slow down as you drill deeper into the metal. Let the drill bit do the work without pushing too hard. Consistent speed improves control and hole quality.
Handling Tough Metal Surfaces
Start with a small pilot hole to guide the larger bit. Use a center punch to mark the drilling spot and prevent slipping. Hold the drill firmly and keep it straight. Take breaks to cool the bit if the metal feels hot. Patience is key when working with thick or hard metal.

Credit: diy.stackexchange.com
Troubleshooting Drilling Issues
Drilling a hole in a metal door for a deadbolt can be tricky. Problems may happen during drilling. These issues can slow down your work or cause mistakes. Knowing how to handle these problems helps you finish the job well. Here are common drilling problems and how to fix them quickly.
Dealing With Drill Bit Slippage
Drill bit slippage happens when the bit slips off the mark. Metal doors are smooth, so the bit may slide easily. To stop this, use a center punch to make a small dent. This dent holds the drill bit in place. Start drilling slowly to keep the bit steady. Use bits made for metal to get better grip.
Fixing Misaligned Holes
Misaligned holes can ruin the deadbolt installation. Check measurements before drilling to avoid this. If the hole is off, fill it with metal filler or epoxy. Let the filler dry fully. Mark the correct spot again. Drill the new hole carefully, using a guide or jig for help. Take your time to stay precise.
Repairing Damage To The Door
Accidental damage can happen during drilling. Scratches or dents weaken the door’s surface. Clean the damaged area with a cloth. Use metal filler to cover dents or holes. Sand the surface smooth after the filler dries. Paint the repaired spot to protect from rust. This keeps your door strong and looking good.
Frequently Asked Questions
How Do You Drill A Deadbolt Hole In A Metal Door?
First, mark the hole location using a template. Use a center punch to create an indentation. Drill a pilot hole, then enlarge it with a hole saw designed for metal. Finish with a metal file to smooth edges before installing the deadbolt.
What Tools Are Needed For Drilling Metal Door Holes?
Essential tools include a power drill, metal hole saw, center punch, measuring tape, and safety gear. A lubricant helps reduce heat. A file is needed to smooth the hole edges after drilling for a clean fit of the deadbolt.
How To Avoid Damaging The Metal Door While Drilling?
Use a center punch to prevent drill slipping. Drill slowly with steady pressure and use lubricant to reduce heat. Avoid excessive force to prevent dents or warping. Always wear safety gear to protect yourself from metal shards.
Can I Drill A Deadbolt Hole In Any Metal Door?
Most metal doors can be drilled, but check door thickness and metal type. Thicker or hardened steel doors may require specialized drill bits or professional help. Always confirm compatibility with your deadbolt lock specifications before drilling.
Conclusion
Drilling a deadbolt hole in a metal door takes care and the right tools. Follow each step slowly and carefully to avoid mistakes. Use a drill bit made for metal to make clean holes. Measure twice, drill once. Safety matters—wear goggles and gloves to protect yourself.
With patience and practice, you can install your deadbolt securely. This skill adds extra safety to your home. Keep your tools ready for future projects. Simple steps lead to strong results.