Are you struggling to fit a new deadbolt into your door because the hole is just a bit too small? You’re not alone.
Many homeowners face this exact problem when upgrading their locks. The good news is, enlarging an existing deadbolt hole is easier than you might think—and you don’t have to be a professional to do it right. In this guide, you’ll discover simple, step-by-step tips that will help you expand your deadbolt hole safely and accurately.
Keep reading, and you’ll have your door ready for that stronger, more secure lock in no time.
Tools Needed
Enlarging an existing deadbolt hole requires a few key tools. These tools help you work safely and accurately. Gathering the right equipment makes the job easier and faster. Below are the main tools you will need.
Drill And Bits
A power drill is essential for enlarging the hole. Choose one that you can handle comfortably. You will need drill bits of different sizes. Start with a smaller bit to guide the hole. Then use a larger bit to reach the right size. Sharp, high-quality bits work best on wood and metal.
Measuring Tools
Precise measuring tools are important for accuracy. Use a tape measure or ruler to check the hole size. A pencil helps mark where to drill. A caliper can measure the diameter of the hole. This ensures you do not make the hole too big or small.
Safety Gear
Safety is important during any drilling task. Wear safety glasses to protect your eyes. Use gloves to shield your hands from splinters and sharp edges. Ear protection helps reduce noise from the drill. Work in a well-lit area to see clearly.

Credit: www.youtube.com
Assessing The Existing Hole
Before enlarging a deadbolt hole, assess the existing hole carefully. This step helps ensure a smooth and precise enlargement process. You avoid damage and guarantee proper lock fitting. Focus on three key areas: measuring the current diameter, checking the door material, and evaluating lock compatibility.
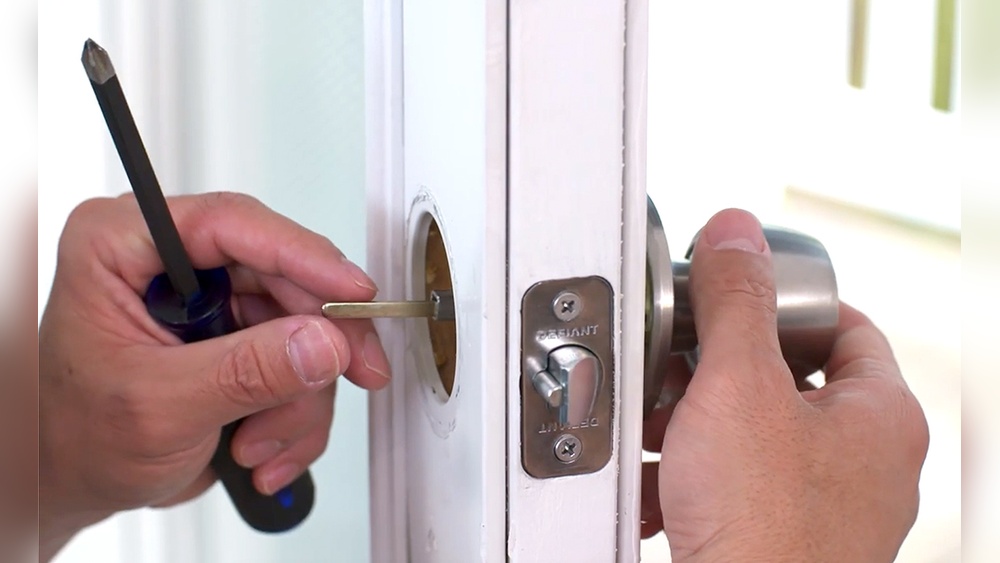
Measuring Current Diameter
Use a tape measure or caliper to find the hole’s diameter. Measure across the widest part of the hole. Write down the number to compare with the new lock size. Accurate measurement prevents mistakes during the enlargement.
Checking Door Material
Identify the door’s material. It can be wood, metal, fiberglass, or composite. Different materials need different tools and techniques. Wood is easier to work with than metal. Knowing the material helps select the right drill bit or hole saw.
Evaluating Lock Compatibility
Check if the new lock fits the enlarged hole size. Read the lock’s installation instructions carefully. Some locks need specific hole diameters or shapes. Confirm the backset and latch size match the door’s thickness. Proper compatibility avoids extra work later.
Marking The New Hole Size
Marking the new hole size is a key step in enlarging a deadbolt hole. Accurate marks guide the drilling and cutting. Mistakes here lead to a poor fit or damage. Take your time and be precise. Use proper tools to ensure straight, clear marks.
Using A Template
A template helps outline the exact size needed. Most deadbolt kits include one. If not, create your own from cardboard or thin wood. Align it with the existing hole. Hold it firmly against the door surface. Trace around the template with a pencil. Check that the marks are clear and complete.
Marking Drill Points
Mark drill points inside the traced circle for clean cuts. Use a center punch to make small indentations. These dents guide the drill bit and prevent slipping. Place drill points evenly around the hole’s edge. Double-check measurements before drilling. Precise drill points ensure a smooth enlargement process.

Credit: diy.stackexchange.com
Preparing The Door
Preparing the door is the first step to enlarge an existing deadbolt hole. This step ensures safety and precision during the process. Proper preparation helps avoid damage and makes the task easier. Follow these simple steps before you start drilling or cutting.
Securing The Door
Keep the door steady to prevent movement. Use clamps or ask someone to hold it firmly. A stable door makes drilling safer and more accurate. Avoid working on a swinging or loose door. This reduces the risk of mistakes and injury.
Protecting Surrounding Areas
Cover the floor and walls near the door. Use drop cloths or old newspapers to catch dust and debris. Protect the door’s surface with painter’s tape around the hole. This prevents scratches and chips during drilling. Clean up is easier with these simple protections in place.
Drilling And Enlarging The Hole
Drilling and enlarging the hole for a deadbolt requires care and precision. The hole must be the right size for the lock to fit securely. This process involves choosing the correct tools and using proper techniques. Careful drilling prevents damage to the door and lock mechanism.
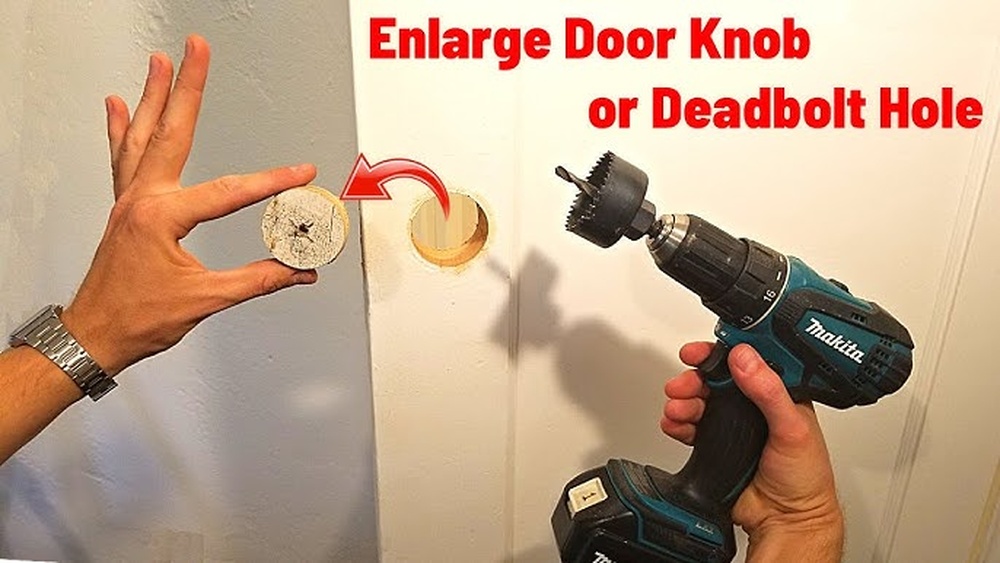
Choosing The Right Drill Bit
Select a drill bit that matches the new hole size needed. A hole saw bit works best for large holes. Use a high-speed steel or carbide bit for clean cuts. Avoid using bits that are too small or too large. The right drill bit ensures smooth and accurate drilling.
Drilling Techniques
Mark the center of the existing hole clearly. Start drilling slowly to avoid slipping. Use steady pressure to control the drill. Drill straight and avoid tilting the bit. Pause occasionally to clear out wood chips. This keeps the hole clean and prevents overheating.
Avoiding Damage
Protect the door surface with painter’s tape. This reduces splintering around the hole edges. Keep the drill bit sharp to make clean cuts. Do not force the drill; let it work at its own pace. Check progress often to avoid drilling too deep. Careful work protects the door and lock parts.
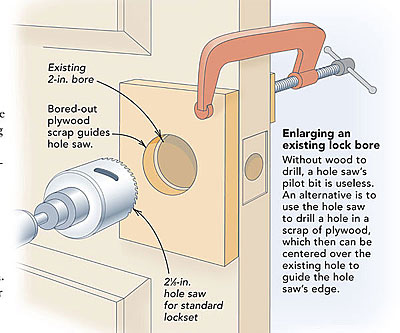
Credit: www.finehomebuilding.com
Smoothing And Finishing
Smoothing and finishing the enlarged deadbolt hole is a key step. It ensures the lock fits well and works smoothly. This step also helps the door look neat and protects it from damage. Proper smoothing avoids splinters and rough spots that can cause problems later.
Removing Rough Edges
Use a round file or sandpaper to smooth the hole edges. Move the tool gently around the hole’s perimeter. Remove any splinters or jagged wood pieces. Take your time to make the edges even and smooth. This makes it easier to install the deadbolt and prevents wood from breaking.
Cleaning Debris
Clear out all dust and wood shavings inside and around the hole. Use a brush or vacuum for thorough cleaning. Removing debris helps the lock fit better and avoids interference. A clean hole ensures a tight and secure deadbolt installation.
Installing The Deadbolt
Installing the deadbolt is the final step in securing your door. This part requires care to fit the lock properly. A well-installed deadbolt works smoothly and keeps your home safe.
Fitting The Lock
Begin by placing the deadbolt into the hole you enlarged. Check that it fits snugly without forcing. Align the lock’s latch with the edge of the door. Secure the lock with screws, tightening them evenly. Make sure the lock plate sits flush on the door surface.
Testing Functionality
Turn the key or thumb turn to test the lock. The bolt should slide smoothly in and out. Check both sides of the door to ensure easy operation. If the bolt sticks, adjust the lock or hole slightly. Confirm the door closes fully without resistance.
Tips For Success
Enlarging an existing deadbolt hole needs care and patience. Follow these tips for a smooth, precise job. Preparation and the right tools make a big difference. Take your time and work step-by-step to avoid damage.
Common Mistakes To Avoid
Do not rush the drilling process. Moving too fast can crack the door. Avoid using the wrong drill bit size. A bit too large or small will ruin the hole.
Never force the drill. Let the tool do the work. Skipping measurement checks leads to uneven holes. Measure twice, drill once.
Ignoring door material type causes problems. Wood and metal need different drill bits. Using the wrong one can break the drill bit or damage the door.
Maintenance Advice
After enlarging the hole, clean all debris carefully. Dust and chips can block the lock mechanism. Test the lock several times to ensure smooth operation.
Lubricate the lock with graphite or silicone spray. Avoid oil-based lubricants that attract dirt. Check the lock annually for signs of wear.
Keep screws tight but avoid over-tightening. Loose screws reduce security. Replace worn parts promptly to keep the deadbolt strong and reliable.
Frequently Asked Questions
How Do I Enlarge A Deadbolt Hole Safely?
Use a hole saw slightly larger than the existing hole. Mark the center carefully. Drill slowly to avoid splintering the wood. Always wear safety goggles and keep the drill steady for a clean cut.
What Tools Are Needed To Enlarge Deadbolt Holes?
You need a power drill, a hole saw bit, a pencil, and safety goggles. A spade bit or rotary tool can also help for fine adjustments. These tools ensure accuracy and safety during the process.
Can Enlarging A Deadbolt Hole Weaken My Door?
If done correctly, enlarging the hole won’t weaken your door. Use the right size hole saw and avoid removing too much material. Reinforce around the hole with wood filler or a metal plate if needed.
How Much Larger Should I Make The Deadbolt Hole?
Make the hole slightly larger than the new deadbolt size. Usually, 1/8 inch bigger than the lock cylinder diameter is ideal. This allows the lock to fit snugly without forcing or damaging the door.
Conclusion
Enlarging a deadbolt hole is simple with the right tools and steps. Take your time and measure carefully before drilling. Always wear safety gear to protect yourself. A clean, precise hole ensures your lock fits well and works smoothly. Practice on scrap wood if unsure.
This project can improve your home security with little effort. Stay patient and follow the process step-by-step for best results. You will feel proud once the job is done properly.