Have you ever tried to remove a hollow wall anchor and ended up frustrated, unsure of what to do next? You’re not alone.
These little anchors can be tricky, often sticking stubbornly in your wall and making simple repairs feel like a big challenge. But don’t worry—getting them out doesn’t have to be a headache. You’ll discover easy, step-by-step methods to remove hollow wall anchors without damaging your walls.
Keep reading, and you’ll learn the secrets to making this common home repair quick and hassle-free.
Tools Needed
Removing hollow wall anchors requires the right tools. Using proper tools makes the job easier and safer. You can choose from common household tools or specialized removal tools. Each has its own use depending on the situation. Knowing what to use helps save time and effort.
Common Household Tools
Many hollow wall anchors can be removed with tools found at home. A flathead screwdriver helps pry the anchor gently from the wall. Needle-nose pliers work well to grip and pull small anchors. A utility knife can cut around the anchor for easier removal. Even a hammer can help tap the anchor loose if used carefully. These tools are easy to find and simple to use.
Specialized Removal Tools
Specialized tools make removing stubborn anchors faster. An anchor removal tool is designed to grip and pull anchors cleanly. A drill with a screwdriver bit can loosen anchors that are stuck tightly. Wall anchor extractors work by gripping and turning the anchor out of the wall. These tools cost more but offer better control and less damage to the wall. They are worth it for frequent or tough removal jobs.
Types Of Hollow Wall Anchors
Hollow wall anchors come in different types. Each type fits specific needs and wall types. Knowing these types helps you remove them properly. This section explains three common hollow wall anchors.
Plastic Expansion Anchors
Plastic expansion anchors are simple and widely used. They are made of plastic and expand inside the wall. The screw pushes the anchor to widen and hold firm. These anchors work best in lightweight materials like drywall. They are easy to install but can be tricky to remove without damage.
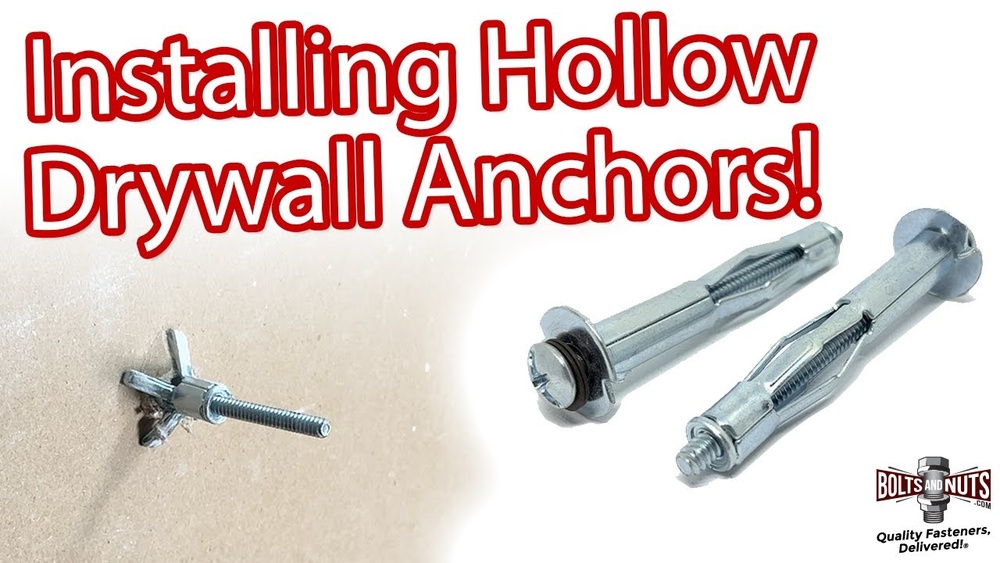
Metal Molly Bolts
Metal molly bolts have a sleeve that expands behind the wall. They provide strong support for heavier items. When installed, the sleeve opens inside the hollow space. This anchor grips the wall firmly. Removing molly bolts requires careful unscrewing to avoid tearing the wall.
Toggle Bolts
Toggle bolts have wings that fold to fit through the hole. Once inside, the wings open wide for strong hold. They are useful for heavy loads and uneven surfaces. Removing toggle bolts can be challenging because of their large wings. Special tools or techniques often help take them out safely.
Preparation Steps
Preparing well is important before removing hollow wall anchors. It helps make the process safer and smoother. Taking time to get ready can save effort and prevent damage to walls and tools.
Clearing The Area
Start by clearing the space around the anchor. Remove furniture or objects near the wall. This gives you enough room to work freely. It also prevents items from getting dirty or damaged. Lay down a drop cloth or old sheet. This catches dust and small debris. Keep a small container nearby. Use it to collect screws or anchor parts. A tidy work area helps keep focus and avoid accidents.
Safety Precautions
Wear safety goggles to protect your eyes from dust and debris. Use gloves to avoid cuts and scrapes. Make sure the room is well-lit. Good lighting helps you see the anchor clearly. Keep a first-aid kit nearby for minor injuries. Check your tools before starting. Use the right tools for the job. Faulty or wrong tools can cause accidents. Follow these safety steps to protect yourself and your home.

Credit: www.youtube.com
Removing Plastic Expansion Anchors
Removing plastic expansion anchors can be tricky but possible with the right method. These anchors expand inside the wall to hold firmly. Taking them out requires care to avoid wall damage. Two common ways work well: using pliers or pushing the anchor through the wall. Both methods are simple and effective for small plastic anchors.
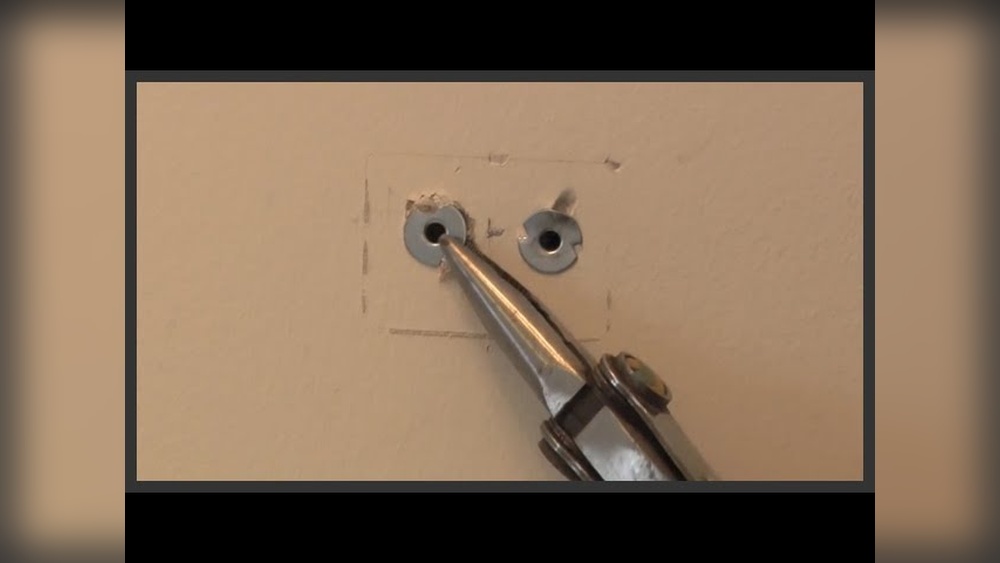
Using Pliers
Start by gripping the edge of the anchor with pliers. Pull gently and steadily to avoid breaking it inside the wall. If the anchor moves slowly, wiggle it back and forth. This helps loosen the anchor’s grip inside the wall. Keep pulling until the anchor slides out completely. If it breaks, try another method.
Pushing Through The Wall
This method works well for anchors that won’t pull out. Use a screwdriver slightly smaller than the anchor’s hole. Push the anchor gently into the wall cavity. The anchor will fall inside the wall, leaving a small hole. Patch the hole later with spackling or filler for a smooth finish. This method avoids wall surface damage.
Removing Metal Molly Bolts
Removing metal molly bolts from hollow walls can be tricky. These anchors are strong and built to hold tight. Knowing the right steps helps you remove them without damage. Start by focusing on the bolt itself. Then, work on the anchor behind the wall.
Unscrewing The Bolt
Begin by turning the bolt counterclockwise. Use a screwdriver that fits well to avoid slipping. Turn slowly and steadily. The bolt should come out easily. If it feels stuck, try applying a little more force. Avoid stripping the head of the bolt. A damaged bolt can make removal harder.
Collapsing The Anchor
After removing the bolt, the anchor stays inside the wall. It expands behind the wall to hold tight. To remove it, push the anchor inward gently. Use pliers to grip the anchor’s collar. Squeeze to collapse the anchor’s legs. Once collapsed, pull it out carefully. This prevents wall damage and prepares the surface for repair.
Removing Toggle Bolts
Removing toggle bolts from hollow walls can be tricky. These anchors expand behind the wall for a strong hold. Pulling them out requires patience and the right steps. Follow this guide to remove toggle bolts safely and easily.
Unscrewing And Retrieving
Start by unscrewing the bolt from the wall. Use a screwdriver that fits the bolt head well. Turn the screw counterclockwise to loosen it. Keep turning until the bolt comes free from the toggle.
Once the bolt is out, the toggle may fall inside the wall. Sometimes it stays attached to the bolt. Pull gently to retrieve the toggle through the hole. Avoid forcing it to prevent wall damage.
Dealing With Stuck Anchors
Some toggles get stuck and do not come out easily. Use needle-nose pliers to grab the toggle inside the wall. Pull slowly to avoid tearing the drywall.
If the toggle is too tight, push it further into the wall cavity. This hides it safely behind the drywall. Patch the hole later with spackle or wall filler for a smooth finish.
Repairing The Wall After Removal
After removing hollow wall anchors, the wall may have visible holes or damage. Repairing these spots makes your wall look clean and smooth again. Proper repair helps the paint stick well and hides past damage. Follow simple steps to fix your wall quickly and easily.
Filling Holes
Start by cleaning the holes with a dry cloth. Remove any dust or loose bits inside. Use a putty knife to apply spackling paste or wall filler. Press the filler firmly into the hole to fill it completely. Smooth the surface with the putty knife to match the wall. Let the filler dry fully, usually for a few hours.
Sanding And Painting
Once the filler dries, sand the patch gently with fine sandpaper. Sand until the surface feels smooth and even. Wipe away dust with a clean cloth. Paint over the patched area with matching wall paint. Use a small brush for precise coverage. Let the paint dry and apply a second coat if needed.

Credit: www.andersonlumbercompany.com
Tips To Avoid Wall Damage
Removing hollow wall anchors can damage your walls if done carelessly. Protect your wall by using gentle and careful methods. Avoiding wall damage saves time and money on repairs. Small efforts make a big difference in keeping walls intact.
Gentle Techniques
Start by loosening the anchor gently. Use slow, steady movements to avoid cracking the wall. Pull anchors straight out to reduce stress on the drywall. Avoid twisting or forcing the anchor, which may cause holes. Patience helps keep your wall smooth and clean.
Using The Right Tools
Choose tools made for wall anchors. Needle-nose pliers work well for gripping small anchors. A screwdriver can help push anchors back inside the wall. Use a putty knife to gently pry around the anchor if stuck. The correct tools reduce the chance of wall damage.
Credit: stonedesignbysantos.com
Frequently Asked Questions
How Do You Remove Hollow Wall Anchors Safely?
To remove hollow wall anchors safely, first unscrew the anchor if possible. If not, push it through the wall carefully. Use pliers or a screwdriver to gently pry it out without damaging the wall surface.
What Tools Are Needed To Extract Hollow Wall Anchors?
You need pliers, a screwdriver, a drill, and possibly a utility knife. These tools help loosen, unscrew, or push out the anchor effectively without harming the wall.
Can Hollow Wall Anchors Damage My Wall During Removal?
Yes, improper removal can cause wall damage like holes or cracks. Using the right tools and techniques minimizes damage and helps maintain wall integrity.
How To Fix The Wall After Removing Hollow Anchors?
Fill holes with spackle or wall filler. Sand the surface smooth once dry. Finally, repaint or touch up the area to match the wall color.
Conclusion
Removing hollow wall anchors can be simple with the right steps. Use the proper tools and stay patient throughout the process. Avoid damaging the wall by working carefully and gently. Small mistakes can cause bigger problems later. Practice makes the task easier over time.
Now you can fix or replace anchors without stress. Keep these tips in mind for future projects. Cleaning up after removal leaves your wall ready for new use. A little effort brings smooth results every time.