Are you sure your floor jack is ready when you need it most? Testing your floor jack might seem simple, but doing it right can save you from dangerous surprises and costly repairs.
In this guide, you’ll discover easy steps to check your jack’s safety and strength, so you can lift with confidence every time. Keep reading to learn how to protect yourself and your vehicle by making sure your floor jack works perfectly.
Types Of Floor Jacks
Floor jacks are essential tools for lifting vehicles safely. They come in different types, each designed for specific tasks. Understanding these types helps you choose the right jack and test it properly. Here are the main types of floor jacks you will encounter.
Hydraulic Floor Jacks
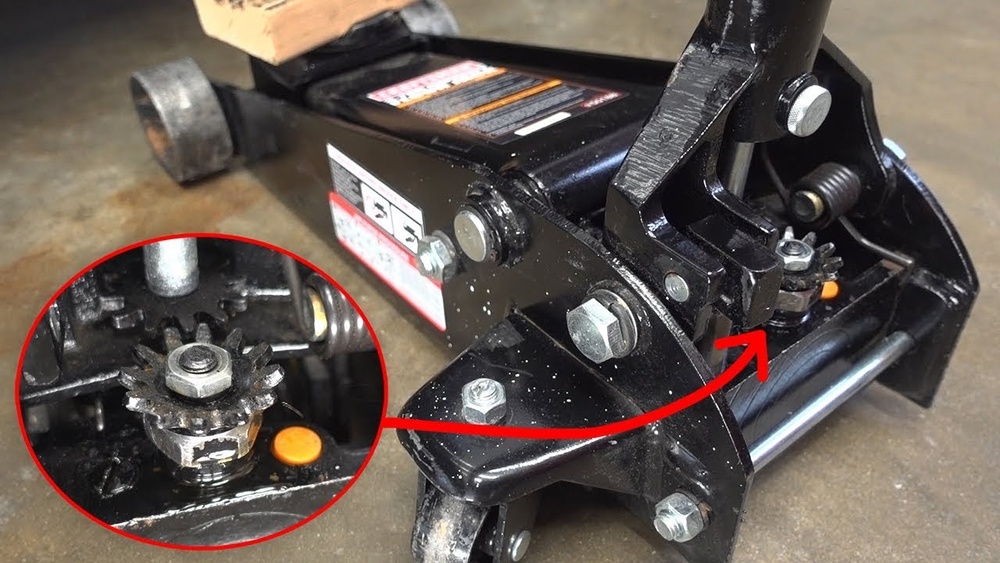
Hydraulic floor jacks use fluid pressure to lift heavy loads. They have a pump handle that moves hydraulic fluid inside a cylinder. This action pushes a piston upward, lifting the vehicle. These jacks are smooth and require less effort. They are common in garages and workshops.
Testing a hydraulic jack means checking for leaks and smooth lifting. It should hold pressure without dropping. Make sure the release valve works well to lower the jack safely.
Mechanical Floor Jacks
Mechanical floor jacks use gears and screw mechanisms to lift loads. You turn a handle or crank to raise the jack slowly. They do not use fluid and are simpler but need more effort. Mechanical jacks work well for lighter vehicles or occasional use.
Testing mechanical jacks includes checking the gears and screws for wear. They must move smoothly and hold the weight firmly. Look for any bending or damage in the frame and lifting arm.
Bottle Jacks
Bottle jacks are compact hydraulic jacks shaped like a bottle. They have a vertical cylinder that lifts heavy vehicles. Bottle jacks are strong and portable but have limited lifting height. They work well for trucks and SUVs with higher ground clearance.
To test a bottle jack, inspect the hydraulic fluid level and seals. Pump the handle to lift and watch for steady movement. The jack should hold the load without sinking or leaking.

Credit: www.bendpak.com
Safety Precautions
Testing a floor jack requires careful attention to safety. Ignoring safety rules can cause accidents or damage. Always follow safety steps before and during the test. This keeps you safe and protects your tools.
Work On A Level Surface
Place the floor jack on flat, hard ground. Uneven surfaces can cause the jack to slip or tip. A level surface keeps the jack stable during testing. Avoid soft or sloped areas that may affect balance.
Wear Protective Gear
Use gloves to protect your hands from pinches and dirt. Safety glasses shield your eyes from debris or fluid leaks. Wear sturdy shoes to protect your feet from heavy parts. Protective gear lowers injury risk during the test.
Check Weight Capacity
Know the maximum weight your floor jack can hold. Never test with loads heavier than this limit. Overloading can break the jack or cause sudden failure. Always read the jack’s label for its safe weight capacity.
Visual Inspection
Visual inspection is the first and easiest step in testing a floor jack. It helps to spot problems early before using the jack. This step protects you from accidents and damage to your vehicle.
Look closely at every part of the jack. Check for signs of wear, damage, or leaks. A careful eye can save time and money by finding issues early.
Check For Cracks And Rust
Examine the metal parts for cracks or rust. Cracks weaken the jack and can cause failure. Rust can eat away metal, making the jack unsafe. Pay close attention to the lifting arm and base.
Inspect Wheels And Casters
Spin the wheels and casters to see if they move smoothly. Check for cracks or missing parts. Worn wheels make the jack hard to move. Replace any damaged or stuck wheels before use.
Examine Hydraulic Fluid Levels
Hydraulic fluid powers the jack’s lifting action. Look at the fluid reservoir to check the level. Low fluid means weak lifting power or leaks. Top up or change the fluid if needed for safe operation.

Credit: www.researchgate.net
Functional Testing
Functional testing of a floor jack checks how well it works. It helps find problems before using the jack for lifting. This testing ensures safety and proper performance. Follow simple steps to test the jack’s functions.
Pump The Handle Smoothly
Start by pumping the handle slowly and evenly. The handle should move without stiffness or jerks. Smooth pumping means the hydraulic system is working well. If it feels rough or stuck, there may be air or dirt inside.
Test Lifting And Lowering
Place the jack under a solid part of a vehicle or a heavy object. Pump the handle to lift the load gently. The jack should lift steadily without slipping. Then, use the release valve to lower the load slowly. The lowering action must be smooth and controlled.
Listen For Unusual Noises
While pumping and lowering, listen carefully for strange sounds. Clicking, grinding, or hissing noises could signal problems. These sounds might mean worn parts or leaks. Clear sounds mean the jack is functioning correctly and safely.
Load Testing
Load testing is a key step in checking a floor jack’s safety and strength. It shows how well the jack holds weight under pressure. This test helps find problems before using the jack for real work. Follow clear steps to do the test safely and correctly.
Use A Safe Test Load
Choose a test load lower than the jack’s maximum limit. This prevents damage and keeps you safe. Use heavy but safe items like stacked tires or metal blocks. Avoid unstable or uneven loads that could slip or fall.
Monitor Stability
Watch the jack as it lifts the test load. Make sure it stays steady and does not wobble. Check the base and lifting arm for any movement. Stop the test if the jack feels shaky or unstable at any point.
Check For Fluid Leaks
Look closely at the hydraulic parts during and after the test. Fluid leaks weaken the jack and cause failure. Wipe away dirt to see cracks or wet spots clearly. Fix any leaks before using the jack again.
Maintenance Tips
Maintaining your floor jack keeps it safe and working well. Regular care stops problems before they start. Small steps help your jack last longer and work better every time.
Lubricate Moving Parts
Oiling the moving parts reduces friction and wear. Use light machine oil on hinges and joints. Move the jack up and down to spread the oil well. Do this every few months or after heavy use.
Replace Hydraulic Fluid
Check the hydraulic fluid level often. Old fluid can cause the jack to fail. Drain the old fluid and refill with fresh hydraulic oil. This keeps the lifting smooth and strong. Replace fluid at least once a year.
Store Properly
Keep your floor jack in a dry, clean place. Avoid damp or dusty areas that cause rust. Lower the jack fully before storing to ease pressure on parts. Cover it to protect from dirt and moisture.

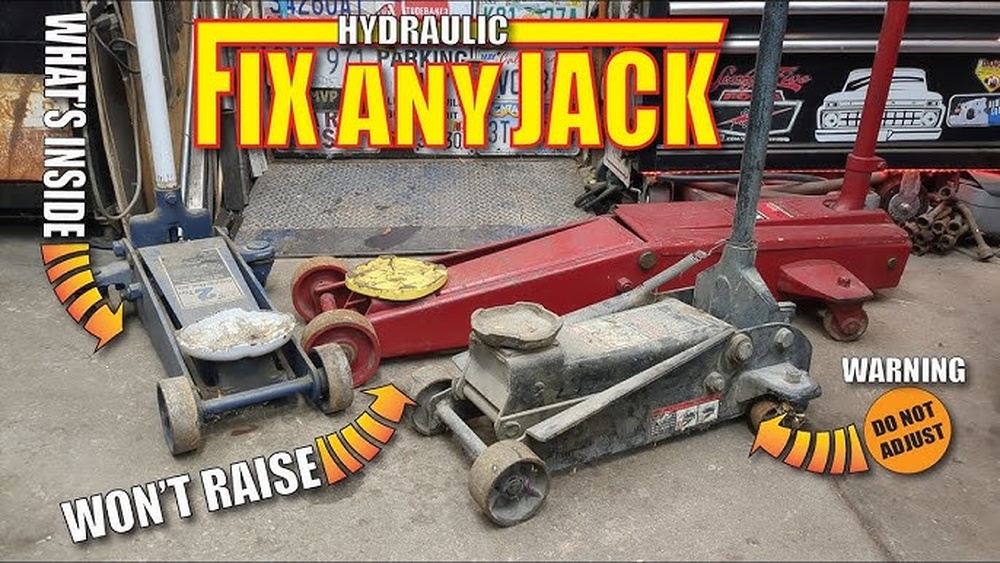
Credit: www.youtube.com
Frequently Asked Questions
How Do I Check If My Floor Jack Is Working?
Inspect for leaks, test lifting capacity, and check handle movement. Ensure it lifts smoothly and holds weight without dropping.
What Safety Steps Should I Follow When Testing A Floor Jack?
Use jack stands for support, test on flat ground, and avoid overloading. Always wear safety gear and keep clear of the load.
How Often Should I Test My Floor Jack For Safety?
Test your floor jack every six months or before heavy use. Regular checks ensure reliable performance and prevent accidents.
What Signs Indicate A Floor Jack Needs Repair?
Look for oil leaks, difficulty lifting, slow operation, or handle issues. These signs mean maintenance or replacement is needed.
Conclusion
Testing a floor jack keeps you safe and your tools working well. Check for leaks, smooth movement, and strong lifting power. Regular tests help spot problems early and avoid accidents. Use the right steps every time you test your jack.
Stay careful and always follow safety rules. This way, your floor jack will last longer and work better. Keep your vehicle safe by using a well-tested jack. Simple checks make a big difference in your work.