Imagine saving energy and cutting your electricity bills without lifting a finger. Installing a timer on your light switch lets you control when your lights turn on and off automatically.
Whether you want to keep your home safe while you’re away or simply avoid forgetting to turn off the lights, this simple upgrade can make a big difference. In this guide, you’ll learn exactly how to install a timer on your light switch step by step — no confusing jargon, just clear instructions you can follow right now.
Ready to take control of your lighting and boost your home’s efficiency? Let’s get started!
Credit: www.youtube.com
Choosing The Right Timer
Choosing the right timer for your light switch is important. It affects how well the timer works and how easy it is to use. Timers come in many types and styles. Some fit better with certain home setups than others. Understanding the options helps you pick the best timer for your needs.
Types Of Light Switch Timers
Mechanical timers use a dial to set time. They are simple and cost less. Digital timers have buttons and screens. They offer more control and settings. Smart timers connect to Wi-Fi. You can control them with a phone app. Each type suits different tasks and budgets.
Features To Consider
Look for easy programming options. Some timers allow multiple on/off settings. Backup batteries keep time during power cuts. A manual override lets you turn lights on or off anytime. Choose timers with clear displays and simple buttons.
Compatibility With Existing Wiring
Check your current wiring before buying a timer. Some timers need a neutral wire to work. Older homes may lack this wire. Make sure the timer matches your switch type. Confirm it can handle your light’s voltage and wattage. Correct compatibility avoids installation problems.
Gathering Tools And Materials
Gathering the right tools and materials is the first step to install a timer on a light switch. Proper preparation saves time and ensures safety. Having everything ready helps the process go smoothly. This section covers the essential tools, safety gear, and timer choices you need.
Essential Tools
You need a screwdriver set with flathead and Phillips tips. Wire strippers help remove insulation from wires. A voltage tester checks if the power is off. Pliers assist in twisting wires together. A drill may be needed for mounting screws. Keep a flashlight nearby for better visibility.
Safety Equipment
Safety is very important when working with electricity. Wear insulated gloves to protect against shocks. Safety goggles prevent debris from entering your eyes. Use a sturdy ladder if the switch is high. Turn off the power at the circuit breaker before starting. Double-check with a voltage tester to confirm power is off.
Timer Models And Accessories
Choose a timer that fits your switch type and needs. Mechanical timers are simple and easy to use. Digital timers offer more precise control and features. Check if the timer comes with mounting screws and wire nuts. Some models include a faceplate to match your decor. Make sure the timer supports your home’s voltage and load capacity.
Preparing The Work Area
Preparing the work area is the first step to install a timer on a light switch safely. This step helps prevent accidents and makes the installation smooth. You need to follow a few important actions before starting any electrical work.
Turning Off Power
Switch off the power at the circuit breaker. This stops electricity from flowing to the switch. Double-check by flipping the light switch to see if the light turns off. Use a voltage tester to confirm no power is running through the wires. Safety first.
Removing The Existing Switch
Unscrew the faceplate covering the switch. Keep the screws in a safe place. Gently pull the switch out from the wall box. Notice how the wires connect to the switch. Take a picture for reference. This helps when you install the new timer switch.
Checking Wiring Conditions
Look for any damaged or frayed wires. Do not use wires with visible damage. Ensure the wires are clean and not corroded. Check the wire colors and types. The timer switch usually requires a neutral wire. Confirm it is available before proceeding.
Credit: www.homedepot.com
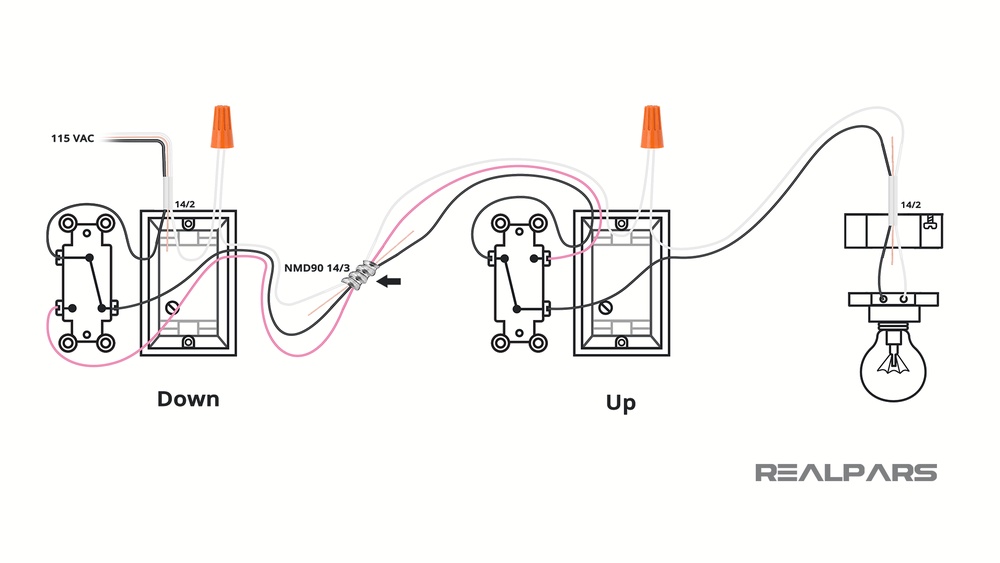
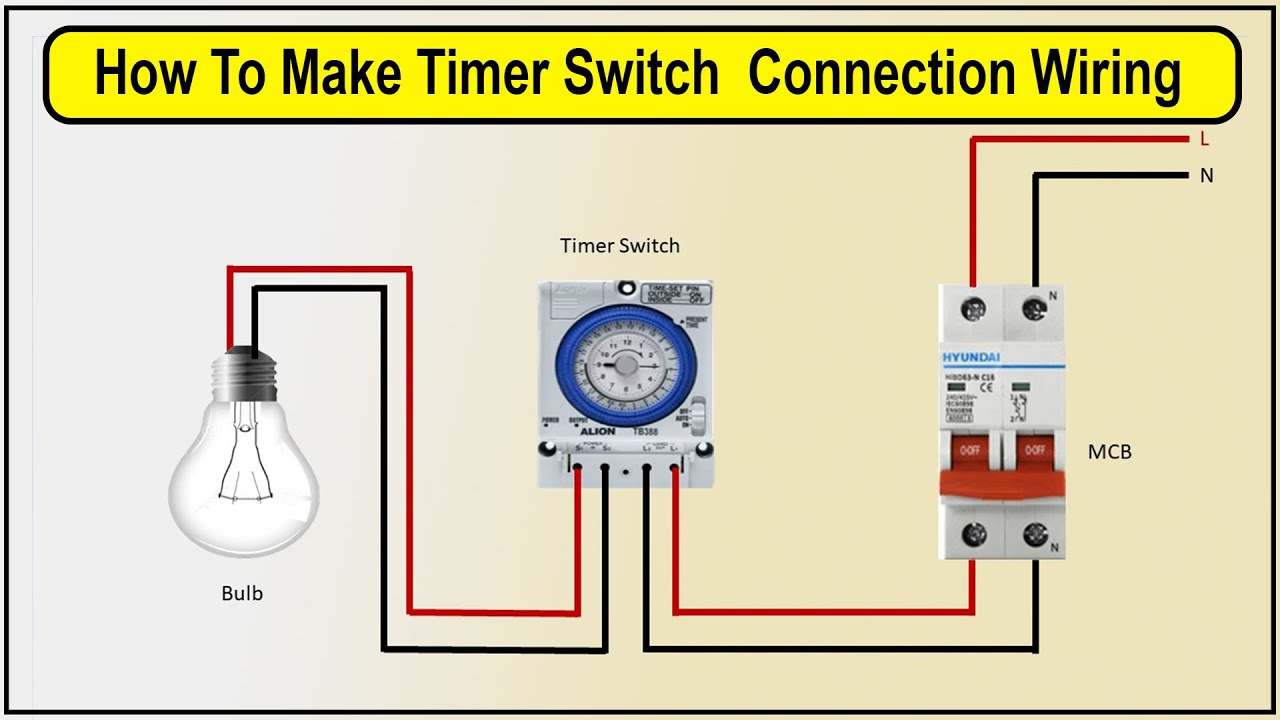
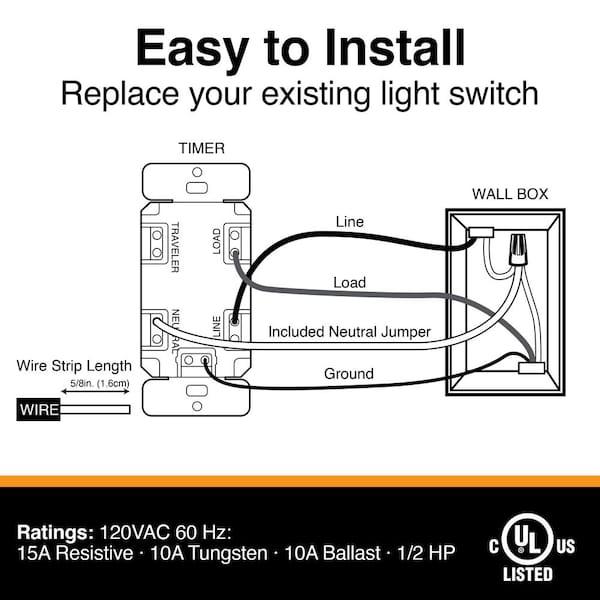
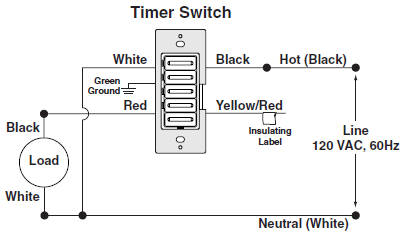
Wiring The Timer Switch
Wiring the timer switch is a key step in installing your new light timer. This process connects the timer to your home’s electrical system. Careful wiring ensures the timer works safely and correctly. Follow these simple steps to wire your timer switch confidently.
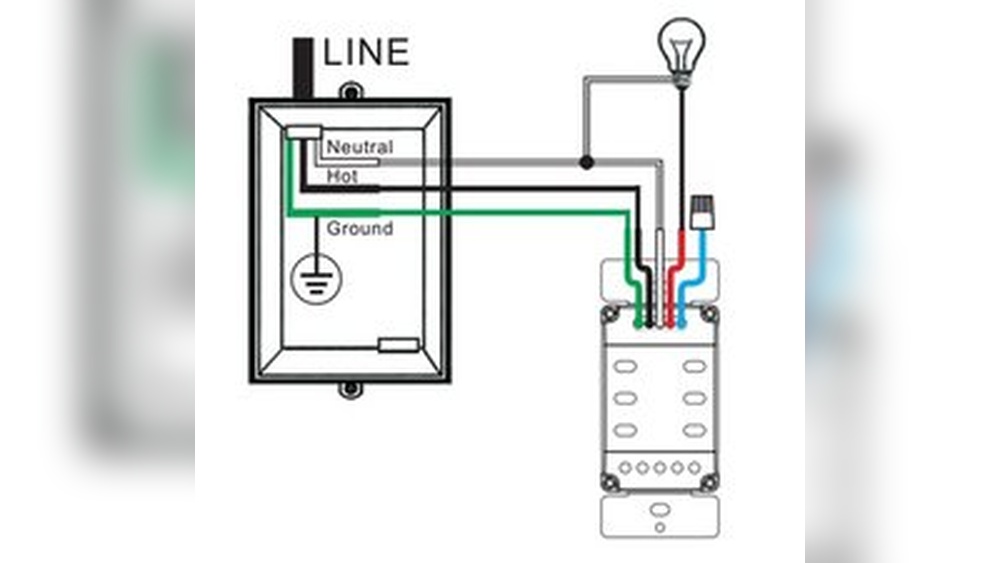
Identifying Wires
Turn off power at the circuit breaker before touching wires. Remove the old switch cover to see the wires. Look for the black (hot) wire, white (neutral) wire, and green or bare copper (ground) wire. Some switches may have a red wire for three-way setups. Use a voltage tester to confirm no power is present. Label each wire with tape for easy reference.
Connecting The Timer
Match each wire from the timer to the house wires. Connect the black wire from the timer to the black (hot) wire in the wall. Attach the white wire from the timer to the white (neutral) wire. Connect the green or bare wire from the timer to the ground wire. If your timer has a red wire, connect it to the red wire from the wall. Use wire nuts to secure each connection firmly.
Securing The Connections
After connecting wires, gently push them back into the electrical box. Make sure no wires are loose or exposed. Tighten the screws on the timer switch to hold it in place. Attach the switch cover and turn the power back on. Test the timer switch to ensure it controls the light properly.
Mounting The Timer Switch
Mounting the timer switch is a key step in your installation process. It ensures the timer fits securely and works properly. Take your time to align everything correctly. A stable mount prevents damage and keeps the switch safe to use.
Fixing The Switch To The Wall
First, hold the timer switch against the wall box. Check that the wires fit inside without bending. Use the screws that came with your timer. Tighten them gently to avoid cracking the switch. Make sure the switch is straight before fully tightening. A level switch looks better and operates smoothly.
Installing The Cover Plate
After securing the switch, place the cover plate over it. The plate protects wires and gives a finished look. Align the screw holes on the plate with the switch. Insert the screws and tighten carefully. Avoid over-tightening to prevent breaking the plate. The cover plate should sit flush against the wall.
Credit: mydome.co.uk
Testing And Programming
After installing a timer on your light switch, testing and programming ensure it works correctly. This step is important to avoid any damage and to make sure the timer fits your needs. Follow the instructions below carefully for a smooth setup.
Restoring Power Safely
Turn the power back on at the circuit breaker. Avoid touching the switch or wires. Use a voltage tester to confirm power is restored. Keep your hands dry and stand on a safe surface. Safety first, always.
Setting The Timer
Find the timer’s control panel or dial. Set the current time accurately. Program the on and off times for your light. Use simple steps from the timer’s manual. Double-check your settings before moving on.
Verifying Operation
Test the timer by waiting for the light to turn on and off. Adjust the settings if the timing is wrong. Watch for any flickering or unusual behavior. Confirm the light responds exactly as programmed. Your timer is ready once everything works smoothly.
Troubleshooting Common Issues
Troubleshooting common issues helps keep your timer switch working well. Problems can happen during or after installation. Quick fixes save time and frustration. This guide covers the most frequent problems and how to solve them.
Timer Not Turning On
Check the power supply first. Make sure the circuit breaker is on. Verify the wires connect tightly to the timer. Loose wires stop power flow. Test the timer on another switch if possible. A faulty timer might need replacement.
Flickering Lights
Flickering lights often mean loose wiring. Turn off the power before checking connections. Tighten any loose wire nuts or screws. Sometimes, the timer is not compatible with your light bulbs. Try using different bulbs or a compatible timer model.
Incorrect Timing Settings
Double-check the timer’s manual for setting instructions. Reset the timer to factory defaults if needed. Set the current time correctly before programming. Use clear, simple steps to avoid mistakes. Make small changes and test the timer after each change.
Maintenance Tips
Keeping your timer on a light switch in good shape helps it work well for a long time. Simple maintenance steps protect your investment. These easy tips keep your timer running smoothly and avoid problems.
Regular Checks
Look at the timer regularly. Make sure the display and buttons work fine. Check for any cracks or loose parts. Clean dust and dirt gently with a dry cloth. Avoid using water or harsh cleaners.
Updating Timer Settings
Change the timer settings as needed. Adjust the time for different seasons or schedules. Confirm the current time is correct. Reset the timer after power outages. This keeps your lights on the right schedule.
When To Replace The Timer
Replace the timer if it stops working correctly. Signs include flickering lights or unresponsive buttons. Also replace if the timer shows wrong times frequently. Old timers may waste energy and cause frustration. Choose a new timer that fits your needs and budget.
Frequently Asked Questions
What Tools Do I Need To Install A Timer Switch?
You need a screwdriver, voltage tester, wire stripper, and the timer switch. These tools ensure safe and efficient installation.
How Do I Turn Off Power Before Installation?
Switch off the circuit breaker controlling the light switch. Use a voltage tester to confirm no electricity flows.
Can I Install A Timer On Any Light Switch?
Most standard switches work, but check compatibility with your timer model. Some timers require a neutral wire connection.
How Long Does Installing A Timer Switch Take?
Installation usually takes 15 to 30 minutes. Time varies with your experience and wiring complexity.
Conclusion
Installing a timer on a light switch saves energy and adds convenience. The steps are simple and easy to follow. Always turn off the power before starting your work. Use the right tools and parts for safety. A timer helps control lighting without wasting electricity.
Enjoy the benefits of automatic lighting control every day. This small change can make a big difference in your home. Give it a try and see how it works for you.