Are you struggling with stubborn leather fasteners that just won’t budge? Whether you’re fixing a favorite jacket, a worn-out bag, or a vintage piece, removing leather fasteners can feel tricky and frustrating.
But don’t worry—you’re about to learn simple, effective steps to get the job done quickly and safely. Keep reading, and you’ll discover easy tips that save you time, protect your leather, and bring your item back to life. Your next DIY success starts here!

Credit: www.reddit.com
Types Of Leather Fasteners
Leather fasteners hold pieces of leather together. They come in many types and shapes. Knowing the types helps in removing them safely. Each fastener needs a different method to remove it.
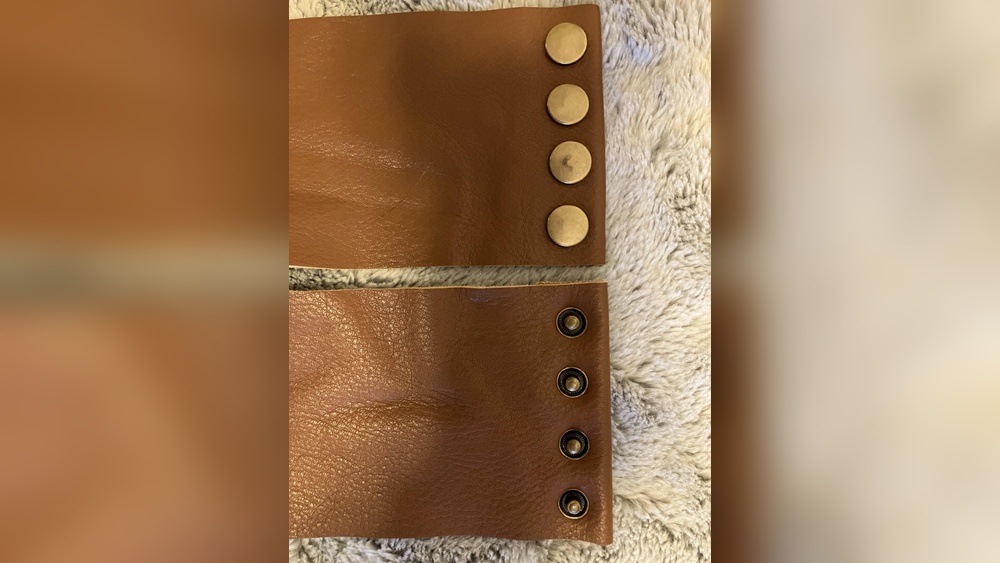
Snap Buttons
Snap buttons are small and round. They click to close and pull apart to open. They have two parts: a male and a female side. Removing snap buttons needs care to avoid damage.
Rivets
Rivets are strong metal pins. They join leather pieces tightly. Rivets have a head and a tail. Removing rivets often means drilling or pushing them out.
Eyelets And Grommets
Eyelets and grommets are metal rings. They protect holes in the leather. They help with laces or decoration. Removing them requires pushing or cutting around the ring.
Buckles And Clasps
Buckles and clasps close straps or belts. Buckles have a frame and a pin. Clasps snap or hook together. Removing these fasteners means loosening screws or prying carefully.
Tools Needed
Removing leather fasteners requires the right tools. These tools help you work safely and efficiently. Using proper tools makes the job easier and protects the leather from damage.
Basic Tools
Start with simple hand tools. A flathead screwdriver helps pry up fasteners gently. Needle-nose pliers grip small parts for pulling. A small hammer taps fasteners loose carefully. These tools suit most basic fastener removal tasks.
Specialized Tools
Some fasteners need special tools. A leather punch removes rivets cleanly. A staple remover lifts staples without tearing. A seam ripper cuts stitching near fasteners. These tools save time and reduce damage.
Safety Equipment
Protect your hands with gloves. Safety glasses shield your eyes from flying bits. Work on a stable surface to avoid slips. Proper safety gear prevents injuries during removal.
Preparing The Leather
Preparing the leather is the first step before removing any fasteners. It helps protect the material and makes the process easier. Proper preparation prevents damage and keeps the leather in good shape.
Cleaning The Area
Start by cleaning the leather around the fastener. Use a soft cloth and mild soap with water. Gently wipe the surface to remove dirt and oils. Dry the area well with a clean towel. Clean leather reacts better to tools and reduces slipping.
Securing The Leather
Next, hold the leather firmly in place. Use clamps or place it on a stable surface. Avoid bending or stretching the leather. Keeping it steady stops accidental tears or marks. Proper support makes fastener removal safer and smoother.
Removing Snap Buttons
Removing snap buttons from leather requires care and the right tools. Snap buttons hold leather pieces together firmly. Removing them without damage keeps your leather in good shape.
Follow easy steps to take out snap buttons safely. This section explains how to find, remove, and clean up after removing snap buttons.
Locating The Fastener
Find the snap button on your leather item. It usually has two parts: a cap and a socket. Check both sides of the leather to see the snap clearly. Knowing the exact spot helps prevent mistakes during removal.
Using Pliers Or A Snap Remover
Use flat-nose pliers or a special snap remover tool. Hold the leather steady on a firm surface. Gently squeeze the snap button’s edge with pliers. Avoid pressing too hard to protect the leather. The snap should pop off after a few tries.
Cleaning Up
After removing the snap, clean the leather surface. Use a soft cloth to wipe away dirt or small metal pieces. Apply leather conditioner to keep the leather soft and smooth. This step helps your leather stay strong and ready for new fasteners.
Detaching Rivets
Detaching rivets from leather fasteners can be a simple task with the right tools and steps. Rivets hold leather pieces tightly together. Removing them carefully keeps the leather safe and ready for reuse.
Identifying Rivet Type
Rivets come in different shapes and sizes. Some have a round head, while others are flat or domed. Knowing the type helps choose the best removal method. Check the rivet’s head and post. This step is key to avoid damage.
Using A Hammer And Punch
Place the leather on a hard surface. Use a punch tool that fits the rivet head. Tap the punch gently with a hammer. This loosens the rivet without harming the leather. Keep your taps steady and controlled.
Removing Rivet Post
After the head is loose, flip the leather over. Push out the rivet post from the back side. Use a small punch or screwdriver for this. The rivet should slide out easily. Take care not to tear the leather.
Extracting Eyelets And Grommets
Removing eyelets and grommets from leather can be tricky. These fasteners are strong and hold tight. To remove them without damaging the leather, follow careful steps. This section covers how to extract eyelets and grommets safely and cleanly.
Cutting Around The Fastener
Start by cutting the leather around the fastener. Use a sharp knife or small scissors. Cut slowly and close to the metal edge. Be careful not to cut into the leather more than needed. This step loosens the fastener’s hold. It makes prying easier and safer for the leather.
Prying Out Carefully
After cutting, use a flat tool to pry the fastener out. A small flathead screwdriver or a thin knife works well. Slide the tool under the edge of the eyelet or grommet. Gently lift it little by little. Avoid using too much force. Too much pressure can tear or stretch the leather. Take time to work around the fastener evenly. This method protects the leather and removes the metal cleanly.
Taking Off Buckles And Clasps
Taking off buckles and clasps from leather items needs care and patience. These fasteners hold parts of leather together tightly. Removing them without damage is important for repair or replacement. Understanding how these fasteners work helps avoid tearing or stretching the leather. Use gentle tools and simple steps for the best results.
Unfastening Mechanisms
Buckles and clasps come in different styles. Some have pins that fit into holes on the leather strap. Others use hooks or snaps to stay closed. Identify the type before you start. For pin buckles, lift the pin gently out of the hole. For hooks or snaps, press or slide the parts apart carefully. Avoid pulling hard to stop damage.
Handling Stitched Areas
Many buckles and clasps attach to leather with stitches. These stitches hold the fastener firmly in place. Use a small seam ripper or sharp blade to cut the stitches slowly. Take care not to cut the leather itself. Remove all thread pieces before detaching the fastener. Keep the leather smooth and ready for a new buckle or clasp.

Credit: www.youtube.com
Repairing Leather After Removal
After removing leather fasteners, the leather often needs repair. Small holes or marks can spoil the look. Fixing these issues helps keep your leather smooth and strong. Proper repair also prevents further damage and extends leather life.
Filling Holes
Start by cleaning the area around the holes. Use a soft cloth and mild soap. Let it dry completely. Then apply a leather filler to the holes. Use a spatula or your finger to smooth it out. Let the filler dry. Repeat if needed for deep holes. Sand gently with fine sandpaper after it dries. This creates a flat, even surface.
Restoring Surface
After filling, the leather surface may look dull or rough. Use a leather repair compound to restore texture. Apply a thin layer with a sponge or cloth. Allow it to dry fully. Lightly buff the area to blend with the rest of the leather. This step helps the leather look natural again.
Conditioning Leather
Conditioning is key after any repair. Use a good leather conditioner to soften the area. Apply with a clean cloth in circular motions. This adds moisture and flexibility to the leather. Conditioning also protects the leather from cracking or drying out. Do this regularly to keep leather healthy and smooth.
Tips For Avoiding Damage
Removing leather fasteners can be tricky. The leather might tear or get scratched. Following some simple tips helps protect your leather. These tips make sure you remove fasteners safely without damage.
Taking care while working on leather keeps it looking good. Using the right tools and testing first saves time and money. Let’s explore some important advice.
Working Slowly
Go slow when removing leather fasteners. Rushing can cause tears or holes. Take your time to avoid mistakes. Slow work helps you see small problems early. Patience keeps the leather safe and strong.
Using Proper Tools
Use tools made for leather work. Sharp, small tools help remove fasteners cleanly. Avoid big or dull tools that can scratch leather. Proper tools make the job easier and safer. They help keep the leather smooth and neat.
Testing On Scrap Pieces
Try removing fasteners on scrap leather first. This practice shows how the leather reacts. Testing helps you learn the right pressure and tool use. It prevents damage to your main leather piece. Always test before working on the final item.

Credit: www.reddit.com
Frequently Asked Questions
What Tools Are Needed To Remove Leather Fasteners?
You need pliers, a flathead screwdriver, and a leather punch for safe removal. These tools help avoid damaging the leather and fasteners.
How To Remove Leather Fasteners Without Damaging Leather?
Use gentle prying with a flathead screwdriver and pliers. Work slowly to avoid stretching or tearing the leather surface.
Can Leather Fasteners Be Reused After Removal?
Yes, if the fasteners are undamaged, they can be cleaned and reused. Inspect them carefully before reattaching to ensure durability.
How Long Does It Take To Remove Leather Fasteners?
Removing leather fasteners typically takes 5 to 15 minutes, depending on the type and number of fasteners involved.
Conclusion
Removing leather fasteners is easier with the right tools and care. Take your time to avoid damage. Use pliers or a small screwdriver to loosen fasteners gently. Keep the leather clean and dry during the process. Patience helps you finish the job well.
Now, you can repair or replace fasteners safely. Try these steps next time you work on leather items. Simple actions make a big difference in results.