Are you tired of struggling with messy glue or nails that damage your walls? Scotch Mounting Tape might be the simple solution you’ve been looking for.
It’s strong, easy to use, and perfect for sticking things quickly and cleanly. In this guide, you’ll discover how to make the most of Scotch Mounting Tape to secure pictures, decorations, and more without hassle. Keep reading, and you’ll learn tips and tricks that save you time and keep your space looking neat.

Credit: www.youtube.com
Choosing The Right Scotch Tape
Choosing the right Scotch mounting tape is important for a strong hold. Different tapes work better for different tasks and surfaces. Picking the correct tape saves time and prevents damage. It also makes your projects look neat and last longer.
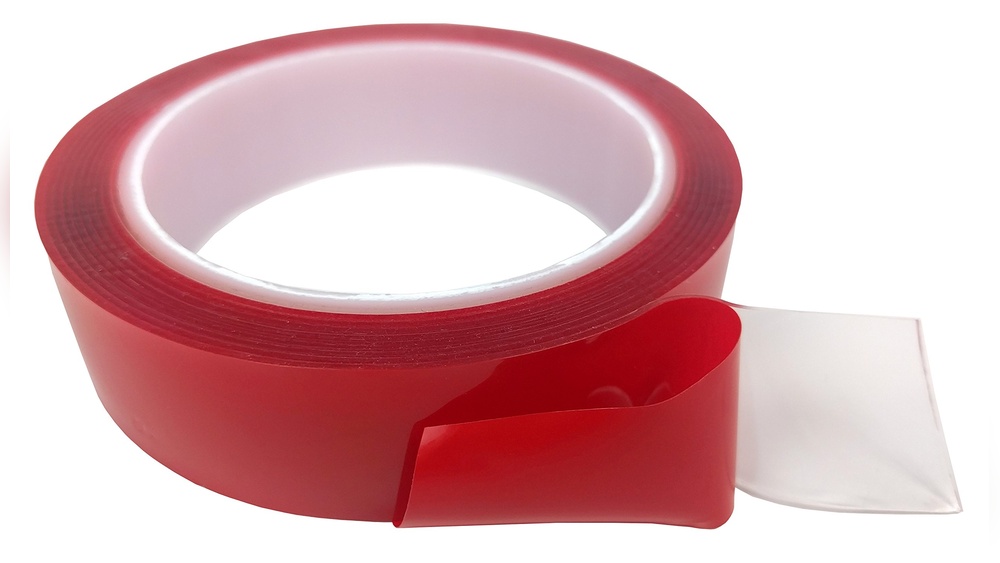
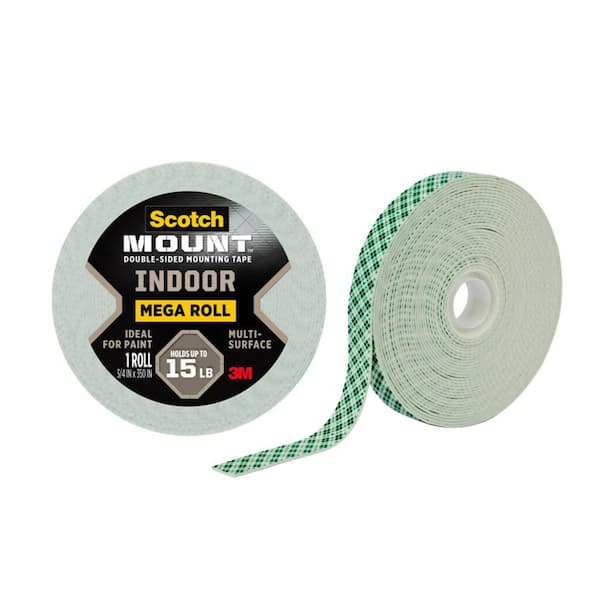
Types Of Scotch Mounting Tape
Scotch offers various mounting tapes. Double-sided tapes stick on both sides for invisible mounting. Foam tapes add cushioning and work well on uneven surfaces. Clear tapes are good for smooth, clean surfaces. Each type has a special use. Knowing these helps you select the best tape.
Selecting Tape For Different Surfaces
Surfaces affect tape choice a lot. For walls, use tapes made for paint and drywall. Glass and metal need strong, clear tapes. Wood requires tapes that hold well without damage. Rough surfaces call for foam tapes for better grip. Always check the surface before applying tape.
Credit: www.scotchbrand.com
Preparing The Surface
Preparing the surface is a key step when using Scotch mounting tape. It helps the tape stick better and last longer. Taking time to prepare ensures a strong and neat hold. The surface must be clean and dry. It should also be smooth to avoid bumps under the tape.
Cleaning And Drying
Start by removing dust, dirt, and grease from the surface. Use a soft cloth with mild soap and water. Avoid harsh chemicals that might damage the surface. After cleaning, dry the area completely. Moisture can stop the tape from sticking well.
Ensuring Smooth Application
Check the surface for bumps, holes, or rough spots. Use sandpaper or a smoothing tool if needed. A smooth surface helps the tape lie flat. This prevents air bubbles and weak spots. Smooth surfaces improve the tape’s grip and appearance.
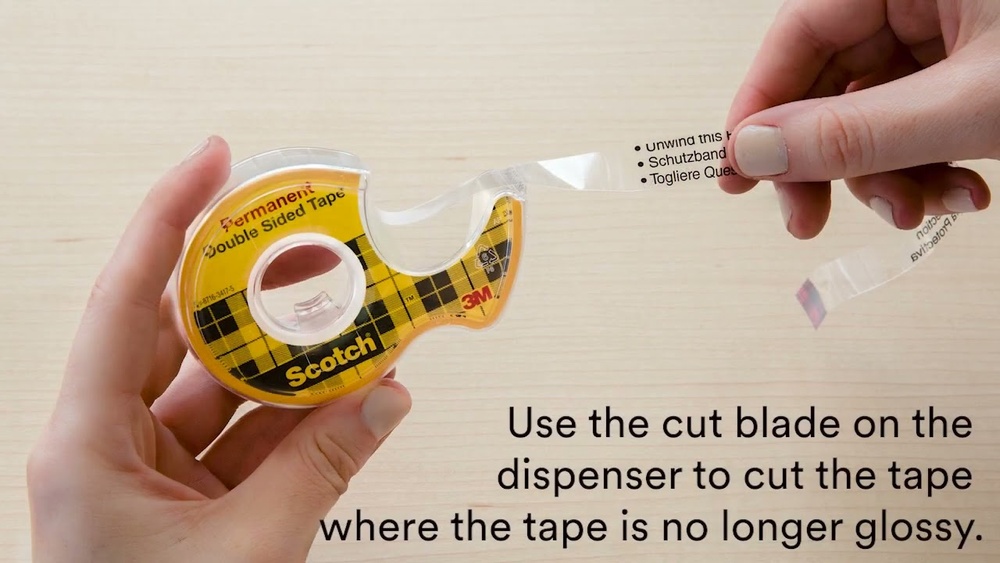
Cutting And Measuring Tape
Cutting and measuring Scotch mounting tape is a key step for a neat, strong hold. Proper tape size helps avoid waste and ensures the tape sticks well. This section guides you through measuring and cutting the tape correctly. Follow these tips for smooth, easy work.
Tools For Accurate Cutting
Use sharp scissors or a craft knife for clean cuts. Dull tools can tear the tape and weaken the stickiness. A ruler or straight edge helps cut in a straight line. Keep your cutting tools handy for quick, precise tape pieces. Avoid stretching the tape while cutting.
Measuring For Perfect Fit
Measure the surface where you want to apply the tape. Use a tape measure or ruler for exact length. Mark the tape lightly before cutting. Cut a little longer if unsure, trim the excess later. Proper measuring stops tape waste and keeps your work tidy.
Credit: www.homedepot.com
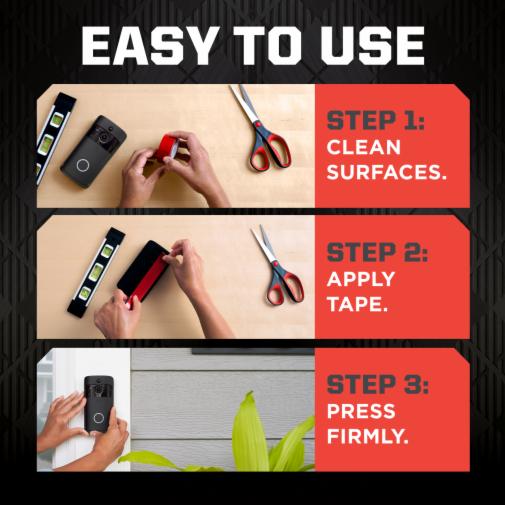
Applying The Tape
Applying Scotch mounting tape correctly is key to a strong hold. The tape sticks best when placed with care and precision. This section guides you through simple steps to get it right every time.
Positioning Techniques
Start by cleaning the surfaces. Dirt or dust can reduce stickiness. Cut the tape to the needed length. Align the tape carefully on the object. Press it down gently but firmly. Make sure it is straight and flat. Adjust quickly before the tape sticks too well. This helps avoid mistakes and wasted tape.
Avoiding Air Bubbles
Air bubbles weaken the tape’s grip. Use a flat tool or your fingers to smooth the tape. Start from one edge and move to the other. Press firmly to push out trapped air. Small bubbles can be flattened by pressing harder. Larger bubbles may need lifting the tape gently to fix. Smooth tape means stronger and cleaner results.
Pressing And Securing
Pressing and securing Scotch mounting tape properly ensures a strong and lasting hold. This step is key to prevent items from falling or shifting. Applying the correct pressure and allowing enough time for the tape to stick will give the best results. Below are simple tips to help you press and secure the tape effectively.
Using The Right Pressure
Press firmly but do not squeeze too hard. Too much pressure can damage delicate surfaces. Use your fingers or the palm of your hand to press evenly. Focus on the edges first, then the center. This helps the tape stick well and avoid air bubbles. A smooth, flat press improves the grip between the tape and surface.
Time For Adhesion
After pressing, let the tape sit without moving the item. The adhesive bonds stronger over time. Wait at least 30 minutes for small items. Larger or heavier objects may need a few hours. Avoid touching or lifting the item during this period. Patience helps the tape reach its full holding power.
Tips For Removing Tape
Removing Scotch mounting tape can be tricky without damaging the surface. Proper care helps keep walls and objects clean. Following the right steps makes removal easy and safe.
Safe Removal Methods
Start by peeling the tape slowly from one corner. Pull it back on itself at a low angle. If the tape resists, warm it with a hairdryer. Heat softens the adhesive, making removal easier. Use gentle, steady force to avoid tearing the tape. Avoid using sharp tools to lift the tape. They can scratch or damage surfaces. For stubborn residue, apply a small amount of rubbing alcohol. Let it sit for a minute, then wipe gently. Always test any liquid on a hidden spot first.
Preventing Surface Damage
Remove tape soon after applying it. Old tape is harder to remove cleanly. Avoid pulling tape too fast or straight up. This can peel paint or wallpaper. Use a soft cloth or sponge to clean the surface after removal. This removes leftover sticky bits without harm. If tape is on delicate surfaces, consider using specialized adhesive removers. Follow product instructions carefully to protect the finish. Patience and gentle handling keep surfaces safe and smooth.
Common Mistakes To Avoid
Using Scotch mounting tape seems simple, but many make avoidable errors. These mistakes reduce the tape’s strength and cause projects to fail. Knowing what to avoid helps you get the best results and keep your items secure.
Applying On Dirty Surfaces
One common mistake is placing tape on dirty or dusty surfaces. Dirt blocks the tape’s adhesive from sticking well. Always clean the area with a cloth before applying the tape. A clean, dry surface ensures better grip and longer hold.
Overstretching The Tape
Stretching the tape too much weakens its hold. It can snap back or lose stickiness. Gently pull the tape to the needed length. Press it down firmly without stretching. This keeps the tape strong and reliable.
Frequently Asked Questions
What Surfaces Work Best With Scotch Mounting Tape?
Scotch mounting tape adheres well to clean, smooth, and dry surfaces like glass, metal, and painted walls. Avoid using it on rough, dusty, or oily surfaces for optimal bonding and durability.
How Do I Apply Scotch Mounting Tape Correctly?
Cut the tape to the desired length, peel off the protective liner, and press firmly onto the surface. Apply pressure for several seconds to ensure a strong bond before mounting your item.
Can Scotch Mounting Tape Support Heavy Objects?
Yes, Scotch mounting tape can hold light to medium-weight objects. For heavier items, check the tape’s weight limit and use multiple strips or alternative mounting solutions for safety.
Is Scotch Mounting Tape Removable Without Damage?
Generally, Scotch mounting tape can be removed cleanly from most surfaces. Peel slowly and use heat if needed, but some surfaces may experience minor residue or paint damage.
Conclusion
Scotch mounting tape offers a quick and clean way to stick items. It works well on many surfaces like walls, paper, and plastic. Use it to hang pictures, craft projects, or decorations. Just cut the tape, press firmly, and enjoy a strong hold.
Keep surfaces dry and clean for best results. This tape saves time and avoids mess. Try it to make your tasks easier and neater. Simple, useful, and reliable—Scotch mounting tape fits many needs.