Are you ready to transform your space with beautiful mosaic tiles but worried about the mess and hassle? What if you could mount those intricate tiles quickly and neatly using just sticky paper and tape?
In this guide, you’ll discover a simple, clever method that saves you time and keeps your tiles perfectly in place. Whether you’re a beginner or want a fuss-free way to handle mosaics, this step-by-step approach will make your project smoother than ever.
Keep reading, and you’ll be amazed at how easy and satisfying tile mounting can be!
Credit: blog.mosaicartsupply.com
Materials Needed
Mounting mosaic tiles with sticky paper and tape needs specific materials. Using the right supplies makes the work easier and the results better. Prepare everything before you start for a smooth process.
Types Of Mosaic Tiles
Mosaic tiles come in glass, ceramic, and stone varieties. Glass tiles shine and reflect light well. Ceramic tiles are sturdy and easy to cut. Stone tiles offer a natural, textured look. Choose the tile type based on your project style and location.
Choosing Sticky Paper
Sticky paper holds the mosaic tiles in place during mounting. Pick a paper with strong adhesive but easy to remove. Clear sticky sheets help you see tile placement better. Make sure the paper size fits your tile sheets for less waste.
Selecting The Right Tape
Use tape to secure the sticky paper and tiles temporarily. Masking tape is gentle and won’t harm surfaces. Double-sided tape works well for extra hold on tricky spots. Avoid tapes that leave residue or damage tiles.
Additional Tools
Gather a few tools to complete your project. A utility knife helps cut sticky paper and tape precisely. A ruler or straight edge keeps lines neat. A sponge or cloth cleans tiles after mounting. These simple tools improve your work quality.
Preparing The Surface
Preparing the surface is the first step for mounting mosaic tiles with sticky paper and tape. A clean, smooth, and properly measured area helps the tiles stick well. This step makes your work neat and long-lasting.
Cleaning The Area
Start by removing dirt, dust, and grease from the surface. Use a mild soap and water solution. Wipe the area with a clean cloth until it is dry. A clean surface helps the sticky paper stick better.
Smoothing The Surface
Check for bumps, holes, or rough spots. Use sandpaper or a scraper to smooth the surface. Fill any holes with putty and let it dry. A smooth surface ensures the tiles lay flat and stay in place.
Measuring And Marking
Measure the area where you will place the tiles. Use a pencil and ruler to mark guidelines. These marks help align the sticky paper and tiles evenly. Accurate measuring prevents mistakes and saves time.
Cutting And Arranging Tiles
Cutting and arranging mosaic tiles is a key step in your project. It helps create a neat and beautiful design. Proper cutting ensures tiles fit perfectly in corners and edges. Arranging tiles well prevents mistakes and saves time.
Start by planning your design. This makes cutting easier and more accurate. Use simple tools and follow safety steps for best results.
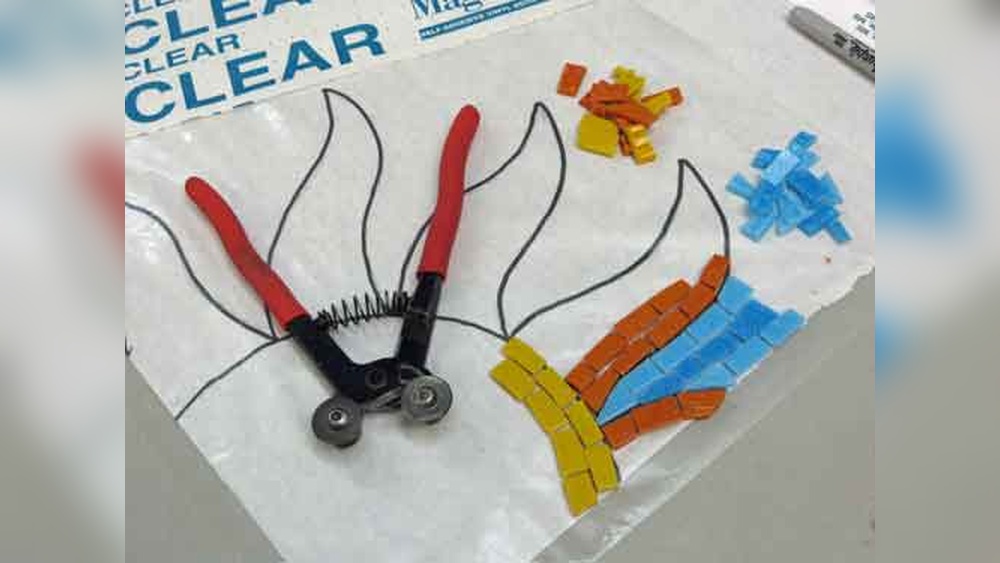
Cutting Mosaic Tiles
Use a tile cutter or nippers for cutting mosaic tiles. Mark the tile where you want to cut with a pencil. Hold the tile firmly and cut slowly. Small pieces may need careful nibbling. Wear safety glasses to protect your eyes.
Laying Out The Design
Place tiles on a flat surface to see the full design. Move tiles around to find the best fit. Check colors and patterns before fixing them. This step saves you from mistakes later. Make sure all tiles align properly.
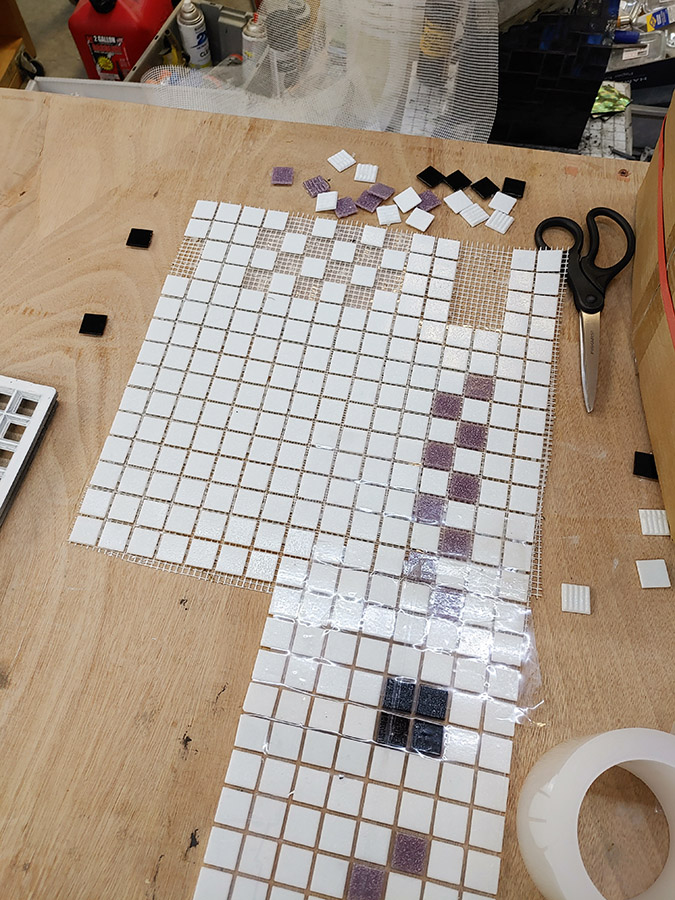
Using Sticky Paper For Arrangement
Sticky paper holds tiles in place during arrangement. Lay the sticky paper on your work surface. Press tiles gently onto the sticky paper. This keeps tiles from moving while you adjust them. It also makes transferring tiles easier.

Credit: witsendmosaic.com
Applying Sticky Paper
Applying sticky paper is a key step in mounting mosaic tiles. It holds the tiles firmly and keeps them in place. This method makes tile installation easier and faster. Sticky paper acts like a base, so the tiles do not shift during mounting. Follow these simple steps to apply the sticky paper correctly.
Attaching Tiles To Sticky Paper
Start by peeling off the backing of the sticky paper. Place each tile carefully onto the exposed adhesive. Press tiles gently to ensure they stick well. Work row by row to keep the process organized. Make sure the tiles touch edge to edge without gaps.
Ensuring Proper Alignment
Check the alignment of tiles often. Use a ruler or straight edge to keep lines even. Adjust tiles slightly before pressing firmly. Good alignment creates a neat and professional look. Take your time; small corrections improve the final result.
Securing With Tape
Use clear tape to secure the tiles on the sticky paper. Place tape across the tiles to hold them tightly. This prevents tiles from moving during handling. Tape adds extra strength to the sticky paper’s grip. Remove tape carefully after mounting the mosaic.
Mounting Tiles On The Wall
Mounting mosaic tiles on the wall using sticky paper and tape is a simple process. It helps keep tiles in place and makes installation neat. This method works well for small areas and detailed designs.
Positioning The Mosaic
Start by choosing the exact spot for your mosaic. Hold the sticky paper with tiles close to the wall. Align the edges carefully. Make sure the design fits well and looks balanced.
Use a level to check the straightness. Adjust the position until it feels right. Take your time. Precise placement avoids future problems.
Pressing And Smoothing
Once the mosaic is positioned, press it firmly against the wall. Use your hands or a soft roller. Press evenly to remove air bubbles and gaps.
Smooth the tiles gently. This step ensures good contact between tiles and wall. It helps the adhesive stick well and keeps the mosaic flat.
Removing Tape Carefully
After pressing, slowly peel off the tape from the mosaic. Pull the tape at a low angle to avoid moving tiles. Go gently to keep the mosaic intact.
Check if all tiles stay in place. If some tiles lift, press again softly. Removing tape carefully keeps your mosaic neat and secure.
Finishing Touches
After placing mosaic tiles with sticky paper and tape, finishing touches make your project look complete. These final steps protect your tiles and give a clean, polished look.
Focus on grouting, cleaning off excess adhesive, and sealing tiles. Each step is important for long-lasting results and a beautiful finish.
Grouting Tips
Choose a grout color that matches your tiles for a smooth look. Use a rubber float to spread grout evenly over the tiles. Press grout firmly into all gaps to avoid air pockets. Remove extra grout quickly with the float held at a 45-degree angle. Let grout dry for the time the package suggests before touching.
Cleaning Excess Adhesive
Use a damp sponge to wipe off any sticky glue left on tiles. Clean gently to avoid moving the tiles. Rinse the sponge often to keep it clean. Wait for the adhesive to set before cleaning for best results. Removing glue early prevents stains and keeps tiles shiny.
Sealing The Tiles
Apply a tile sealer to protect your mosaic from water and dirt. Use a small brush or cloth to spread the sealer evenly. Let the first coat dry before applying a second one for full coverage. Sealing keeps grout strong and tiles looking fresh longer. Follow the sealer instructions for best protection.
Common Mistakes To Avoid
Mounting mosaic tiles using sticky paper and tape can be simple. Yet, many make mistakes that cause frustration and poor results. Avoiding these common errors saves time and effort. Here are key pitfalls to watch out for during your project.
Misalignment Issues
Mosaic tiles must line up perfectly. Misaligned tiles spoil the final look. Take time to place tiles carefully on the sticky paper. Use a level or straight edge to keep rows even. Check alignment often before pressing tiles down.
Using Wrong Adhesives
Sticky paper and tape must be strong but gentle. Using the wrong adhesives can cause tiles to fall off or damage the surface. Choose tape that holds well but peels off cleanly. Avoid cheap tapes that lose stickiness quickly. Confirm that the adhesive suits the tile type.
Ignoring Surface Prep
The surface must be clean and dry before mounting tiles. Dust, grease, or moisture weakens the sticky paper’s grip. Wipe the area with a damp cloth and let it dry fully. Rough surfaces may need light sanding for better adhesion. Proper prep ensures tiles stay in place longer.
Credit: mosaicartsupply.com
Maintenance Tips
Maintaining mosaic tiles mounted with sticky paper and tape ensures they look fresh for a long time. Proper care keeps the tiles clean, secure, and free from damage. This section offers simple tips to help you maintain your mosaic tile surface easily.
Regular Cleaning
Clean the tiles gently using a soft cloth or sponge. Use mild soap mixed with water to avoid damage. Avoid harsh chemicals that can break down the adhesive or fade the tile colors. Wipe spills immediately to prevent stains. Dry the surface well after cleaning to keep it neat.
Repairing Damaged Tiles
Check your tiles often for any loose or damaged pieces. Carefully peel off damaged tiles without harming others. Replace them with new tiles using fresh sticky paper or tape. Press firmly to secure the new tile in place. Quick repairs stop damage from spreading and keep the design intact.
Preventing Mold And Mildew
Keep the tiled area dry to avoid mold growth. Use a dehumidifier or improve ventilation in damp spaces. Clean the tiles and edges regularly to remove moisture buildup. Use a soft brush to clean hard-to-reach areas gently. Preventing mold keeps your tiles healthy and looking good.
Frequently Asked Questions
What Materials Are Needed To Mount Mosaic Tiles?
You need mosaic tiles, sticky paper, tape, a measuring tape, scissors, and a clean surface. These tools ensure precise and secure tile placement.
How Does Sticky Paper Help In Mounting Tiles?
Sticky paper holds mosaic tiles firmly in place. It simplifies alignment and prevents tiles from slipping during installation, ensuring a smooth application.
Can Tape Replace Adhesive For Mosaic Tiles?
Tape can temporarily hold tiles but isn’t a substitute for adhesive. Use tape for positioning, then secure tiles with proper adhesive for durability.
What Surface Preparation Is Required Before Mounting Tiles?
Clean and dry the surface thoroughly. Remove dust, grease, or old adhesive to ensure sticky paper and tiles adhere effectively and last longer.
Conclusion
Mounting mosaic tiles with sticky paper and tape is simple and neat. This method saves time and keeps tiles in place. You can create beautiful patterns without much mess. Just follow the steps carefully and take your time. Practice makes the process easier and more fun.
Enjoy your new tile design that looks clean and stylish. Try this easy technique for your next project. It helps you work quickly and get great results.