Have you ever wished you could control an outlet with a simple flick of a light switch? Imagine turning your lamp, fan, or any device on and off without reaching for the plug.
Running an outlet from a light switch is easier than you think, and it can add convenience and safety to your home. In this guide, you’ll learn clear, step-by-step instructions to help you do it yourself, even if you’re not an expert.
Keep reading, and soon you’ll have a smart, switch-controlled outlet ready to use.
Tools And Materials Needed
Running an outlet from a light switch requires specific tools and materials. Having the right items makes the job safer and easier. Prepare everything before starting the work to avoid interruptions.
Essential Tools
Use a voltage tester to check power before touching wires. A wire stripper helps remove insulation cleanly. Screwdrivers with flat and Phillips heads are needed to remove covers and tighten screws. Pliers assist in bending and holding wires securely. A drill with bits may be necessary for making holes in walls or panels.
Necessary Materials
Use electrical wires rated for your home’s voltage and current. Install a new outlet designed for residential use. Get a proper electrical box to hold the outlet safely. Wire connectors or wire nuts join wires securely. Electrical tape insulates exposed wires and connections. Consider a faceplate to cover the outlet for safety and neatness.
Safety Precautions
Safety is the top priority when running an outlet from a light switch. Electrical work can be risky without the right steps. Taking proper safety precautions reduces dangers like shocks or fires.
Follow clear rules before starting. Prepare your workspace and tools. Stay alert to avoid accidents. These tips help protect you and your home.
Turn Off The Power
Always switch off power at the circuit breaker. Test the light switch with a voltage tester. Confirm no electricity flows before touching wires.
Use Proper Tools And Gear
Wear insulated gloves and safety glasses. Use tools made for electrical work. Avoid metal jewelry that can cause shocks.
Check Local Electrical Codes
Review rules for wiring in your area. Codes ensure safe and legal electrical installations. Follow code requirements for outlets and switches.
Work In A Dry Area
Keep your hands and floor dry. Water increases the risk of electric shock. Do not work in damp or wet conditions.
Double-check Connections
Secure all wire connections tightly. Loose wires cause sparks or shorts. Inspect each joint before restoring power.
Planning The Wiring Layout
Planning the wiring layout is the first step in running an outlet from a light switch. A clear plan helps avoid mistakes and safety issues. It also saves time and effort during installation.
Understanding how electricity flows is key. The wiring layout shows how power moves from the switch to the outlet. Proper planning ensures the outlet works safely and correctly.
Assessing Existing Wiring
Check the current wiring in your wall. Identify the wires connected to the light switch. Look for the power source, switch wires, and neutral wires. This helps decide where to connect the outlet.
Choosing The Right Circuit
Select a circuit with enough capacity for the new outlet. Avoid overloading the circuit. Overload can cause breakers to trip or wires to heat up. Use a circuit that has space for more devices.
Mapping The Wiring Path
Plan the path from the switch box to the new outlet location. Keep the wiring neat and short. Avoid sharp bends and obstacles. Mark the path on a diagram to guide the installation.
Turning Off Power
Turning off power is the first and most important step before working on electrical outlets or switches. It keeps you safe from electric shocks and injuries. Always make sure the power is completely off before starting any work.
Many people forget this step and get hurt. Don’t be one of them. Taking a moment to turn off the power can save your life.
Locate The Circuit Breaker
Find the main electrical panel in your home. It is usually in the basement, garage, or utility room. Open the panel door and look for the circuit breaker that controls the light switch you want to work on.
Switch Off The Correct Breaker
Turn off the breaker connected to the light switch. It will stop the flow of electricity to the switch and outlet. If you are unsure which breaker it is, switch off the main breaker to cut power to the whole house.
Use A Voltage Tester
Check if the power is really off. Use a voltage tester or multimeter on the light switch or outlet wires. If the tester shows no voltage, it is safe to continue your work.
Removing The Light Switch Cover
Removing the light switch cover is the first step to run an outlet from a light switch. This task is simple but requires care. You must ensure safety before starting. Always turn off the power at the circuit breaker. This prevents any electric shock while working.
Once the power is off, you can begin removing the cover. This will give you access to the wiring behind the switch. Knowing how to remove the cover properly helps avoid damage to the wall or switch.
Tools Needed For Removing The Cover
Use a flathead or Phillips screwdriver. Check the type of screws holding the cover. Have a small flashlight ready for better visibility. Keep a container nearby to hold screws safely.
Steps To Remove The Light Switch Cover
First, unscrew the screws on the cover plate. Place the screws in the container. Gently pull the cover plate away from the wall. Avoid forcing it to prevent cracks or chips.
Inspecting The Switch And Wiring
Look for any signs of damage or wear. Loose wires need tightening or replacement. Clean any dust or debris around the switch. This keeps the wiring area safe and tidy.
Credit: www.azdiyguy.com
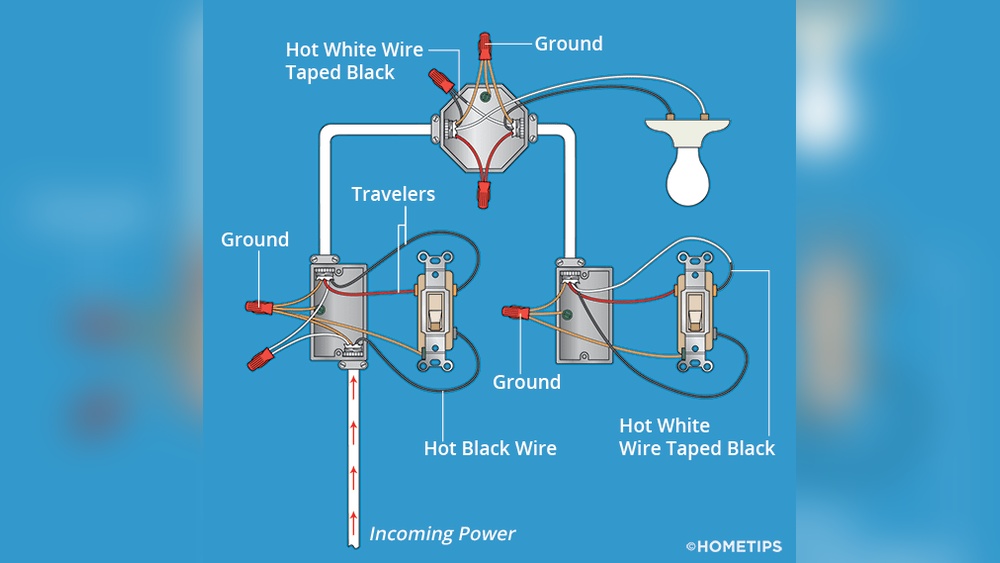
Identifying Wiring Connections
Identifying wiring connections is the first step to run an outlet from a light switch. Understanding which wires control the power flow is crucial. This knowledge helps avoid mistakes and keeps the project safe.
Light switches usually have three types of wires: hot, neutral, and ground. Each wire plays a specific role in the electrical circuit. Recognizing these wires makes the installation easier and faster.
Understanding Wire Colors
Wire colors indicate their function in the circuit. Black or red wires are typically hot wires. White wires serve as neutral wires. Bare copper or green wires are ground wires. Correctly identifying these colors prevents wiring errors.
Locating The Hot Wire
The hot wire carries electricity from the power source to the switch. It often connects to the switch terminal. Use a voltage tester to find the hot wire safely. This step ensures power control at the switch.
Identifying The Neutral Wire
The neutral wire completes the electrical circuit. It connects back to the main panel. Neutral wires usually do not connect to the switch. Confirming the neutral wire helps run the outlet correctly.
Finding The Ground Wire
The ground wire protects against electrical shocks. It connects to the metal box or ground terminal. Ground wires are essential for safety. Always include the ground wire when installing the outlet.
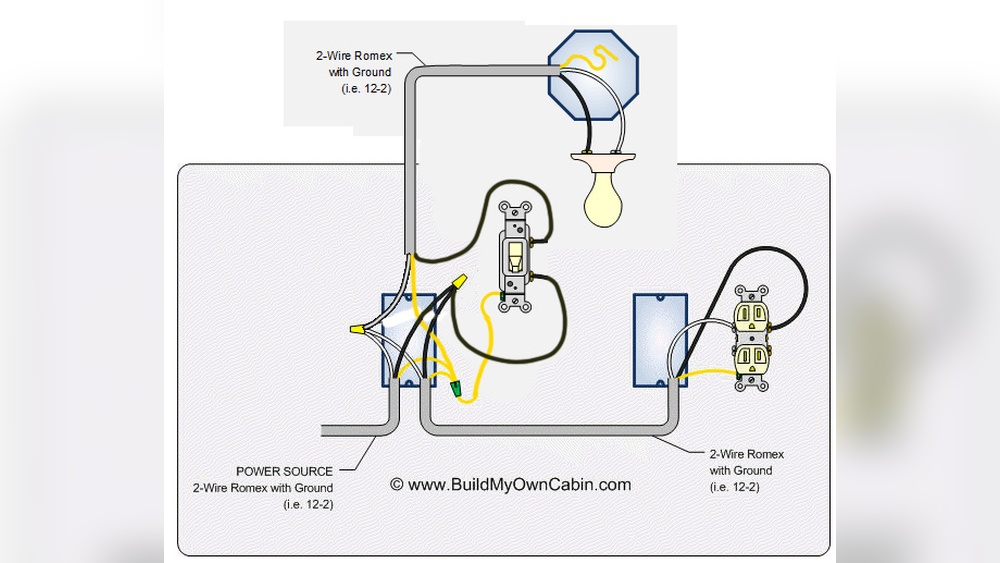
Adding The Outlet Wiring
Adding the outlet wiring is a key step in running an outlet from a light switch. This process connects the new outlet to the existing electrical circuit. It allows the outlet to receive power controlled by the switch.
Careful wiring ensures safety and proper function. Use the right tools and materials before starting.
Turn Off Power At The Breaker
Start by switching off the power at the breaker box. This prevents electric shock while working. Use a voltage tester to confirm power is off before touching wires.
Identify The Wires In The Switch Box
Remove the switch cover and look inside the box. Find the black (hot), white (neutral), and ground wires. Note which wire carries power from the breaker and which goes to the light fixture.
Run Cable From Switch To Outlet Location
Use a new cable to connect the switch box to the outlet spot. Secure the cable properly inside walls or conduit. Leave enough length on both ends for connections.
Connect Wires At The Switch Box
Attach the new cable’s black wire to the switch’s load terminal. Connect the white wires together with a wire nut. Join ground wires securely with a grounding screw or wire nut.
Wire The Outlet
At the outlet, connect the black wire to the brass terminal. Attach the white wire to the silver terminal. Connect the ground wire to the green grounding screw. Tighten all connections firmly.
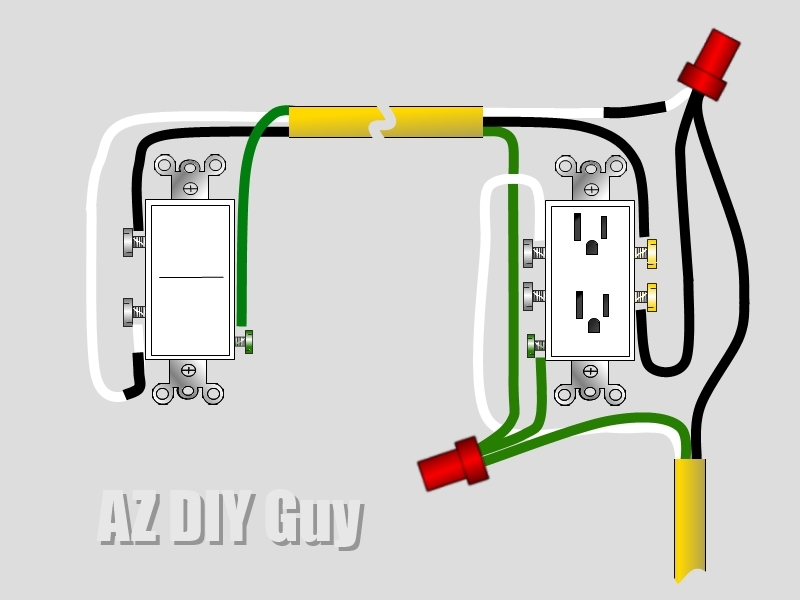
Connecting The Outlet
Connecting the outlet to a light switch requires careful attention to safety and wiring rules. This process controls power flow from the switch to the outlet. Proper connections ensure the outlet works only when the switch is on.
Follow clear steps to connect wires correctly. This will avoid short circuits or electrical hazards. Use the right tools and double-check your work for safety.
Turn Off The Power
Start by switching off the power at the circuit breaker. This step prevents electric shocks. Use a voltage tester to confirm no power is present in the wires.
Identify The Wires
Locate the black (hot), white (neutral), and green or bare (ground) wires. The black wire carries current to the switch. The white wire completes the circuit. The ground wire protects against faults.
Connect The Outlet Wires
Attach the black wire from the switch to the brass terminal on the outlet. Connect the white wire to the silver terminal. Secure the ground wire to the green terminal on the outlet.
Secure Wire Connections
Use wire nuts or terminal screws to tighten the wires. Ensure no copper is exposed outside the connectors. Loose connections can cause sparks or failure.
Mount The Outlet And Test
Push the outlet back into the electrical box carefully. Screw it tightly to hold in place. Turn on the power and test the outlet with the switch. The outlet should work only when the switch is on.
Testing The Outlet And Switch
Testing the outlet and switch is a key step after wiring an outlet from a light switch. This step ensures everything works safely and correctly. Without testing, you cannot be sure the setup is functional or secure.
Test the switch and outlet carefully. Use simple tools to check power flow and switch control. This process helps spot wiring errors or faults early. Proper testing prevents electrical hazards and saves time fixing problems later.
Testing The Outlet With A Voltage Tester
Use a voltage tester to check if the outlet has power. Insert the tester probes into the outlet slots. The tester light or display should show if power is present. No power means a wiring issue or a faulty switch.
Test both slots in the outlet. Confirm the tester reacts when the switch is on. This confirms the outlet receives power controlled by the switch.
Checking The Switch Operation
Flip the switch on and off several times. Observe if the outlet power turns on and off too. The outlet should only have power when the switch is on. If it stays powered or never powers up, check the wiring again.
Testing the switch ensures it controls the outlet as planned. A faulty switch or loose wire can cause failure.
Using A Plug-in Device To Confirm Power
Plug a lamp or small device into the outlet. Turn the switch on and off. The device should turn on and off with the switch. This simple test confirms the outlet works well.
If the device doesn’t respond, the outlet wiring or switch is not correct. Repeat previous tests to find the issue.

Credit: www.do-it-yourself-help.com
Replacing Covers And Cleanup
Replacing covers and cleaning up are the final steps after running an outlet from a light switch. These steps protect your work and keep the area safe. A neat finish also helps the outlet look professional and organized.
Properly replacing covers prevents dust and dirt from entering the electrical box. It also stops accidental contact with wires. Cleaning the work area removes debris and tools, making the space safe to use.
Replace The Outlet And Switch Covers
First, gently place the outlet cover back on. Align it so the screws fit perfectly. Tighten the screws carefully but do not overtighten. Next, do the same for the light switch cover. Check that both covers sit flush against the wall.
Check For Loose Screws
Loose screws can cause the covers to fall or wires to move. Use a screwdriver to tighten all screws on the outlet and switch. Make sure the covers are secure but not cracked.
Clean The Work Area
Remove any wire scraps or insulation pieces. Use a vacuum or brush to clear dust and debris. Wipe the wall surface if needed. This keeps the area safe and tidy.
Test The Outlet And Switch
Turn the power back on at the breaker. Test the outlet with a small device or tester. Flip the switch to ensure the outlet works correctly. Confirm everything is safe before finishing.
Troubleshooting Common Issues
Running an outlet from a light switch is a handy project. Sometimes, things do not work as planned. Common issues can stop your outlet from working correctly. Troubleshooting helps find and fix these problems fast.
Check The Power Source
First, ensure the power is on. Use a voltage tester on the outlet and switch. No power means a breaker might be off. Reset the breaker if needed. Sometimes, a loose wire can stop power flow. Tighten all wire connections carefully.
Inspect The Switch Wiring
Look at the switch wiring closely. Wires must connect to the right terminals. A common mistake is swapping the hot and neutral wires. The black wire usually goes to the switch. The white wire should not connect to the switch. Fix any wrong wiring to restore function.
Test The Outlet Itself
Check if the outlet is faulty. Plug in a device or use a tester. No power here could mean a broken outlet. Replace the outlet if it shows no voltage. Use a simple outlet tester for quick results.
Look For Tripped Gfci Outlets
Some outlets are protected by GFCI devices. These can trip and cut power. Find any GFCI outlet on the same circuit. Press the reset button on the GFCI. This action restores power to connected outlets.
Verify The Switch Type
Make sure the switch is a single-pole switch. Some circuits need special switches. A three-way or dimmer switch may not work properly. Replace it with the correct type to control the outlet.

Credit: www.do-it-yourself-help.com
Frequently Asked Questions
How Do I Wire An Outlet To A Light Switch Safely?
Turn off power at the breaker before starting. Connect the outlet’s hot wire to the switch’s load terminal. Use proper wire gauges and secure all connections with wire nuts. Follow local electrical codes and consult a professional if unsure.
Can I Control Multiple Outlets With One Light Switch?
Yes, you can. Wire the outlets in parallel from the switch’s load wire. Ensure the switch and circuit can handle the total load. Use proper wiring to avoid overloads and potential hazards.
What Tools Do I Need To Run An Outlet From A Switch?
You need a voltage tester, wire stripper, screwdriver, wire nuts, electrical tape, and appropriate wire. A drill may help for running cables through walls. Always follow safety procedures when working with electricity.
Is It Legal To Run An Outlet From A Light Switch?
Yes, it is legal if done according to local electrical codes. Ensure the circuit can handle the load and the outlet is properly grounded. Consult your local code or a licensed electrician before proceeding.
Conclusion
Running an outlet from a light switch can save space and add convenience. Always turn off power before starting any work. Use the right tools and follow safety rules carefully. Double-check your wiring to avoid problems later. This project can be done by beginners with patience and care.
Taking your time helps ensure the outlet works well and safely. Enjoy the extra power control in your room. Simple steps make the job easier than it seems.