Are you looking to install a double pole light switch but unsure where to start? Connecting this type of switch might seem tricky, but with the right guidance, you can do it safely and confidently.
You’ll discover simple, step-by-step instructions that make the process clear—even if you’re not an expert. By the end, you’ll have the skills to control your lights more effectively and add convenience to your home. Keep reading to learn exactly how to connect a double pole light switch without any hassle.
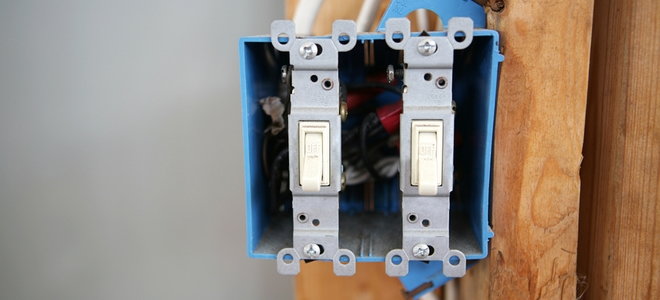
Credit: www.doityourself.com
Double Pole Switch Basics
Understanding the basics of a double pole switch helps with safe and effective wiring. This switch controls two circuits at the same time. It is different from a single pole switch, which controls only one circuit. Knowing its function makes your electrical work easier and safer.
What Is A Double Pole Switch
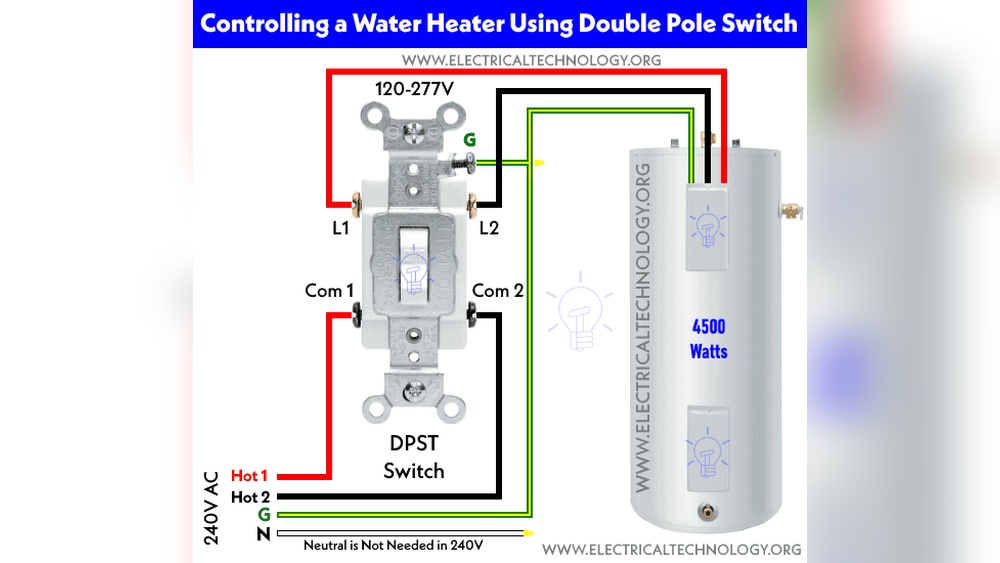
A double pole switch has four terminals. It controls two separate wires. Both wires open or close together. This switch allows turning off power to a device completely. It is often used for heavy appliances and equipment. It handles 240 volts, unlike single pole switches. This makes it suitable for larger electrical loads.
When To Use It
Use a double pole switch for high voltage devices. Examples include water heaters, ovens, and air conditioners. It ensures both hot wires disconnect power. This adds extra safety during maintenance or repairs. It also prevents accidental electric shocks. Use it when local codes require double disconnection. It helps protect both users and equipment.
Credit: www.reviewed.com
Safety Precautions
Safety is the top priority when connecting a double pole light switch. Taking the right precautions protects you from electric shocks and injury. Always prepare properly before starting any electrical work.
Turn Off Power
Switch off the main power at the circuit breaker. Confirm the power is off using a voltage tester. Never rely on the switch position alone. This simple step can save your life.
Use Proper Tools
Use insulated tools designed for electrical work. Avoid metal tools without insulation. Proper tools reduce the risk of accidental contact with live wires. Keep your workspace clean and organized for safety.
Tools And Materials Needed
Before starting to connect a double pole light switch, gather the right tools and materials. This step ensures safety and smooth work. Using proper equipment makes the task easier and faster. It also helps avoid common mistakes.
Essential Tools
- Screwdriver (flathead and Phillips) for screws
- Wire stripper to remove insulation
- Voltage tester to check power
- Pliers for bending and twisting wires
- Electrical tape for insulation
- Flashlight or headlamp for better visibility
Required Materials
- Double pole light switch
- Electrical wires (matching your home’s wiring)
- Wire nuts for connecting wires
- Wall plate to cover the switch
- Circuit breaker (if needed for safety)
Identify Wiring Components
Before wiring a double pole light switch, knowing each wire is key. Identifying the wiring components helps avoid mistakes and keeps you safe. It also makes the installation smooth and clear. Let’s explore the main wires you will find.
Live And Neutral Wires
The live wire carries electricity from the power source. It usually has black or red insulation. This wire connects to the switch to control the light or device.
The neutral wire returns electricity back to the source. It often has white insulation. It completes the electrical circuit and ensures proper flow.
Ground Wire
The ground wire protects from electrical shocks. It is bare copper or green insulated. This wire connects to the switch’s grounding screw or metal box for safety.
Identifying these wires correctly is essential. It keeps you safe and ensures your switch works right.
Prepare The Wiring
Preparing the wiring is an essential step before connecting a double pole light switch. Proper preparation ensures safety and a smooth installation process. Take your time to get the wiring ready. This helps prevent problems later.
Strip Wire Insulation
Start by removing the outer insulation from the wires. Use a wire stripper tool for clean results. Strip about half an inch of insulation from each wire end. Avoid cutting into the metal wire inside. Expose just enough wire to make a good connection.
Check Wire Condition
Examine the wires for damage or wear. Look for cracks, breaks, or corrosion on the metal. Damaged wires can cause short circuits or failure. Replace any wires that look weak or broken. Strong, clean wires ensure a safe and lasting connection.
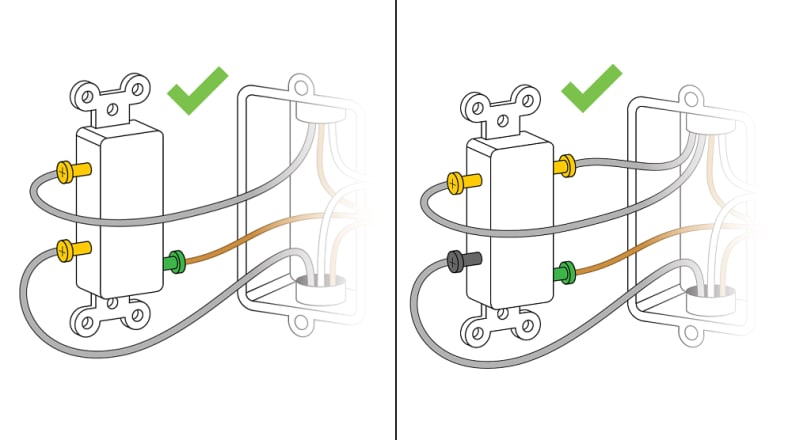
Connect Wires To Switch
Connecting the wires to a double pole light switch is an important step. This part ensures the switch controls the power safely and correctly. Follow each step carefully to avoid mistakes. The switch has specific terminals for different wires. Knowing where to attach each wire makes the process simple and safe.
Attach Live Wires
Identify the live wires coming from the power source. These wires carry electricity to the switch. Connect each live wire to the brass or black screws on the switch. Tighten the screws securely to hold the wires in place. Make sure no copper wire is exposed outside the terminal. This prevents short circuits and keeps the connection safe.
Attach Load Wires
Load wires go from the switch to the light fixture. These wires carry electricity to the lights when the switch is on. Connect the load wires to the silver or white screws on the switch. Secure the wires firmly under the screws. Check that the wires do not touch each other or other terminals. Proper connection ensures the lights work correctly.
Connect Ground Wire
The ground wire is usually green or bare copper. It protects against electrical shocks by directing electricity safely to the ground. Attach the ground wire to the green screw on the switch. If your switch box has a ground wire, connect it too. Tighten the screw to keep the ground wire secure. This step is vital for safety in your electrical system.
Secure The Switch
Securing the double pole light switch is an important step. It ensures safety and proper function. A loose switch can cause sparks or failure.
Follow these steps to mount and fasten the switch correctly. This will keep the wiring safe and stable.
Mounting The Switch
Place the switch in the electrical box carefully. Align it with the box holes for a snug fit. Check that the wires are not pinched or twisted. Hold the switch steady while preparing to fasten it.
Fastening Screws
Use the screws provided with the switch. Insert them into the mounting holes. Tighten the screws evenly to keep the switch level. Avoid over-tightening to prevent cracking the switch or box. Ensure the switch feels firm and does not move.

Credit: www.youtube.com
Test The Connection
Testing the connection after wiring a double pole light switch is crucial. It confirms that the switch works safely and correctly. This step prevents electrical problems and ensures your light operates as expected.
Always follow safety rules during testing. Check every part carefully before fully restoring power. Small errors can cause big issues.
Restore Power
Turn the main power back on at the circuit breaker. Make sure no one touches the wires during this step. Watch for any sparks or unusual sounds. These signs mean you must turn off the power immediately and check your work.
Check Switch Operation
Flip the switch to the ON position. The light should turn on without flickering or delay. Switch it OFF and ON a few times. The light should respond every time without fail. If it does not, double-check your wiring and connections.
Troubleshooting Tips
Troubleshooting a double pole light switch can save time and avoid hazards. Knowing common problems helps fix issues quickly. Some problems are easy to solve with basic tools and care.
Other times, the problem might be complex. Understanding when to call a professional is important for safety and proper repair.
Common Issues
One common issue is the switch not turning the light on or off. This could mean a loose wire or a faulty switch. Check the wiring connections carefully and tighten any loose screws.
Another problem is flickering lights. This might happen if the switch is old or damaged. Replacing the switch often solves this.
Sometimes, the switch feels warm or hot. This can be dangerous. It may mean the switch is overloaded or the wiring is wrong. Turn off the power and inspect the switch.
When To Call A Professional
Call a professional if you smell burning or see smoke near the switch. These signs show serious electrical problems.
If you do not feel confident handling wires, get expert help. Mistakes can cause electric shock or fire.
Complex issues like circuit breaker trips or unknown wiring require a licensed electrician. They have the right tools and knowledge.
Frequently Asked Questions
What Is A Double Pole Light Switch?
A double pole light switch controls two separate circuits simultaneously. It is used for 240-volt appliances or devices that need dual power sources.
How Do You Wire A Double Pole Light Switch?
Connect the incoming power wires to the switch terminals. Attach the load wires to the other terminals. Ensure proper grounding and follow safety standards.
Can A Double Pole Switch Replace A Single Pole Switch?
Yes, but only if the device requires controlling two circuits. Otherwise, a single pole switch is sufficient and simpler to install.
What Tools Are Needed To Connect A Double Pole Switch?
You need a screwdriver, wire stripper, voltage tester, and electrical tape. Safety gear like gloves and goggles is also recommended.
Conclusion
Connecting a double pole light switch can be simple with the right steps. Always turn off power before starting the work. Follow the wiring instructions carefully to avoid mistakes. Double check connections for safety and proper function. Taking your time makes the process easier and safer.
This switch controls two circuits at once, so accuracy matters. With patience and care, you can complete this task yourself. Safety first, then enjoy the control this switch offers your lights.