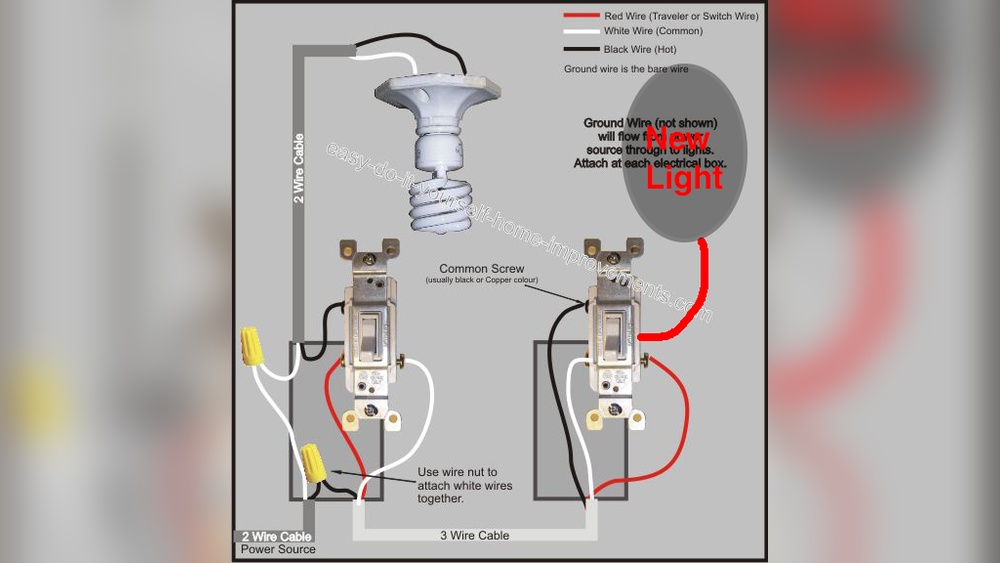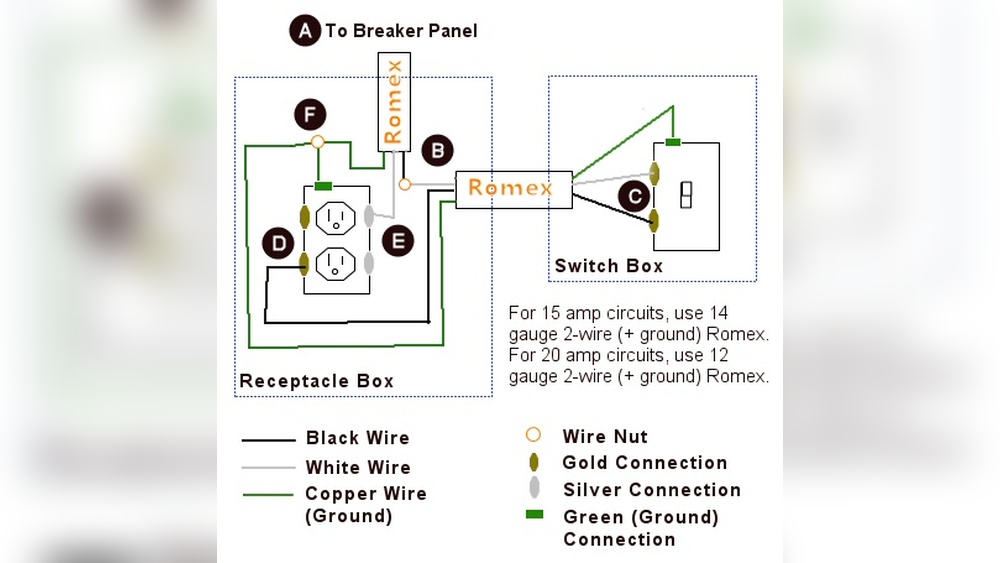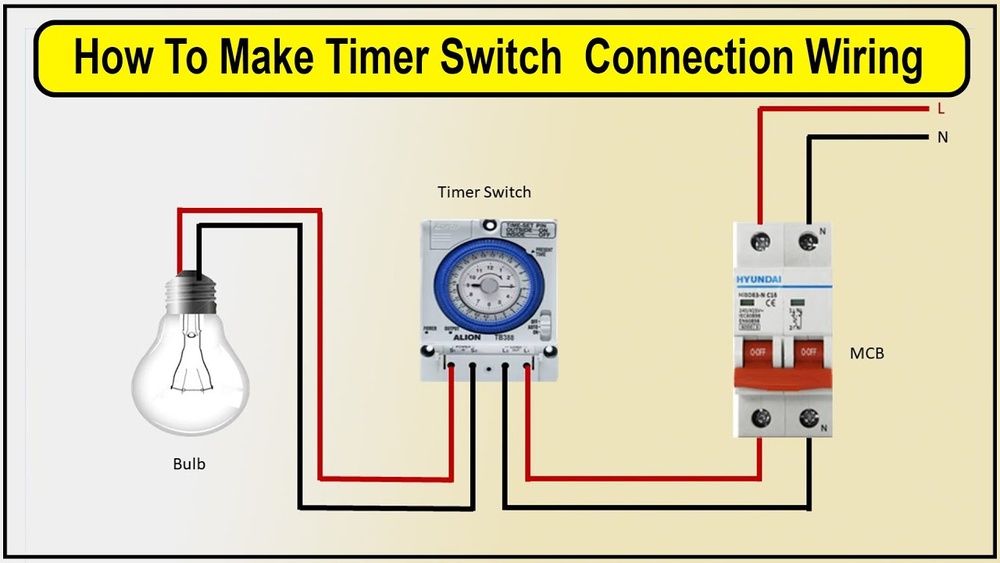
Have you ever wished your lights could turn on or off automatically without you having to flip a switch every time? Connecting a timer to your light switch can make that happen easily.
Imagine coming home to a well-lit room or saving energy by ensuring lights don’t stay on longer than needed. In this guide, you’ll discover simple steps to install a timer on your light switch, even if you’re not a tech expert.
Keep reading, and you’ll learn how to add convenience and control to your home lighting in no time.
Choosing The Right Timer
Choosing the right timer for your light switch is important. It helps control your lights efficiently. The right timer saves energy and adds convenience. Understanding different types and features makes the choice easier.
Types Of Timers
Mechanical timers use a dial to set time. They are simple and cost-effective. Digital timers offer precise control and easy programming. Some come with remote controls. Smart timers connect to Wi-Fi. They allow control through a smartphone app.
Compatibility With Light Switches
Check if the timer works with your switch type. Some timers fit standard toggle switches. Others work with rocker or paddle switches. Confirm the voltage and current ratings match your system. Compatibility ensures safe and proper operation.
Key Features To Consider
Look for easy installation and clear instructions. A backup battery keeps settings during power loss. Adjustable timing options fit different needs. Some timers have manual override to control lights anytime. Consider timers with energy-saving modes.

Credit: www.youtube.com
Gathering Necessary Tools
Before connecting a timer to a light switch, gather all necessary tools. Having the right tools makes the job easier and safer. It also saves time and prevents mistakes. Prepare your workspace and check each tool carefully. Below are the essential tools and materials you need for this task.
Basic Electrical Tools
Start with a screwdriver set, including flathead and Phillips types. Use a wire stripper to remove insulation from wires. Needle-nose pliers help bend and hold wires during connection. A voltage tester checks if the power is off. Include electrical tape for securing wire connections.
Safety Equipment
Wear insulated gloves to protect against electric shock. Safety goggles shield your eyes from dust and sparks. Use a face mask if dust or debris is present. Have a fire extinguisher nearby for emergencies. Always work in a well-lit area to avoid accidents.
Additional Materials
Keep wire nuts ready to join wires securely. Use a timer switch designed for your light fixture. Have extra electrical wires in case you need longer connections. Carry a small flashlight for dark spaces. A circuit breaker finder helps locate the correct switch in your panel.
Preparing For Installation
Preparing for installation is the first step in connecting a timer to a light switch. This stage ensures safety and smooth work. Take time to do it right.
Start by making sure no electricity flows to the switch. Then remove the old switch carefully. Finally, check the wires to plan the new connection.
Turning Off Power
Safety comes first. Find the circuit breaker that controls the light switch. Turn it off to cut power. Use a voltage tester to confirm no electricity flows. Never skip this step.
Removing The Existing Switch
Unscrew the switch cover plate. Use a screwdriver to remove the switch screws. Pull the switch gently from the wall box. Keep wires attached for now. Note how wires connect to the switch.
Inspecting Wiring
Look at the wires carefully. Check for damage or loose ends. Identify the line, load, neutral, and ground wires. Clean any dirt or corrosion. Proper wiring ensures the timer works well and lasts long.

Credit: www.ifixit.com
Wiring The Timer
Wiring the timer to a light switch is a key step in the installation process. This step controls when your light turns on or off automatically. It is important to understand the wiring well before starting. Safety is important. Always turn off the power at the breaker before handling wires.
Identifying Wires
Look at the wires coming from the wall. Usually, you will see three types: live (hot), neutral, and ground. The live wire carries electricity to the switch. The neutral wire completes the circuit back to the panel. The ground wire is for safety and is often green or bare copper.
Use a voltage tester to confirm which wire is live. This helps avoid mistakes. Label the wires with tape to keep track. Every timer may need the wires connected slightly differently. Check your timer’s instructions for details.
Connecting Wires To Timer
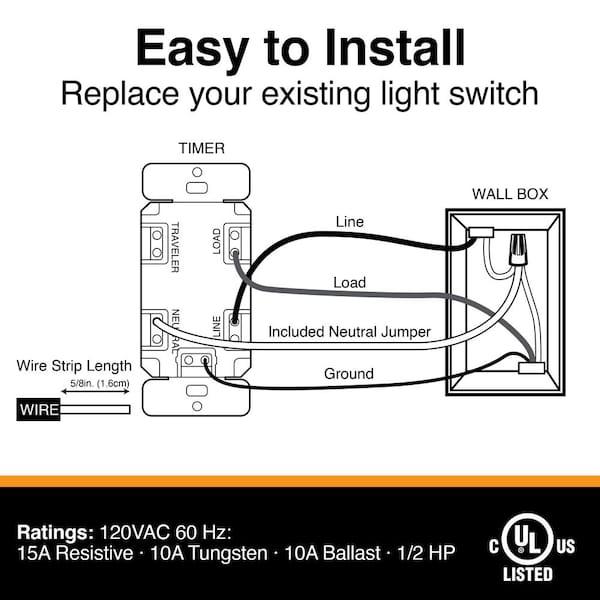
Match the wires from the timer to the wires in the wall. Connect live wire from the timer to the live wire in the wall. Attach the neutral wire from the timer to the neutral wire in the wall. Connect the ground wire from the timer to the ground wire in the wall. Use wire nuts to join the wires securely.
Follow the color codes carefully. Some timers have extra wires for different functions. Connect those as explained in the manual. Wrong connections can cause the timer to fail or create hazards.
Securing Connections
After connecting wires, twist wire nuts tightly onto the wire ends. Tug each wire gently to check the connection. No wires should come loose. Wrap electrical tape around wire nuts for extra security. Push the wires carefully back into the switch box.
Mount the timer to the box with screws. Attach the faceplate to cover the wires. Turn the power back on and test the timer. The light should turn on and off as set.
Mounting And Testing
After wiring the timer to the light switch, the next step is mounting and testing. This part ensures the timer fits well and works correctly. Proper mounting keeps the timer secure and safe. Testing confirms the timer controls the light as expected.
Attaching Timer To Wall
Start by placing the timer into the electrical box. Use screws to fix the timer tightly on the wall. Make sure it sits flush with the wall surface. Avoid loose or tilted positioning. Check that the timer buttons and dials are easy to reach.
Restoring Power
Turn the circuit breaker back on to restore power. Double-check the switch is in the off position. Restore power carefully to avoid electrical shock. Watch for any sparks or unusual sounds. If all looks safe, proceed to test the timer.
Testing Timer Functionality
Set the timer according to the instructions. Switch the light on and wait for the timer to act. Observe if the light turns off or on at the set time. Repeat the test to confirm accuracy. Adjust settings as needed for proper operation.
Credit: www.homedepot.com
Troubleshooting Common Issues
Troubleshooting common issues can help keep your timer and light switch working well. Problems might occur due to wiring, settings, or power supply. Fixing these issues early saves time and avoids damage. Below are simple solutions for frequent problems.
Timer Not Turning On
Check if the timer is properly connected to the power source. Loose wiring can stop the timer from receiving power. Make sure the circuit breaker is on. Test the power at the switch with a voltage tester. Replace the timer if it still does not turn on.
Light Flickering
Flickering lights often mean poor connections. Inspect the wires at the timer and switch for any loose ends. Tighten all screws firmly. Use a bulb with the correct wattage for the timer. Try a different bulb to rule out bulb issues. If flickering continues, the timer may be faulty.
Incorrect Timer Settings
Wrong settings can cause the timer to turn the light on or off at the wrong times. Double-check the current time on the timer. Adjust the on/off periods to match your needs. Reset the timer to factory settings if unsure. Follow the user manual carefully to program the timer correctly.
Safety Tips And Best Practices
Connecting a timer to a light switch can save energy and add convenience. Safety must come first in this task. Simple steps help avoid accidents and ensure the timer works well. Follow these safety tips and best practices for a smooth installation.
Avoiding Electrical Hazards
Turn off the power at the circuit breaker before starting. Use a voltage tester to check wires. Never touch live wires. Wear insulated gloves for extra protection. Keep the work area dry and well-lit. Avoid using metal tools near wires. Follow the timer’s instructions carefully. Wrong wiring can cause shocks or fires.
Regular Maintenance
Check the timer and switch regularly for damage. Look for loose wires or signs of burning. Clean dust and dirt from the switch area. Replace the timer if it stops working properly. Test the timer function every few months. Proper maintenance extends the life of your setup. It also keeps your home safe.
When To Call A Professional
Call an electrician if unsure about wiring. Complex wiring or old switches need expert help. If you notice sparks or burning smells, stop immediately. Professionals can ensure the timer is installed correctly. They prevent risks and code violations. Don’t risk injury or damage by doing it alone.
Frequently Asked Questions
How Do I Connect A Timer To A Light Switch Safely?
Turn off power at the breaker before starting. Connect the timer’s input wires to the switch’s power supply wires. Attach the output wires from the timer to the light fixture. Follow the timer’s wiring diagram carefully to avoid mistakes.
What Tools Are Needed To Install A Timer Switch?
You will need a screwdriver, wire stripper, voltage tester, and electrical tape. These tools help safely remove the old switch and connect the timer switch. Always verify power is off before working with electrical wiring.
Can Any Light Switch Be Replaced With A Timer?
Most standard light switches can be replaced with compatible timers. Ensure the timer supports your light type, such as LED or incandescent. Check your home’s wiring setup to confirm compatibility before purchasing a timer switch.
How Do I Program A Timer Switch After Installation?
Follow the manufacturer’s instructions to set current time and desired on/off intervals. Most timers use buttons or dials for programming. Test the timer by switching power back on and observing the light’s operation.
Conclusion
Connecting a timer to a light switch saves energy and adds convenience. It helps control when lights turn on or off. The process is simple with the right tools and steps. Always make sure to turn off power before starting.
Double-check all connections for safety and proper function. A timer switch can improve your home’s lighting easily. Try it yourself and enjoy smarter lighting control today.