Are you tired of that old, flickering light switch in your home? Replacing a light switch might sound tricky, but it’s easier than you think—and you don’t need to be an expert.
Imagine controlling your lights smoothly, without worrying about sparks or weird noises. In this guide, you’ll discover simple steps to safely replace your light switch and give your room a quick upgrade. Keep reading, and you’ll be surprised how fast and satisfying this small fix can be!

Credit: www.youtube.com
Tools And Materials Needed
Replacing a light switch is a simple home project. Having the right tools and materials makes the job easier and safer. Prepare everything before you start. This helps avoid delays and mistakes.
Tools Needed
You need a screwdriver, usually a flathead and a Phillips. A voltage tester is important to check if wires have power. Wire strippers help remove insulation from the wires. Needle-nose pliers make it easier to bend and hold wires.
Materials Needed
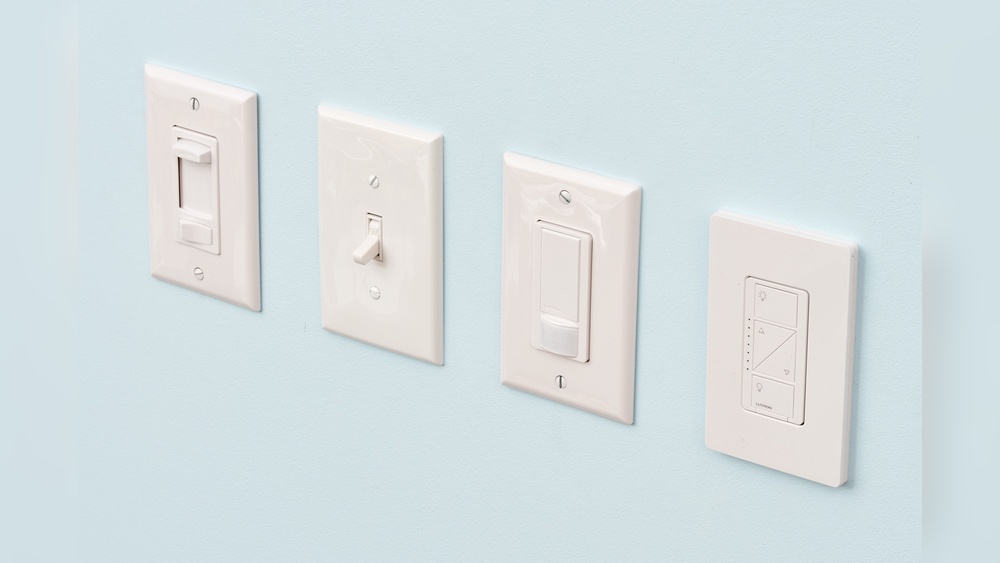
Get a new light switch that fits your needs and wall box. Electrical tape is useful to secure wire connections. Wire nuts protect and join wires safely. Make sure to have a flashlight or work light if the area is dark.
:max_bytes(150000):strip_icc()/how-to-replace-a-light-switch-1824670_07_newswitch_40431-69f2872f4a734dc89e3c2bed8711fc69.jpg)
Credit: www.thespruce.com
Turn Off Power Safely
Turning off power safely is the first step in replacing a light switch. It stops electricity from flowing to the switch. This prevents shocks or accidents. Taking this step seriously keeps you safe.
Before touching any wires, make sure the power is completely off. A small mistake can cause injury. Follow the steps below to turn off power safely.
Locate The Circuit Breaker
Find your home’s circuit breaker box. It is usually in the basement, garage, or utility room. Look for the panel with many switches or breakers. Each controls power to different parts of your home.
Identify The Right Switch
Check the labels on the breaker panel. Look for the one marked for lights or the room you work in. If labels are missing, turn off the main breaker. This cuts power to the whole house.
Turn Off The Breaker
Flip the correct breaker switch to the OFF position. You should feel a click. This stops electricity from reaching the light switch. Do not guess or leave it halfway.
Test The Power
Use a voltage tester or plug in a light to check. If the light does not turn on, power is off. If it still works, double-check the breaker or turn off the main switch.
Use Safety Gear
Wear rubber-soled shoes and avoid standing on wet floors. Use insulated tools when handling wires. These extra steps lower the risk of electric shock.
Remove The Old Switch
Removing the old light switch is the first step in replacing it safely. It involves turning off power, unscrewing the switch, and disconnecting wires. Follow each step carefully to avoid accidents and ensure a smooth process.
Turn Off The Power
Start by switching off the power at the circuit breaker. This step stops electricity flow to the switch. Use a voltage tester to confirm the power is off before touching wires.
Remove The Switch Cover Plate
Use a screwdriver to take off the cover plate. This exposes the screws holding the switch in place. Keep the screws safe for the new switch installation.
Unscrew The Old Switch
Unscrew the mounting screws on the switch. Gently pull the switch out from the wall box. Avoid pulling too hard to prevent wire damage.
Disconnect The Wires
Note how wires connect to the switch for easy reinstallation. Loosen the terminal screws or release wires from push-in connectors. Carefully separate the wires from the switch.
Identify And Label Wires
Identifying and labeling wires is a crucial step before replacing a light switch. It helps you understand which wire does what. This prevents mistakes and keeps you safe during the process.
Wires inside a switch box can look very similar. Without labels, connecting the wrong wires can cause problems. Labeling wires makes the reinstallation smooth and accurate.
Turn Off Power And Check Wires
Start by turning off the power at the circuit breaker. Use a voltage tester to confirm no electricity flows to the switch. This step ensures safety.
Once power is off, remove the switch cover. Carefully pull the switch out to see the wires attached to it.
Identify Each Wire Type
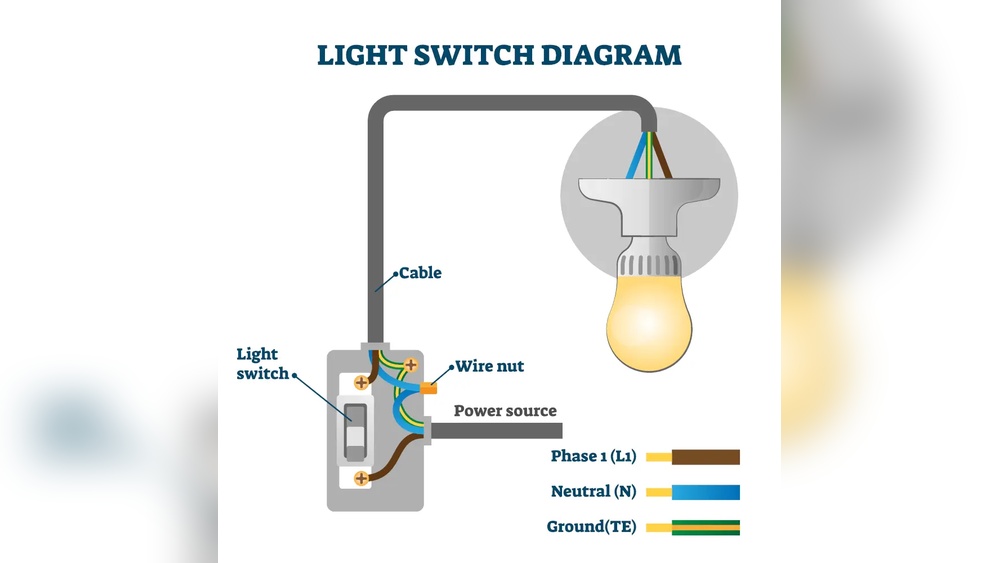
Look for common wire types: hot, neutral, and ground. Hot wires usually have black or red insulation. Neutral wires are white. Ground wires are bare copper or green.
Some older homes may have different colors. Note the colors and where each wire connects on the switch.
Label Wires Clearly
Use masking tape or wire labels to mark each wire. Write simple tags like “Hot,” “Neutral,” or “Ground.” Attach labels near the wire ends.
Labeling stops confusion when you install the new switch. It helps ensure correct connections and safe operation.
Connect The New Switch
Connecting the new light switch is a key step in replacing it. It ensures the switch works safely and correctly. Take time to connect each wire properly. This step requires care and attention. Follow each instruction closely for best results.
Turn off the power before starting. This prevents electric shocks. Use a voltage tester to confirm no power flows to the wires.
Identify The Wires
Look at the wires inside the box. Usually, you will see a black (hot) wire, a white (neutral) wire, and a green or bare copper (ground) wire. The new switch mainly connects to the black and ground wires. Knowing each wire’s role helps avoid mistakes.
Attach The Ground Wire
Connect the green or bare copper wire to the green screw on the switch. This ground wire keeps the switch safe by directing electricity away if there is a fault. Tighten the screw firmly so the wire does not come loose.
Connect The Hot Wires
Attach the black wires to the brass or black screws on the switch. Some switches have two screws for hot wires. Wrap the wire clockwise around the screw. Tighten the screws well to ensure a good connection. Loose wires cause flickering or no power.
Secure The Switch In The Box
Push the wires gently back into the electrical box. Be careful not to pinch or damage them. Screw the switch to the box using the mounting screws. Make sure it sits flush and straight.
Secure The Switch And Cover Plate
Securing the switch and cover plate is a key step in replacing a light switch. It keeps the switch stable and protects the wiring. A loose switch can cause problems and may be unsafe. The cover plate also gives a clean, finished look to the wall. Follow these simple steps to secure both parts properly.
Secure The Light Switch To The Wall Box
Start by placing the switch into the wall box carefully. Align the screw holes on the switch with those on the box. Use a screwdriver to tighten the screws. Tighten just enough to hold the switch firmly. Do not overtighten. The switch should not move or wiggle.
Check The Switch Alignment
Look at the switch from the front. Make sure it sits straight and flush against the wall. If it tilts or sticks out, loosen the screws slightly. Adjust the position and tighten again. Proper alignment makes the switch easier to use.
Attach The Cover Plate
Place the cover plate over the switch carefully. Match the screw holes of the plate with those on the switch. Use the screws that came with the plate. Tighten them by hand or with a screwdriver. Do not overtighten to avoid cracking the plate.
Final Inspection
Check the switch and cover plate for any gaps. Ensure no wires are visible. The cover plate must sit flat against the wall. Press the switch to confirm it moves smoothly. A secure installation improves safety and appearance.
Restore Power And Test
After replacing a light switch, restoring power and testing is the last step. This step confirms the switch works correctly and safely. Careful testing avoids electrical problems and saves time.
Restore Power To The Circuit
Turn the circuit breaker back on at the main panel. This action restores electricity to the switch. Make sure the switch is in the off position before turning power on. Avoid touching any exposed wires during this process.
Test The Light Switch
Flip the switch on and off to check if the light works. The light should turn on without flickering or delay. Test the switch several times to confirm proper function. If the light does not work, double-check your wiring connections.
Check For Safety And Functionality
Look for any signs of sparks or burning smells. Ensure the switch feels firm and does not wiggle. Loose switches can cause electrical hazards. If anything seems wrong, turn off the power and inspect the installation again.
Troubleshooting Common Issues
Troubleshooting common issues helps fix problems when replacing a light switch. Many issues arise from simple mistakes. Knowing what to check saves time and ensures safety. This section covers typical problems and easy fixes. Follow these tips to solve common errors quickly.
Checking For Power Supply Problems
First, make sure the power is off. Use a voltage tester to confirm no electricity flows. If the switch does not work, the circuit breaker might be off. Reset it if needed. Also, check the fuse box for any blown fuses. No power means the switch cannot work.
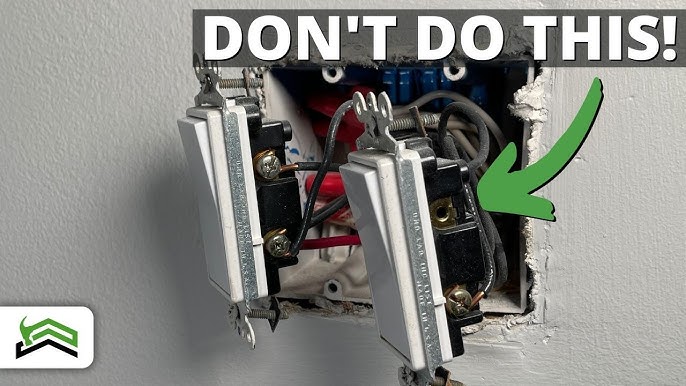
Identifying Loose Or Wrong Wiring
Loose wires cause the switch to fail. Turn off the power before touching wires. Tighten all wire connections firmly. Make sure wires connect to the correct terminals. Refer to the switch’s wiring diagram for accuracy. Wrong wiring can cause sparks or a short circuit.
Testing The Light Switch Itself
Sometimes the switch is faulty. Use a multimeter to test the switch’s continuity. Press the switch and watch for changes in the reading. No change means the switch is broken. Replace the switch with a new one that fits your setup.
Examining The Light Fixture
The problem might not be the switch. Check the light fixture for loose bulbs or damaged sockets. Replace burned-out bulbs with new ones. Look for signs of wear or corrosion inside the fixture. Fixing the fixture might solve the issue without changing the switch.
Safety Tips For Electrical Work
Working with electricity can be risky without the right safety steps. Taking proper precautions helps avoid shocks, injuries, or damage. Follow these safety tips to keep your project safe and smooth.
Turn Off Power At The Circuit Breaker
Always switch off power before starting any electrical work. Find the correct breaker and turn it off. Double-check by testing the switch with a voltage tester. This step prevents electric shocks and serious harm.
Use The Right Tools And Equipment
Choose tools designed for electrical tasks. Insulated screwdrivers and pliers keep you safer. Avoid metal tools without insulation to reduce shock risk. Good tools make the job easier and safer.
Wear Protective Gear
Wear rubber-soled shoes and safety glasses. Gloves made for electrical work protect your hands. These items reduce injury chances during work. Always prepare with the right gear before touching wires.
Work In A Dry Environment
Keep your work area dry. Water conducts electricity and increases shock danger. Avoid working in wet rooms or damp conditions. Dry surroundings help maintain safety while replacing a switch.
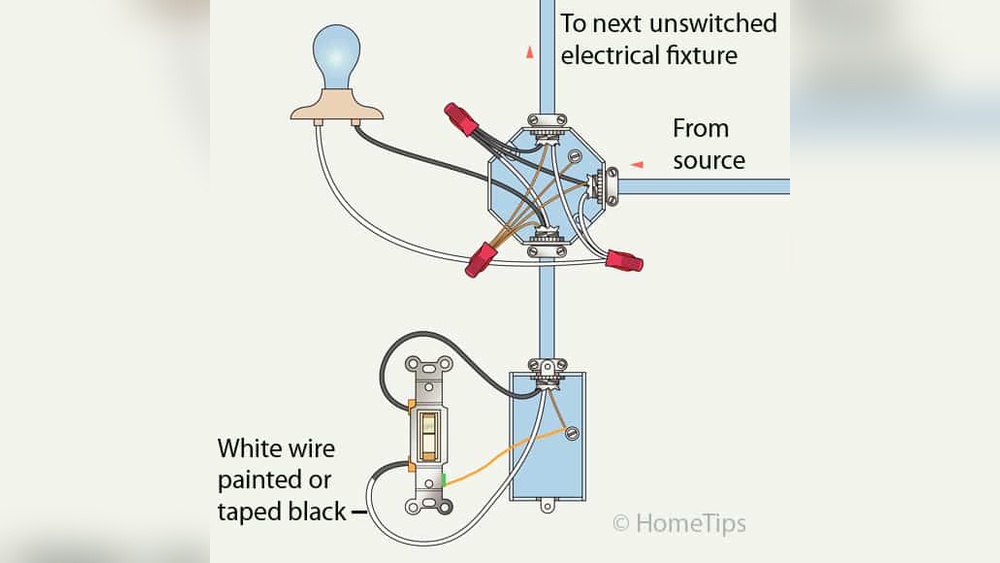
Follow Wiring Diagrams Carefully
Use correct wiring diagrams for your switch type. Wrong connections can cause short circuits or fires. Check each wire before attaching it. Clear diagrams guide safe and proper installation.
Credit: www.youtube.com
Frequently Asked Questions
How Do I Safely Replace A Light Switch?
Turn off power at the circuit breaker before starting. Use a voltage tester to ensure no electricity flows. Remove the old switch carefully, noting wire positions. Connect wires to the new switch matching the original layout. Secure the switch and restore power to test.
What Tools Are Needed To Replace A Light Switch?
You need a screwdriver, voltage tester, wire stripper, and electrical tape. These tools help remove the old switch, test wires, and connect the new switch properly. Using the right tools ensures safety and a successful replacement.
How Can I Identify Switch Wiring Before Replacement?
Turn off power and remove the switch cover. Note wire colors and positions carefully. Typically, black or red wires are hot, white is neutral, and green or bare is ground. Label wires if needed to avoid confusion during installation.
How Long Does It Take To Replace A Light Switch?
Replacing a light switch typically takes 15 to 30 minutes. This includes turning off power, removing the old switch, wiring the new one, and testing. Time varies based on experience and switch type.
Conclusion
Replacing a light switch is simple with the right steps. Always turn off power before starting work. Use basic tools and follow safety rules carefully. Take your time to avoid mistakes. A new switch can improve your room’s look and function.
This small job saves money and boosts confidence in home repairs. You can handle it yourself with patience and care. Keep this guide handy for future projects. Simple tasks like this make your home better every day.