Are you tired of dealing with old, faulty light switches that don’t work properly? Changing your light switches might seem tricky, but it’s easier than you think—and it can make a big difference in your home’s look and safety.
In this guide, you’ll learn simple, step-by-step instructions to switch your light switches quickly and confidently. By the end, you’ll feel empowered to upgrade your lighting setup without calling an electrician. Ready to transform your space and take control of your home’s lighting?
Let’s get started!
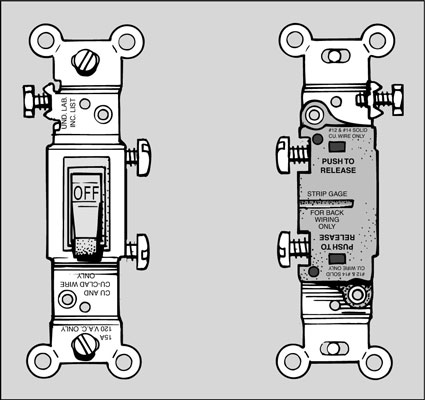
Credit: www.dummies.com
Tools And Materials Needed
Switching a light switch needs some basic tools and materials. Using the right items makes the job safer and easier. Prepare everything before starting. This helps to avoid delays and mistakes.
Safety Gear
Safety should always come first. Use insulated gloves to protect your hands. Safety goggles will keep your eyes safe from sparks or dust. Wear shoes with rubber soles to avoid electric shocks.
Tools
A flathead and a Phillips screwdriver are essential. A voltage tester checks if the power is off. Wire strippers help remove insulation from wires. Needle-nose pliers are useful for bending wires.
Materials
Get a new light switch that fits your setup. Electrical tape helps secure wire connections. Wire nuts join wires safely. Keep a small flashlight handy for dark spaces.
Safety Precautions Before Starting
Before starting to switch light switches, safety must come first. Working with electricity can be dangerous. Taking the right steps helps prevent accidents and injuries. Small precautions make a big difference.
Always prepare your workspace and tools before you begin. Knowing what to do keeps you safe and confident.
Turn Off The Power
Switch off the power at the circuit breaker. Do not rely on the wall switch alone. This stops electricity from flowing to the switch. Use a tester to check if power is off.
Use The Right Tools
Use insulated tools made for electrical work. Avoid metal tools without insulation. Proper tools protect against electric shocks. Keep tools dry and in good condition.
Wear Safety Gear
Wear rubber-soled shoes and safety gloves. These protect against electric shocks. Avoid wearing jewelry or loose clothing. Keep your work area clean and dry.
Check For Damaged Wires
Inspect wires for cracks or frays. Damaged wires increase the risk of shock. Replace or repair any faulty wiring before starting. Never touch exposed wires without protection.
Work In A Well-lit Area
Ensure the workspace has good lighting. Clear visibility helps avoid mistakes. Use a flashlight or portable lamp if needed. A well-lit area keeps your hands steady.
Turning Off Power Safely
Turning off power safely is the first step before switching light switches. It protects you from electric shocks and accidents. Always treat electricity with respect and caution.
Before starting, locate your home’s main electrical panel. This panel controls the power supply to different areas. You need to cut power to the switch you want to replace.
Find The Correct Circuit Breaker
Look for the circuit breaker that controls the light switch. It may be labeled in the panel. If not, turn off breakers one at a time to find the right one.
Switch Off The Power
Flip the correct breaker to the “off” position. This stops electrical flow to the switch. Double-check by flipping the light switch to see if power is gone.
Use A Voltage Tester
Before touching any wires, use a voltage tester. This tool confirms no electricity flows to the switch. It adds an extra layer of safety for you.
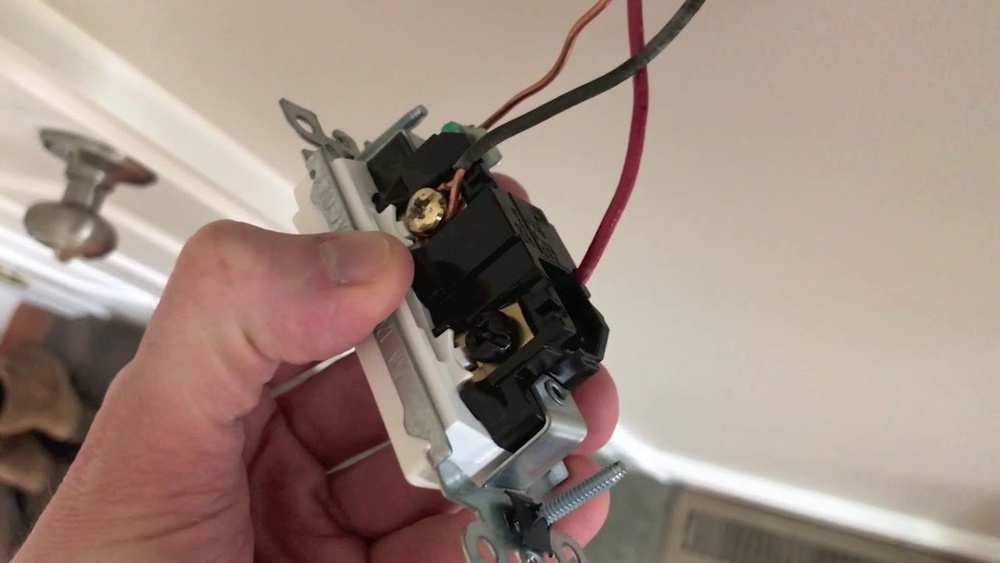
Removing The Old Switch
Removing the old light switch is the first step in the switch replacement process. It is important to work safely and carefully. This step helps prepare the wall for the new switch installation.
Before starting, make sure the power is turned off at the circuit breaker. This prevents electric shock during the work.
Turn Off The Power
Locate your home’s circuit breaker panel. Find the switch that controls power to the light switch. Flip it off to cut the electricity. Use a voltage tester to confirm no power flows to the switch.
Remove The Switch Cover Plate
Use a screwdriver to take out the screws holding the cover plate. Gently pull the plate away from the wall. Set it aside carefully for reuse or replacement.
Unscrew The Old Switch
Remove the screws holding the switch to the electrical box. Pull the switch out slowly. Keep the wires attached and visible for the next step.
Disconnect The Wires
Note the position of each wire on the switch. Unscrew the terminal screws to free the wires. If wires are attached with push-in connectors, use a small tool to release them. Keep the wires separated to avoid accidental contact.
Identifying Wires And Connections
Identifying wires and connections is a crucial step before switching light switches. It ensures safety and helps the new switch work correctly. Each wire in a light switch box has a specific role. Knowing which wire does what prevents mistakes and electrical hazards.
Wires usually come in different colors. These colors show their purpose. Understanding these colors makes the job easier. It also helps to follow the right wiring process.
Understanding Wire Colors
Most homes use three common wire colors: black, white, and green or bare copper. Black wires carry electricity to the switch. White wires return electricity to the power source. Green or bare copper wires connect to the ground. Ground wires help protect from electric shocks.
Recognizing Wire Types
Switch boxes contain two main wire types: hot and neutral. Hot wires bring power to the switch. Neutral wires complete the circuit back to the panel. Ground wires add safety by connecting to the earth. Identifying these helps you connect the new switch properly.
Using A Voltage Tester Safely
Before touching any wires, use a voltage tester. It shows if wires have electricity. Always test each wire twice. This avoids electric shock and confirms the power is off. Safety first. Never skip this step.
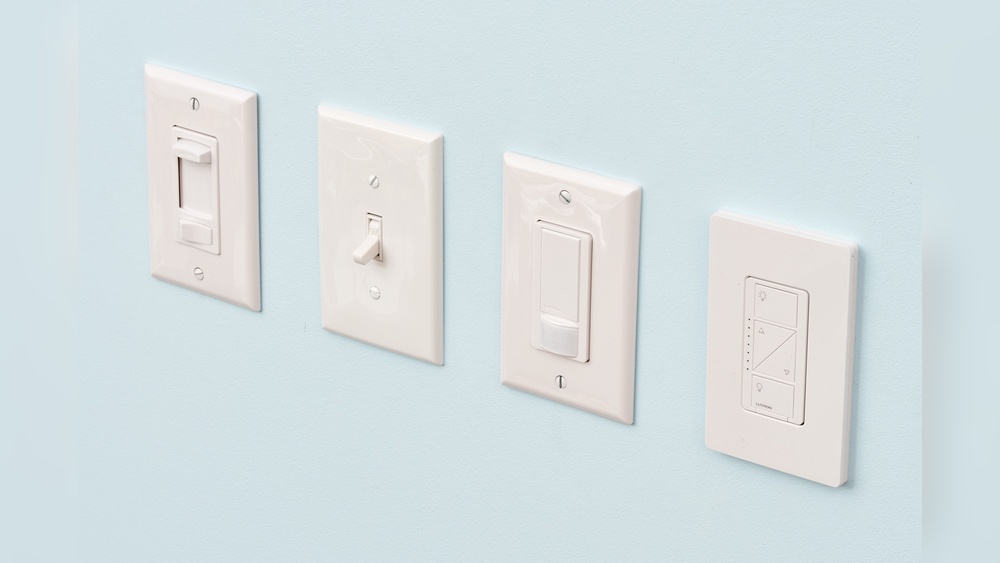
Credit: www.snappower.com
Wiring The New Switch
Wiring the new switch is a key step in changing a light switch. It connects the electrical wires to the switch so the light can turn on and off. This process needs care and attention to make sure everything works safely. Follow these steps to wire your new switch correctly and avoid common mistakes.
Turn Off The Power
Start by turning off the power at the breaker box. This stops electricity from flowing to the switch. Use a voltage tester to check if the wires have no power. Safety first—never work on live wires.
Identify The Wires
Look at the wires in the switch box. Usually, you will see a black (hot) wire and a white (neutral) wire. Some switches also have a green or bare copper ground wire. Knowing which wire is which helps connect them correctly.
Connect The Wires To The New Switch
Attach the black wire to the brass or black screw on the switch. Connect the white wire to the silver screw if your switch needs it. Attach the green or bare wire to the green grounding screw. Tighten all screws firmly to avoid loose connections.
Secure The Switch And Test
Push the wires back into the box carefully. Screw the switch into place. Turn the power back on at the breaker. Test the switch by turning the light on and off. If it works, you did the wiring right.
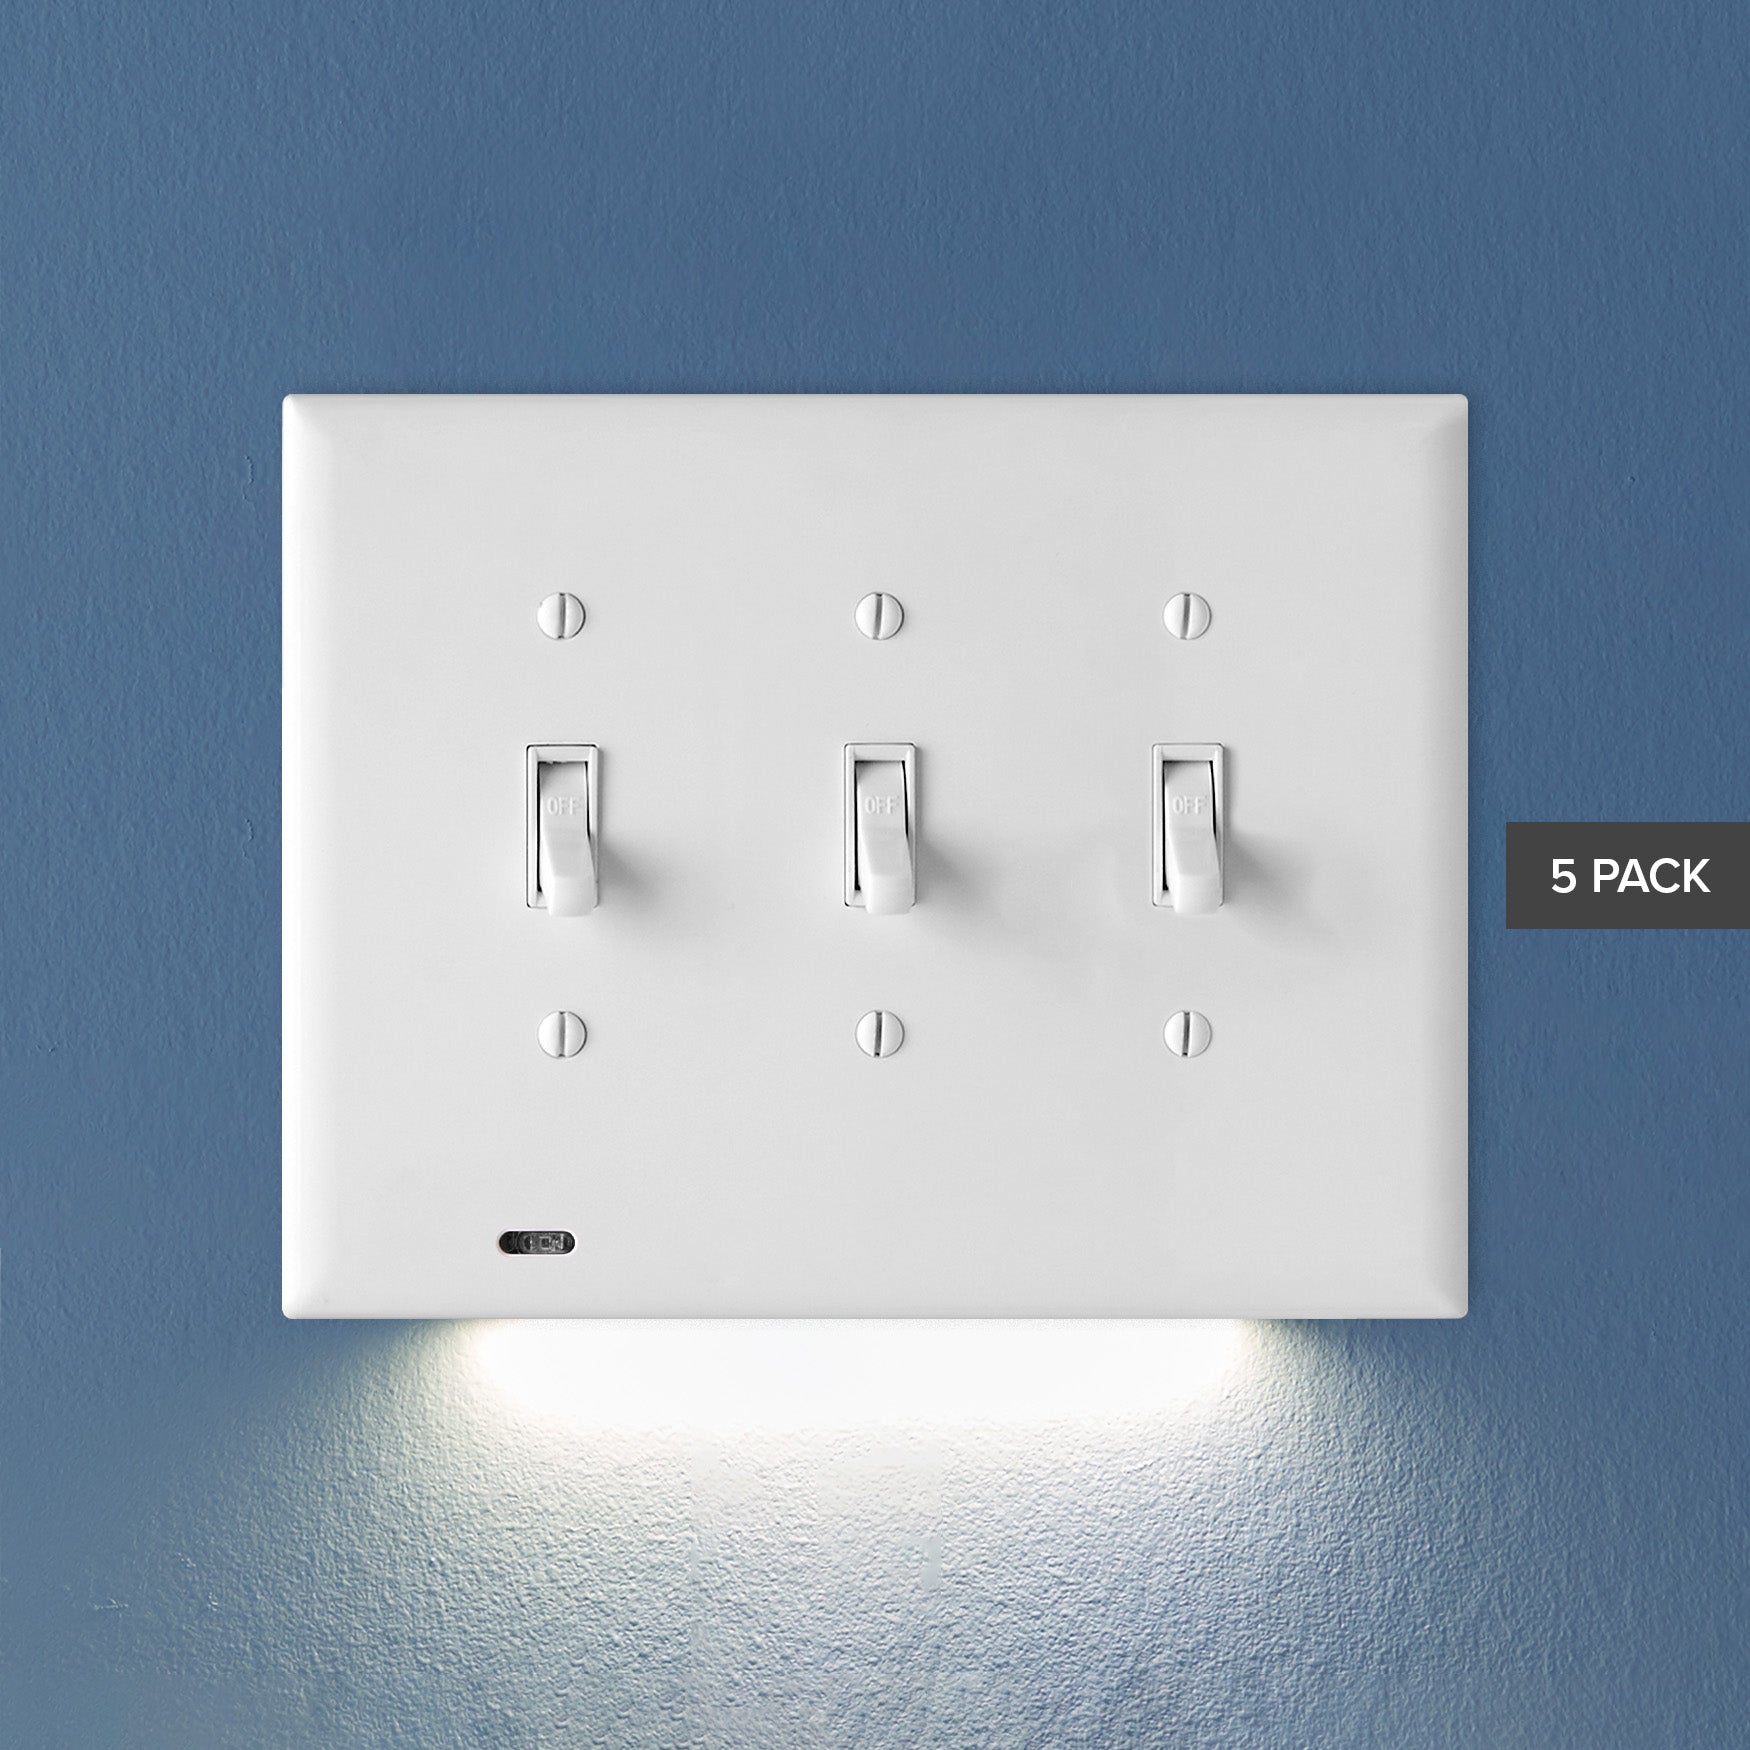
Securing The Switch And Cover Plate
Securing the switch and cover plate is the final step in switching light switches. It keeps everything safe and looks neat. A loose switch can cause problems or even be dangerous. The cover plate protects wires and gives a clean finish. Follow these simple steps to secure them properly.
Align The Switch Properly
Place the switch in the electrical box carefully. Make sure the switch fits straight. Check that the toggle or rocker moves freely. Avoid pushing the switch too far in. This helps the switch work well and last longer.
Tighten The Switch Screws
Use a screwdriver to tighten the screws on the switch. Tighten each screw evenly. Do not over-tighten, or the switch may crack. Screws should hold the switch firmly in place. Check that the switch does not wiggle or move.
Attach The Cover Plate
Put the cover plate over the switch. Line up the screw holes with the switch box. Hold the cover plate flat against the wall. This keeps dust and dirt out of the box.
Secure The Cover Plate Screws
Insert the screws into the cover plate holes. Tighten them gently with a screwdriver. Do not overtighten to avoid cracking the plate. The plate should be flush with the wall. A tight cover plate improves safety and appearance.
Restoring Power And Testing
Restoring power and testing the light switch is the final step in the replacement process. This step confirms the switch works safely and correctly. It ensures the wiring is secure and the electrical connection is complete.
Always follow safety rules before restoring power. Double-check that no wires touch each other or the switch box. Loose wires can cause shorts or shocks.
Restore Power At The Circuit Breaker
Go to your main electrical panel. Find the breaker that controls the switch. Flip the breaker back to the ON position. This restores electricity to the switch and the connected light.
Test The Light Switch
Stand near the switch. Flip it ON and OFF several times. The light should turn on and off smoothly. If it does, the switch works correctly.
Check For Any Issues
Look for flickering lights or unusual sounds. Flickers or buzzing mean wiring problems. Switch off the breaker and recheck connections. Fix any loose wires before testing again.
Troubleshooting Common Issues
Troubleshooting common issues helps fix problems quickly. Problems with light switches can stop lights from working.
Knowing how to find and solve these problems saves time and effort. Here are some common issues and how to address them.
Check For Power Supply Problems
First, ensure the power is on. A tripped breaker or blown fuse can cut power to the switch. Use a voltage tester to check power at the switch. No power means checking the circuit breaker box is needed.
Inspect The Switch Wiring
Loose or wrong wiring causes switches to fail. Turn off power before opening the switch box. Look for loose wires or disconnected terminals. Tighten any loose screws and reconnect wires correctly.
Test The Switch Itself
The switch may be faulty. Remove the switch and test it with a multimeter. A good switch shows continuity when on and no continuity when off. Replace the switch if it fails this test.
Look For Burn Marks Or Damage
Burn marks on the switch or wires signal overheating or short circuits. Replace any damaged parts immediately. Damaged wires can cause safety hazards and must be fixed by a professional if unsure.
Verify The Light Fixture
The problem might not be the switch but the light fixture. Check the bulb and fixture connections. Replace burnt-out bulbs and ensure the fixture wires are secure.
Upgrading To Smart Switches
Upgrading to smart switches is a simple way to bring modern convenience to your home. These switches allow you to control lights using a phone or voice commands. They can save energy and add security by letting you turn lights on and off remotely.
Smart switches fit into your existing wiring but offer more control than regular switches. You can set schedules, dim lights, and connect with other smart devices. This upgrade can improve your daily routine and add comfort to your space.
Choosing The Right Smart Switch
Select a smart switch that matches your home’s wiring and needs. Some switches work with Wi-Fi, others with smart hubs. Check if the switch supports dimming if you want that feature. Also, make sure it fits the size of your switch box.
Tools And Safety Tips
Turn off power at the circuit breaker before starting. Use a voltage tester to confirm the power is off. Gather tools like a screwdriver, wire stripper, and electrical tape. Follow all safety rules to avoid shocks and damage.
Installation Steps
Remove the old switch by unscrewing it and disconnecting wires. Connect the smart switch wires to the house wires using wire nuts. Secure the switch back into the wall box. Restore power and test the switch using the app or voice control.

Credit: www.wikihow.com
Frequently Asked Questions
How Do I Turn Off Power Before Switching Light Switches?
Always turn off the circuit breaker controlling the switch. Use a voltage tester to confirm no power is present. This ensures safety while working on electrical wiring. Never rely on the switch’s off position alone.
What Tools Are Needed To Switch Light Switches?
You need a screwdriver, voltage tester, wire stripper, and new switch. These basic tools help safely remove and install the light switch. Having the right tools makes the process faster and safer.
Can I Replace A Light Switch Myself Safely?
Yes, if you follow safety steps and turn off power first. Basic electrical knowledge is helpful, but many homeowners can replace switches safely. When in doubt, consult a professional electrician.
How Do I Identify Wires For A Light Switch?
Look for black (hot), white (neutral), and green or bare (ground) wires. Use a voltage tester to confirm the live wire. Proper identification avoids wiring errors and potential hazards.
Conclusion
Switching light switches can be simple and safe. Always turn off the power first. Use the right tools and follow steps carefully. Check connections to avoid any problems. Take your time and do not rush. A working switch improves your home’s lighting.
Now, you can change switches with confidence. Stay safe and enjoy your new setup.