Have you ever wondered how easy it is to replace a light switch in your home? If your switch feels old, flickers, or just doesn’t work right, you might think you need to call an electrician.
But what if you could fix it yourself quickly and safely? Imagine saving time and money by handling this simple task on your own. You’ll discover step-by-step tips that make replacing a light switch straightforward—even if you’ve never done it before.
Keep reading, and you’ll see just how doable this home fix really is.

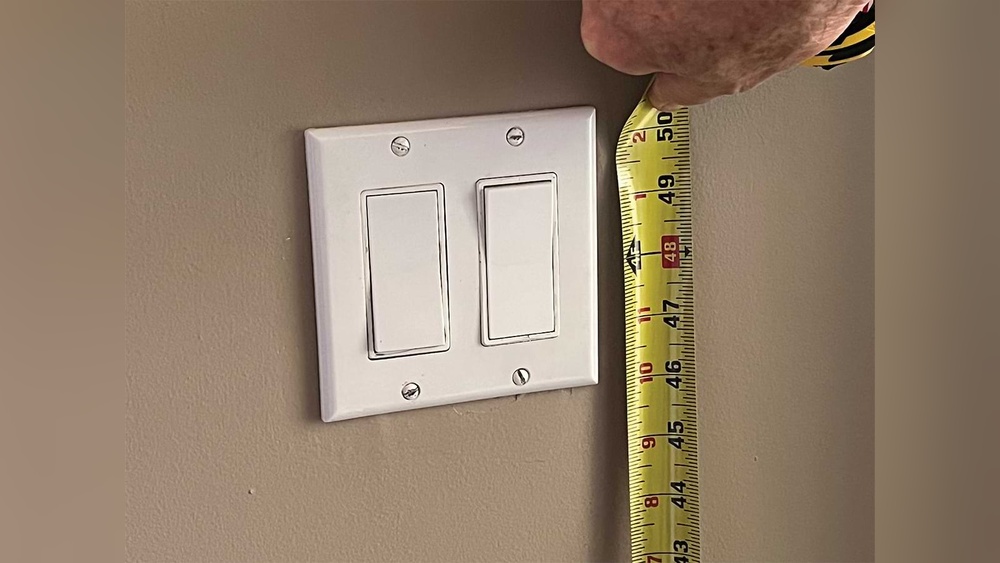
Credit: www.youtube.com
Tools You Need
Replacing a light switch is a simple task that needs a few basic tools. Having the right tools makes the job quicker and safer. This section lists the tools required to replace a light switch easily.
Basic Tools List
A screwdriver set is essential for removing and installing screws. A flathead and a Phillips head screwdriver cover most switch types. Wire strippers help to remove insulation from wires cleanly. Needle-nose pliers make bending and holding wires easier. A voltage tester checks if the power is off, preventing shocks. A flashlight or headlamp helps to see in dark spaces behind the switch plate.
Safety Gear
Safety gear protects you from electrical hazards. Insulated gloves reduce the risk of electric shock. Safety glasses protect your eyes from dust and debris. Wear shoes with rubber soles to avoid grounding yourself. Avoid loose clothing to prevent catching on tools or wires. Always turn off the power at the breaker before starting.

Credit: www.wikihow.com
Choosing The Right Switch
Choosing the right light switch is an important step in replacing one. The right switch affects how well your light works and how it looks. Picking a switch that fits your needs is simple once you know what to consider.
Understanding the types of switches and matching them to your fixture can save time and trouble. This guide helps you select the best switch for your home or office.
Types Of Light Switches
There are many types of light switches. The most common is the single-pole switch. It controls one light or fixture from one place. Another popular type is the three-way switch. It allows control of a light from two different places. Dimmer switches adjust the brightness of your lights. They create mood lighting and save energy. Touch switches and smart switches are newer options. They work with a simple touch or through apps on your phone. Each type serves a different purpose. Knowing these helps you pick the best one.
Matching Switch To Fixture
Your light switch must match your fixture’s needs. Check the power rating of both switch and fixture. A switch with low power rating can cause problems. Look at the fixture’s wiring and voltage. Some lights need special switches like dimmers or smart switches. Outdoor fixtures may need weatherproof switches. Always pick a switch that fits the fixture’s style and function. This makes sure your lights work safely and well.
Turning Off Power
Turning off power is the first and most important step before replacing a light switch. It keeps you safe from electric shock. Always take this step seriously. A small mistake can cause serious injury. Follow the right process to ensure the power is completely off.
Locating The Circuit Breaker
The circuit breaker box controls electricity for your home. It is usually in the basement, garage, or a utility closet. Open the box door carefully. Each switch inside controls a different area. Find the switch labeled for the light switch you want to replace. If labels are missing, turn off the main breaker to cut all power. This stops electricity from flowing to your light switch.
Verifying Power Is Off
Turning off the breaker is not enough. Always check if the power is truly off. Use a voltage tester or a multimeter. Touch the tester to the wires in the switch box. No light or reading means no power. If the tester shows power, double-check the breaker. Never start work until you confirm the power is off. Safety first.
Removing The Old Switch
Removing the old light switch is the first step in replacing it. It involves careful handling to avoid damage or injury. Make sure the power is off before starting. This section explains how to take out the old switch safely.
Unscrewing The Plate
Start by removing the switch cover plate. Use a screwdriver to take out the screws. Keep the screws in a safe place. Gently pull the plate away from the wall. Sometimes the plate may stick; pull slowly to avoid breaking it.
Disconnecting Wires
After removing the plate, the switch will be visible. Unscrew the mounting screws holding the switch in place. Carefully pull the switch out from the wall box. Note how the wires are connected before disconnecting. Use a screwdriver to loosen the terminal screws. Disconnect each wire one at a time. Handle wires with care to avoid damage.
Wiring The New Switch
Wiring the new switch is a key step in replacing a light switch. It means connecting the wires from your wall to the switch properly. Doing this right ensures the switch works safely and well. This part may seem tricky, but it is simple with clear steps and care.
Identifying Wire Types
First, know the wires in your switch box. Usually, you see three types: live, neutral, and ground. The live wire carries power to the switch. It is often black or red. The neutral wire returns power to the panel and is usually white. The ground wire is for safety and is green or bare copper. Identifying these wires helps avoid mistakes.
Connecting Wires Correctly
Match the wires to the right terminals on the new switch. The live wire goes to the switch’s live terminal. The neutral wire may not connect to the switch but to other neutral wires in the box. The ground wire attaches to the green screw on the switch. Tighten all connections well. Loose wires cause problems or danger. Double-check connections before finishing.
Securing And Testing
Securing and testing the new light switch is the final step. This step ensures your switch works correctly and safely. It involves attaching the switch firmly and turning the power back on to test it. Follow these simple steps to complete the process.
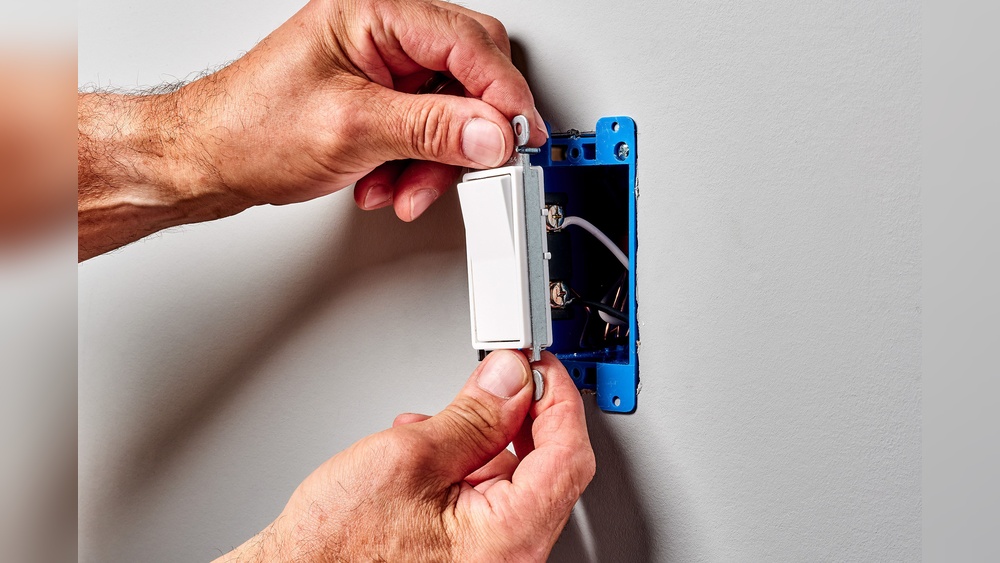
Attaching The Switch
Place the new switch into the electrical box carefully. Make sure the wires are connected tightly to the switch terminals. Use a screwdriver to secure the switch with screws. The switch should feel steady and not move. Check that no wires are loose or exposed. This keeps everything safe and ready for power.
Restoring Power And Testing
Turn the circuit breaker back on to restore power. Flip the light switch to test if the light turns on. If the light works, the installation was successful. Test the switch a few times to confirm it works smoothly. If the light does not turn on, double-check your wiring. Never ignore any signs of problems like sparks or flickering.
Troubleshooting Tips
Troubleshooting a light switch can save time and money. Basic problems often have simple fixes. Knowing what to check first helps avoid unnecessary work. This section guides you through common issues and signs that require expert help.
Common Issues
Sometimes the switch feels loose or won’t click properly. This can mean the internal parts are worn out. Flickering lights often point to a bad connection or a faulty bulb. If the switch or plate is warm, it may be overloaded or damaged. Loose wires behind the switch can cause it to stop working. Checking these areas usually solves the problem quickly.
When To Call A Professional
Electrical work can be dangerous without the right skills. Call a professional if you see sparks or smoke. If the breaker trips every time you use the switch, expert help is needed. Complex wiring or older homes require careful handling. Do not attempt repairs if you feel unsure or unsafe. Professionals have tools and knowledge to fix issues safely.
Safety Reminders
Replacing a light switch is a common home task, but safety must come first. Small mistakes can cause big problems. Follow these safety reminders to protect yourself and your home.
Avoiding Electrical Hazards
Turn off power at the circuit breaker before starting. Test the switch with a voltage tester to confirm power is off. Use insulated tools to avoid shocks. Never work on wet or damp surfaces. Wear rubber-soled shoes to reduce risk. Keep your hands dry while working. Double-check connections before restoring power. Stay focused and avoid distractions during the task.
Proper Disposal Of Old Parts
Old switches contain metal and plastic parts. Do not throw them in regular trash. Check local rules for electronic waste disposal. Some areas have special bins or recycling centers. Proper disposal helps protect the environment. It also prevents hazards from broken parts. Wrap sharp edges before disposing to avoid injury. Dispose of packaging materials responsibly too.
:max_bytes(150000):strip_icc()/how-to-replace-a-light-switch-1824670_07_newswitch_40431-69f2872f4a734dc89e3c2bed8711fc69.jpg)
Credit: www.thespruce.com
Frequently Asked Questions
How Difficult Is It To Replace A Light Switch?
Replacing a light switch is generally easy for most DIYers. It requires basic tools and safety precautions. Turn off power first, then remove the old switch and connect wires to the new one. Follow instructions carefully to avoid mistakes or hazards.
What Tools Are Needed To Replace A Light Switch?
You need a screwdriver, voltage tester, wire stripper, and electrical tape. These tools help safely remove the old switch and install the new one. Using the right tools ensures a secure and code-compliant replacement.
How Long Does It Take To Replace A Light Switch?
Replacing a light switch usually takes 15 to 30 minutes. This includes turning off power, removing the old switch, wiring the new one, and testing. Time may vary depending on experience and switch type.
Is It Safe To Replace A Light Switch Yourself?
Yes, it’s safe if you follow proper safety steps. Always turn off power at the breaker before starting. Use a voltage tester to confirm no electricity flows. If unsure, consult a professional electrician.
Conclusion
Replacing a light switch can be simpler than it seems. Basic tools and careful steps make the task doable. Always turn off power first for safety. Clear instructions help avoid mistakes and save time. Taking your time ensures a secure and lasting fix.
Small projects like this build confidence with home repairs. Give it a try, and you might be surprised by the ease. Simple changes can brighten your space quickly and safely.