Have you ever wondered how a 3 way light switch works? Maybe you’ve noticed those switches at both ends of a hallway or stairway and asked yourself how flipping either one can control the same light.
Understanding this simple yet clever setup can save you time and money when fixing or installing lighting in your home. You’ll discover exactly how these switches function, why they’re useful, and how you can troubleshoot common issues. By the end, you’ll feel confident handling your own 3 way switches like a pro.
Let’s dive in!
Credit: mepacademy.com
Basic Components
The basic components of a 3 way light switch system are simple yet important. These parts work together to control a light from two different locations. Understanding each component helps you see how the switch operates smoothly.
Each element plays a role in making the light turn on or off from either switch. The main parts include the switches themselves and the wiring that connects them. Knowing these will help you grasp the system’s function better.
Switch Types
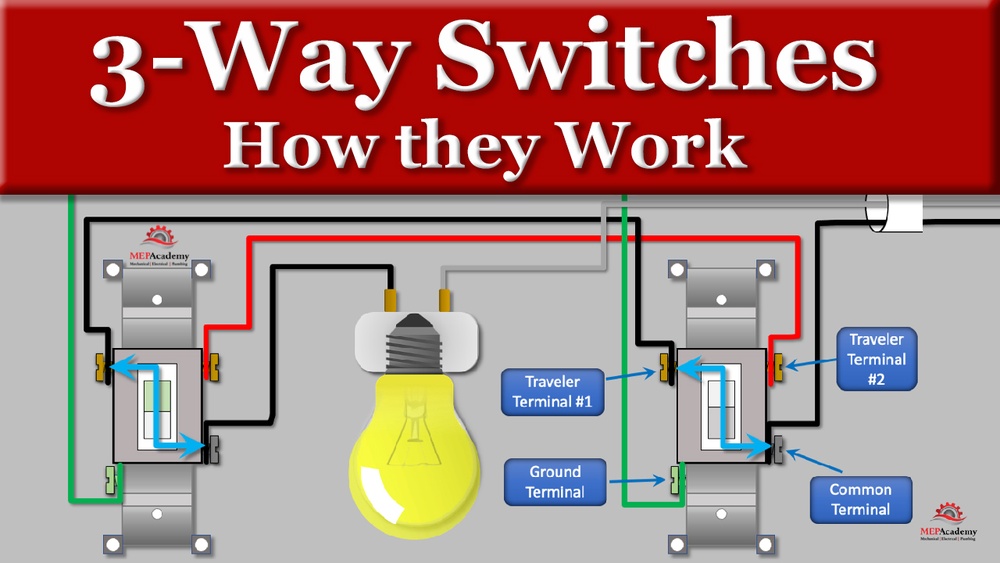
There are special switches called 3 way switches. They have three terminals instead of two. These switches allow current to flow in different paths. This feature lets you control one light from two places.
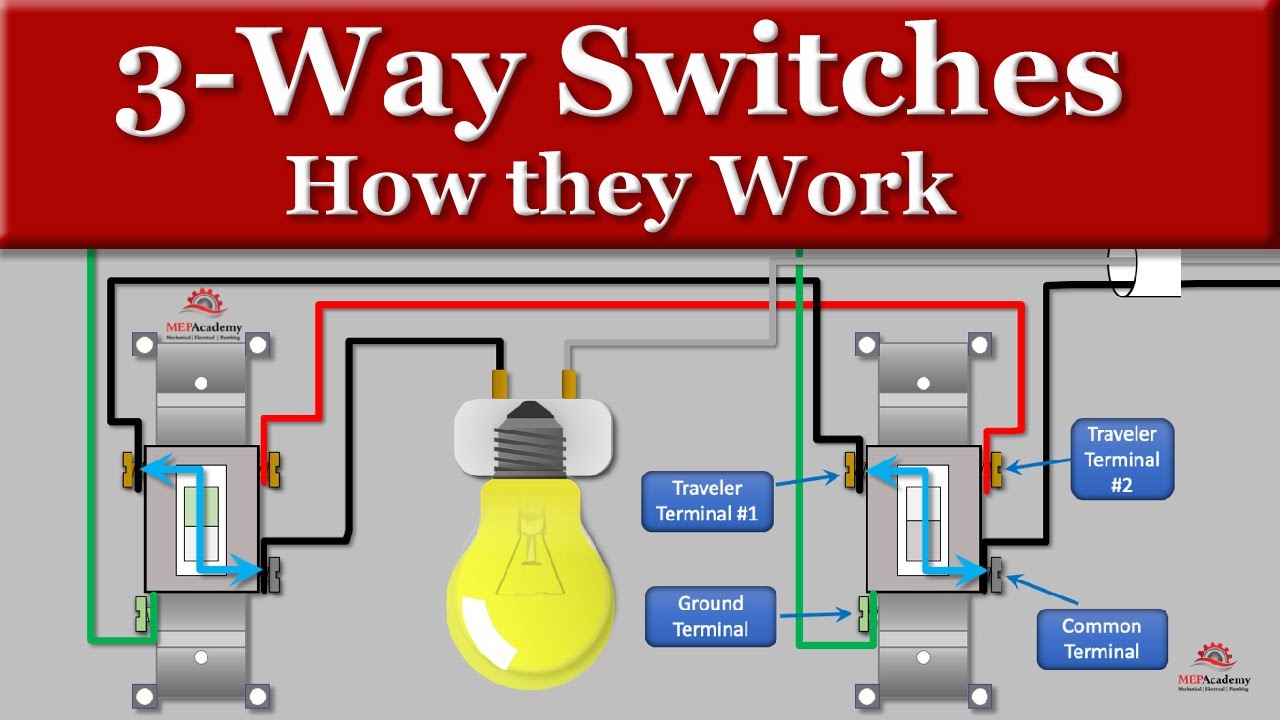
Each 3 way switch has a common terminal and two traveler terminals. The common terminal connects to the power or the light. The traveler terminals connect the two switches. This setup changes the path of electricity to turn the light on or off.
Wiring Materials
Wires connect the switches and the light fixture. Usually, three wires are used: a common wire, two traveler wires, and a ground wire. The common wire carries power. The traveler wires carry current between switches. The ground wire is for safety.
Wire colors help identify each wire’s purpose. Black or red wires often carry power. White wires are neutral. Green or bare wires are ground wires. Proper wiring ensures the switches work correctly and safely.

Credit: mepacademy.com
Circuit Setup
The circuit setup is the foundation of how a 3 way light switch works. It controls the flow of electricity from the power source to the light fixture. Two switches allow you to turn a light on or off from different locations. Understanding the key parts helps you grasp the whole system better.
Power Source Location
The power source usually comes from the main electrical panel. It sends electricity to the first switch or directly to the light fixture. The location of the power source changes the wiring layout. Knowing where power starts is important for correct installation.
Switch Placement
Two switches control the same light. Each switch has three terminals: one common and two travelers. The travelers connect the two switches, allowing current to pass through. Switches are placed in different rooms or areas for convenience.
Light Fixture Connection
The light fixture connects to the circuit’s end. It receives power only when one switch completes the circuit. The connection ensures the light turns on or off from either switch. Proper wiring at the fixture prevents electrical problems.
Wiring Steps
Wiring a 3 way light switch involves careful steps. Each step ensures the switch works correctly. Understanding these steps helps you install the switch safely and easily.
Start by knowing the wires you will work with. Then connect the traveler wires between the switches. Finally, set up the ground wire to keep everything safe.
Identifying Wires
Look for three main wires: common, travelers, and ground. The common wire is usually black or darker. Traveler wires are often red and black. The ground wire is green or bare copper.
Use a voltage tester to check each wire. Label each wire to avoid confusion later. Clear identification makes the next steps easier.
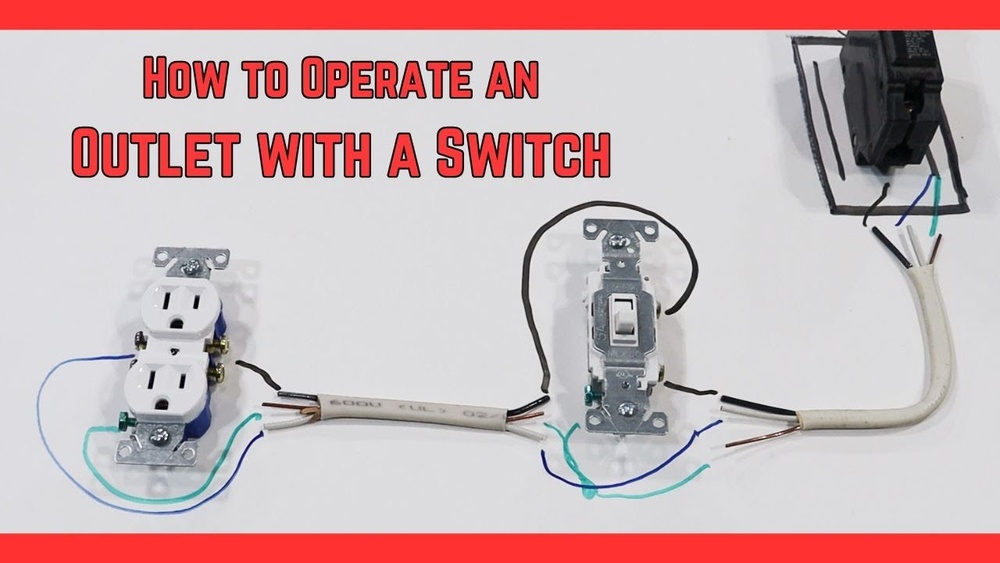
Connecting Travelers
Traveler wires link the two switches. Connect traveler wires to the traveler terminals on each switch. These terminals are often brass or gold-colored.
Ensure the traveler wires are tight and secure. Loose connections can cause the light to flicker or fail. Double-check both switches for proper traveler connections.
Ground Wire Setup
The ground wire protects against electric shocks. Connect the ground wire to the green screw on each switch. Also, attach it to the metal switch box if it is metal.
Secure the ground wire with a wire nut if joining multiple wires. Proper grounding is key for safety and code compliance.

Credit: www.youtube.com
Switch Operation
The operation of a 3 way light switch is simple but unique. It lets you control one light from two different spots. Understanding how it works helps you fix or install it properly. The key lies in how the switches connect and move the electric current.
How Current Flows
Electric current flows through wires inside the switches. One wire brings power to the first switch. The switches have special terminals called travelers. These travelers carry current between the two switches.
The current flows through one traveler or the other, depending on switch positions. This changes the path of electricity to the light. The light turns on or off based on this flow. The system works because the current finds a complete path or not.
Toggle Functionality
The toggle switch changes the connection between travelers. Each switch has three terminals: one common and two travelers. Flipping the toggle moves the connection from one traveler to the other.
This switch action lets the current choose its route. Both switches work together to control the light’s power. You can turn the light on or off from either switch by toggling them. This makes controlling lights easier in long rooms or hallways.
Common Issues
Three-way light switches can sometimes cause confusion and issues. These switches control a single light from two different locations. Problems can arise due to wiring errors, faulty switches, or loose connections. Identifying common issues helps keep the system working smoothly.
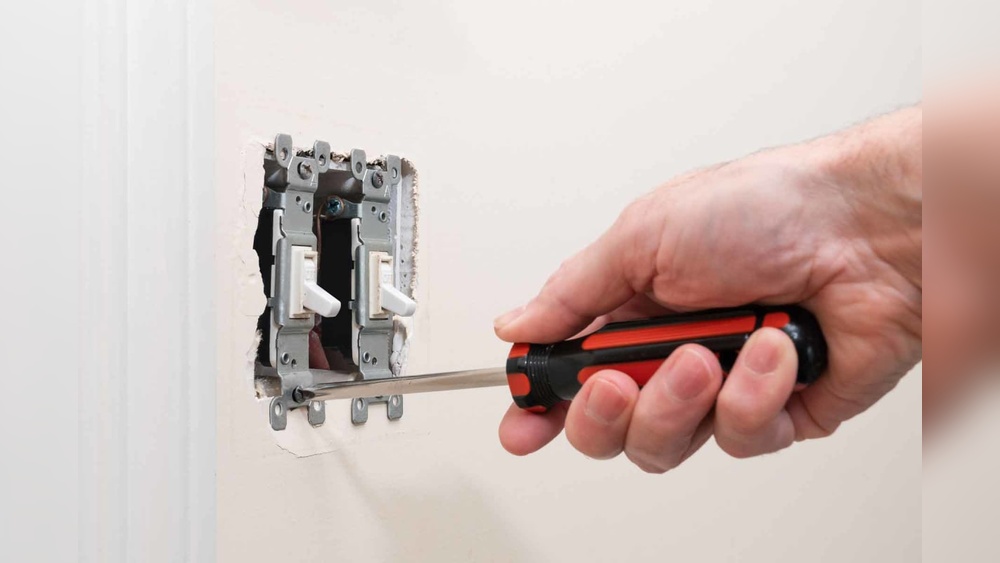
Troubleshooting Tips
Start by turning off the power to the circuit. Check both switches for any signs of damage or wear. Test each switch by flipping them on and off. Use a voltage tester to see if power reaches the switches. Look for loose or disconnected wires inside the switch boxes. Replace any damaged switches with new ones. Tighten any loose wire connections carefully. Sometimes cleaning the switch terminals improves contact.
Safety Precautions
Always switch off power at the breaker before working on wiring. Use insulated tools to avoid electric shocks. Wear rubber-soled shoes and avoid wet floors. Never touch bare wires without proper protection. Confirm power is off with a voltage tester before starting work. If unsure, call a licensed electrician to handle repairs. Safety comes first in all electrical tasks.
Advanced Tips
Advanced tips help you get more from your 3 way light switch setup. They guide you on expanding and upgrading your system. These tips show ways to add more control points and use smart technology.
Adding More Switches
You can add more than two switches to control one light. Use a 4-way switch between the two 3-way switches. This setup lets you control lights from many places.
Each added switch connects in series with the existing switches. Wire it carefully to keep the circuit working well. This is useful in long hallways or large rooms.
Smart Switch Integration
Smart switches let you control lights with your phone or voice. Replace one or both 3-way switches with smart models. They connect to Wi-Fi or smart home hubs.
Smart switches often need a neutral wire. Check your wiring before buying. You can set schedules or control lights remotely. This adds convenience and saves energy.
Frequently Asked Questions
What Is A 3 Way Light Switch?
A 3 way light switch controls one light from two different locations. It uses two switches connected by traveler wires to toggle the light on or off. This setup adds convenience for rooms with multiple entrances or long hallways.
How Does A 3 Way Switch Wiring Work?
3 way switch wiring involves three wires: one common wire and two traveler wires. The common wire connects to the power source or light fixture. The traveler wires link the two switches, allowing current flow to change based on switch positions.
Can I Replace A Single Switch With A 3 Way Switch?
Yes, but you need to add a second 3 way switch and proper wiring. Simply replacing one switch won’t work without wiring the traveler wires between the two switches. It’s best to consult an electrician for safe installation.
Why Use A 3 Way Switch Instead Of A Single Switch?
A 3 way switch offers control of a light from two spots. This improves convenience in large rooms or staircases. It eliminates the need to walk across the room to turn the light on or off.
Conclusion
A 3 way light switch lets you control one light from two places. It uses two switches and special wiring. This setup helps you turn lights on or off easily. Understanding how it works can save time and money. It also makes your home more convenient and safe.
Try to follow the basic steps when installing or fixing one. Always be careful with electricity. Now, you know the key points about 3 way switches. Simple and useful for everyday life.