Are you looking to install a light switch wiring by yourself but feel unsure where to start? You’re not alone.
Many people want to save money and gain confidence by handling basic electrical tasks at home. This guide will walk you through each step in a simple and clear way, so you can feel in control and avoid common mistakes.
By the end, you’ll know exactly how to install light switch wiring safely and effectively, making your home brighter and your skills stronger. Ready to take charge? Let’s get started!
Tools And Materials Needed
Installing light switch wiring requires specific tools and materials. Having the right items makes the job safer and easier. It helps you work faster and avoid mistakes.
This section lists all tools and materials needed. Prepare them before starting your project. You will save time and effort.
Basic Tools
Start with simple tools. A flathead screwdriver and a Phillips screwdriver are essential. These help remove and tighten screws on the switch and wall plate.
Wire strippers are needed to remove insulation from wires. Needle-nose pliers help bend wires for better connections. A voltage tester checks if wires carry electricity.
Materials Required
Use a standard single-pole light switch for most rooms. Electrical wire, usually 14/2 or 12/2 gauge, connects the switch to power and the light fixture.
Wire nuts secure wire connections. Electrical tape wraps around wire nuts for extra safety. A switch box holds the switch in the wall.
Safety Gear
Wear insulated gloves to protect your hands. Safety glasses shield your eyes from dust and debris. Use a sturdy ladder if needed to reach the switch box.
Turn Off Power Safely
Turning off power safely is the first step in installing light switch wiring. Working with electricity can be dangerous. Even a small mistake can cause shocks or damage. Always make sure the power is off before starting any electrical work. This keeps you safe and protects your home’s wiring.
Follow clear steps to turn off power correctly. Double-check everything to avoid accidents. Safety should be your top priority.
Locate The Circuit Breaker
Find the main electrical panel in your home. It is usually in the basement, garage, or utility room. Open the panel door to see the breakers. Each breaker controls power to different parts of your house. Identify the breaker for the room where you will work.
Switch Off The Correct Breaker
Flip the breaker switch to the off position. This stops electricity flow to that area. You may hear a click when the breaker is off. Use a label or note to mark the breaker you turned off.
Test The Power Is Off
Use a voltage tester or a simple light to check the wires. Touch the tester to the wires in the switch box. If the tester shows no power, it is safe to proceed. If power is present, switch off the breaker again or try another one.
Inform Others In The Home
Tell family members or roommates about the power shutdown. This prevents anyone from turning the breaker back on by mistake. Place a note on the breaker box as a reminder.
Remove Old Switch
Removing the old switch is the first step in installing new light switch wiring. This process prepares the wall box and wires for the new switch. It is important to work safely and carefully to avoid any electrical hazards.
Take your time and follow each step closely. This will make the installation easier and safer.
Turn Off Power
Find the circuit breaker that controls the light switch. Turn it off to stop electricity flow. Use a voltage tester to check the switch wires. Make sure no current is running before touching wires.
Remove Switch Plate
Use a screwdriver to remove the screws holding the switch plate. Take off the plate gently to expose the switch. Keep the screws safe for later use.
Unscrew The Old Switch
Remove the screws that attach the switch to the wall box. Pull the switch out slowly. This reveals the wires connected to the switch.
Note Wire Connections
Look at how wires connect to the old switch. Take a photo or write notes to remember wire positions. This helps connect the new switch correctly.
Disconnect The Wires
Loosen the screws or release the wires from the old switch. Carefully pull the wires away. Avoid damaging the wire ends or insulation.
Identify Wiring Types
Identifying wiring types is an important first step in installing light switch wiring. It helps you know what wires you have and how to connect them safely.
Different wiring types have different colors and functions. Recognizing these wires prevents mistakes and keeps your home safe.
Understanding Common Wire Colors
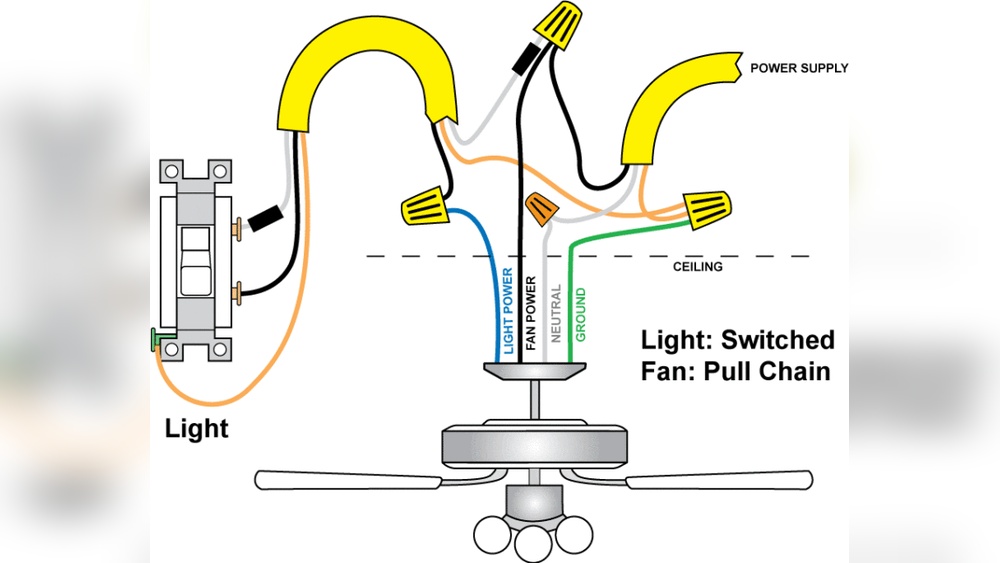
Most homes use standard wire colors. Black or red wires usually carry the current. White wires are neutral and return the current. Green or bare wires are ground wires for safety.
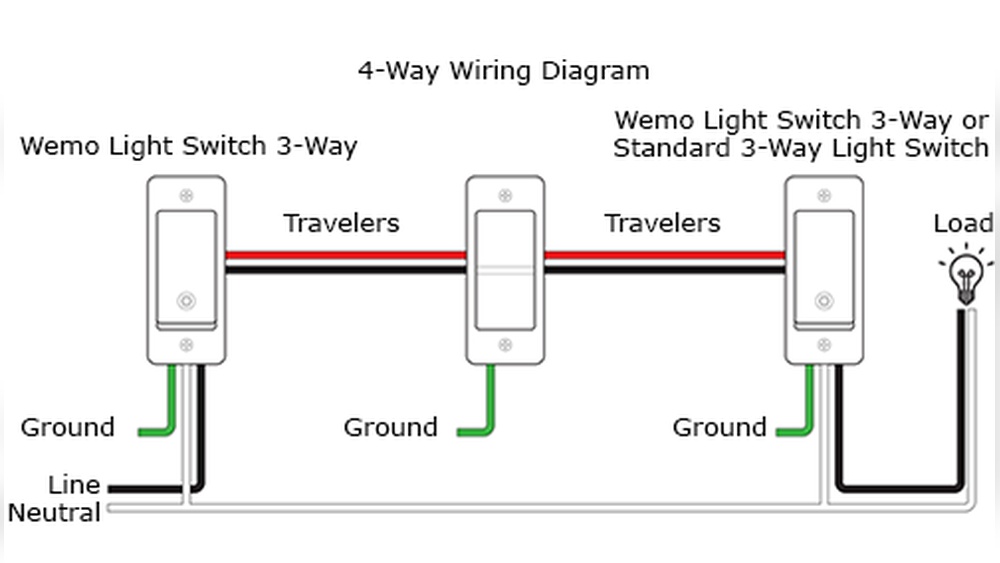
Recognizing Single-pole And Three-way Switch Wires
Single-pole switches have two wires: hot and load. Three-way switches have three wires: two travelers and one common. Knowing these helps connect switches correctly.
Identifying Wire Types By Material
Wires can be copper or aluminum. Copper wires are common and conduct electricity well. Aluminum wires need special connectors and care to avoid hazards.
Connect New Switch Wires
Connecting new switch wires is a key step in installing a light switch. It ensures the switch works safely and correctly. You must connect the ground, hot, and neutral wires to the new switch. Each wire has a specific role in the circuit. Proper connections help prevent electrical problems and hazards.
Follow clear steps to attach each wire. Use the right tools and check for power before you start. This part of the process needs care and attention.
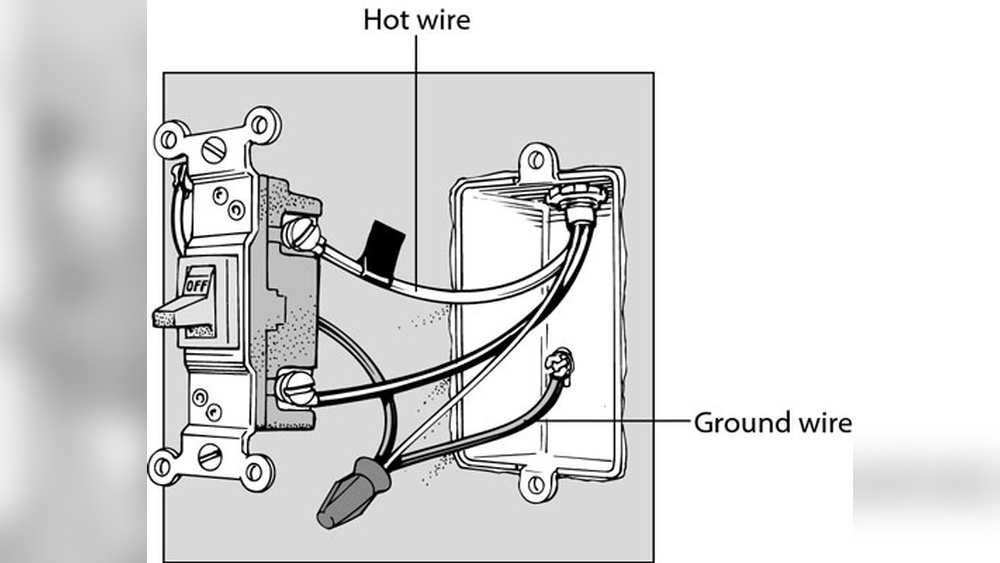
Attach Ground Wire
The ground wire is usually green or bare copper. It protects you from electric shocks. Connect this wire to the green screw on the switch. If the switch has no green screw, attach the ground wire to the metal box. Make sure the wire is tight and secure. A loose ground wire can cause safety issues.
Connect Hot Wire
The hot wire carries electricity to the switch. It is often black or red. Find the screw labeled “live” or “line” on the switch. Wrap the hot wire around this screw. Tighten the screw to hold the wire firmly. Avoid letting any wire strands stick out. This connection powers the light when the switch is on.
Connect Neutral Wire
The neutral wire completes the electrical circuit. It is usually white. Some switches do not need a neutral wire connection. Check your switch’s instructions. If needed, connect the neutral wire to the silver screw. Secure the wire tightly. Proper neutral connection helps the switch function well.
Secure Switch And Cover Plate
Securing the switch and cover plate is the final step in installing light switch wiring. This step ensures safety and gives your work a clean, finished look. Properly securing the switch prevents it from moving or coming loose over time.
The cover plate protects the wiring inside the wall. It also stops dust and moisture from entering the switch box. A well-secured cover plate keeps your installation safe and neat.
Align The Switch In The Wall Box
Place the switch carefully inside the wall box. Make sure the switch is straight and fits snugly. Check that the wires do not get pinched or twisted.
Hold the switch firmly to avoid movement. This helps prevent future electrical problems.
Screw The Switch Into Place
Use the screws provided with the switch. Tighten them evenly to hold the switch securely. Do not over-tighten, or you may crack the switch or wall box.
Check that the switch feels stable and does not wiggle.
Attach The Cover Plate
Place the cover plate over the switch carefully. Align the screw holes with the switch mounting screws. Use a screwdriver to tighten the cover plate screws.
Do not force the screws. Tighten them just enough to hold the plate flat against the wall.
Final Safety Check
Inspect the switch and cover plate for any gaps or loose parts. Make sure the switch moves smoothly without wobbling. Confirm that no wires show outside the cover plate.
Turn the power back on and test the switch. Your installation is now safe and complete.
Restore Power And Test
Restoring power and testing the light switch wiring is a crucial step. It confirms the installation works correctly and safely. This step ensures the switch controls the light as expected. Follow simple instructions to restore power and test the switch.
Turn On The Circuit Breaker
Locate the main electrical panel in your home. Find the breaker that controls the switch’s circuit. Flip the breaker to the ON position. This restores power to the wiring you installed. Be careful and stand clear of the panel while switching.
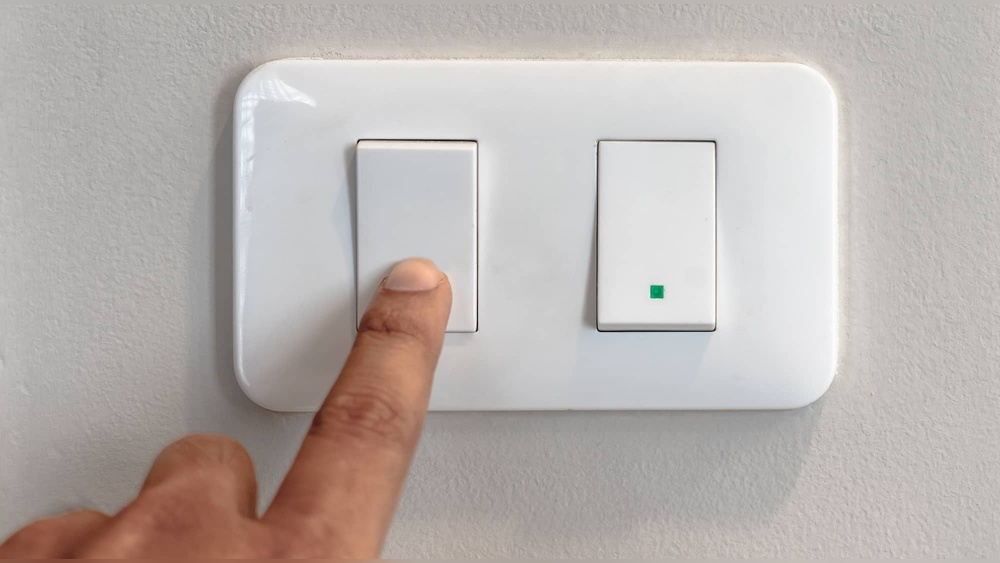
Test The Light Switch Operation
Go to the light switch you installed. Flip the switch up and down slowly. Check if the light turns on and off correctly. The switch should control the light without flickering or delay. If the light does not work, turn off power and recheck wiring.
Check For Any Electrical Issues
Look for signs of problems like sparks or buzzing sounds. Feel the switch for unusual heat. These signs indicate wiring problems or loose connections. If you notice any issues, turn off the breaker immediately. Fix the problem before restoring power again.

Credit: community.smartthings.com
Troubleshooting Common Issues
Troubleshooting common issues is a key step in installing light switch wiring. Small mistakes can cause the switch to not work or create safety risks. Understanding these problems helps fix them fast.
Checking each problem carefully saves time and avoids damage. Below are common troubles and easy ways to solve them.
Incorrect Wiring Connections
Wires must connect to the right terminals. Mixing wires can stop the switch from working. Black (hot) wire goes to the switch terminal. White (neutral) wire should not touch the switch. Ground wire connects to the green screw.
Use a tester to check if wires have power. Always turn off the power before fixing wires.
Loose Wire Nuts Or Terminals
Loose connections cause flickering lights or no power. Make sure wire nuts are tight. Wrap wires firmly and twist wire nuts on securely. Tighten screw terminals on the switch to hold wires well.
Faulty Switch Or Damaged Wires
Old or broken switches may stop working. Replace the switch if it feels loose or cracked. Inspect wires for cuts or burns. Replace damaged wires to keep safe.
Power Supply Issues
Check if the circuit breaker is on. A tripped breaker cuts power to the switch. Reset the breaker to restore power. Also, test other switches or outlets on the same circuit.
Wrong Type Of Switch Used
Use the correct switch for your wiring setup. Single-pole switches work for one switch controls. Three-way switches are for controlling lights from two places. Using the wrong switch can cause issues.
Safety Tips For Wiring
Working with electrical wiring can be risky. Safety is the most important part of installing a light switch. Following basic safety tips prevents accidents and damage.
Before starting, always prepare well. Use the right tools and follow clear steps. Stay focused and avoid rushing. Small mistakes can cause serious problems.
Turn Off The Power
Always switch off the power at the main breaker. Do not rely only on the wall switch. Use a voltage tester to check if wires are live. Safety first. No shortcuts.
Use Proper Tools And Equipment
Use insulated tools made for electrical work. Avoid using damaged or worn-out tools. Wear safety gloves and goggles for extra protection. Good tools make the job safer and easier.
Check Local Electrical Codes
Follow local rules for wiring and installation. Codes ensure safe and proper work. Check these before starting any project. It keeps your home safe and legal.
Work In A Dry Area
Water and electricity are a dangerous mix. Make sure your workspace is dry. Avoid working in wet or damp places. This reduces the risk of shocks and short circuits.
Label Wires Clearly
Mark wires to avoid confusion later. Clear labels help when connecting or troubleshooting. It saves time and prevents mistakes. Organization is key to safety.

Credit: icreatables.com
Credit: www.hometips.com
Frequently Asked Questions
How Do I Install Light Switch Wiring Safely?
Turn off power at the circuit breaker before starting. Use a voltage tester to confirm no electricity flows. Follow wiring diagrams carefully and use proper tools. If unsure, consult a licensed electrician to avoid hazards.
What Tools Are Needed For Light Switch Wiring?
You need a screwdriver, wire stripper, voltage tester, electrical tape, and wire nuts. These tools help you connect wires securely and safely. Having the right tools ensures a smooth installation process.
Can I Replace A Light Switch Without An Electrician?
Yes, if you follow safety steps and basic wiring knowledge. Always turn off power before handling wires. Use proper tools and follow instructions closely. For complex wiring, hiring a professional is safer.
How Do I Identify Wires In Light Switch Wiring?
Typically, black or red wires are hot, white is neutral, and green or bare is ground. Use a voltage tester to confirm live wires. Proper identification prevents wiring mistakes and ensures safety.
Conclusion
Installing light switch wiring is simple with the right steps. Always turn off power before starting work. Follow the wiring guide carefully and check connections twice. Use tools safely and take your time. A well-installed switch improves home lighting and safety.
Practice makes perfect, so don’t rush. Soon, you will feel more confident handling basic electrical tasks. Keep learning and stay safe with every project.