Is your ceiling fan light switch not working properly? Maybe it flickers, won’t turn on, or feels loose when you touch it.
You don’t have to live with that annoying problem or call an expensive electrician. You can fix it yourself—and it’s easier than you think. In this guide, you’ll learn simple, step-by-step instructions to replace your ceiling fan light switch safely and quickly.
By the end, you’ll have your light working perfectly again, giving you the comfort and control you deserve. Ready to get started? Let’s dive in!
Tools And Materials Needed
Replacing a ceiling fan light switch requires a few basic tools and materials. Having the right items ready makes the job faster and safer. This section lists what you need to complete the task smoothly.
Essential Tools
A screwdriver set with flathead and Phillips tips is a must. You will use these to remove screws and panels. A voltage tester helps check if the power is off. Wire strippers prepare wires for connection. Needle-nose pliers make handling wires easier. A flashlight or headlamp improves visibility in dark spaces.
Required Materials
Get a replacement ceiling fan light switch that matches your fan model. Electrical tape secures wire connections. Wire nuts help join wires safely. Keep a small container handy to hold screws and small parts. A ladder or step stool allows safe access to the ceiling fan.
Safety Gear
Wear insulated gloves to protect against electrical shocks. Safety glasses guard your eyes from dust and debris. Choose comfortable clothing that covers your arms and legs. Avoid loose garments that could catch on parts.
Safety Precautions
Replacing a ceiling fan light switch requires careful attention to safety. Electrical work can be risky without the right steps. Taking precautions protects you from shocks and accidents. Follow these safety rules before starting your project.
Turn Off The Power
Always switch off the power at the main circuit breaker. Do not rely on the wall switch alone. Use a voltage tester to confirm no electricity flows to the fan. This step is crucial to avoid electric shock.
Use Proper Tools
Select insulated tools made for electrical work. Avoid metal tools without insulation. This helps prevent accidental shocks. Using the right tools makes the job safer and easier.
Wear Safety Gear
Wear rubber-soled shoes and safety glasses. These protect you from electric shocks and debris. Gloves provide extra protection when handling wires. Safety gear reduces the chance of injury.
Work In A Dry Area
Ensure the room is dry before starting. Water and electricity do not mix well. Avoid working in damp or wet conditions. Dry surroundings lower the risk of electric shock.
Check For Loose Wires
Inspect wires for damage or looseness before handling. Loose wires can cause sparks or shocks. Secure any loose connections carefully. This keeps the electrical system safe.
Turn Off Power
Turning off the power is the first step in safely replacing a ceiling fan light switch. This step stops electricity from flowing to the fan and light. It protects you from electric shock and prevents damage to the wiring. Always take this step seriously before starting any electrical work.
Locate The Circuit Breaker
Find your home’s electrical panel. Look for the circuit breaker that controls the ceiling fan. The breaker is usually labeled for each room or area. If not, turn off the main breaker to cut power to the whole house.
Switch Off The Power
Flip the correct circuit breaker to the “off” position. This will stop the electricity to the ceiling fan and light. Double-check that the breaker stays in the off position before moving forward.
Confirm Power Is Off
Use a non-contact voltage tester to check the wires. Hold the tester near the fan wires to see if power is present. No light or beep means the power is off. Never skip this step.
Remove Existing Switch
Start by turning off the power to the ceiling fan at the circuit breaker. Carefully unscrew and pull out the old switch from the wall box. Disconnect the wires by loosening the terminal screws, preparing for the new switch installation.
Safety is the top priority. Start by turning off the power at the circuit breaker. This stops any electricity from reaching the switch. Use a voltage tester to make sure the power is off before touching wires.
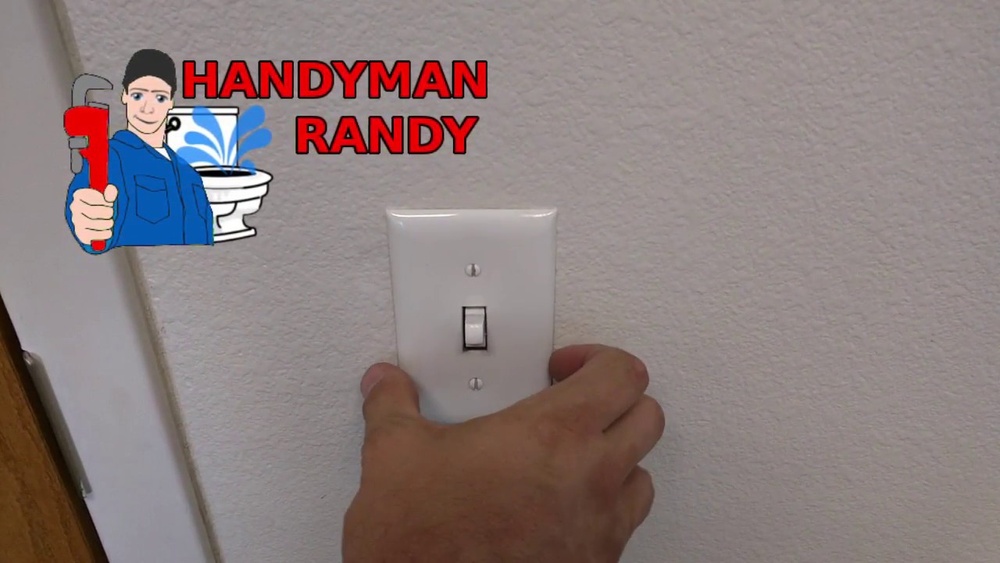
Remove Switch Cover Plate
Use a screwdriver to take off the switch cover plate. This reveals the switch and wiring inside the wall. Keep the screws safe for reinstallation later.
Unscrew The Switch
Next, unscrew the switch from the electrical box. Gently pull the switch out to see the connected wires. Do not pull too hard to avoid damaging wires.
Note Wire Placement
Check how the wires connect to the switch. Take a picture or note the wire colors and their terminals. This step helps when installing the new switch.
Disconnect Wires
Loosen the terminal screws or release the push-in wires. Carefully disconnect all wires from the old switch. Keep wires separated to avoid confusion.
Identify Wiring
Identifying the wiring is the first step in replacing a ceiling fan light switch. Understanding which wire does what helps you avoid mistakes. This step makes the entire process safer and easier.
Each ceiling fan may have different wiring setups. Knowing the wires’ purpose ensures you connect the new switch correctly. Let’s explore how to identify the wiring safely and clearly.
Turn Off Power At The Breaker
Always turn off the power before touching any wires. Find the correct breaker and switch it off. Use a voltage tester to confirm no electricity flows to the fan.
Locate The Wires In The Ceiling Fan
Remove the fan’s light switch cover carefully. Look inside to see the wires connected to the switch. Usually, you will see black, white, and ground wires.
Understand Wire Colors And Functions
Black wires typically carry power to the switch. White wires usually are neutral and return current. Green or bare copper wires are grounding wires for safety.
Label Each Wire For Easy Reconnection
Use masking tape and a pen to label each wire. Mark which wire connects to the fan and which to the light. This step helps prevent confusion when installing the new switch.
Use A Voltage Tester To Check Wires
Test each wire with a voltage tester to confirm its function. This tool helps identify live wires and ensures safety. Never trust wire color alone.

Credit: www.amazon.com
Install New Switch
Installing a new ceiling fan light switch is a key step in the replacement process. This part controls your fan’s light and ensures it works safely. Follow clear steps to connect the wires and fix the switch in place. Take your time and double-check each connection for safety.
Turn Off Power And Prepare Wires
Start by turning off the power at the circuit breaker. Use a voltage tester to confirm no electricity flows to the wires. Strip about half an inch of insulation from each wire end. This prepares them for connection to the new switch.
Connect The Wires To The New Switch
Match the wires from the ceiling to the switch terminals. Usually, black wires connect to the switch screws. Attach the ground wire to the green screw if present. Tighten all screws firmly to secure the wires in place.
Secure The Switch In The Wall Box
Push the wires carefully back into the wall box. Align the switch so the mounting holes match the box screws. Use a screwdriver to fix the switch tightly. Make sure it sits flush and does not move.
Attach The Switch Cover Plate
Place the cover plate over the switch. Align the screw holes and secure it with screws. This gives a clean, finished look and protects the switch mechanism.
Test The Switch
Testing the ceiling fan light switch is a vital step before finalizing the replacement. It ensures the new switch works properly and prevents future issues. This step saves time and effort by catching problems early.
Turn The Power Back On
Switch the circuit breaker back to the ON position. This restores electricity to the fan and the switch. Always double-check that power is restored before testing the switch.
Use A Voltage Tester
Use a voltage tester on the switch terminals. This tool checks if current flows through the switch. A reading confirms the switch receives power correctly.
Operate The Switch
Flip the switch on and off several times. Watch the fan light to see if it responds. The light should turn on and off smoothly without flickering.
Check For Loose Connections
If the light does not work, inspect the wiring. Loose wires can cause the switch to fail. Tighten any loose connections and test again.
Confirm Full Functionality
Make sure the fan light operates at all switch positions. This confirms the switch controls the light properly. A fully functional switch means your replacement is successful.

Credit: www.amazon.com
Troubleshooting Tips
Troubleshooting a ceiling fan light switch can save time and effort. It helps find common problems fast. Understanding basic tips makes the job easier and safer.
Check the switch and wiring carefully before replacement. Small mistakes can cause bigger issues. Follow these tips to spot and fix problems early.
Check The Power Supply
Make sure the power is off before starting. Use a voltage tester on the switch wires. No power means it is safe to work.
Confirm the circuit breaker is switched off. Sometimes, power comes from a different source. Double-check to avoid shocks.
Inspect The Light Bulbs
Remove the light bulbs and test them separately. A burnt-out bulb may seem like a switch problem. Replace any bulbs that do not light up.
Examine The Switch For Damage
Look for cracks, burn marks, or loose parts on the switch. Damaged switches often cause light failure. Replace any faulty switches immediately.
Test The Wiring Connections
Loose or disconnected wires can prevent the light from working. Tighten all wire nuts and screws securely. Make sure wires match the correct terminals.
Use A Multimeter For Testing
A multimeter can check the switch’s continuity. No continuity means the switch is bad. Replace the switch if the multimeter shows no connection.

Credit: www.youtube.com
Frequently Asked Questions
How Do I Replace A Ceiling Fan Light Switch Safely?
Turn off the power at the circuit breaker first. Use a voltage tester to confirm no electricity flows. Remove the switch cover and disconnect wires carefully. Replace the old switch with a new compatible one. Secure the wires and restore power to test the switch.
What Tools Are Needed To Replace A Ceiling Fan Light Switch?
You need a screwdriver, voltage tester, wire stripper, and a new switch. A flashlight can help if the area is dim. Always use insulated tools for electrical work. These tools ensure safety and proper switch installation.
Can I Replace The Ceiling Fan Light Switch Myself?
Yes, if you have basic electrical knowledge and follow safety guidelines. Always cut off power before starting. If unsure, consult a professional electrician. DIY replacement saves money but requires careful handling of electrical components.
How Do I Know Which Switch To Buy For Replacement?
Check the old switch for voltage and amperage ratings. Match the new switch to these specifications. Look for switches designed specifically for ceiling fan lights. Proper matching ensures safety and functionality.
Conclusion
Replacing a ceiling fan light switch is simple with the right steps. Always turn off the power before starting work. Use basic tools and follow safety tips closely. Take your time to avoid mistakes or damage. After installing, test the switch to ensure it works well.
This task saves money and improves your home’s lighting. Anyone can do it with clear instructions and care. Try it yourself and enjoy a brighter room.