Are you looking to save energy and add convenience to your home? Installing a timer light switch can do just that—and it’s easier than you might think.
Imagine your lights turning on and off automatically, exactly when you want them to, without lifting a finger. In this guide, you’ll learn simple, step-by-step instructions to install a timer light switch yourself, even if you have little or no electrical experience.
Keep reading, and by the end, you’ll have a smart, energy-saving upgrade ready to go.
Credit: mydome.co.uk
Benefits Of Timer Light Switches
Timer light switches offer many advantages for homeowners. They help control lighting without manual effort. This simple tool can improve your home in several ways. Below are the key benefits of using timer light switches.
Energy Savings And Cost Reduction
Timer light switches turn lights off automatically. They prevent lights from staying on too long. This reduces electricity use and lowers energy bills. Using timers means you do not waste power. It is an easy way to save money each month.
Enhanced Home Security
Timer switches make your home look occupied. Lights turn on and off at set times. This can scare away burglars. It creates the illusion someone is home. A simple timer can increase your home’s safety.
Convenience And Automation
Timers remove the need to remember turning lights off. You set schedules once, and the switch does the rest. It adds comfort by automating your lighting. This is helpful for busy or forgetful people. Automation makes everyday life easier.

Credit: mydome.co.uk
Tools And Materials Needed
Installing a timer light switch requires specific tools and materials. Having the right items makes the job easier and safer. Prepare everything before starting to avoid delays.
Essential Tools
Gather these tools for a smooth installation:
- Flathead screwdriver
- Phillips screwdriver
- Voltage tester
- Wire stripper
- Needle-nose pliers
- Electrical tape
- Wire nuts
These tools help you safely remove the old switch and connect wires properly. The voltage tester ensures power is off before you touch anything.
Choosing The Right Timer Switch
Select a timer switch that fits your needs and wiring type. Check if your home uses single-pole or three-way switches. Match the timer switch to your circuit.
Look for switches with clear instructions and simple controls. Some have digital displays, others use dials. Pick one that feels easy to use.
Safety Precautions
Safety is the top priority when installing a timer light switch. Electrical work can be dangerous without the right care. Taking safety steps protects you from shocks and injuries. Always prepare properly before starting any work on your home’s wiring.
Power Shutoff Procedures
Turn off the main power at the breaker box. This stops electricity from flowing to the switch. Use a voltage tester to confirm the power is off. Never skip this step. It is the most important way to avoid electric shock.
Handling Electrical Components Safely
Wear rubber-soled shoes and avoid wet areas. Handle wires and terminals with care. Use insulated tools designed for electrical work. Do not touch exposed wires with bare hands. Keep your workspace clean and organized to prevent accidents.
Credit: www.homedepot.com
Preparing For Installation
Preparing for installation is a key step before you start wiring your timer light switch. It helps avoid mistakes and keeps you safe. Take your time to get ready. Gather tools like a screwdriver, voltage tester, and wire stripper. Turn off the power to the switch at the circuit breaker. Double-check the power is off before touching any wires.
Clear the area around the switch. Good lighting helps you see clearly. Having a helper can be useful too. Follow these steps carefully to remove the old switch and check your wiring.
Removing The Existing Switch
First, remove the switch cover plate. Use a screwdriver to take out the screws. Place screws in a safe spot. Next, check for power with a voltage tester. Confirm the power is off. Unscrew the switch from the electrical box. Gently pull it out. Look at the wires attached to the switch. Note how they connect. Taking a photo helps for reference later.
Inspecting Wiring And Connections
Look for any damaged or loose wires. Wires should be tight and neat. Check wire colors and match them to your timer switch instructions. Look for signs of wear or burning. Replace any damaged wires before proceeding. If unsure about wiring, consult an electrician. Proper wiring is crucial for safety and switch function.
Step-by-step Installation Guide
Installing a timer light switch can save energy and add convenience to your home. This guide breaks down the process into simple steps. Follow each part carefully for a safe and correct installation.
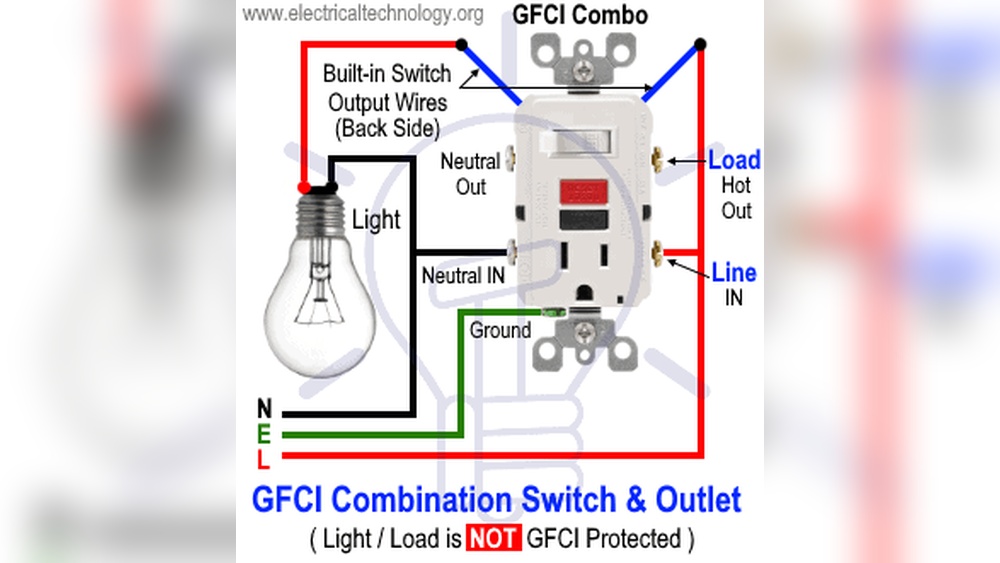
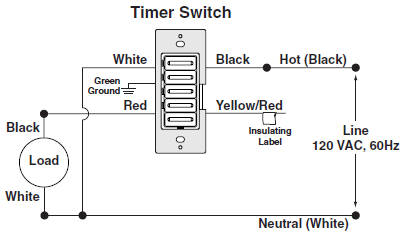
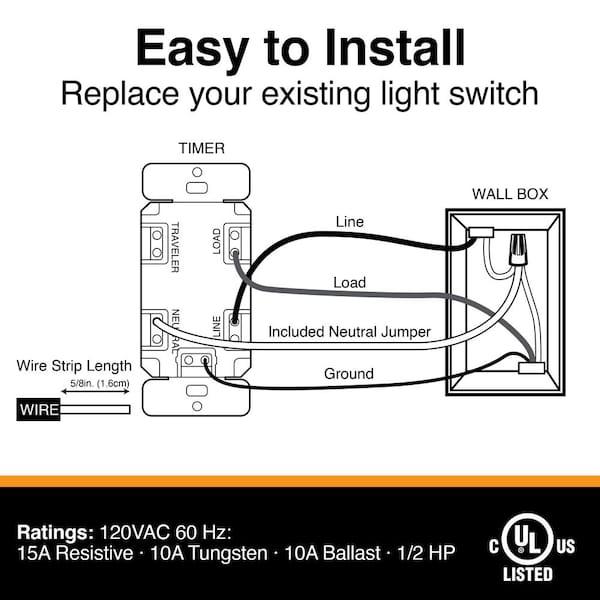
Wiring The Timer Switch
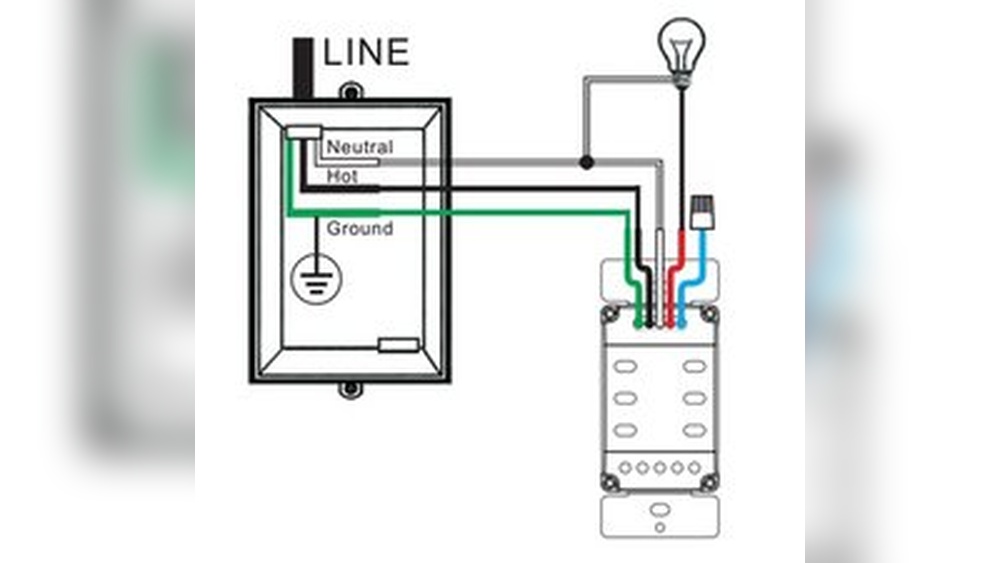
Turn off power at the circuit breaker before starting. Remove the old switch by unscrewing it from the wall. Note the wires connected to the old switch. Usually, you will find a line wire, load wire, and ground wire.
Connect the timer switch wires to the matching wires in the wall. Use wire nuts to secure connections. Black wires usually connect together. Green or bare copper wires connect to ground. White wires, if present, connect to neutral. Check your timer switch instructions for wire colors.
Securing The Switch And Faceplate
Push the wires gently into the electrical box. Align the timer switch with the screw holes. Screw the switch firmly but do not overtighten. Attach the faceplate over the switch. Tighten the faceplate screws until snug.
Testing The Installation
Turn the power back on at the circuit breaker. Set the timer switch according to the instructions. Check if the light turns on and off as timed. Test all timer functions to ensure proper work. If it does not work, turn off power and recheck wiring.
Programming Your Timer Switch
Programming your timer light switch lets you control lights automatically. It saves energy and adds convenience. This section guides you through setting up your timer for daily use and seasonal changes. Follow these simple steps to make your timer work perfectly.
Setting On/off Times
First, find the programming button on your timer switch. Press it to enter the programming mode. Set the on time by choosing the hour and minute. Confirm your selection by pressing the button again. Next, set the off time the same way. Make sure the AM and PM settings are correct. Repeat for any additional on/off cycles your timer supports. Save the settings before exiting the mode. Your lights will now turn on and off automatically.
Adjusting For Seasonal Changes
Daylight changes throughout the year, affecting light needs. Adjust your timer switch to match longer or shorter days. Change the on time earlier in winter for dark mornings. Delay the off time in summer for longer evenings. Some timers have a daylight saving option—enable it if available. Check your timer settings monthly to keep them accurate. This keeps your home well-lit and energy-efficient all year.
Troubleshooting Common Issues
Installing a timer light switch is usually simple. Sometimes, issues may arise during or after installation. Troubleshooting these problems can save time and effort. This section helps you solve common problems with timer switches quickly.
Switch Not Responding
First, check if the power is on at the breaker. A switch without power will not work. Make sure the switch is properly connected to wires. Loose or wrong wires can stop the switch from responding. Try pressing the reset button if your timer switch has one. Some switches need a manual reset after installation. Check the user manual for any special setup steps. A faulty switch may need replacement if it still does not respond.
Lights Flickering Or Not Turning Off
Flickering lights often mean a poor connection. Ensure all wires are tightly connected at the switch and the light fixture. Use a voltage tester to confirm stable power supply. Some timer switches need a neutral wire. Missing this wire can cause flickering or failure to turn off. Check if your timer switch matches your home’s wiring. Dimmer switches or LED bulbs might not work well with some timers. Try replacing bulbs with standard ones to test. Adjust the timer settings to ensure correct on and off times.
Tips For Maximizing Savings
Saving energy with a timer light switch is simple. Small changes make a big difference. Setting the timer right helps cut down on wasted electricity. Using smart home devices together boosts savings even more.
Optimal Timer Settings
Set your timer to match your daily routine. Choose times when lights are needed. Turn lights off during daylight or when rooms are empty. Use shorter timer periods to avoid lights staying on too long. Adjust settings seasonally to save more energy.
Integrating With Other Smart Home Devices
Connect your timer switch with sensors or smart hubs. Motion sensors turn lights on only when needed. Smart hubs let you control lights from your phone. Combine devices for automatic light control based on time and movement. This reduces energy use and makes your home smarter.
Frequently Asked Questions
What Tools Are Needed To Install A Timer Light Switch?
You need a screwdriver, voltage tester, wire stripper, and electrical tape. Turn off power before starting installation for safety. Having these tools ensures a smooth and safe timer light switch installation process.
How Do I Turn Off Power Before Installation?
Switch off the circuit breaker controlling the light switch. Use a voltage tester to confirm no power is present. This step prevents electrical shock and ensures a safe installation environment.
Can I Install A Timer Switch Myself Safely?
Yes, if you follow safety guidelines and instructions carefully. Turn off power, use proper tools, and double-check wiring. If unsure, consult a professional electrician to avoid hazards.
How Long Does Timer Light Switch Installation Take?
Installation usually takes about 15 to 30 minutes. Time depends on your experience and wiring complexity. Proper preparation and following instructions speed up the process.
Conclusion
Installing a timer light switch saves energy and adds convenience. You only need a few tools and some basic steps. Always turn off the power before starting to stay safe. Follow the instructions carefully, and double-check your wiring. This simple upgrade helps control lighting automatically.
Enjoy the ease and energy savings every day. Try it yourself and see how it works. Small changes make a big difference.