Are you ready to tackle your next home project with confidence? Knowing how to install Wall Driller Plus anchors can make all the difference when it comes to securing heavy items safely and easily.
Whether you’re hanging shelves, mounting TVs, or fixing cabinets, the right anchors ensure your walls stay strong and damage-free. In this guide, you’ll discover simple, step-by-step instructions that anyone can follow—no special skills needed. Keep reading to learn how to make your walls work for you, so your projects look great and hold firm for years to come.
Choosing The Right Wall Driller Plus Anchors
Choosing the right Wall Driller Plus anchors is key for a secure hold. Different projects need different anchors. Picking the wrong type can cause damage or weak support. This guide helps you select the best anchors for your wall and task.
Types Of Anchors Available
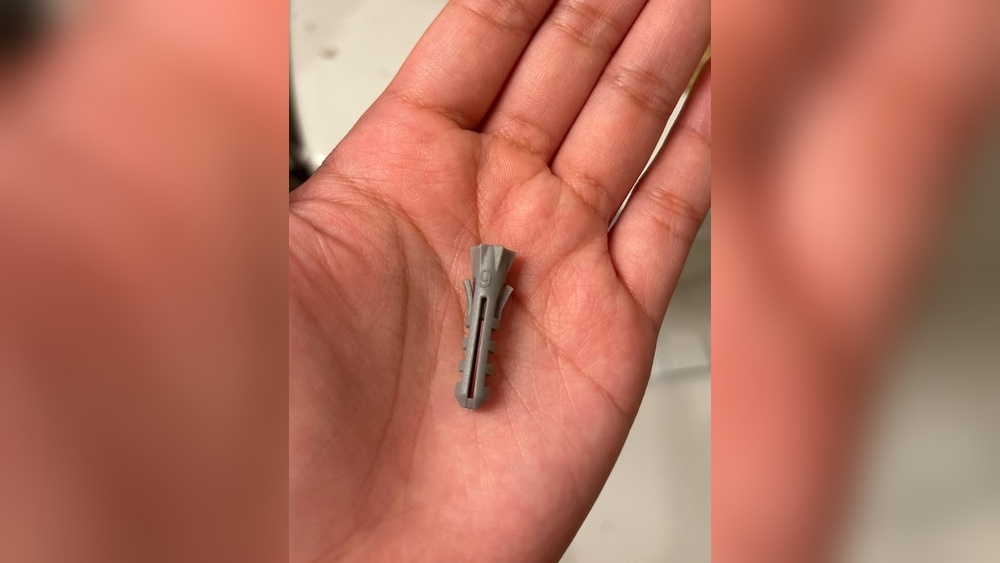
Wall Driller Plus anchors come in many types. Plastic anchors fit light loads and drywall. Metal anchors handle heavier items and stronger walls. Some anchors expand inside the wall for a tight grip. Others use screws that cut threads in the wall. Knowing these types helps pick the best fit.
Matching Anchors To Wall Material
Walls vary: drywall, concrete, brick, or plaster. Each wall needs a different anchor type. Plastic anchors suit drywall well. Concrete walls require metal anchors that drill in. Brick walls need anchors that spread inside gaps. Match anchors to your wall for safety and strength.
Tools Needed For Installation
Prepare tools before starting. A drill with the right bit size is essential. Screwdrivers or a power driver help fix anchors in place. A hammer may be needed for plastic anchors. Use a level to keep items straight. Having the right tools saves time and effort.
Preparing The Wall Surface
Preparing the wall surface is a key step before installing Wall Driller Plus anchors. A clean and well-marked surface makes drilling easier. It also helps place anchors in the right spots. Taking time to prepare protects your walls and ensures strong anchor holds.
Cleaning And Marking Drill Spots
Start by cleaning the wall area. Remove dust, dirt, and grease. Use a damp cloth and let the wall dry completely. Clean walls prevent drill bits from slipping.
Next, mark the exact spots for drilling. Use a pencil or masking tape. Marking helps you drill straight and avoid mistakes. Double-check measurements to keep anchors level and spaced well.
Checking For Hidden Pipes And Wires
Check for hidden pipes and wires inside the wall. Use a stud finder or pipe detector tool. Drilling into pipes or wires can cause damage or injury.
Scan the marked drill spots carefully. Move the detector slowly over the area. If you detect any wires or pipes, choose new drill spots away from them. Safety first.
Drilling The Hole
Drilling the hole is a key step when installing Wall Driller Plus anchors. It sets the base for a strong hold. Correct drilling ensures the anchor fits well and supports weight safely. This part requires careful attention to detail.
Selecting The Correct Drill Bit
Choose a drill bit that matches the anchor size. Use a bit slightly smaller than the anchor’s diameter. This helps the anchor grip tightly inside the hole. Using the wrong bit can make the anchor loose or hard to insert.
Drilling At The Right Depth And Angle
Drill the hole to the exact depth of the anchor length. Mark the drill bit with tape to keep track of depth. Hold the drill steady and straight. A tilted hole can weaken the anchor’s hold. Drill slowly to avoid cracking the wall.
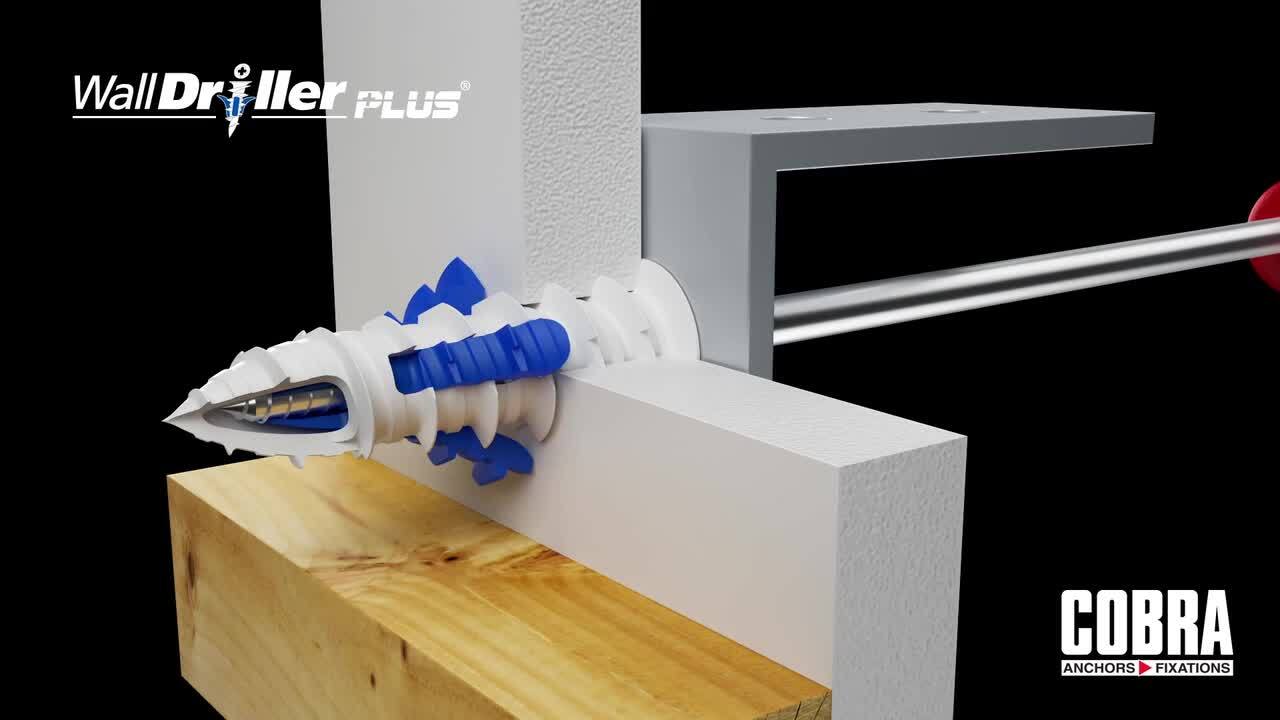
Inserting The Wall Driller Plus Anchor
Inserting the Wall Driller Plus anchor is a key step in securing objects to walls. This process ensures the anchor holds tight and supports the weight you need. Proper insertion prevents damage to the wall and keeps your items safe. Follow simple steps to place the anchor correctly and achieve a strong hold.
Proper Placement Techniques
Start by marking the exact spot on the wall where the anchor will go. Use a pencil for a clear, visible mark. Make sure the spot is free from wires or pipes. Drill a hole that matches the anchor size. The hole must be clean and smooth to fit the anchor well. Avoid making the hole too big or small. Position the anchor straight into the hole, not at an angle. This helps the anchor grip the wall firmly.
Ensuring A Secure Fit
Push the Wall Driller Plus anchor gently but firmly into the hole. Use a hammer if needed, but tap lightly to avoid damage. The anchor should sit flush with the wall surface. Check that it does not wobble or move. If the anchor feels loose, remove and try again with a tighter hole. Once inserted, the anchor expands inside the wall. This expansion locks it in place, giving strong support. Confirm the anchor is secure before attaching any items.
Securing Fixtures With Screws
Securing fixtures with screws is a key step after placing Wall Driller Plus anchors. It ensures your shelves, hooks, or frames stay firmly attached to the wall. Using the right screws and tightening them properly keeps the anchors strong and prevents wall damage.
Choosing The Right Screws
Select screws that match the size of your Wall Driller Plus anchors. Screws too long or too short can cause issues. Long screws might push too deep and damage the wall. Short screws may not hold the fixture securely. Use screws made of durable metal to resist rust and wear. Choose screws with a head type that fits your screwdriver well, such as Phillips or flathead.
Tightening Without Damaging The Wall
Turn screws slowly and steadily to avoid cracking the wall. Stop tightening once the fixture feels firm and does not move. Over-tightening can strip the anchor or break the wall surface. Use a screwdriver instead of a power drill for better control. Check the fixture’s stability by gently shaking it after tightening. This step ensures your installation lasts long and stays safe.
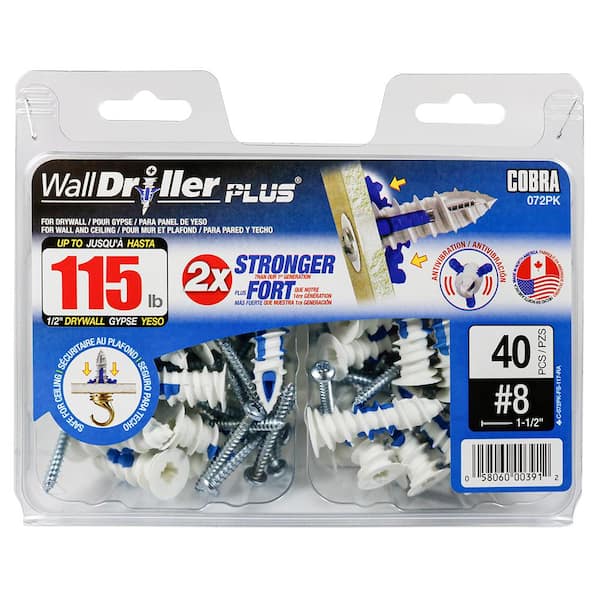
Credit: www.homedepot.com
Testing The Anchor’s Strength
Testing the strength of Wall Driller Plus anchors is an important step after installation. It confirms the anchor can hold the weight you plan to apply. This helps avoid accidents and damage to your walls. Take time to test each anchor carefully before hanging heavy objects.
Applying Load Safely
Start by applying a small load to the anchor. Use a weight that is less than the anchor’s rated capacity. Gently increase the load step by step. Watch for any movement or slipping in the anchor. Stop immediately if the anchor shows signs of failure. This method ensures safety during testing.
Troubleshooting Loose Anchors
If the anchor feels loose, remove the load right away. Check if the anchor is installed correctly. The hole might be too big or the anchor might be damaged. Try tightening the anchor or reinstalling it in a new spot. Replace the anchor if it does not hold firmly after adjustments.
Tips For Long-lasting Support
Ensuring wall driller plus anchors hold strong over time needs care and smart steps. Proper support lasts longer with simple habits and clear checks. These tips help keep anchors safe and reliable for years.
Maintenance And Inspection
Check anchors regularly for any signs of damage or looseness. Tighten screws or bolts if you find them loose. Clean the area around anchors to avoid dirt buildup. Dust and dirt can reduce anchor grip strength. Look for cracks in the wall near the anchor. Early detection prevents bigger problems later. Repeat inspections every few months to keep support strong.
Avoiding Common Mistakes
Do not overload anchors beyond their weight limit. Follow manufacturer instructions carefully for best results. Use the right drill size for anchor holes. Too big or too small holes weaken the hold. Avoid hitting electrical wires or pipes behind the wall. Mistakes can cause damage and reduce anchor safety. Always check the wall type before choosing anchors. Proper installation ensures long-lasting support.

Credit: www.youtube.com
Credit: www.homedepot.com
Frequently Asked Questions
What Tools Are Needed To Install Wall Driller Plus Anchors?
You need a drill, Wall Driller Plus anchors, a screwdriver, and a measuring tape. These tools ensure precise and secure installation of the anchors in walls.
How Do I Prepare The Wall For Wall Driller Plus Anchors?
Clean the wall surface and mark the drilling points. Use a suitable drill bit to make holes matching anchor size for a firm hold.
Can Wall Driller Plus Anchors Support Heavy Loads?
Yes, Wall Driller Plus anchors are designed for heavy-duty support. They provide strong grip and stability for various heavy objects on walls.
How Deep Should I Drill For Wall Driller Plus Anchors?
Drill holes slightly deeper than the anchor length. This allows the anchor to expand fully for maximum grip and secure fastening.
Conclusion
Installing Wall Driller Plus anchors is simple and effective. Follow each step carefully to ensure strong support. Use the right tools and measure twice before drilling. Take your time and keep safety in mind. Proper installation helps your anchors hold firmly and last longer.
With these tips, your project will stay secure. Try it yourself and see the difference good anchors make. Ready to hang with confidence? You’ve got this!